
Creating a colored volcano using vinegar and baking soda is one of the most exciting science activities children can do at home or in the classroom. This simple experiment combines learning, creativity, and hands-on fun while introducing young learners to basic chemistry concepts. Watching colorful “lava” bubble and erupt helps children understand how chemical reactions work in an engaging and memorable way.
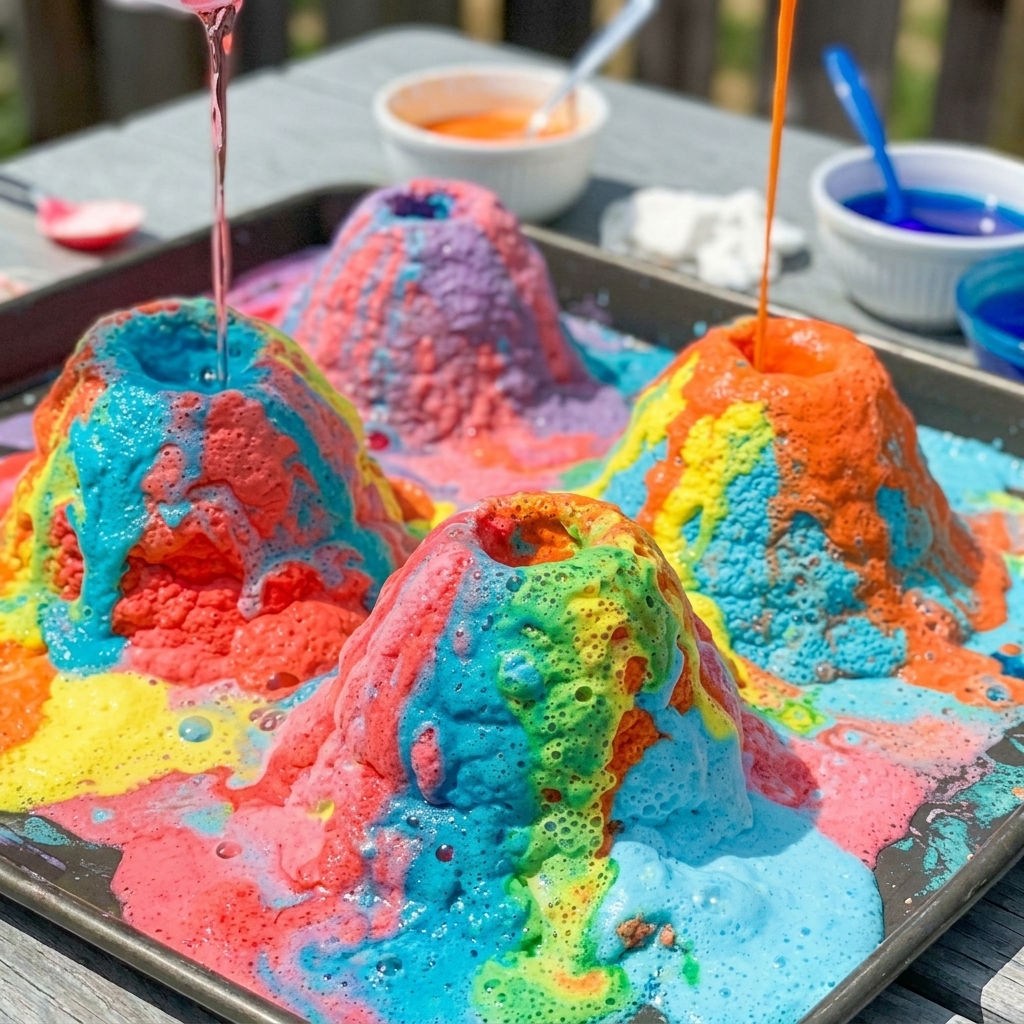
The best part is that this project requires only a few inexpensive household ingredients. Parents, teachers, and caregivers can easily organize this activity for children of different ages, making it perfect for science lessons, rainy-day entertainment, homeschooling, or family bonding.
Quick Overview Table
| Feature | Details |
| Experiment | Colored Volcano Using Vinegar and Baking Soda |
| Activity Type | Science Experiment |
| Age Group | 4–12 years |
| Difficulty | Easy |
| Time Required | 20–30 minutes |
| Main Materials | Baking soda, vinegar, food coloring |
| Learning Focus | Chemical reactions, observation, creativity |
| Mess Level | Medium |
| Indoor/Outdoor | Both |
| Adult Supervision | Recommended |
What Is a Colored Volcano Using Vinegar and Baking Soda?
A colored volcano using vinegar and baking soda is a classic science experiment that demonstrates an acid-base reaction. When baking soda (a base) mixes with vinegar (an acid), carbon dioxide gas is produced.
The gas creates bubbles that build pressure and force the colorful liquid upward, making it look like a volcanic eruption. Although it resembles real lava, the colorful foam is completely different from molten rock found in nature.
Adding food coloring makes the eruption more exciting and visually appealing, helping children stay engaged while learning scientific concepts.
Why Kids Love This Experiment
Children enjoy activities that combine surprise, color, and movement. This experiment delivers all three.
Some reasons kids love it include:
- Watching colorful lava overflow
- Mixing ingredients themselves
- Learning through play
- Feeling like real scientists
- Repeating the experiment with different colors
The excitement of predicting what will happen next keeps children interested from start to finish.
Materials You’ll Need
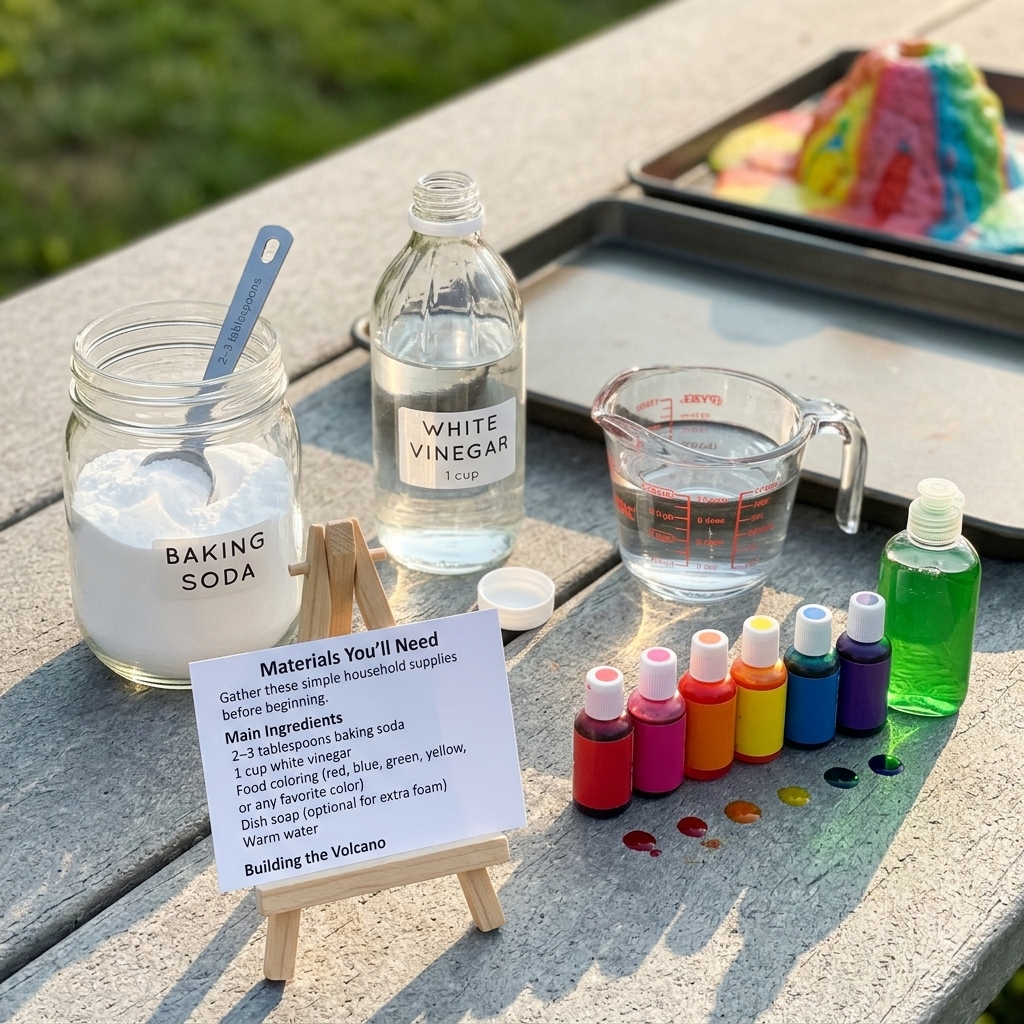
Gather these simple household supplies before beginning.
Main Ingredients
- 2–3 tablespoons baking soda
- 1 cup white vinegar
- Food coloring (red, blue, green, yellow, or any favorite color)
- Dish soap (optional for extra foam)
- Warm water
Building the Volcano
- Small plastic bottle or cup
- Modeling clay
- Play dough
- Sand
- Cardboard base
- Tray or baking pan for easy cleanup
Optional Decorations
- Small toy dinosaurs
- Plastic trees
- Rocks
- Grass
- Glitter (optional)
Step-by-Step Instructions
Step 1: Build the Volcano
Place the plastic bottle in the center of a tray.
Use modeling clay or play dough to create a mountain around the bottle. Leave the bottle opening uncovered.
Decorate your volcano with rocks, trees, or toy animals.
Step 2: Add Baking Soda
Pour about two or three tablespoons of baking soda into the bottle.
This ingredient acts as the base in the chemical reaction.
Step 3: Add Food Coloring
Mix several drops of food coloring with the baking soda.
Red is the traditional lava color, but children can experiment with:
- Blue lava
- Green lava
- Purple lava
- Rainbow lava
- Orange lava
Step 4: Add Dish Soa
Add one teaspoon of dish soap.
This step isn’t required, but it creates thicker, longer-lasting foam that looks even more like flowing lava.
Step 5: Pour in Vinegar
Slowly pour vinegar into the bottle.
Immediately, colorful foam begins rising and spilling over the sides.
Children will enjoy watching the eruption happen before their eyes.
The Science Behind the Volcano
Although this activity seems magical, it’s actually based on chemistry.
Baking Soda
Baking soda is called sodium bicarbonate.
It is a base.
Vinegar
Vinegar contains acetic acid.
It is an acid.
The Chemical Reaction
When the acid and base combine, they create:
- Carbon dioxide gas
- Water
- Sodium acetate
The carbon dioxide forms bubbles.
These bubbles push the colorful liquid upward, producing the volcanic eruption.
Why Dish Soap Makes Bigger Eruptions
Dish soap traps carbon dioxide bubbles.
Instead of popping immediately, the bubbles remain inside the soap.
This creates thick foam that continues flowing for a longer time.
Children often notice that adding soap makes the volcano much more dramatic.
Educational Benefits
This experiment teaches many valuable skills beyond science.
1. Scientific Observation
Children watch:
- Changes
- Movement
- Colors
- Bubble formation
- Foam production
These observations develop scientific thinking.
2. Critical Thinking
Kids begin asking questions like:
- Why did it bubble?
- What happens if I add more vinegar?
- Does more baking soda make a bigger eruption?
- Which color looks best?
Curiosity leads to learning.
3. Fine Motor Skills
Scooping, pouring, and mixing ingredients strengthen hand coordination.
These actions improve motor development.
4. Measuring Skills
Children practice measuring:
- Tablespoons
- Cups
- Small amounts
This reinforces early math concepts.
5. Creativity
Designing the volcano encourages imagination.
Every volcano can look different.
Children enjoy decorating landscapes with:
- Trees
- Rivers
- Dinosaurs
- Houses
- Miniature people
Fun Variations
Once children master the basic experiment, try exciting variations.
Rainbow Volcano
Use several colors inside the bottle.
The lava becomes a beautiful rainbow.
Glitter Volcano
Add biodegradable glitter.
The eruption sparkles in the sunlight.
Neon Volcano
Use neon food coloring under a black light.
The glowing lava creates an unforgettable science experience.
Double Volcano
Build two volcanoes.
Erupt them simultaneously.
Compare their reactions.
Giant Volcano
Use a larger bottle and increase the ingredients.
Children love extra-big eruptions.
Questions Children Can Investigate
Turn the activity into a real science experiment.
Ask children:
- Does warm vinegar create more foam?
- Which food coloring mixes best?
- Does extra baking soda increase the eruption?
- What happens without dish soap?
- Does bottle size matter?
- Which eruption lasts longest?
Recording observations helps children think like scientists.
Safety Tips
Although this experiment is safe, a few precautions are important.
Always:
- Work on a tray.
- Wear old clothes.
- Avoid rubbing eyes after handling food coloring.
- Wash hands afterward.
- Supervise younger children.
- Clean spills promptly.
Never drink the mixture.
Easy Cleanup
Cleanup takes only a few minutes.
Simply:
- Rinse the bottle.
- Throw away disposable decorations.
- Wipe the tray.
- Wash reusable materials.
- Dry everything before storing.
The ingredients are common household products, making cleanup simple.
Connecting the Experiment to Earth Science
After the experiment, discuss real volcanoes.
Explain that Earth’s volcanoes erupt because molten rock, called magma, rises beneath the surface.
Unlike the experiment, real volcanoes involve:
- Heat
- Pressure
- Melted rock
- Ash
- Gases
The vinegar-and-baking-soda volcano is a safe model that helps children understand the basic idea of an eruption.
Extending the Learning
Expand the activity with related lessons.
Ideas include:
- Drawing the volcano before and after eruption
- Writing predictions
- Measuring eruption height
- Timing the eruption
- Comparing multiple recipes
- Reading books about volcanoes
- Making a volcano fact sheet
These extensions combine science with art, literacy, and math.
Common Mistakes to Avoid
To achieve the best eruption, avoid these common problems.
Using Too Little Vinegar
Too little vinegar creates a weak reaction.
Overfilling the Bottle
Leave room for bubbles.
Forgetting the Tray
The foam can spread quickly.
Using Old Baking Soda
Fresh baking soda produces better eruptions.
Pouring Too Slowly
A steady pour usually creates a stronger reaction.
Why This Experiment Is Perfect for Families
Parents appreciate this activity because it is:
- Affordable
- Educational
- Entertaining
- Easy to prepare
- Safe with supervision
- Repeatable
Families can enjoy experimenting with different colors, ingredient amounts, and volcano designs every time.
Frequently Asked Questions
Can I use apple cider vinegar?
Yes. White vinegar is preferred because it is clear, but apple cider vinegar also works.
Is food coloring necessary?
No.
It simply makes the eruption more colorful and exciting.
Can I reuse the volcano?
Absolutely.
Just rinse the bottle, rebuild decorations if needed, and repeat the experiment.
Why didn’t my volcano erupt much?
Possible reasons include:
- Not enough vinegar
- Old baking soda
- Bottle overfilled
- Missing dish soap (if expecting lots of foam)
Is this experiment safe for preschoolers?
Yes, with adult supervision.
Young children enjoy pouring ingredients and watching the colorful reaction.
Tips for the Biggest Eruption
For an impressive eruption:
- Use fresh baking soda.
- Add one teaspoon of dish soap.
- Use warm vinegar.
- Pour the vinegar quickly but carefully.
- Decorate the volcano beforehand.
- Try different amounts of baking soda and vinegar to compare results.
Keeping a simple experiment journal allows children to record what worked best.
Conclusion
A colored volcano using vinegar and baking soda is much more than a fun craft—it is an engaging introduction to chemistry, observation, and scientific thinking. With only a handful of household materials, children can create a dramatic, colorful eruption while learning how acids and bases react to produce carbon dioxide gas.
This experiment encourages curiosity, creativity, and problem-solving as kids test different colors, ingredient amounts, and volcano designs. Whether used in a classroom, at home, during a birthday party, or as part of a homeschool science lesson, it provides a memorable hands-on learning experience that blends education with excitement.
Best of all, the activity is inexpensive, easy to set up, and can be repeated again and again. Every eruption becomes a new opportunity to ask questions, make predictions, and discover the fascinating world of science through play.
