
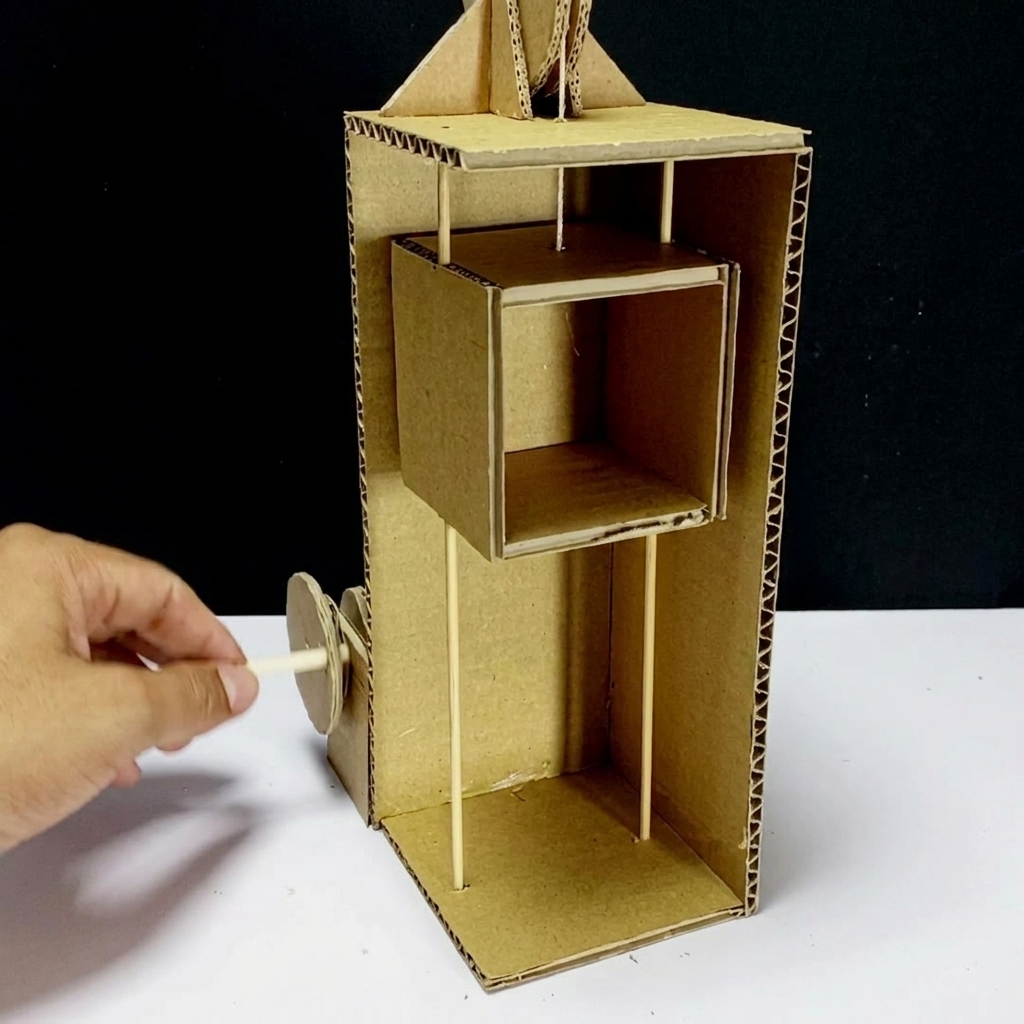
Machines help people complete difficult tasks every day. From construction sites to warehouses, lifting machines make it possible to move heavy objects safely and efficiently. Without these machines, many jobs would require much more time, effort, and physical strength. Cranes, hoists, elevators, forklifts, and pulley systems are all examples of machines designed to lift heavy loads. They rely on basic engineering principles that allow a small amount of force to move much larger weights.
Building a small lifting machine as a school project is an exciting way for students to learn about science, technology, engineering, and mathematics (STEM). Instead of simply reading about simple machines in a textbook, students can design, build, test, and improve their own working model. This practical experience develops creativity, critical thinking, teamwork, and problem-solving skills while making learning enjoyable.
The project also demonstrates how simple machines work together. A pulley changes the direction of a force, a wheel and axle reduce friction, and a lever multiplies force. Combining these components creates a machine capable of lifting objects that would otherwise be difficult to move by hand. During the project, students discover that careful planning and precise construction are just as important as using strong materials.
Whether the lifting machine is made from wooden craft sticks, cardboard, string, small wheels, and glue, or from recycled household materials, the same engineering principles apply. Every successful design begins with understanding the problem, creating a plan, building a prototype, testing its performance, and making improvements based on the results.
The following sections explain each stage of building a simple lifting machine and highlight the scientific ideas that make the project successful.
Understanding the Purpose
Before building any machine, it is important to understand its purpose. A lifting machine is designed to raise heavy objects while reducing the amount of force required by the user. Instead of relying only on muscle power, the machine transfers and multiplies force through mechanical components.
Students should think about questions such as:
- How much weight should the machine lift?
- How high should it raise the object?
- What materials are available?
- How can the machine remain stable during operation?
Answering these questions helps guide the design process and prevents problems later during construction.
Planning the Design
Every engineering project begins with a detailed plan. Students should draw a simple sketch showing the base, vertical supports, lifting arm, pulley system, and handle. The sketch does not need to be perfect, but it should clearly show how all the parts connect together.
Planning allows students to estimate the number of wooden sticks, pieces of cardboard, wheels, string, glue, screws, and other materials they will need. It also encourages them to think about balance and stability before building begins.
Good planning often saves time because potential design problems can be identified on paper before any materials are cut or glued.
Gathering Materials
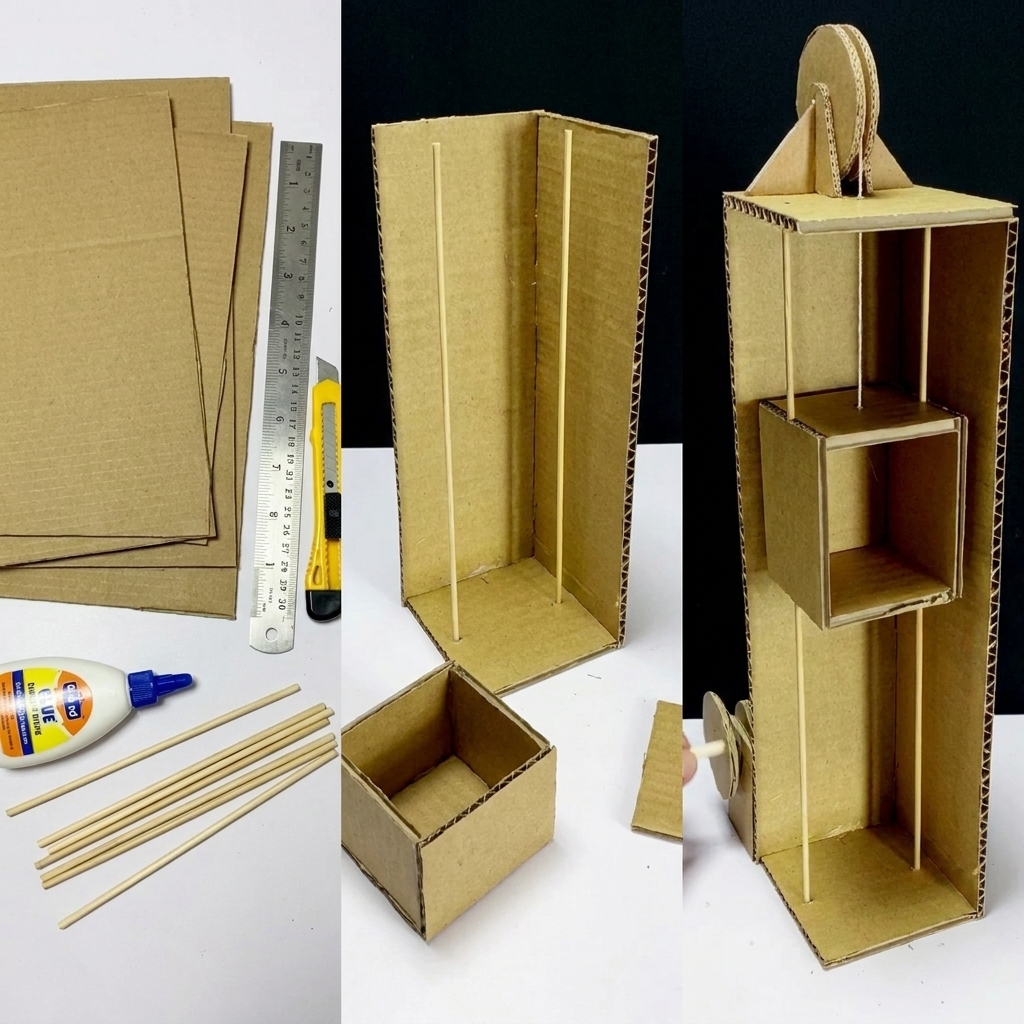
Most classroom lifting machines can be built using inexpensive materials.
Common supplies include wooden craft sticks, thick cardboard, strong glue, cotton string, plastic pulleys, drinking straws, bottle caps, rubber bands, small screws, paper clips, rulers, scissors, and a hot glue gun used under adult supervision.
Recycled materials are excellent choices because they reduce waste while encouraging creative thinking. Students often discover that everyday household objects can become useful engineering components.
Building a Strong Base
The base is the foundation of the entire machine. If the base is weak or uneven, the lifting machine may tip over when raising a heavy object.
A wide rectangular base made from several layers of cardboard or wooden sticks provides excellent stability. Extra support pieces placed underneath increase strength and prevent bending.
Students should carefully check that the base sits flat on the table before continuing.
Constructing the Vertical Frame
The vertical frame supports the lifting arm and pulley system. It must be straight, strong, and securely attached to the base.
Cross braces placed between the vertical supports improve stability and reduce unwanted movement. Engineers use similar reinforcement techniques when constructing real cranes and bridges.
The stronger the frame, the more weight the machine can safely lift.
Installing the Pulley System
The pulley is one of the most important parts of the project. It changes the direction of the pulling force and makes lifting easier.
The pulley is attached near the top of the frame. Strong string passes over the pulley, with one end connected to the load and the other connected to a turning handle or winding drum.
As the handle rotates, the string wraps around the drum, gradually lifting the object upward.
Quick Overview Table
| Aspect | Details |
| Project Name | DIY Machine for Lifting Heavy Things |
| Difficulty Level | Intermediate |
| Recommended Age | 10 years and older (with supervision) |
| Project Type | STEM Engineering Project |
| Main Materials | Wooden sticks, cardboard, glue, string, pulleys, wheels |
| Engineering Concepts | Force, pulleys, levers, balance, mechanical advantage |
| Estimated Build Time | 2–4 hours |
| Skills Developed | Creativity, teamwork, problem-solving, engineering design |
| Safety Precautions | Adult supervision, careful use of scissors and hot glue |
| Final Goal | Lift small heavy objects safely using mechanical advantage |
Building the Lifting Mechanism
After the pulley system is installed, the next step is to create the lifting mechanism. A small winding drum can be made by attaching a cardboard tube, wooden dowel, or thick straw to both sides of the frame. A handle connected to one end of the drum allows the user to rotate it easily. As the handle turns, the string wraps around the drum, pulling the load upward in a controlled manner.
The string should be tied securely to prevent slipping while lifting. It should also move smoothly through the pulley without becoming tangled. If the string twists or catches on the frame, the machine may not operate efficiently. Students should test the movement several times before lifting any weight.
Testing the Machine
Once construction is complete, the lifting machine should be tested using light objects first. Small containers filled with coins, toy blocks, or small bags of sand make excellent test loads. Starting with lighter weights helps identify any weak points without damaging the model.
During testing, students should observe several important factors:
- Does the machine remain stable?
- Does the string stay in place?
- Is the handle easy to turn?
- Does the load rise smoothly?
- Does the frame bend under pressure?
Careful observation allows students to understand how well their design performs and where improvements are needed.
Troubleshooting Common Problems
Very few engineering projects work perfectly on the first attempt. Engineers constantly improve their designs after testing, and students should do the same.
If the machine tips over, the base should be made wider or heavier. If the string slips off the pulley, it may need better alignment. If glue joints become loose, additional reinforcement can increase strength. If the handle is difficult to turn, reducing friction or using a larger pulley may solve the problem.
Learning from mistakes is one of the most valuable parts of engineering. Every problem provides an opportunity to improve the design and gain a deeper understanding of mechanical systems.
The Science Behind the Machine
A lifting machine demonstrates several important scientific principles. The most obvious is mechanical advantage, which allows a small force to move a larger load. Pulleys distribute the required force more effectively, while levers and rotating handles make lifting easier.
Gravity constantly pulls the load downward, while the machine applies an upward force to overcome gravity. Friction between moving parts can reduce efficiency, so smooth surfaces and properly aligned components improve performance.
Balance also plays a critical role. If the weight is not centered, the machine may lean or fall. Engineers carefully calculate weight distribution to ensure safety and stability in real lifting equipment.
Safety Considerations
Safety should always be a priority when building and using any lifting machine, even a small classroom model. Students should wear safety glasses when cutting materials and should use scissors, craft knives, or hot glue guns only under adult supervision.
Heavy test objects should be lifted slowly to avoid sudden movements. Fingers should be kept away from moving parts, especially around the pulley and winding drum. The machine should always be placed on a flat, stable surface before operation.
Following these simple precautions helps prevent accidents and encourages responsible engineering practices.
Real-World Applications
The same principles used in this classroom project are found in many machines that people use every day. Tower cranes lift steel beams during the construction of skyscrapers. Elevators raise passengers between floors of tall buildings. Warehouse forklifts transport heavy pallets, while dockside cranes load and unload cargo ships.
Rescue teams also depend on lifting equipment to remove debris after natural disasters. Even fitness equipment and hospital patient lifts use similar mechanical principles to reduce physical effort while increasing safety.
Understanding these applications helps students appreciate the importance of engineering in modern society.
Skills Developed Through the Project
Building a lifting machine teaches far more than science alone. Students strengthen their problem-solving abilities as they overcome design challenges. Measuring, cutting, assembling, and testing improve precision and attention to detail.
Working in groups encourages communication, cooperation, and leadership. Team members learn to divide responsibilities, share ideas, and solve problems together. These collaborative experiences prepare students for future academic and professional projects.
The project also develops creativity because there are many possible designs. Some students may choose a tall crane, while others create a compact hoist or a rotating lifting arm. Each design reflects different engineering solutions to the same challenge.
Possible Improvements
After completing the first version, students can improve their machine in many ways. Adding a second pulley can increase the mechanical advantage and make lifting even easier. Reinforcing the frame with additional braces increases stability when handling heavier loads.
Students may also install a longer handle for greater turning power or add wheels to the base for mobility. Decorating the finished model with paint, warning signs, or miniature construction accessories makes the project more attractive while demonstrating creativity.
Some advanced builders may even incorporate a small electric motor to automate the lifting process, introducing concepts related to robotics and automation.
Educational Value
This project combines science, mathematics, engineering, and creativity into one engaging activity. Students learn that successful engineering depends on planning, experimentation, observation, and continuous improvement rather than simply following instructions.
Teachers can use the project to explain topics such as force, gravity, friction, energy transfer, and mechanical advantage. Mathematics becomes meaningful as students measure lengths, estimate weights, and calculate balance. The project transforms abstract scientific concepts into real-world experiences that are easier to understand and remember.
Most importantly, students gain confidence as they see their own machine successfully lift an object. This achievement encourages curiosity and inspires many young learners to explore engineering, robotics, architecture, and technology in the future.
Conclusion
Building a machine for lifting heavy things is an enjoyable and educational engineering project that demonstrates the power of simple machines. Using basic materials such as wooden sticks, cardboard, string, pulleys, and glue, students can construct a working model that illustrates important scientific principles in a practical way.
Throughout the project, students practice planning, designing, building, testing, and improving their creations. They learn that strong structures, careful measurements, balanced designs, and mechanical advantage all contribute to a successful lifting machine. They also discover that engineering is a process of continuous learning, where each challenge leads to a better solution.
Beyond the classroom, the concepts explored in this project connect directly to the machines that shape the modern world. From towering construction cranes to warehouse forklifts and rescue equipment, lifting machines make everyday tasks safer and more efficient. By completing this project, students not only build a useful model but also develop valuable skills in creativity, teamwork, critical thinking, and innovation that will benefit them throughout their education and future careers.
