

Making crafts from paper is a wonderful way for children to explore their creativity while improving important skills such as cutting, folding, and gluing. One exciting project that children enjoy is creating a paper hammer. This simple craft transforms ordinary sheets of paper into a colorful pretend tool that is perfect for imaginative play, classroom activities, and creative storytelling.
A paper hammer is lightweight, safe, inexpensive, and easy to customize. Children can decorate it with their favorite colors, patterns, stickers, or drawings, making each hammer unique. Whether used for a construction-themed lesson, a pretend repair shop, or simply for fun, this project encourages creativity and hands-on learning.
In this guide, you’ll discover everything you need to know about making a paper hammer, including materials, step-by-step instructions, educational benefits, and creative decorating ideas.
What Is a Paper Hammer?
A paper hammer is a handmade toy created using paper, cardboard, glue, and simple craft supplies. Although it looks like a real hammer, it is soft, lightweight, and completely safe for children to use during pretend play.
Kids can imagine they are builders, carpenters, engineers, or repair workers while using their paper hammer in role-playing games. This encourages storytelling, teamwork, and creative thinking.
Why Children Love This Craft
There are many reasons why paper hammer projects are popular among children:
- Easy to make
- Uses inexpensive materials
- Safe for indoor play
- Encourages imagination
- Improves fine motor skills
- Helps develop patience and focus
- Perfect for school projects
- Great for rainy-day activities
Because every child can decorate the hammer differently, no two projects look exactly alike.
Materials You’ll Need
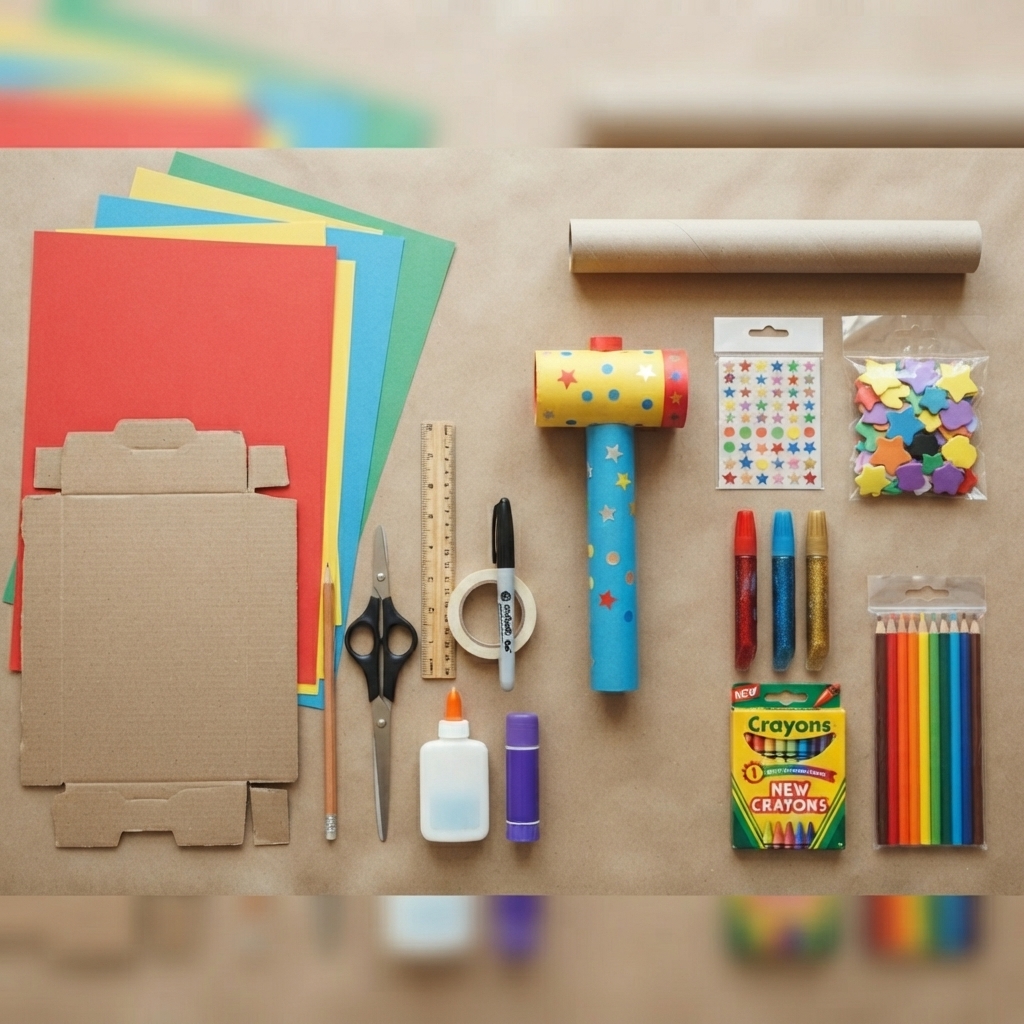
Gather these simple supplies before starting:
- Thick construction paper
- Cardboard (from a cereal box)
- Colored paper
- Pencil
- Scissors
- School glue
- Glue stick
- Tape
- Black marker
- Ruler
- Craft stick or rolled paper tube
- Crayons or colored pencils
- Stickers (optional)
- Foam shapes (optional)
- Glitter glue (optional)
Most of these materials are already available at home or in the classroom.
Preparing the Workspace
Before beginning:
- Cover the table with newspaper.
- Organize all materials.
- Make sure scissors are child-safe.
- Keep glue nearby.
- Wash hands before crafting.
A clean workspace helps children enjoy the activity without distractions.
Step 1: Draw the Hammer Head
Start by drawing the outline of a hammer head on cardboard.
A simple hammer shape includes:
- A flat top
- A wide front
- A shorter back section
- Rounded corners
Adults can prepare templates for younger children.
Step 2: Cut Out the Hammer Head
Carefully cut around the outline.
If the cardboard is thick, an adult may assist younger children.
To make the hammer stronger, cut two identical pieces.
Glue them together.
Step 3: Cover with Colored Paper
Glue gray, silver, brown, or colorful paper over both sides.
Smooth the paper to remove wrinkles.
Trim any extra edges neatly.
Now the hammer looks much more realistic—or wonderfully colorful if children choose bright colors.
Step 4: Make the Handle
There are several easy options.
Option 1
Roll a sheet of paper tightly into a long tube.
Tape the end securely.
Option 2
Use a craft stick.
Option 3
Wrap cardboard into a cylinder.
Decorate the handle with colored paper or markers.
Step 5: Attach the Handle
Apply plenty of glue to the bottom center of the hammer head.
Insert the handle.
Hold it firmly until it stays in place.
For extra strength, reinforce the connection with tape hidden beneath colored paper.
Step 6: Decorate Your Hammer
Now comes the fun part.
Children can decorate their paper hammer using:
- Stars
- Hearts
- Zigzag lines
- Polka dots
- Rainbow colors
- Construction stripes
- Stickers
- Glitter
- Cartoon faces
- Funny messages
Every hammer becomes a personal masterpiece.
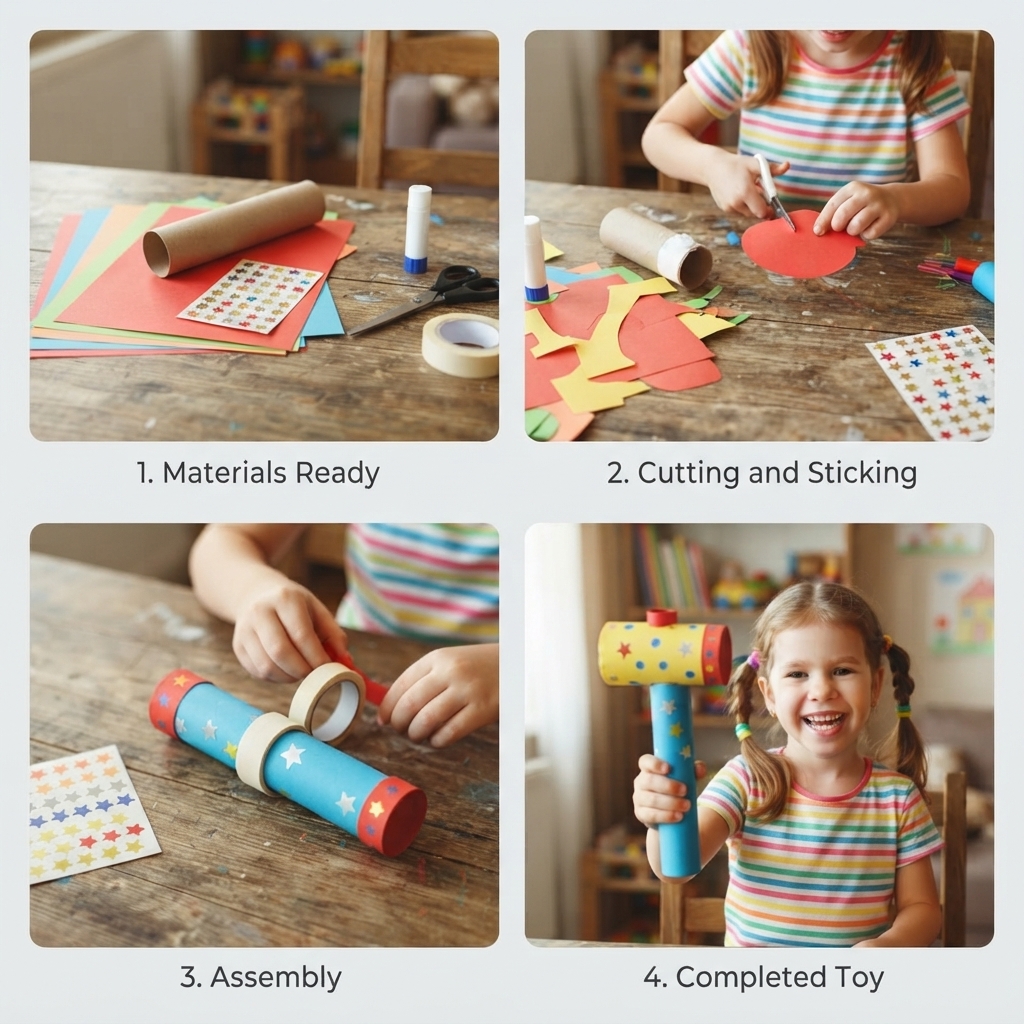
Creative Decoration Ideas
Try exciting themes like:
Rainbow Hammer
Decorate every section with bright rainbow colors.
Superhero Hammer
Add lightning bolts and a superhero logo.
Princess Hammer
Use pink, purple, hearts, and glitter.
Pirate Hammer
Decorate with skulls and treasure symbols.
Space Hammer
Add planets, rockets, and stars.
Dinosaur Hammer
Decorate with dinosaur footprints and green scales.
Robot Hammer
Draw buttons, gears, and metallic details.
Educational Benefits
This project teaches much more than crafting.
Children learn:
- Hand-eye coordination
- Fine motor control
- Measuring skills
- Shape recognition
- Color matching
- Problem-solving
- Creative thinking
- Following directions
- Patience
- Confidence
Craft projects help children practice learning through play.
Classroom Uses
Teachers can include this craft in many lessons.
Examples include:
- Community helpers
- Construction workers
- Engineering units
- Career day
- Building challenges
- STEAM activities
- Art class
- Dramatic play centers
Students enjoy creating tools they can later use during pretend play.
Pretend Play Ideas
Once finished, children can use their paper hammers in imaginative games.
They might pretend to be:
- Builders
- Carpenters
- Home repair experts
- Toy makers
- Robot engineers
- Castle builders
- Furniture makers
Pretend play builds language, confidence, and social interaction.
Safety Tips
Although this is a safe project, remember to:
- Use child-safe scissors.
- Avoid sharp tools.
- Supervise younger children.
- Do not swing the hammer at people or pets.
- Allow glue to dry completely before play.
Safety should always come first.
Ways to Customize Your Hammer
Children can personalize their creations by adding:
- Their names
- Initials
- Favorite colors
- Animal stickers
- Glitter accents
- Puffy paint
- Foam letters
- Decorative tape
The more personalized the hammer becomes, the more children enjoy using it.
Extend the Project
Turn one hammer into an entire construction set.
Create matching paper:
- Saw
- Wrench
- Screwdriver
- Toolbox
- Hard hat
- Measuring tape
- Toolbox badge
Together they become a complete pretend workshop.
Make It a Group Activity
This craft works well for:
- Birthday parties
- School art lessons
- Scout meetings
- Library activities
- Summer camps
- Family craft nights
Each child can create a unique hammer and share it with friends.
Encourage Storytelling
Invite children to invent stories featuring their paper hammer.
Questions to inspire creativity include:
- What are you building today?
- Who needs your help?
- What magical powers does your hammer have?
- Can your hammer fix anything?
- What colors make it special?
These prompts help strengthen communication and imagination.
Display Finished Projects
Show children’s work by:
- Hanging it on classroom walls
- Creating a construction-themed bulletin board
- Organizing a craft exhibition
- Decorating a play corner
- Taking photos for a memory book
Celebrating their creations boosts confidence and pride.
Conclusion
A paper hammer is a simple, affordable, and enjoyable craft project that children can make with everyday materials. It combines creativity, hands-on learning, and imaginative play in one exciting activity. From designing the hammer head to decorating the finished tool, every step encourages artistic expression while developing valuable motor and problem-solving skills.
Whether completed at home, in school, or during a community craft event, this project offers hours of fun and endless opportunities for storytelling and pretend construction adventures. With just paper, glue, and imagination, children can build a colorful paper hammer that they will be proud to create and excited to use in their next imaginative masterpiece.
