
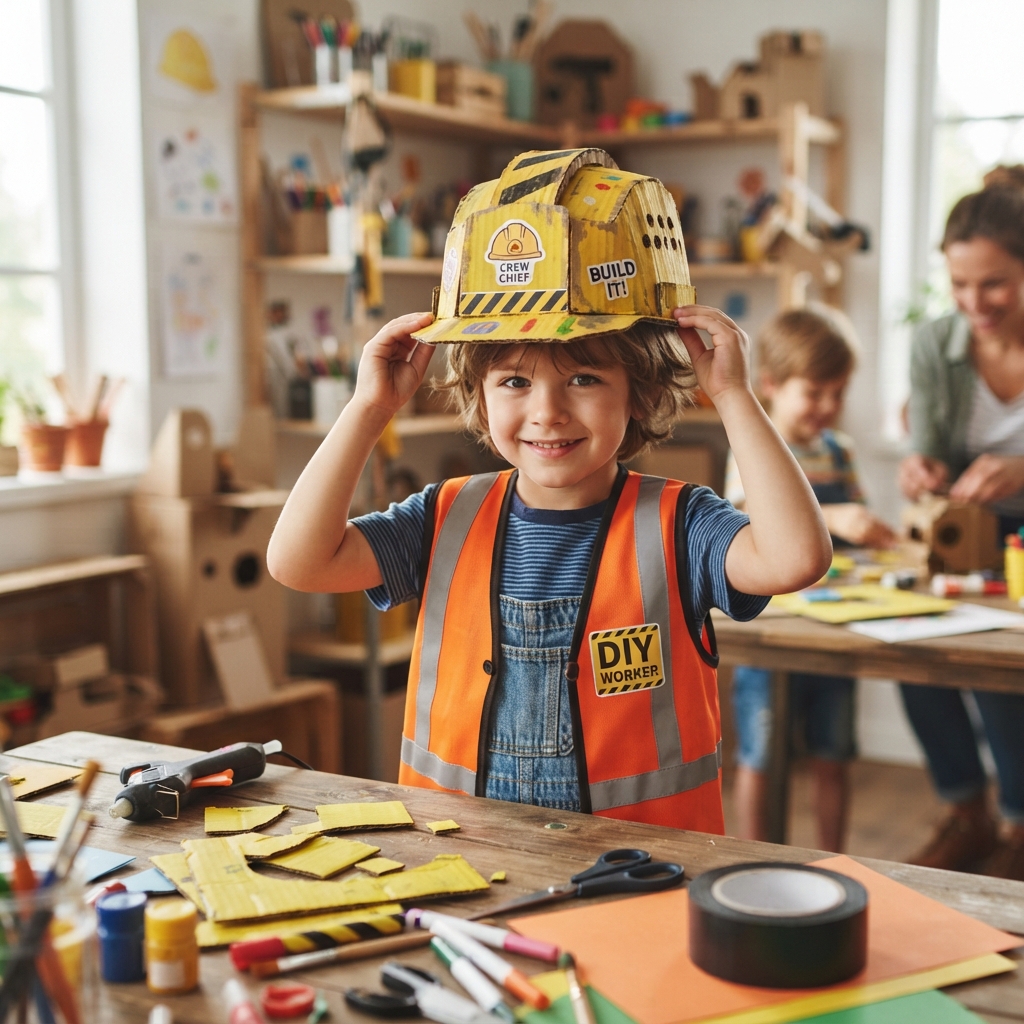
Children love pretending to be builders, engineers, and construction workers. One of the most exciting ways to encourage imaginative play is by creating a cardboard construction worker’s helmet. This easy craft project allows kids to transform ordinary cardboard into a colorful safety helmet for pretend play while learning valuable crafting skills.
Making a cardboard helmet is an affordable, eco-friendly activity that reuses recycled materials and inspires creativity. Whether completed at home, in the classroom, or during a summer camp, this project helps children practice cutting, measuring, painting, and decorating while having fun.
In this guide, you’ll learn how to make a simple cardboard construction worker’s helmet, discover its educational benefits, and explore creative ways to personalize the finished craft.
What Is a Cardboard Construction Helmet?
A cardboard construction helmet is a pretend safety helmet made from recycled cardboard, glue, tape, and colorful decorations. While it resembles a real hard hat, it is lightweight, comfortable, and designed only for imaginative play—not for real safety protection.
Children can wear their handmade helmet while pretending to build houses, repair roads, operate construction vehicles, or manage exciting building projects.
Why Kids Love This Craft
This project is popular because it is:
- Easy to build
- Fun to decorate
- Safe for pretend play
- Made from recycled materials
- Great for individual or group activities
- Perfect for classroom themes
- Encourages imagination
- Helps children feel like real builders
Every child can design a unique helmet using their favorite colors and decorations.
Materials You’ll Need
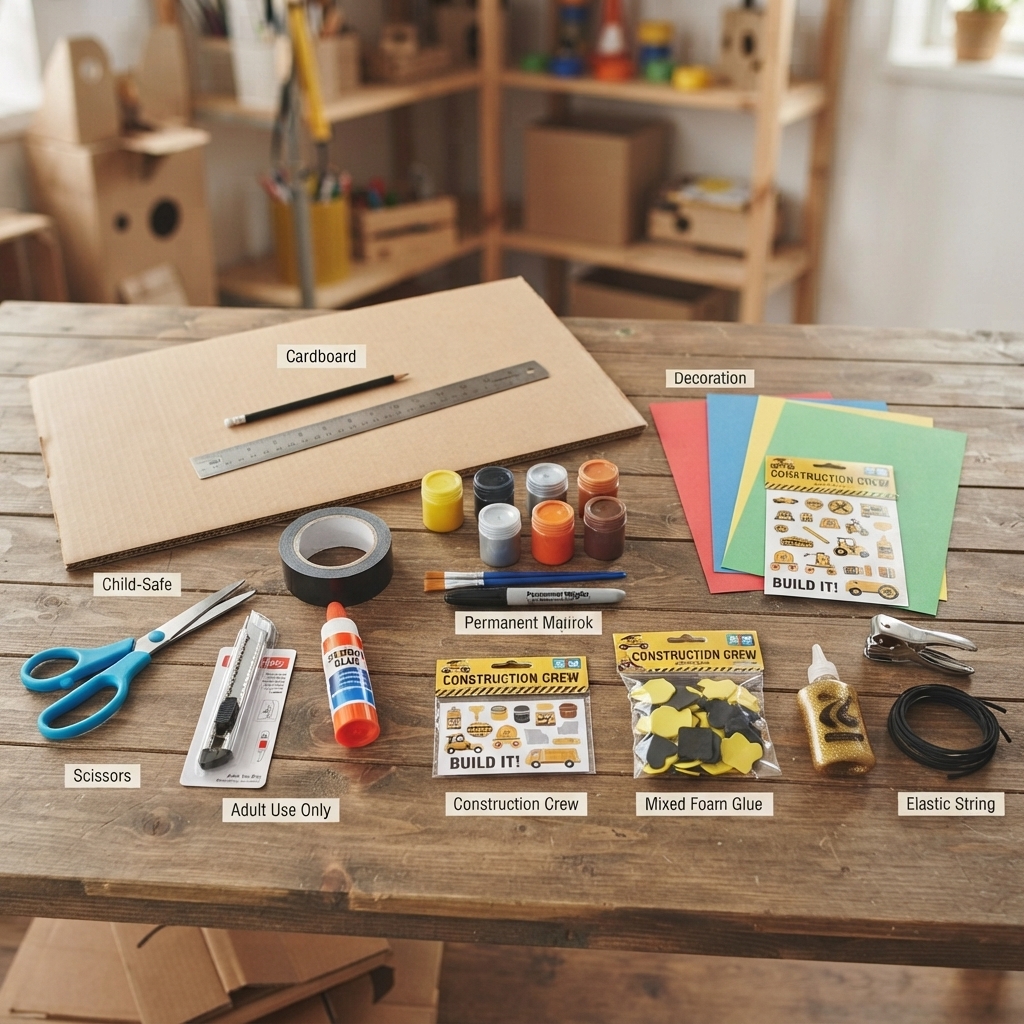
Gather these simple supplies before starting:
- A large piece of cardboard
- Pencil
- Ruler
- Child-safe scissors
- Craft knife (adult use only)
- School glue
- Strong tape
- Yellow paint (traditional construction helmet color)
- Paintbrush
- Black marker
- Elastic string or ribbon
- Hole punch
- Colored paper
- Stickers
- Foam shapes (optional)
- Glitter glue (optional)
Most of these materials can be found at home or in a classroom art supply cabinet.
Prepare Your Workspace
Before beginning:
- Cover the table with newspaper or a reusable craft mat.
- Organize all materials.
- Wear an old shirt or apron while painting.
- Keep paper towels nearby for cleanup.
- Ask an adult to help with difficult cutting.
A tidy workspace makes crafting easier and more enjoyable.
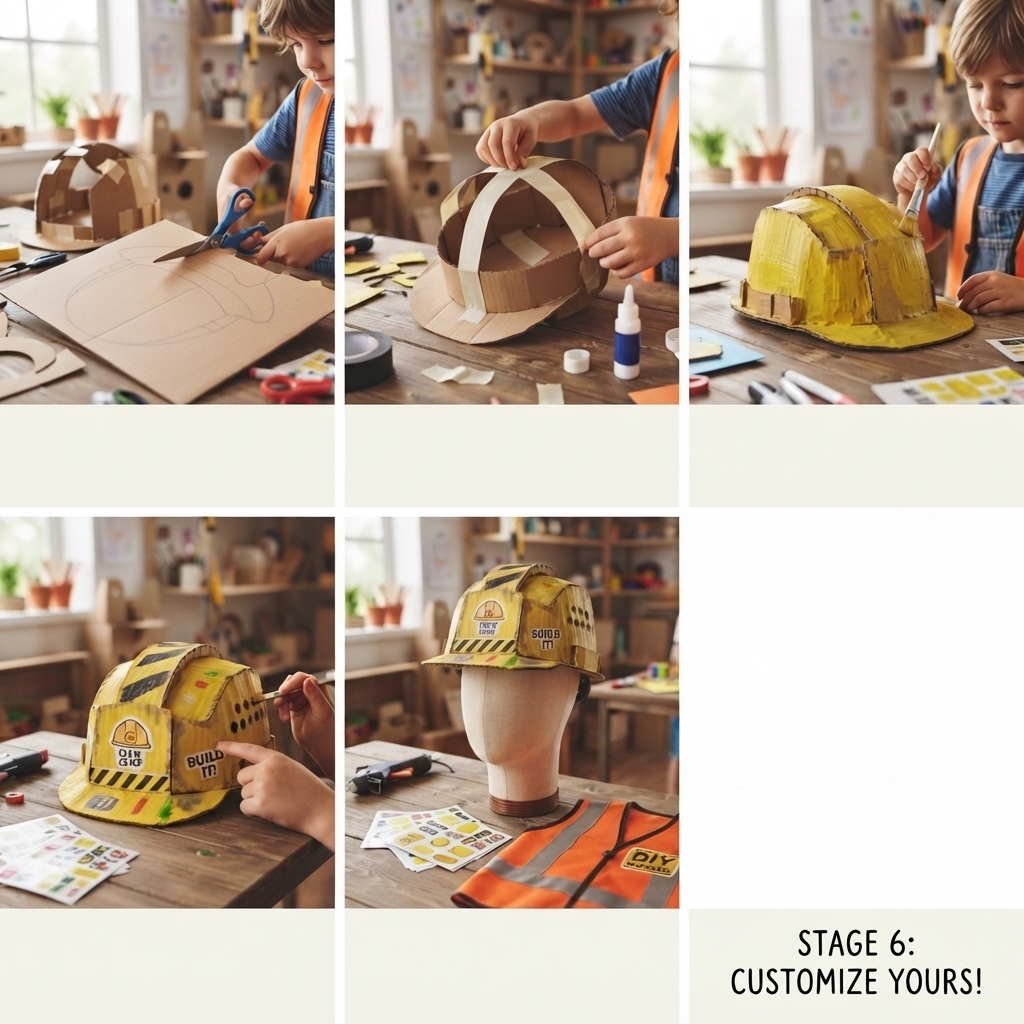
Step 1: Measure the Child’s Head
Wrap a flexible measuring tape or a strip of paper around the child’s head.
Leave a little extra space so the helmet fits comfortably.
Write down the measurement before cutting the cardboard.
Step 2: Create the Helmet Band
Cut a long strip of cardboard about 5–7 centimeters (2–3 inches) wide.
Wrap it around the child’s head.
Adjust the size until it fits comfortably.
Tape or glue the ends together to create a sturdy circle.
This band forms the base of the helmet.
Step 3: Make the Top Strips
Cut four long cardboard strips.
These strips should be the same width.
Glue one strip across the front and back of the helmet band.
Glue the second strip across the opposite direction.
Finally, attach the remaining strips diagonally to create a dome shape.
This framework gives the helmet its rounded appearance.
Step 4: Cover the Helmet
Cut several curved cardboard pieces.
Glue them over the framework.
Overlap the pieces slightly until the entire top is covered.
Smooth each section with your hands as the glue dries.
Now the helmet begins to look like a real construction hard hat.
Step 5: Add the Front Brim
Cut a curved rectangle from cardboard.
Glue it to the front of the helmet.
This small visor gives the helmet its classic construction-worker style.
Step 6: Strengthen the Helmet
Add extra tape inside the helmet where pieces connect.
Reinforcing the joints helps the helmet keep its shape during play.
Step 7: Paint the Helmet
Most construction helmets are bright yellow, but children can choose any color they like.
Popular choices include:
- Yellow
- Orange
- Blue
- Red
- Green
- White
- Pink
- Rainbow colors
Allow the paint to dry completely before decorating.
Step 8: Decorate the Helmet
Now comes the creative part!
Children can decorate their helmet using:
- Stickers
- Stars
- Hearts
- Construction signs
- Lightning bolts
- Animal pictures
- Foam letters
- Glitter glue
- Colorful stripes
- Their name on the front
Every helmet becomes one of a kind.
Creative Design Ideas
Here are some exciting themes children can try.
Builder Helmet
Paint it bright yellow and add black caution stripes.
Superhero Builder
Decorate with lightning bolts, stars, and a superhero emblem.
Rainbow Builder
Use every color of the rainbow across the helmet.
Space Engineer
Draw rockets, planets, and shining stars.
Dinosaur Builder
Decorate with dinosaur footprints and green scales.
Princess Builder
Use pink paint, hearts, flowers, and glitter.
Robot Engineer
Add gears, buttons, and metallic silver details.
Educational Benefits
This craft teaches many important skills.
Children practice:
- Fine motor skills
- Measuring
- Cutting
- Folding
- Painting
- Problem-solving
- Following directions
- Creative thinking
- Patience
- Hand-eye coordination
Craft activities also encourage children to finish projects step by step.
Learning About Construction Workers
While making the helmet, parents and teachers can discuss how construction workers help build:
- Homes
- Schools
- Bridges
- Hospitals
- Roads
- Parks
- Libraries
- Playgrounds
Children begin to appreciate the important work these community helpers do.
Pretend Play Ideas
After finishing the helmet, children can enjoy imaginative games.
They can pretend to be:
- Construction workers
- Architects
- Engineers
- Road builders
- Crane operators
- House designers
- Bridge builders
- Safety inspectors
Pretend play helps children develop language, confidence, and teamwork.
Build a Complete Construction Costume
Pair the helmet with other handmade crafts such as:
- Cardboard hammer
- Paper wrench
- Cardboard toolbox
- Safety badge
- Construction sign
- Measuring tape
- Paper walkie-talkie
- Builder’s vest made from paper or fabric
Together they create a complete pretend construction outfit.
Safety Reminde
Although this craft looks like a real hard hat, it is only for pretend play.
Teach children that:
- It does not protect against falling objects.
- It should never replace a real safety helmet.
- It is designed for indoor games and imaginative activities only.
- Adults should supervise cutting and assembly.
Understanding the difference between real safety equipment and toys is an important lesson.
Classroom Activities
Teachers can use this project during lessons about:
- Community helpers
- Occupations
- Recycling
- Engineering
- Building structures
- Architecture
- Art
- STEM and STEAM learning
Students enjoy wearing their helmets while participating in construction-themed games and storytelling activities.
Display the Finished Helmets
Celebrate everyone’s creativity by:
- Hosting a classroom “Builder Parade”
- Creating a construction-themed display wall
- Organizing a pretend building site
- Taking group photos
- Awarding certificates for creative designs
Displaying finished projects encourages pride and boosts self-confidence.
Tips for Success
To make the project even more enjoyable:
- Use sturdy cardboard from shipping boxes.
- Let the glue dry fully before painting.
- Keep decorations lightweight.
- Encourage children to invent their own designs.
- Work together and help younger children with difficult steps.
Most importantly, focus on having fun and expressing creativity.
Conclusion
A cardboard construction worker’s helmet is a fantastic craft project that combines creativity, recycling, and imaginative play. With just a few everyday materials, children can build a colorful helmet that makes them feel like real builders while developing valuable artistic and problem-solving skills.
Whether used in a classroom, at home, during a birthday party, or at a summer camp, this project provides hours of creative fun. As children measure, cut, glue, paint, and decorate, they also learn about teamwork, construction careers, and the importance of reusing materials. By the end of the activity, every child will have a unique handmade helmet and plenty of exciting adventures waiting in their pretend construction world.
