
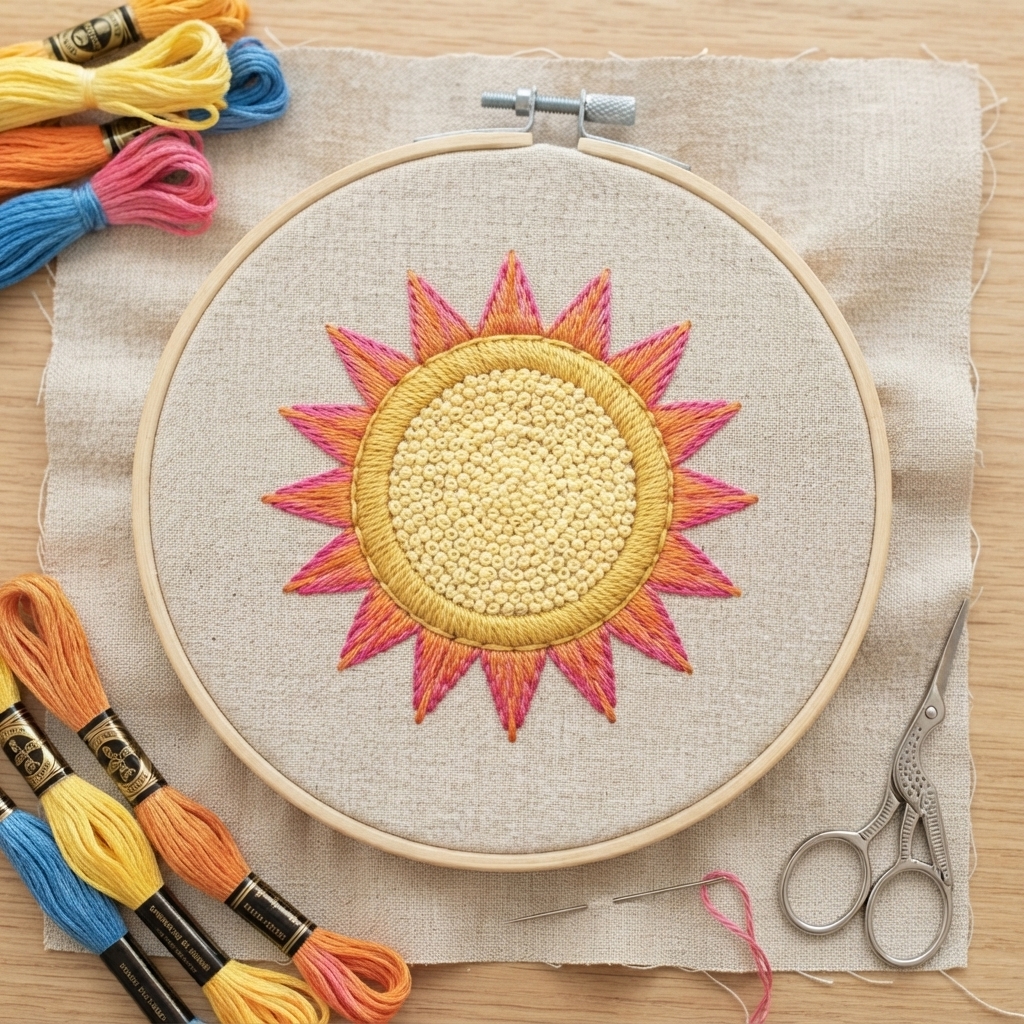
Colorful sun embroidery is a cheerful and creative project for beginners. A simple sun design can turn an ordinary piece of fabric into a bright handmade decoration. With a few basic embroidery stitches and colorful threads, you can create a smiling sun, a rainbow-colored sun, or a simple sunshine design.
This project is easy to customize and works well for children, beginners, and anyone who enjoys handmade crafts. The finished embroidery can be used on tote bags, clothing, pillow covers, aprons, fabric bookmarks, wall decorations, and handmade gifts.
In this guide, you will learn how to embroider a colorful sun step by step.
Why Try Sun Embroidery?
A sun is an excellent embroidery design because it uses simple shapes and straight or curved lines.
This project helps beginners practice:
- Drawing a simple embroidery pattern
- Using an embroidery hoop
- Threading an embroidery needle
- Making basic stitches
- Filling small shapes
- Creating straight lines
- Combining different colors
- Adding decorative details
You can keep your design simple or make it as colorful and detailed as you like.
Materials You Will Need
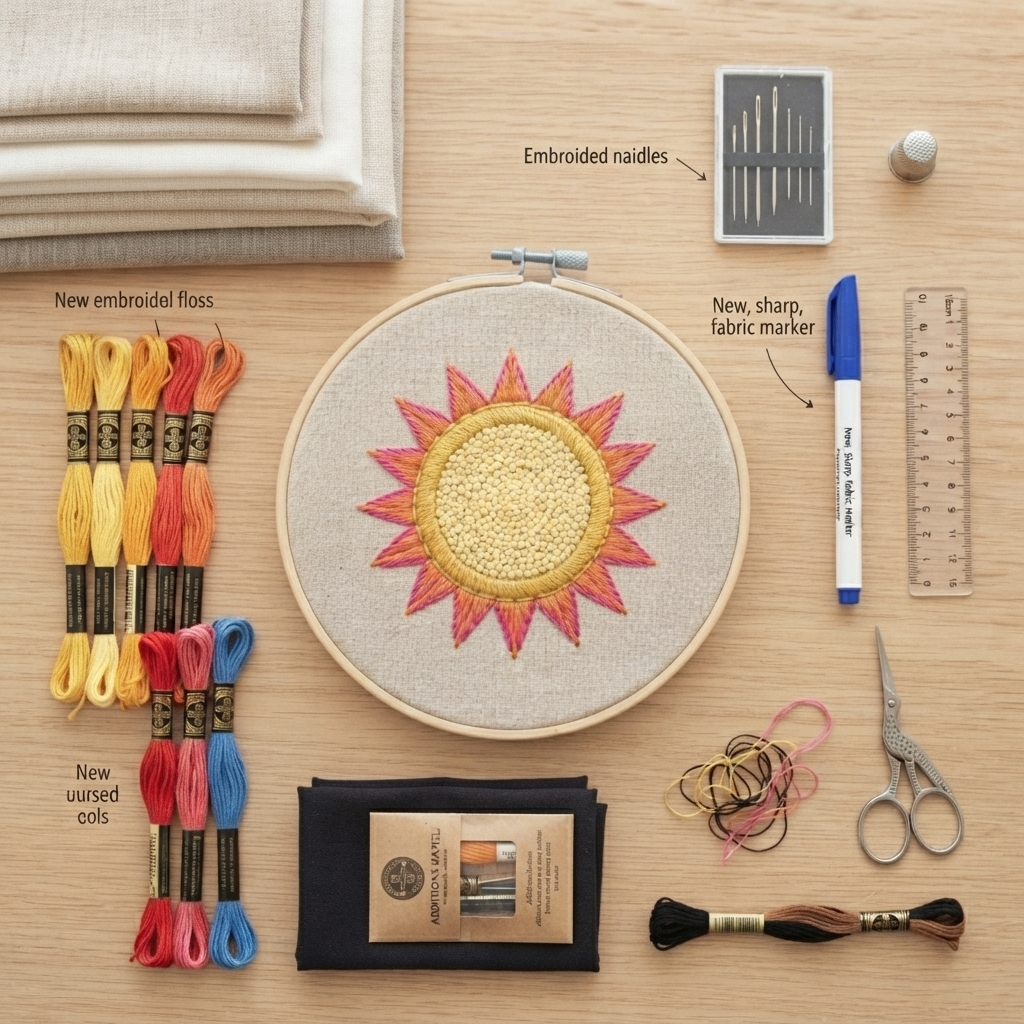
Gather these basic supplies:
- Cotton or linen fabric
- Embroidery hoop
- Embroidery needle
- Yellow embroidery floss
- Orange embroidery floss
- Red, pink, blue, or other colorful threads
- Small scissors
- Washable fabric marker or pencil
- Ruler
- Optional black or brown embroidery floss
Medium-weight cotton is a good fabric for beginners because it is stable and easy to stitch.
Choosing Your Sun Colors
Traditional sun embroidery usually uses yellow and orange.
However, a colorful sun can include many shades.
Try combinations such as:
- Yellow and orange
- Yellow and red
- Gold and pink
- Orange and purple
- Rainbow colors
- Pastel colors
You can use one color for the center and different colors for the rays.
Step 1: Prepare the Fabric
Cut a piece of fabric large enough for your sun design.
Leave extra space around the design so the fabric fits comfortably inside the embroidery hoop.
Iron the fabric if it has wrinkles.
Place it in the hoop and gently tighten it.
The fabric should be smooth and slightly taut.
Step 2: Draw the Sun
Use a washable fabric marker or pencil to draw a simple sun.
Start with a circle for the center.
Then draw several rays around the circle.
The rays can be:
- Straight
- Wavy
- Short
- Long
- Alternating
For a children’s project, you can also add two eyes and a smiling mouth.
Keep the design simple enough to follow with a needle.
Step 3: Thread the Needle
Cut approximately 40–50 centimeters of embroidery floss.
Separate the floss into fewer strands if you want delicate stitches.
Use more strands for a thicker and bolder design.
Thread the needle and secure the thread at the back of the fabric.
Avoid using very long pieces of thread because they can become tangled.
Step 4: Embroider the Sun’s Center
Start with the circular center.
You can outline the circle using backstitch.
Follow the drawn line around the entire circle.
Keep the stitches small and even.
For a fuller sun, fill the circle with satin stitch.
Use yellow, orange, or another bright color.
Step 5: Add the Sun Rays
The rays are one of the easiest parts of the design.
Use straight stitches to create each ray.
Bring the needle up at the edge of the sun and insert it back down at the end of the ray.
Repeat this around the circle.
You can make every ray the same color or alternate different colors.
Step 6: Create Rainbow Sun Rays
For a very colorful design, use several embroidery colors.
For example:
- Red
- Orange
- Yellow
- Green
- Blue
- Purple
- Pink
Assign different colors to different rays.
This creates a playful rainbow effect.
You can also use two colors for each ray by combining threads.
Step 7: Add a Smiling Face
If you want a friendly children’s design, give your sun a face.
Use black or dark brown embroidery thread.
French knots can create small eyes.
Use backstitch to create a simple curved smile.
You can add small pink cheeks using French knots or tiny satin stitches.
Step 8: Add Decorative Details
Now add some extra details around the sun.
You can embroider:
- Small clouds
- Stars
- Hearts
- Flowers
- Birds
- Butterflies
- Raindrops
- Rainbow arcs
Keep the additional designs smaller than the sun.
Step 9: Use Chain Stitch for Curved Details
Chain stitch is useful for adding decorative curves.
You can use it to create:
- Cloud outlines
- Rainbow lines
- Curved rays
- Decorative borders
Use a contrasting thread color to make these details stand out.
Step 10: Add French Knots
French knots are perfect for small decorative dots.
Place a few around the sun.
You can use different colors to create a confetti-like effect.
French knots can also be used as flower centers or tiny stars.
Step 11: Create a Floral Sun
For a unique design, surround the sun with flowers.
Use green embroidery floss for the stems and leaves.
Add colorful petals using pink, purple, blue, or red thread.
A few small flowers around the sun can create a cheerful garden-inspired design.
Step 12: Finish the Embroidery
When you are happy with your sun, check the back of the fabric.
Secure loose threads with small knots or securing stitches.
Trim the excess thread.
Remove the fabric from the embroidery hoop.
Gently press the fabric from the back if necessary.
Your colorful sun embroidery is now complete.
Easy Stitches for Sun Embroidery
You only need a few basic stitches for this project.
Backstitch
Use backstitch to outline the sun and create curved details.
Straight Stitch
Straight stitch is ideal for sun rays.
Satin Stitch
Use satin stitch to fill the center of the sun.
Chain Stitch
Chain stitch works well for decorative curved lines.
French Knots
Use French knots for eyes, dots, flower centers, and small accents.
How to Make a Rainbow Sun
A rainbow sun is especially fun for children.
Use a yellow or orange center.
Then make each ray a different bright color.
You can also create rainbow stripes inside the sun’s center.
For an even more colorful design, add a rainbow above the sun and small clouds beside it.
Colorful Sun Embroidery for Children
This project can be adapted for children who are learning basic embroidery.
Use a simple, large sun design.
Choose thick, colorful embroidery thread.
Keep the stitches large and easy to see.
An adult should supervise children when using needles and scissors and choose tools appropriate for their age.
Let children choose their own colors and decorations.
The goal is to encourage creativity rather than perfect stitches.
Where to Use Sun Embroidery
A colorful embroidered sun can decorate many handmade items.
Try adding it to:
- Tote bags
- Pencil cases
- Fabric wallets
- Aprons
- Pillow covers
- Clothing
- Fabric bookmarks
- Kitchen towels
- Children’s room decorations
- Handmade gifts
You can also frame the finished fabric in an embroidery hoop and display it as wall art.
Common Beginner Mistakes
Pulling the Thread Too Tightly
Too much tension can make the fabric pucker.
Pull the thread gently until the stitch lies flat.
Using Very Long Thread
Long thread can become tangled.
Use manageable lengths.
Making the Rays Uneven
Uneven rays are not necessarily a problem, but you can use a ruler to create more consistent lines if you prefer a neat geometric appearance.
Adding Too Many Colors
Colorful embroidery is fun, but too many unrelated colors can make the design look busy.
Choose a small group of colors that work well together.
Tips for a Beautiful Sun Design
Start with a simple pattern.
Use a washable marker for your guidelines.
Keep stitches relatively even.
Choose bright colors that contrast with the fabric.
Try different shades of yellow and orange for more depth.
Add small decorative details only after finishing the main sun.
Do not worry about making the design perfect. Handmade embroidery should have its own character.
A Simple Beginner Sun Project
For your first project, try this easy design:
- Draw a medium-sized circle.
- Add eight to twelve rays.
- Outline the circle with backstitch.
- Fill the center with yellow satin stitch.
- Make the rays with different colors.
- Add two small eyes.
- Embroider a smiling mouth.
- Add a few French knots around the sun.
This simple project is enough to create a bright and cheerful piece of embroidery.
Final Thoughts
Colorful sun embroidery is an easy and enjoyable project for beginners. It combines simple shapes, bright colors, and basic embroidery stitches to create a cheerful handmade design.
Start with a simple circle and a few straight rays. Once you are comfortable with the basic stitches, experiment with rainbow colors, smiling faces, flowers, clouds, and other decorative details.
Whether you use the finished embroidery on a bag, pillow, piece of clothing, or wall decoration, a colorful embroidered sun is a wonderful way to add warmth, creativity, and personality to handmade projects.
