
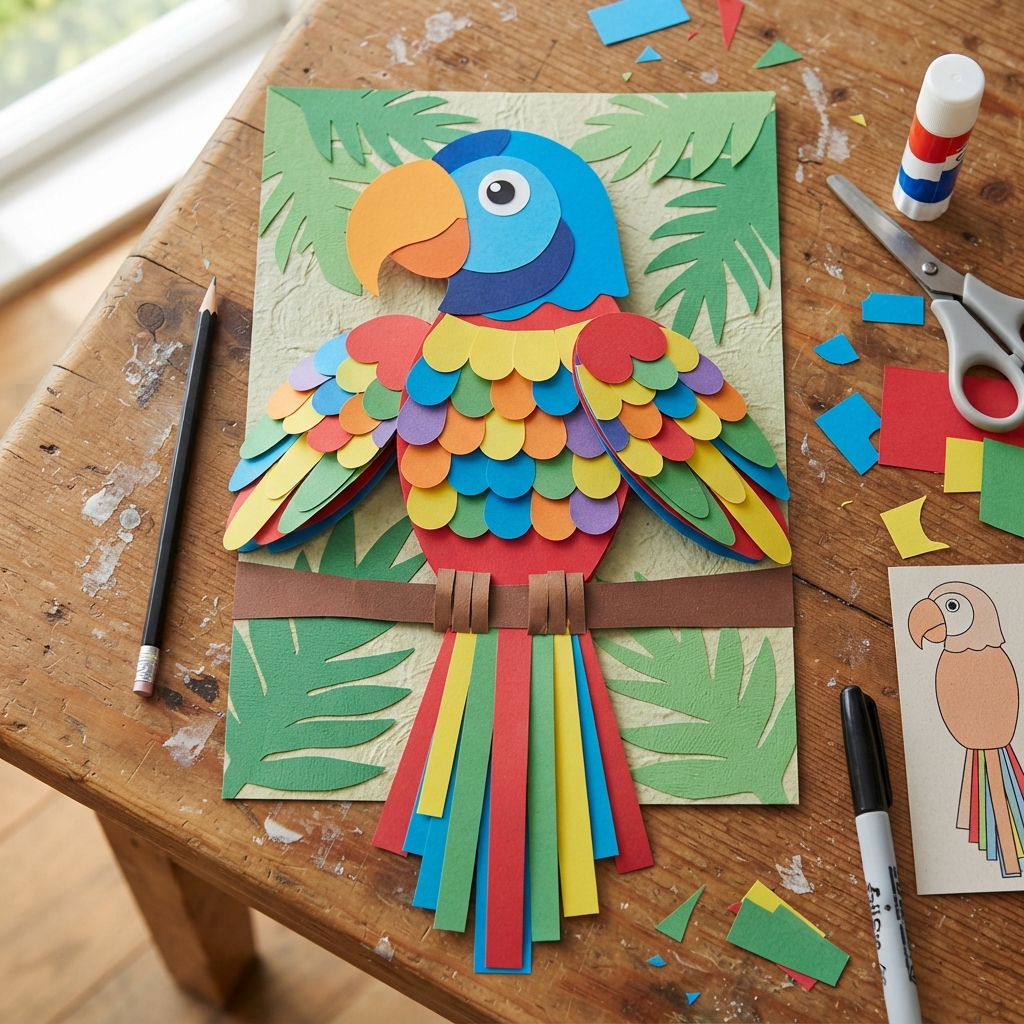
Making a colorful paper parrot is a wonderful craft activity for children who love birds, nature, and bright colors. Parrots are famous for their beautiful feathers, curved beaks, and lively personalities, which makes them an excellent subject for a paper craft. With a few sheets of colored paper, scissors, glue, markers, and a little imagination, children can create a cheerful parrot that can be displayed on a wall, placed on a classroom bulletin board, or used as part of a jungle-themed project.
This activity is more than simply making a decoration. It encourages children to develop creativity, patience, and fine motor skills while learning about parrots and their natural habitats. The project can also be adapted for different ages and skill levels. Younger children can make a simple flat parrot, while older children can create a more detailed three-dimensional bird with layered feathers and a movable wing.
In this essay, we will explore how to make a colorful paper parrot step by step. We will look at the materials needed, how to create each body part, how to decorate the feathers, and how to turn the finished bird into an exciting tropical scene.
Why Make a Paper Parrot?
Parrots are ideal for paper crafts because they have bright and recognizable features. Their feathers can be represented with many different colors, including red, yellow, blue, green, orange, and purple.
A paper parrot also gives children freedom to experiment. They do not have to copy one particular species. They can create a realistic bird or invent a magical parrot with rainbow feathers.
The activity can also be connected to lessons about birds, rainforests, biodiversity, and environmental protection.
Materials You Will Need
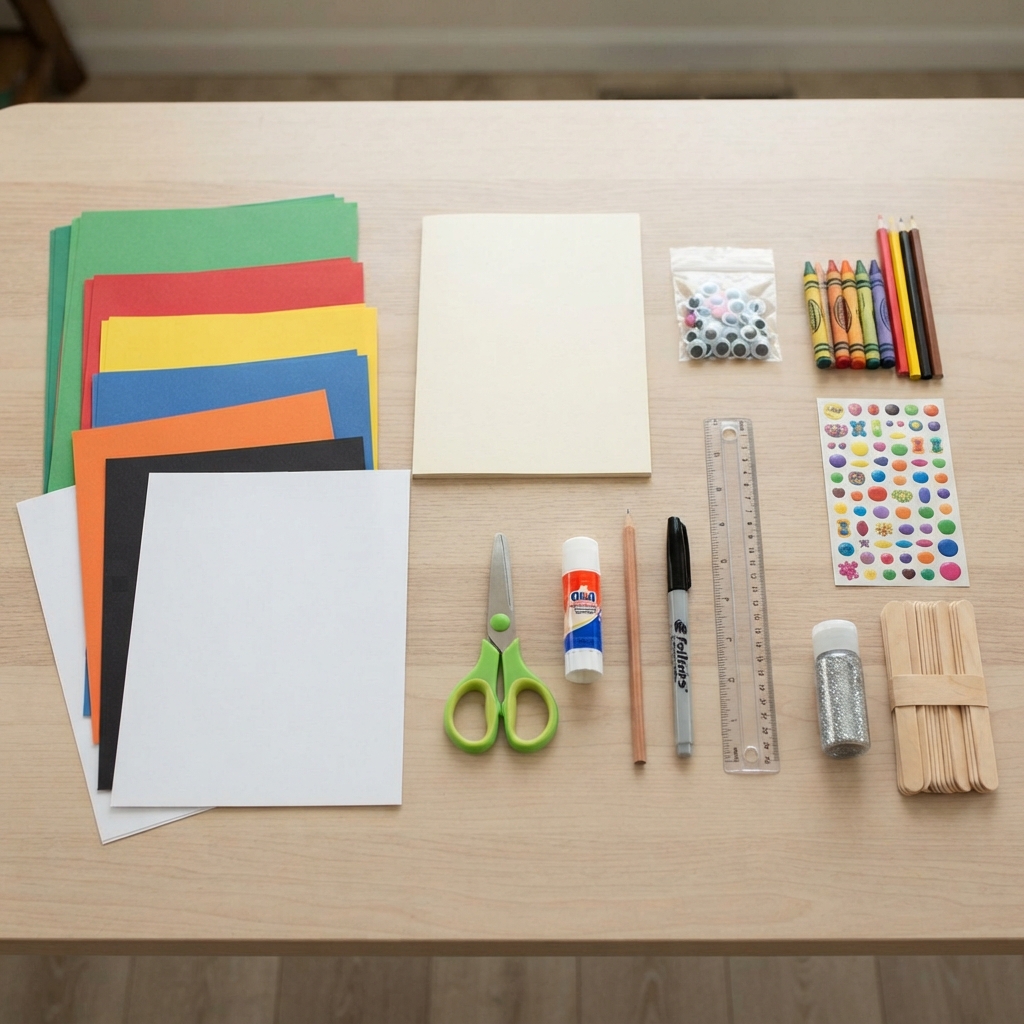
Before beginning, gather all your materials. Most of them are simple and inexpensive.
You will need:
- Green construction paper
- Red construction paper
- Yellow construction paper
- Blue construction paper
- Orange construction paper
- Black paper
- White paper
- A sheet of cardstock
- Child-safe scissors
- Glue
- Pencil
- Black marker
- Ruler
- Optional googly eyes
- Optional crayons or colored pencils
- Optional stickers
- Optional glitter
- Optional craft sticks
You do not need to use every color. Even three or four bright colors can create a beautiful result.
Preparing the Workspace
Before starting the craft, choose a clean, flat surface. Cover the table with newspaper or scrap paper if you are using glue, markers, or paint.
Place the colored paper and other materials where they are easy to reach.
If children are working together, give each child enough space to cut and assemble their parrot.
Young children should be supervised when using scissors. Child-safe scissors are the best choice.
Step 1: Draw the Parrot’s Body
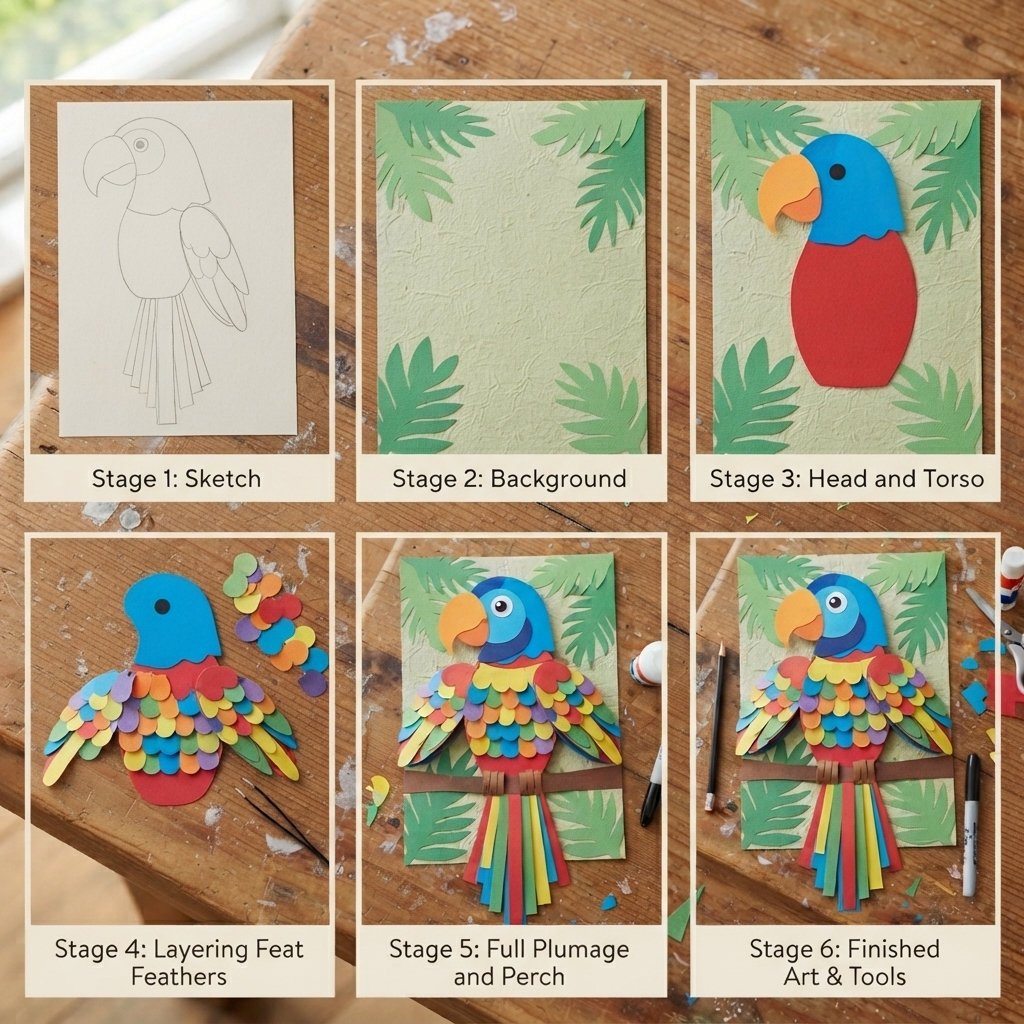
Start by drawing the main body of the parrot on a sheet of cardstock.
A simple parrot body can be shaped like an oval or slightly curved teardrop.
Make the body large enough to leave room for the head, wings, and tail.
Draw the shape with a pencil first. Once you are happy with the outline, carefully cut it out.
You can use green, red, blue, or another color for the body.
For a colorful parrot, you can also cover the body with a sheet of colored paper rather than leaving the cardstock visible.
Step 2: Make the Head
The head should be slightly smaller than the body.
Cut a rounded shape from colored paper.
Many parrots have colorful faces, so you can use a combination of colors.
For example, use green for the head and add a yellow or red face patch.
Glue the head to the top of the body.
Make sure it overlaps slightly so that the parrot looks like one complete bird.
Step 3: Create the Beak
The curved beak is one of the most recognizable features of a parrot.
To make the beak, cut two curved shapes from orange, yellow, or black paper.
The upper part of the beak should be larger and more curved than the lower part.
Glue the beak near the front of the head.
You can fold the upper beak slightly outward to create a three-dimensional effect.
For a cartoon parrot, make the beak slightly oversized. This can give the bird a funny and friendly appearance.
Step 4: Add the Eyes
Cut two small white circles for the eyes.
Add black pupils using a marker.
You can also use googly eyes.
Glue the eye onto the head, just above the beak.
If you want a more detailed design, add a small colored ring around the eye.
This can make the parrot look more realistic.
Step 5: Make the Wings
The wings are one of the most exciting parts of the project because they provide plenty of space for colorful patterns.
Draw two large wing shapes on colored paper.
The wings can be curved and slightly pointed at the ends.
Cut them out carefully.
For a simple parrot, glue the wings directly onto the body.
For a 3D effect, fold each wing slightly along the middle and glue only the center portion. This allows the edges to lift away from the body.
Step 6: Add Colorful Feathers
Now it is time to make the parrot truly colorful.
Cut small feather shapes from different colors of paper.
You can make teardrop shapes, rounded feathers, or simple strips.
Arrange the feathers in rows across the wings and body.
Try combining colors such as:
- Red and yellow
- Blue and green
- Orange and red
- Purple and blue
- Yellow and green
Layering the feathers creates a rich and textured appearance.
Children can create their own color patterns rather than copying a specific bird.
Step 7: Make the Tail
Parrots often have long tail feathers, which are perfect for adding extra color.
Cut several long, narrow feather shapes.
Use different colors for each feather.
Arrange them behind the body so that they spread outward.
Glue the feathers together near the top and attach them to the back of the parrot.
You can make the tail straight, curved, or fan-shaped.
A large rainbow-colored tail can make the finished parrot especially eye-catching.
Step 8: Add Feet
Cut two small feet from orange, yellow, or brown paper.
Each foot can be made from three narrow paper strips.
Glue the feet underneath the body.
If you want your parrot to appear as though it is sitting on a branch, attach the feet to a paper or cardboard branch.
Step 9: Create a Paper Branch
A branch gives the parrot a natural place to sit.
Cut a long, slightly curved strip from brown paper or cardboard.
Add smaller branches extending from the sides.
You can draw lines on the branch to represent bark.
Glue green paper leaves around it.
Then attach your parrot to the branch.
This creates a simple tropical scene.
Creating a Tropical Background
To make the project larger, create a jungle or rainforest background.
Use green paper for large leaves.
Cut long leaves from different shades of green paper.
Add flowers in bright colors such as pink, yellow, purple, and red.
You can also make vines by cutting long, thin strips of green paper and curling them around a pencil.
Place the parrot in the middle of the scene.
The result can become a beautiful classroom display.
Making a 3D Paper Parrot
If you want to make the parrot three-dimensional, use folded paper instead of gluing everything flat.
Fold the body slightly down the center.
Attach the wings using small folded tabs.
Make the beak from folded paper so that it sticks outward.
Use folded tail feathers to create depth.
You can also attach a piece of cardboard behind the bird to make it stand upright.
A 3D parrot can be displayed on a shelf or desk.
Making a Movable Wing
Older children may enjoy making a parrot with a movable wing.
Instead of gluing the wing directly to the body, attach it using a paper fastener.
Make a small hole in the wing and another hole in the body.
Push the fastener through both holes and secure it at the back.
Now the wing can move up and down.
This simple addition makes the craft interactive and can be especially fun for younger children.
Learning About Real Parrots
While making the craft, children can learn interesting facts about parrots.
Parrots belong to a large group of birds that includes many different species. They are found naturally in several warm regions around the world, including parts of South America, Central America, Africa, Asia, and Australia.
Many parrots have strong, curved beaks that help them crack seeds and nuts.
Their feet are adapted for gripping branches, and many species use their feet to hold food while eating.
Some parrots are known for their ability to imitate sounds.
Parrots also have important roles in their ecosystems because they can help spread seeds.
Educational Benefits
Making a colorful paper parrot combines art with learning.
Cutting paper improves fine motor coordination.
Folding and arranging pieces develops spatial awareness.
Choosing colors encourages creativity.
Following instructions teaches sequencing and patience.
The project can also support science education by introducing children to birds, feathers, habitats, and biodiversity.
Teachers can ask students to research a particular parrot species and write a few facts next to their finished craft.
Recycling Materials
This project can easily be made using recycled materials.
Old magazines can provide colorful paper for feathers.
Cereal boxes can be used for the body and wings.
Used wrapping paper can create bright tail feathers.
Paper packaging can become a sturdy branch.
Reusing materials teaches children that craft supplies do not always need to be purchased.
It also encourages them to think about waste and responsible consumption.
Creative Color Ideas
There are countless ways to decorate a paper parrot.
A rainbow parrot can have red, orange, yellow, green, blue, and purple feathers.
A tropical parrot can use bright green, red, and yellow.
A fantasy parrot can have metallic-looking silver paper and unusual colors.
A night parrot can use dark blue, purple, and black with small paper stars.
Encourage children to create their own designs. The goal is not to make every parrot identical.
Paper Parrot Puppet
The finished parrot can also become a simple puppet.
Attach a craft stick to the back of the bird.
Children can hold the stick and make the parrot fly around.
They can create a short story about the bird exploring a rainforest.
This activity combines crafting, storytelling, speaking, and imaginative play.
For a group activity, each child can make a different bird and perform a short puppet show.
Safety Tips
Children should use scissors carefully and under adult supervision when necessary.
Use child-safe scissors and non-toxic glue.
Avoid very small decorations with young children because they can be choking hazards.
If using glitter, keep it away from eyes and avoid creating excessive dust.
Always give glue and markers enough time to dry before moving the finished craft.
Common Problems and Solutions
If the paper feathers keep falling off, use slightly thicker paper or allow the glue to dry longer.
If the body bends, attach it to cardstock or recycled cardboard.
If the wings look too flat, gently fold them along the center before attaching them.
If the parrot seems unbalanced, move the tail or add a small cardboard support behind the body.
Remember that handmade crafts do not have to be perfect. Small differences make each creation special.
Conclusion
Making a colorful paper parrot is a simple and enjoyable craft that combines creativity, imagination, and learning. With construction paper, cardstock, scissors, glue, and markers, children can transform ordinary materials into a bright and cheerful tropical bird.
The project allows children to experiment with colors, shapes, patterns, and textures. They can create layered feathers, a curved beak, colorful wings, and a long rainbow tail. They can also make a paper branch, tropical leaves, flowers, and a rainforest background to create a complete scene.
Beyond its artistic value, the activity offers an excellent opportunity to learn about real parrots. Children can discover where parrots live, what they eat, how their beaks and feet help them survive, and why tropical forests are important habitats.
Whether made as a classroom project, a nature activity, a home craft, or part of an animal-themed display, a colorful paper parrot is an exciting project for children of many ages. Most importantly, it shows how simple pieces of paper can become something beautiful when creativity and imagination are given the chance to take flight.
