
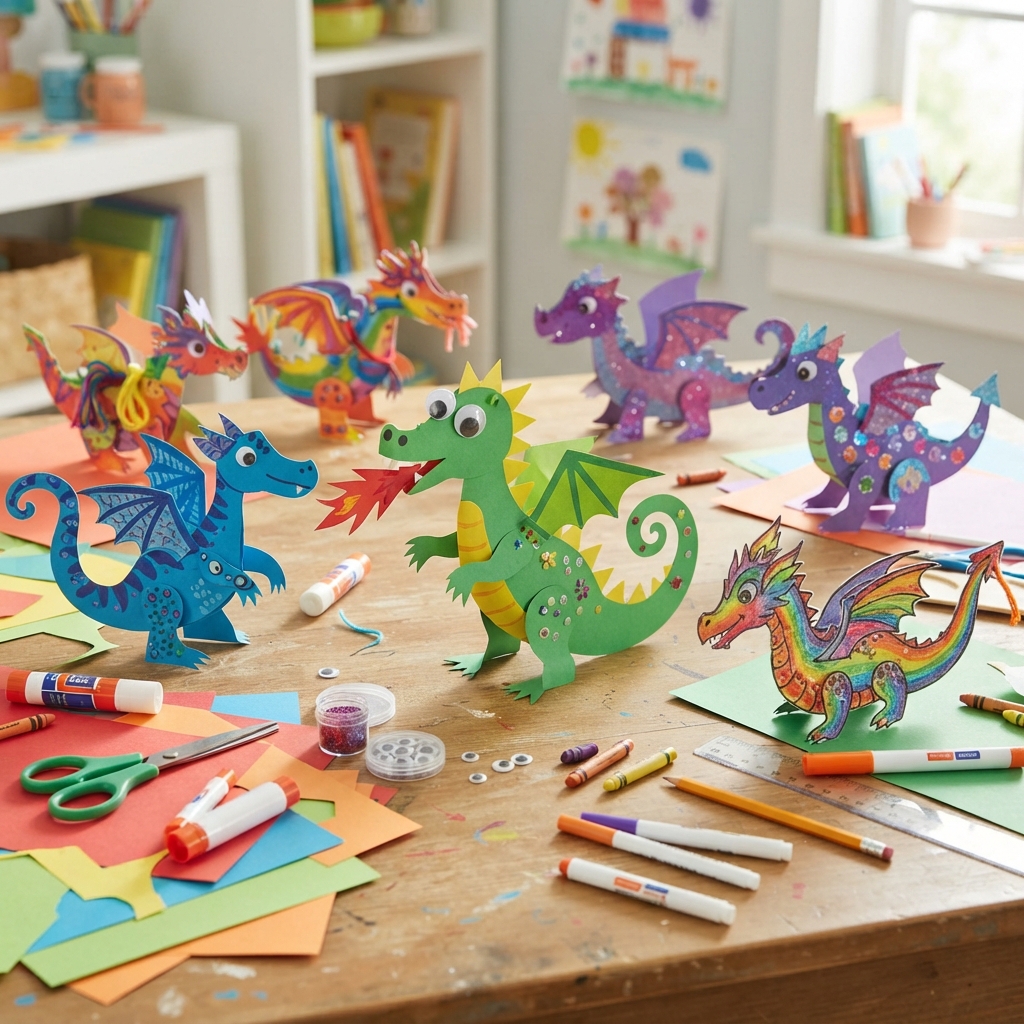
Making a paper dragon is a wonderful craft activity for children who enjoy fantasy, animals, stories, and colorful art. Dragons have fascinated people for centuries because they appear in legends, fairy tales, books, movies, and games. With some colored paper, scissors, glue, markers, and imagination, children can create their own friendly paper dragon.
A paper dragon does not need to be difficult to make. Children can start with simple shapes and gradually add details such as wings, horns, scales, claws, a long tail, and colorful decorations. The finished dragon can be used as a bedroom decoration, classroom project, storytelling character, or part of a fantasy-themed display.
This craft also provides many educational benefits. Children practice cutting, folding, drawing, and assembling paper pieces. They learn how different shapes can be combined to create a larger figure. Most importantly, they have an opportunity to make creative decisions and develop their own ideas.
In this article, you will learn how to make a colorful paper dragon step by step. You will also discover different ways to decorate the dragon, create a three-dimensional version, turn it into a puppet, and use the craft as part of a fun educational activity.
Why Make a Paper Dragon?
Dragons are excellent subjects for children’s crafts because there is no single correct design. A child can create a tiny green dragon, a giant red dragon, a friendly blue dragon, or a completely imaginary rainbow dragon.
This freedom encourages creativity. Children can decide what their dragon looks like, where it lives, what color its scales are, and whether it has wings.
The activity also develops fine motor skills. Cutting small shapes, folding paper, applying glue, and drawing details all require careful hand movements.
Paper dragons can also be connected to storytelling. After finishing the craft, children can invent a story about their dragon and create adventures for it.
Materials You Will Need
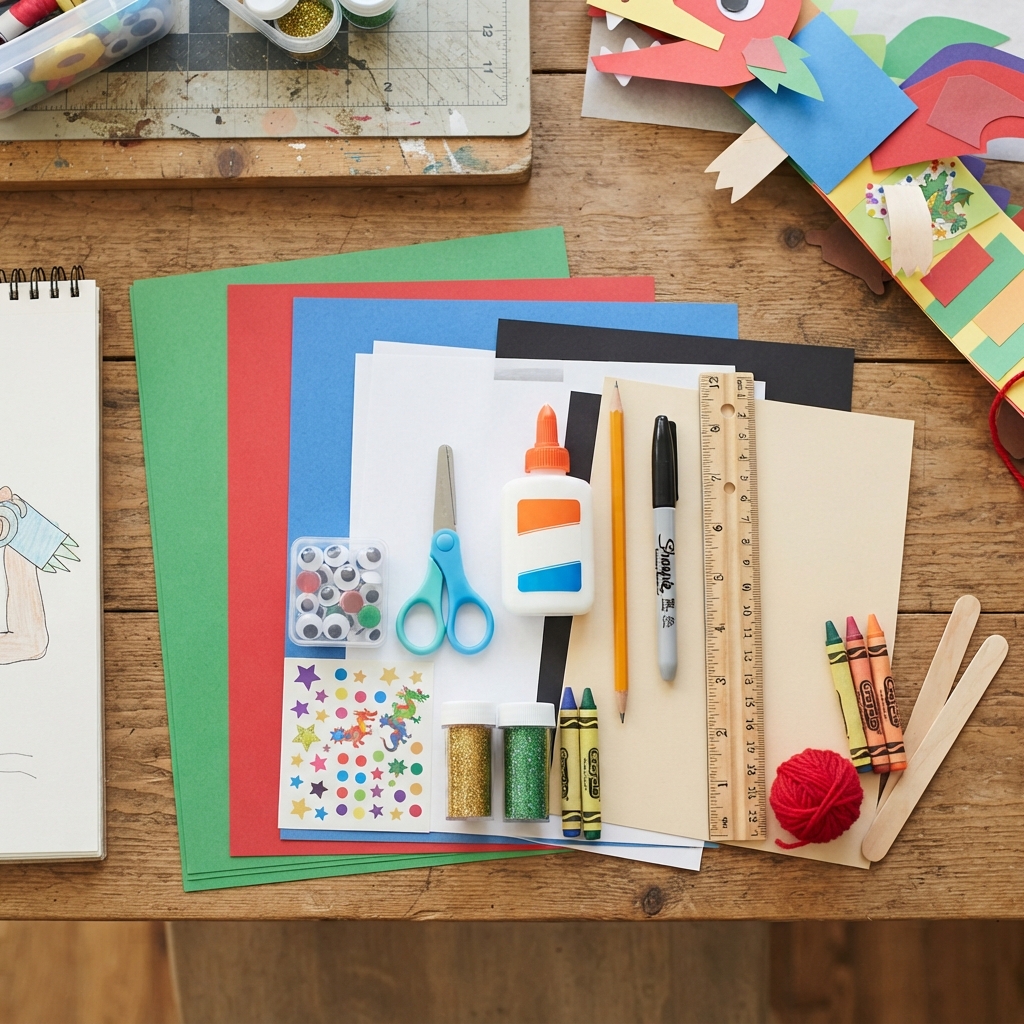
You only need a few inexpensive materials to make a basic paper dragon.
Useful supplies include:
- Green, red, blue, or other colored construction paper
- Cardstock
- White paper
- Black paper
- Scissors
- Child-safe glue
- Pencil
- Black marker
- Ruler
- Crayons or colored pencils
- Optional googly eyes
- Optional stickers
- Optional glitter
- Optional craft sticks
- Optional yarn
You do not have to use every material. The basic dragon can be made with paper, scissors, glue, and a marker.
Preparing the Workspace
Before beginning, choose a clean and comfortable work surface.
Cover the table with scrap paper if you are using glue, crayons, or markers. Arrange your materials so that everything is easy to reach.
If several children are making dragons together, give each child a separate workspace.
Young children should be supervised while using scissors. Child-safe scissors are recommended.
It is also helpful to keep a small container nearby for paper scraps. Some scraps can be reused later for scales and decorations.
Step 1: Make the Dragon’s Body
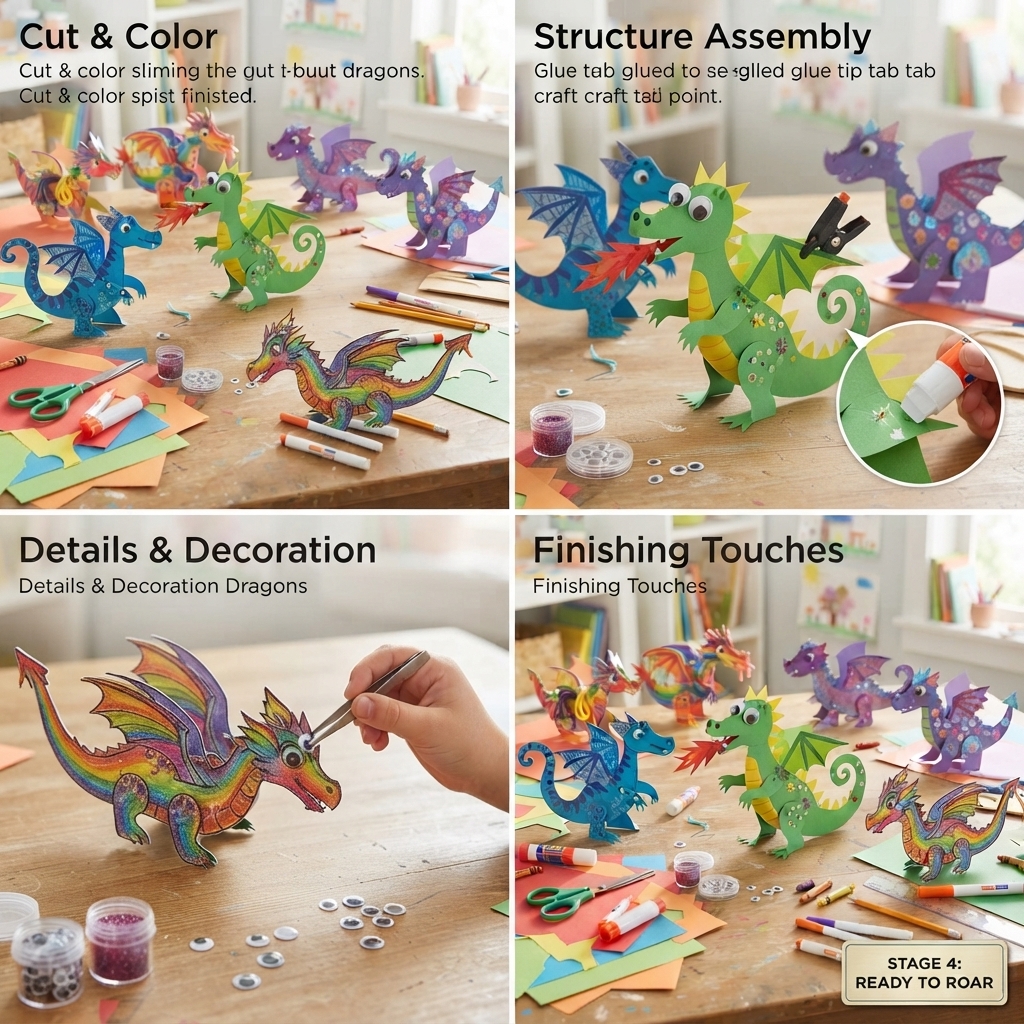
Start by drawing the main body of the dragon on colored cardstock.
You can make the body oval-shaped or slightly curved. A long body can make the dragon look more like a traditional fantasy creature.
Draw the shape with a pencil first. When you are satisfied with it, carefully cut it out.
Green is a popular dragon color, but children can use any color they like.
A red dragon can look fiery, a blue dragon can look magical, and a purple dragon can look mysterious.
Step 2: Make the Dragon’s Head
The head gives the dragon its personality.
Cut a large rounded shape from colored paper. Add a slightly longer section at the bottom to represent the neck.
You can make the head large and cartoon-like for a friendly appearance.
Attach the head to the body using glue.
For a three-dimensional dragon, fold the neck slightly so that the head stands away from the body.
Step 3: Create the Eyes
Eyes are an important part of the dragon’s face.
Cut two small circles from white paper and add black pupils.
You can also use googly eyes.
Glue the eyes near the top of the dragon’s head.
For a funny dragon, make the eyes large.
For a more mysterious dragon, make them smaller and add thick eyebrows.
Children can experiment with different facial expressions.
Step 4: Make the Dragon’s Beak or Snout
Dragons are imaginary creatures, so their faces can be designed in many different ways.
For a simple dragon, cut a small rounded or pointed snout from colored paper.
Glue it below the eyes.
You can add two small nostrils using a black marker.
If you want a more cartoon-like design, make the snout slightly larger.
Step 5: Add Horns
Most fantasy dragons are shown with horns, making them an important decoration.
Cut two small triangles from cardstock.
Fold the bottom of each triangle slightly and glue the folded sections behind the dragon’s head.
You can make short horns or long curved horns.
Use a contrasting color such as yellow, cream, gray, or black.
You can even give your dragon four or six small horns if you want a fantasy design.
Step 6: Create the Dragon’s Mouth
Draw a curved line across the lower part of the face to represent the mouth.
You can make the mouth open by cutting two separate pieces of paper.
Add small white triangles along the edge to represent teeth.
For a friendly children’s dragon, keep the teeth small and playful.
You can also add a red paper tongue.
This makes the dragon look like it is ready to tell a funny story rather than frighten anyone.
Step 7: Make the Wings
The wings are one of the most exciting parts of a paper dragon.
Draw two large wing shapes on colored paper.
The wings can be shaped like bat wings, bird wings, or magical fairy wings.
Cut them out carefully.
To create a three-dimensional effect, fold each wing slightly down the middle.
Apply glue to the inner portion and attach it to the dragon’s back.
Leave the outer edges loose so that the wings can stand away from the body.
You can decorate the wings with lines, dots, stars, or patterns.
Step 8: Add the Dragon’s Legs
Cut four legs from colored paper or cardstock.
Each leg can be a simple rectangular or slightly curved shape.
Add small claws at the bottom using black or yellow paper.
Glue two legs to each side of the body.
For a standing dragon, make the legs wide enough to support the body.
You can fold the feet slightly outward so that they touch the surface.
Step 9: Create the Long Tail
A dragon often has a long, curved tail.
Cut a long strip of colored paper and taper one end.
Bend the strip into a gentle curve.
Attach the wider end to the back of the dragon.
You can decorate the tail with small triangles to represent spikes.
For a more colorful dragon, create the tail from several overlapping strips of paper.
Step 10: Add Scales
Scales can make the dragon look much more detailed.
Cut small circles, triangles, or diamond shapes from colored paper.
Glue them onto the body in overlapping rows.
You do not need to cover the entire dragon. Adding a few rows along the back and tail can be enough.
Another easy option is to draw scales using a marker.
Children can use several shades of the same color to create a textured appearance.
Step 11: Add Spikes
Many imaginary dragons have spikes along their backs.
Cut small triangles from cardstock.
Arrange them from the back of the head down to the tail.
Glue them carefully along the center of the dragon’s body.
Use a contrasting color so that the spikes stand out.
Yellow spikes on a green dragon or orange spikes on a blue dragon can create an attractive effect.
Making a Fire-Breathing Dragon
For an extra-fun design, make a dragon that appears to breathe fire.
Cut several strips of red, orange, and yellow paper.
Make the strips different lengths.
Glue them inside the dragon’s open mouth.
Curl the ends slightly to make the flames look like they are moving.
This creates a bright and playful effect.
Children can use this feature when creating a dragon story.
Making a 3D Paper Dragon
If you want a more advanced project, turn the flat dragon into a three-dimensional model.
Use cardstock instead of thin paper for the body.
Fold the body gently along its center.
Create raised wings using folded tabs.
Make the head from a folded paper shape rather than a flat piece.
Use small paper supports under the body to help the dragon stand.
A 3D dragon can be placed on a shelf, desk, or classroom display.
Making a Dragon Puppet
A paper dragon can also become a simple puppet.
Attach a craft stick to the back of the dragon.
Children can hold the stick and move the dragon while telling a story.
You can make several puppets representing different characters.
For example, one child can make a dragon, another can make a knight, and another can make a castle.
Together, they can create a short fantasy play.
Creating a Dragon Castle
To make the project even more exciting, create a paper castle.
Use gray or brown cardstock to make towers and walls.
Add small flags made from colorful paper.
Draw windows and doors using markers.
Place the dragon beside the castle.
Children can also make mountains, clouds, trees, rivers, and bridges.
This turns a single craft into a complete fantasy landscape.
Educational Benefits
Making a paper dragon can support many important skills.
Cutting and gluing help develop fine motor control.
Drawing and coloring encourage creativity.
Following instructions teaches sequencing.
Designing a dragon requires children to make decisions about shape, color, and size.
The project can also support language development when children describe their dragon or write a story about it.
Teachers can ask students to write a short paragraph explaining where their dragon lives and what it likes to do.
Learning Through Fantasy
Although dragons are mythical creatures, they can be used to introduce children to real animals.
Children can compare dragons with reptiles such as lizards, snakes, and crocodiles.
They can discuss why artists often give dragons scales, claws, wings, and tails.
This can become a lesson about how myths and stories are inspired by the natural world.
Children can also learn that different cultures have their own dragon legends and artistic traditions.
Using Recycled Materials
A paper dragon can easily become a recycling craft.
Use old cereal boxes for the body.
Old magazines can provide colorful paper for scales.
Packaging cardboard can be used for wings and horns.
Paper scraps can become flames, spikes, and decorations.
Reusing materials helps children understand that everyday objects can become useful craft supplies.
Creative Dragon Ideas
There are endless possibilities for dragon designs.
A rainbow dragon can have multicolored scales.
A forest dragon can be green and brown with leaf-shaped decorations.
A snow dragon can use white, silver, and light blue paper.
A fire dragon can use red, orange, and yellow.
A space dragon can be decorated with stars and planets.
A tiny baby dragon can have oversized eyes and small wings.
Encourage children to invent their own species instead of copying a sample exactly.
A Dragon Story Activity
After completing the craft, ask children to give their dragon a name.
They can decide where it lives, what it eats, what its special power is, and who its friends are.
For example, a child might create a green dragon that lives in a magical forest and protects the animals.
Another child might create a blue dragon that lives above the clouds.
Children can then write a short story about their creations.
This turns a craft activity into a creative writing lesson.
Safety Tips
Always supervise young children when using scissors.
Use child-safe scissors and non-toxic glue.
Avoid tiny decorations with very young children because they may become choking hazards.
If glitter is used, keep it away from the eyes and avoid creating excessive dust.
Give glue enough time to dry before moving the dragon.
Troubleshooting Common Problems
If the wings fall off, use thicker cardstock or larger glue tabs.
If the body bends, attach an extra piece of cardboard behind it.
If the dragon cannot stand, widen the feet or add small supports underneath.
If the paper becomes wrinkled from glue, use less glue and allow it to dry on a flat surface.
Remember that handmade crafts do not need to be perfect. Every child’s dragon can have its own personality.
Conclusion
Making a paper dragon is a fun, imaginative, and educational activity for children. With simple materials such as colored paper, cardstock, scissors, glue, and markers, children can create a magical creature with wings, horns, scales, claws, and a long tail.
The project provides plenty of opportunities for creativity. Children can choose their own colors, design their own patterns, and invent unique dragon characters. They can even make fire-breathing dragons, movable puppets, or three-dimensional models.
The craft can also become the beginning of a larger fantasy adventure. Children can create castles, forests, mountains, clouds, and other characters to build an entire magical world around their paper dragon.
Most importantly, making a paper dragon allows children to learn through imagination. They practice important hand skills, follow a sequence of steps, make creative decisions, and develop storytelling abilities.
Whether it is made at home, in a classroom, at a library activity, or during a children’s craft session, a paper dragon is a simple project that can inspire hours of creativity and imaginative play.
