
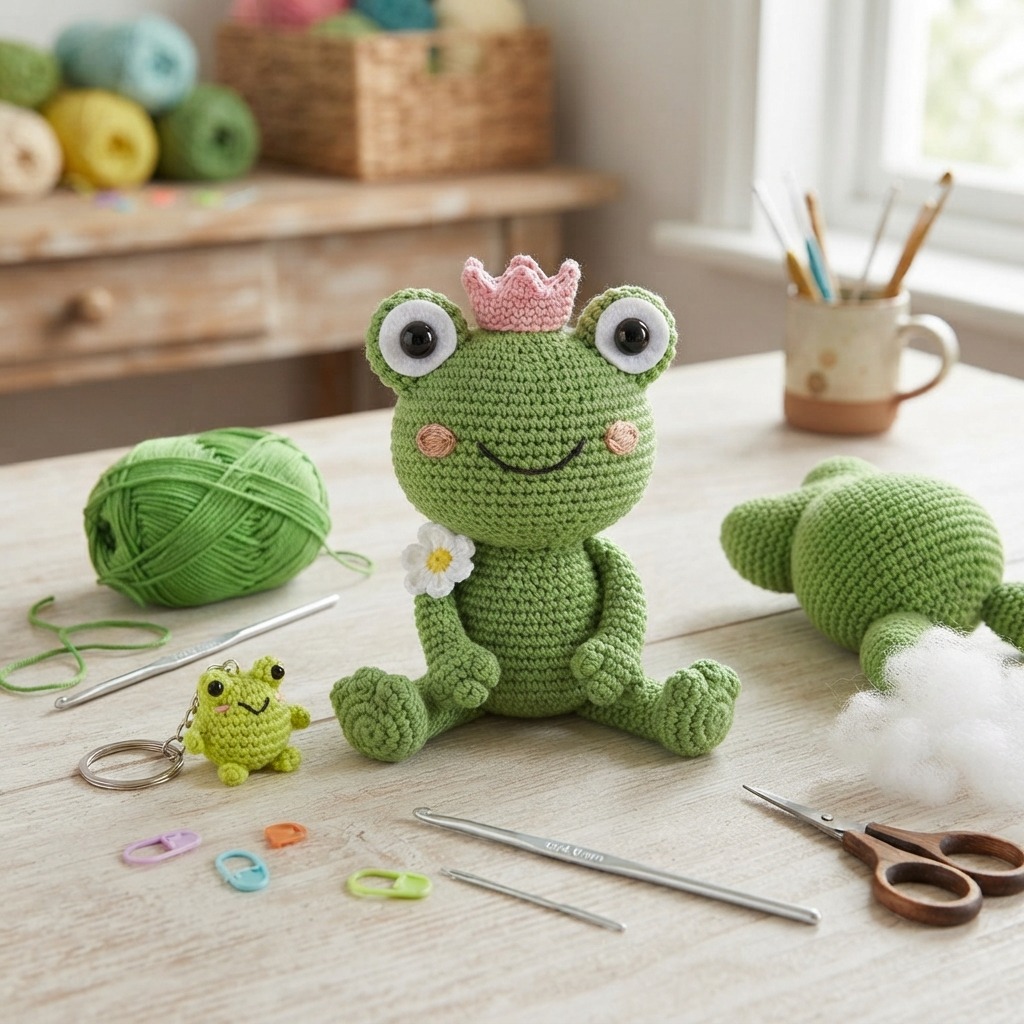
A crocheted frog is a fun, colorful, and charming handmade project that is perfect for beginners and experienced crocheters. With a crochet hook, a small amount of yarn, some stuffing, and a few basic stitches, you can create an adorable frog that can be used as a toy, decoration, keychain, bag charm, or handmade gift.
Frogs are especially fun to crochet because their appearance can be changed in many ways. You can make a traditional green frog, a bright yellow frog, a tiny frog with a crown, or a cute frog wearing a miniature sweater. You can also experiment with different facial expressions, body shapes, and accessories.
This project is a great introduction to amigurumi, the technique of crocheting small stuffed figures. By making a frog, you can practice working in rounds, increasing and decreasing stitches, stuffing crochet pieces, changing colors, and sewing separate parts together.
Why Make a Crocheted Frog?
A crocheted frog is a relatively small project, so it does not require a large amount of yarn. This makes it perfect for using leftover yarn from previous projects.
It is also an excellent project for practicing basic amigurumi techniques. The body and head can be created from simple rounded shapes, while the legs and eyes add the recognizable frog features.
Crochet frogs also make wonderful handmade gifts. You can choose a favorite color or create a personalized frog with a unique outfit.
A tiny frog can become a keychain, while a larger frog can become a soft stuffed animal or decorative pillow.
Materials You Will Need
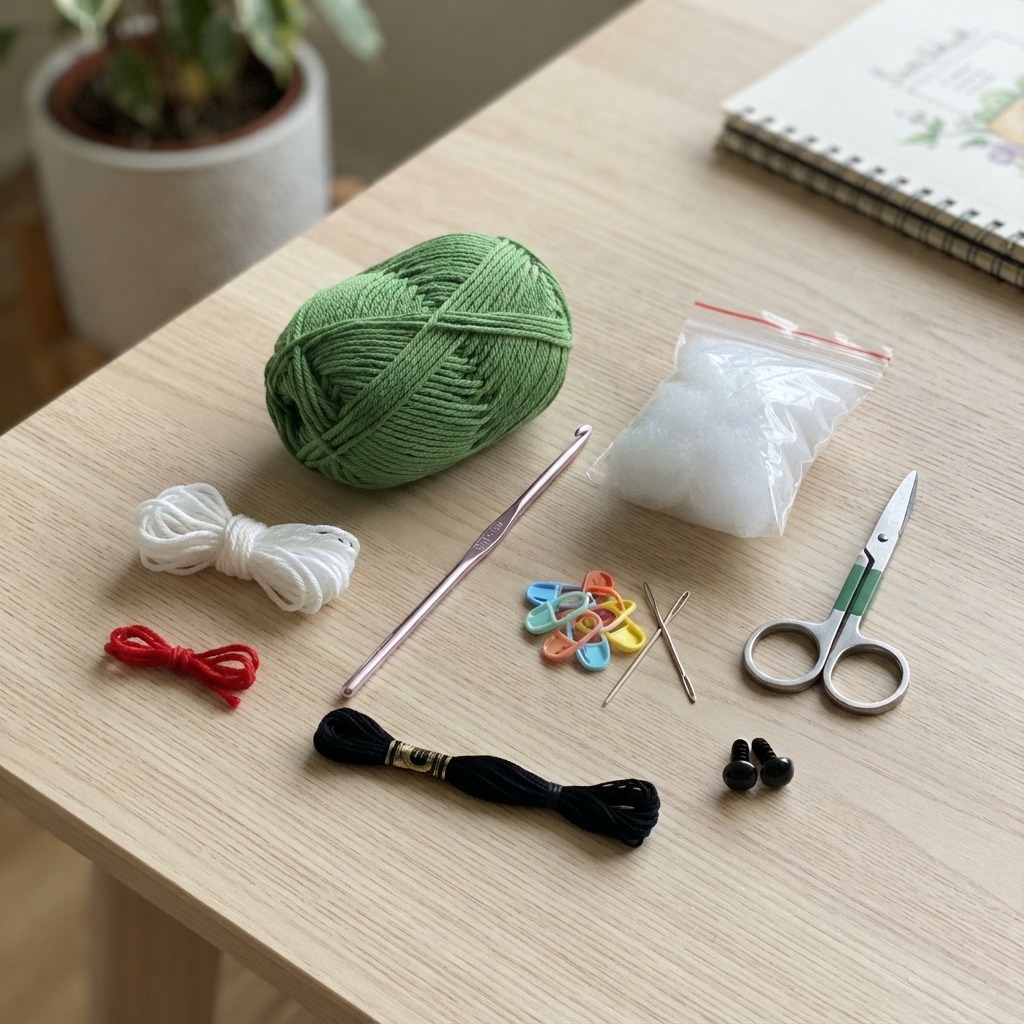
To make a basic crocheted frog, gather:
- Green yarn
- A crochet hook suitable for the yarn
- Polyester fiberfill
- A yarn needle
- Scissors
- Stitch markers
- Black embroidery thread or yarn
- Optional safety eyes
- White or cream yarn for the eyes
- Optional contrasting yarn for accessories
Cotton yarn works well for amigurumi because it produces neat and firm stitches. Acrylic yarn is another good option and offers a wide range of colors.
Choose a hook that creates tight stitches so the stuffing does not show through.
Safety Considerations
If the frog is intended for a baby or young child, consider embroidering the eyes instead of using detachable plastic safety eyes.
Avoid loose buttons, beads, ribbons, sequins, and other small decorations that could become choking hazards.
Make sure the legs, eyes, arms, and other parts are securely attached.
Always choose materials and construction methods appropriate for the intended age of the recipient.
Basic Crochet Skills
You do not need advanced crochet skills to make a frog.
The main techniques include:
- Magic ring
- Chain stitch
- Single crochet
- Slip stitch
- Increase
- Decrease
- Working in continuous rounds
You may also need to change colors.
If you are new to amigurumi, practice making a small ball first. This will help you understand how increases and decreases create rounded shapes.
Step 1: Make the Frog’s Body
Begin with green yarn.
Create a magic ring and work several single crochet stitches into it.
Pull the yarn tail gently to close the center.
Place a stitch marker at the beginning of the round.
Continue working in continuous rounds.
Increase stitches evenly to create a rounded body.
The frog’s body can be slightly oval or round depending on the style you want.
Step 2: Shape the Body
Once the body reaches the desired width, crochet several rounds without increasing.
This creates the main body section.
A cute cartoon frog can have a slightly wide body.
For a taller frog, work more rounds.
Keep your tension consistent so that the shape remains smooth.
Step 3: Add the Stuffing
Begin filling the body with polyester fiberfill.
Add small amounts at a time.
Use your crochet hook or a clean pencil to gently push the stuffing into the sides.
Do not overstuff the body.
The frog should be firm enough to hold its shape while remaining soft and cuddly.
Make sure the filling is evenly distributed.
Step 4: Close the Body
Continue crocheting while decreasing stitches.
As the opening becomes smaller, add a little more stuffing if necessary.
When the opening is almost closed, cut the yarn and leave a long tail.
Thread the tail onto a yarn needle.
Weave it through the remaining stitches and pull gently to close the opening.
Secure the yarn and hide the remaining end inside the body.
Step 5: Make the Frog’s Head
Depending on your design, the head can be made separately or as part of the body.
For a separate head, start with green yarn and create a magic ring.
Work single crochet stitches into the ring.
Increase gradually to create a rounded shape.
Continue working several rounds without increasing.
The frog’s head should be wider than its neck.
Step 6: Add the Frog’s Eyes
Frog eyes are one of the most recognizable features.
You can make two small raised eyes using green or lighter-colored yarn.
Create two small crochet balls or domes.
Add black embroidered pupils.
For a cute cartoon appearance, make the eyes slightly larger.
Sew them securely to the top of the head.
Step 7: Add the Face
Embroider a small mouth below the eyes.
You can create a simple curved smile.
Add tiny nostrils if desired.
Pink or peach-colored yarn can be used to create small cheeks.
A simple embroidered face can give your frog a friendly and playful personality.
Step 8: Attach the Head
Place the head on top of the body.
Use a yarn needle to sew it securely.
Work several stitches around the neck area.
Check the frog from different angles to make sure the head is centered.
For a more playful appearance, you can tilt the head slightly.
Step 9: Make the Frog’s Arms
Crochet two small arms using green yarn.
Start with a magic ring.
Work several rounds of single crochet.
Add a small amount of stuffing if desired.
Close each arm and leave a yarn tail for attaching.
Sew the arms to the sides of the body.
Position them slightly below the head.
Step 10: Make the Frog’s Legs
Frog legs are usually larger than the arms.
Create two elongated crochet pieces.
You can make the upper section thicker and the feet wider.
For a cute frog, make the feet slightly oversized.
Add a small amount of stuffing.
Close the pieces and leave yarn tails for sewing.
Step 11: Attach the Legs
Sew the legs to the lower part of the body.
Position them so the frog can sit comfortably.
You can angle the legs outward to create a classic frog pose.
Use strong stitches to secure each leg.
Check the balance of the frog before finishing the attachment.
Step 12: Add Frog Feet Details
For a more detailed design, add small lines between the toes.
Use black or dark green embroidery thread.
You can also crochet tiny webbed feet.
These details make the frog look more recognizable and add personality.
Choosing Frog Colors
Green is the traditional frog color, but crochet gives you many creative options.
Try:
- Bright green
- Lime green
- Olive green
- Mint green
- Dark green
- Yellow
- Blue
- Purple
- Pink
A pastel frog can look soft and adorable, while a bright green frog creates a classic cartoon appearance.
Making a Rainbow Frog
For a colorful design, use several different colors.
You can create stripes across the body using yellow, blue, pink, purple, and green.
Another option is to make each limb a different color.
A rainbow frog can make a cheerful toy or room decoration.
Making a Mini Crochet Frog
A tiny frog is a quick and enjoyable project.
Use thin yarn and a small crochet hook.
Make a small body, tiny eyes, and short legs.
A miniature frog can become:
- A keychain
- A bag charm
- A backpack decoration
- A zipper pull
- A desk decoration
Make sure any keychain hardware is securely attached.
Crochet Frog Keychain
A small crochet frog makes a charming keychain.
Create a miniature frog and add a secure loop to the top or back.
Attach a metal keychain ring.
Use bright green yarn for a classic appearance.
You can also make several tiny frogs in different colors and give them to friends.
Crochet Frog Bag Charm
A crochet frog can also become a cute bag charm.
Attach a sturdy loop to the top of the frog.
Connect it to a clasp or ring.
You can add a tiny flower, bow, or crown to make the charm unique.
Making a Frog with a Crown
For a fun character, give your crochet frog a tiny crown.
Use yellow or gold-colored yarn.
Crochet a small crown shape and attach it securely to the head.
This can turn an ordinary frog into a little prince or princess.
Making a Frog with a Flower
A tiny crochet flower is another charming accessory.
Make a small flower using pink, white, yellow, or purple yarn.
Attach it near one eye or between the frog’s hands.
This creates a cheerful spring-inspired design.
Crochet Frog Pillow
For a larger project, make a frog pillow.
Use thick yarn and a large crochet hook.
Create a large rounded body and oversized eyes.
Make long arms and legs for a playful appearance.
A large crochet frog pillow can be a fun addition to a child’s bedroom, reading corner, or playroom.
Crochet Frog Applique
A flat crochet frog can be used as an applique.
Sew it onto:
- Bags
- Blankets
- Hats
- Jackets
- Sweaters
- Pillows
- Baskets
Use a contrasting background so the frog stands out.
Several small frogs can be arranged around flowers or lily pads to create a nature-inspired pattern.
Crochet Frog Garland
Several small frogs can be connected to make a playful garland.
Make frogs in different shades of green.
Connect them using a long crochet chain.
Add crochet leaves, flowers, or lily pads between them.
A frog garland can decorate a child’s bedroom, classroom, craft room, or party.
Frog and Lily Pad Collection
For a complete nature-themed crochet display, combine frogs with lily pads.
Make flat green crochet circles for the lily pads.
Add small crochet flowers.
Place tiny frogs on top of the lily pads.
This can create a charming pond-themed decoration.
Tips for Beginners
Start with a small frog if this is your first amigurumi project.
Use a stitch marker to identify the beginning of each round.
Count your stitches regularly.
Keep your tension tight enough that the stuffing does not show.
Add stuffing gradually.
Take your time when positioning the eyes.
Make sure the legs and arms are securely attached.
Do not worry if your first frog is not perfect. Each project helps you improve.
Common Mistakes to Avoid
One common mistake is using a hook that is too large for the yarn. This can create gaps between stitches.
Another mistake is forgetting to count stitches after increases and decreases.
Avoid overstuffing the body because it can stretch the crochet fabric.
Make sure the eyes are positioned evenly.
Attach the legs at similar heights so the frog sits properly.
If the frog is intended for a young child, avoid small detachable decorations.
Creative Crochet Frog Ideas
Once you understand the basic design, experiment with different characters.
Make a sleepy frog with embroidered closed eyes.
Create a frog wearing a tiny crown.
Make a frog with a flower.
Create a rainbow frog.
Make a frog with a miniature backpack.
Create a family of frogs in different sizes.
Make tiny frog keychains in several colors.
Combine frogs with crochet turtles, bees, butterflies, flowers, mushrooms, and lily pads to create a complete garden-themed collection.
How to Make a Crochet Frog Gift
A handmade frog makes a cheerful gift for many occasions.
Choose the recipient’s favorite color.
Make a tiny frog keychain for a friend.
Create a soft frog for a child’s room.
Make a frog wearing a tiny crown for someone who loves cute characters.
You can also create a frog and flower set as a spring-themed gift.
Place the finished frog in a handmade gift bag for an extra personal touch.
Selling Crocheted Frogs
Crocheted frogs can also be suitable for a small handmade craft business.
They can be produced in many sizes, colors, and styles.
Possible products include:
- Mini frog keychains
- Frog bag charms
- Stuffed frog toys
- Frog pillows
- Frog brooches
- Frog appliques
- Seasonal frog decorations
- Personalized crochet frogs
When selling handmade toys or children’s products, focus on secure construction, durable materials, appropriate safety considerations, and any applicable local product-safety requirements.
Final Thoughts
Making a crocheted frog is a fun and rewarding project that combines simple crochet techniques with plenty of room for creativity. Its rounded body, raised eyes, long legs, and friendly face make it an excellent amigurumi project for beginners.
You can make a tiny frog for a keychain, a colorful frog as a handmade gift, or a large frog pillow for home decoration. Experiment with different yarn colors, facial expressions, accessories, and sizes to create a frog with its own personality.
The project also teaches useful crochet techniques such as working in continuous rounds, increasing, decreasing, stuffing, shaping, and sewing separate pieces together.
With a little patience and imagination, a small amount of yarn can become an adorable crocheted frog that brings a playful touch of nature to your handmade collection.
