
Quick Summary Table
| Feature | Details |
| Article Topic | Oil and Water Experiment for Kids |
| Category | STEM Activities for Children |
| Difficulty Level | Easy |
| Recommended Age | 5+ Years |
| Time Required | 10–30 Minutes |
| Main Materials | Oil, Water, Food Coloring, Household Items |
| Learning Focus | Density, Chemistry, Physics |
| Educational Value | High |
| Safety Level | Child-Friendly with Supervision |
| Number of Activities | 10 Fun STEM Experiments |
Introduction
The oil and water experiment for kids is one of the most fascinating and educational science activities children can explore. Few experiments capture attention as quickly as watching oil and water separate into distinct layers. The simple observation sparks curiosity and encourages children to ask important scientific questions. Why don’t these liquids mix? What happens when colors are added? Can objects float between the layers?
Science becomes much more exciting when children can interact directly with the concepts they are learning. Instead of reading about density and molecular behavior in a textbook, they can observe these principles firsthand using everyday household materials.
One of the greatest advantages of oil and water experiments is their simplicity. Most activities require only a few ingredients commonly found in the kitchen. Despite their simplicity, these experiments introduce children to important STEM concepts such as density, polarity, buoyancy, chemical properties, observation skills, and problem-solving.
This guide explores ten exciting STEM activities based on oil and water experiments. Each activity is designed to make science fun, engaging, and easy to understand while helping children develop critical thinking skills.
Why Oil and Water Do Not Mix
Before beginning the activities, it helps to understand the science behind oil and water.
Water molecules are polar, meaning they have positive and negative ends. Oil molecules are non-polar, meaning they do not have these charged regions.
Because of these differences, water molecules prefer to stick to other water molecules, while oil molecules stick to other oil molecules.
As a result, oil and water separate into layers instead of mixing together.
Another important factor is density. Oil is less dense than water, so it floats on top.
This simple concept forms the basis for many fascinating STEM activities.
Materials Commonly Used
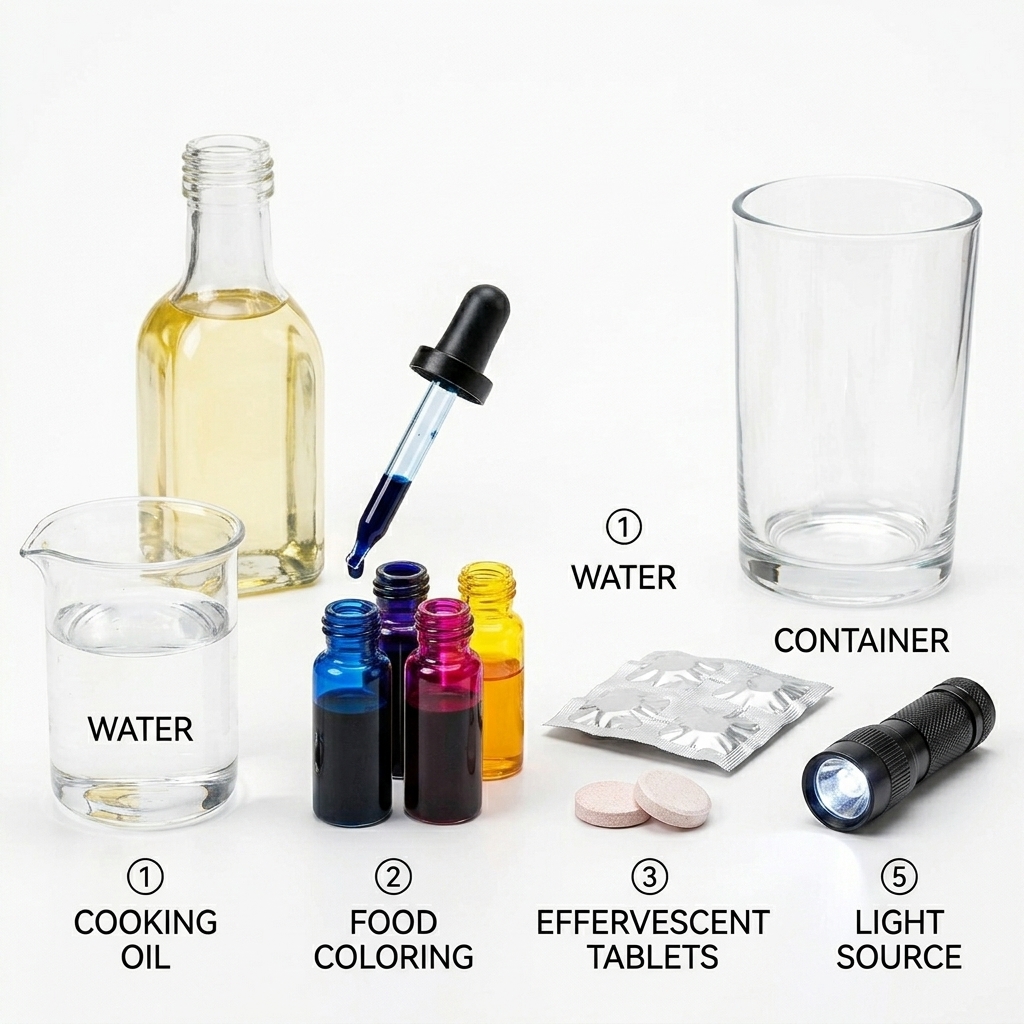
Most of the experiments in this article require:
- Vegetable oil
- Water
- Clear containers
- Food coloring
- Measuring cups
- Spoons
- Small objects for testing
Optional materials include:
- Salt
- Alka-Seltzer tablets
- Dish soap
- Glitter
- Beads
- Raisins
1. Classic Oil and Water Separation Experiment
Materials
- Clear glass
- Water
- Vegetable oil
Instructions
Fill a glass halfway with water.
Slowly pour oil into the glass.
Watch as the oil rises and forms a separate layer.
Science Lesson
Children learn about density and immiscible liquids.
Educational Benefits
- Observation skills
- Scientific vocabulary
- Basic chemistry
2. Colorful Oil and Water Layers
Materials
- Water
- Oil
- Food coloring
- Clear jar
Instructions
Add water to a jar.
Mix food coloring into the water.
Pour oil on top.
Observe how the colored water stays separate from the oil.
Science Lesson
Food coloring dissolves in water but not in oil.
Educational Benefits
- Solubility
- Molecular interactions
- Color observation
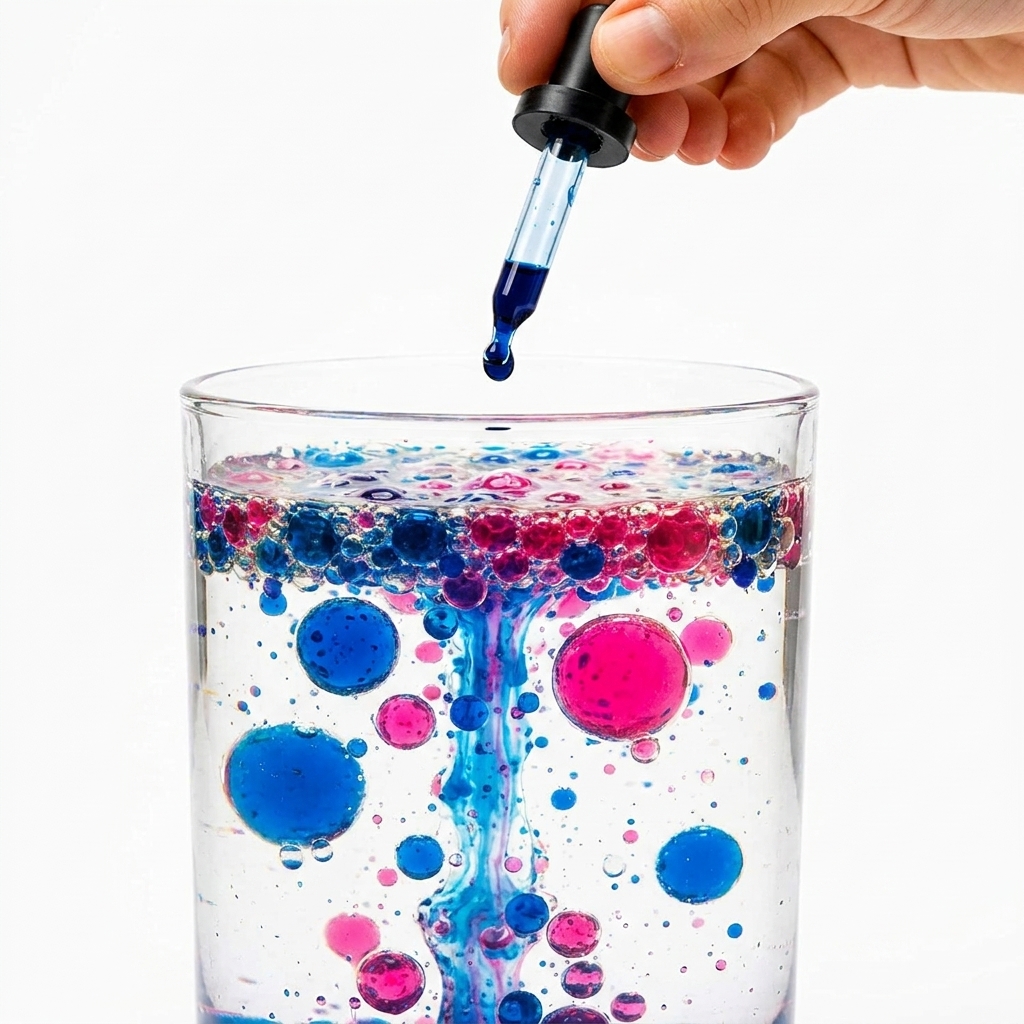
3. Homemade Lava Lamp
Materials
- Oil
- Water
- Food coloring
- Alka-Seltzer tablet
- Bottle
Instructions
Fill a bottle with oil and water.
Add food coloring.
Drop in an Alka-Seltzer tablet.
Watch colorful bubbles move up and down.
Science Lesson
Gas bubbles temporarily change density and create movement.
Educational Benefits
- Density
- Gas formation
- Chemical reactions
4. Floating Objects Challenge
Materials
- Oil
- Water
- Various small objects
Instructions
Place objects into the container.
Observe where they settle.
Some float in oil, some sink to water, and others rest between layers.
Science Lesson
Different materials have different densities.
Educational Benefits
- Prediction skills
- Density concepts
- Scientific investigation
5. Oil and Water Tornado
Materials
- Plastic bottle
- Oil
- Water
- Glitter
Instructions
Fill the bottle with oil and water.
Shake vigorously.
Watch a temporary tornado form.
Science Lesson
Mixing energy temporarily disperses the liquids.
Educational Benefits
- Motion
- Energy transfer
- Observation
6. Salt and Oil Experiment
Materials
- Oil
- Water
- Salt
Instructions
Sprinkle salt onto the oil layer.
Watch as oil droplets travel downward.
Science Lesson
Salt increases weight and pulls oil downward.

Educational Benefits
- Density changes
- Scientific observation
- Cause and effect
7. Oil and Water Art
Materials
- Oil
- Water
- Food coloring
- Paper
Instructions
Create colorful oil-and-water patterns and transfer them to paper.
Science Lesson
Different liquids interact uniquely with pigments.
Educational Benefits
- Creativity
- Scientific exploration
- Artistic expression
8. Bubble Investigation
Materials
- Oil
- Water
- Straw
- Clear container
Instructions
Create bubbles and observe how they move through the layers.
Science Lesson
Air interacts differently with liquids of varying densities.
Educational Benefits
- Fluid dynamics
- Observation
- Critical thinking
9. Oil Density Race
Materials
- Different oils
- Water
- Clear containers
Instructions
Compare vegetable oil, olive oil, and other oils.
Observe which floats higher.
Science Lesson
Different oils have slightly different densities.
Educational Benefits
- Comparison skills
- Data collection
- Scientific testing
10. Mystery Layer Challenge
Materials
- Oil
- Water
- Various household liquids
Instructions
Predict where each liquid will settle.
Test and compare results.
Science Lesson
Liquids form layers based on density.
Educational Benefits
- Hypothesis development
- Experimentation
- Analysis
Understanding Density
Density is one of the most important concepts in these activities.
Density measures how much matter exists within a given space.
Objects or liquids with lower density float above those with higher density.
Children can visualize density easily through oil and water experiments because the layers remain visible.
Understanding density helps explain:
- Floating
- Sinking
- Layer formation
- Buoyancy
These principles appear throughout science and everyday life.
Why STEM Activities Matter
STEM stands for:
- Science
- Technology
- Engineering
- Mathematics
Hands-on STEM activities provide several benefits.
Encourage Curiosity
Children naturally ask questions and seek answers.
Build Confidence
Successfully completing experiments boosts self-esteem.
Improve Problem-Solving
Experiments encourage analytical thinking.
Strengthen Observation Skills
Careful observation is a key scientific skill.
Develop Creativity
Many STEM projects allow room for innovation and exploration.
Oil and water activities support all of these learning goals.
Making Experiments More Educational
Parents and teachers can increase learning by encouraging scientific thinking.
Ask Prediction Questions
Examples include:
- What do you think will happen?
- Which object will float?
- Will the liquids mix?
Record Results
Create a simple science journal.
Children can write:
- Predictions
- Observations
- Conclusions
Change Variables
Experiment with:
- Different oils
- Different temperatures
- Various objects
This helps children understand the scientific method.
Common Questions
Why Does Oil Float?
Oil is less dense than water.
Can Oil and Water Ever Mix?
Not permanently under normal conditions.
However, soap can help create temporary mixtures called emulsions.
Why Doesn’t Food Coloring Mix with Oil?
Food coloring is water-based and dissolves only in water.
Are These Activities Safe?
Yes, when performed with adult supervision and household materials.
What Age Group Benefits Most?
Children ages 5 and older generally enjoy these activities.
Safety Guidelines
Even simple experiments require basic safety measures.
Adult Supervision
Always supervise young children.
Avoid Drinking Materials
Experiment liquids should not be consumed.
Use Stable Containers
Prevent spills and accidents.
Clean Up Thoroughly
Oil can create slippery surfaces.
Wash Hands
Good hygiene is important after every activity.
Extending Learning Beyond the Experiment
Oil and water experiments connect to real-world science.
Examples include:
Environmental Science
Oil spills demonstrate why oil and water separation matters.
Cooking
Many recipes involve oils and liquids.
Engineering
Fluid behavior is important in machine design.
Medicine
Understanding chemical properties helps scientists develop medications.
These connections show children how science applies to everyday life.
Benefits of the Oil and Water Experiment for Kids
The oil and water experiment for kids remains one of the best STEM activities because it combines simplicity with powerful scientific lessons.
Children learn:
- Density
- Polarity
- Observation skills
- Critical thinking
- Scientific reasoning
At the same time, they enjoy colorful, hands-on experiences that make learning memorable.
Conclusion
The oil and water experiment for kids is a fantastic introduction to STEM learning. Using simple household materials, children can explore complex scientific concepts such as density, buoyancy, polarity, and chemical properties in a fun and engaging way.
The ten activities in this guide offer a variety of opportunities for exploration, creativity, and discovery. From homemade lava lamps to floating object challenges, each experiment transforms ordinary materials into exciting scientific investigations.
Whether used in classrooms, homeschool programs, or family science nights, these activities help children develop curiosity, confidence, and a lifelong appreciation for science. Most importantly, they prove that learning can be both educational and incredibly fun.