
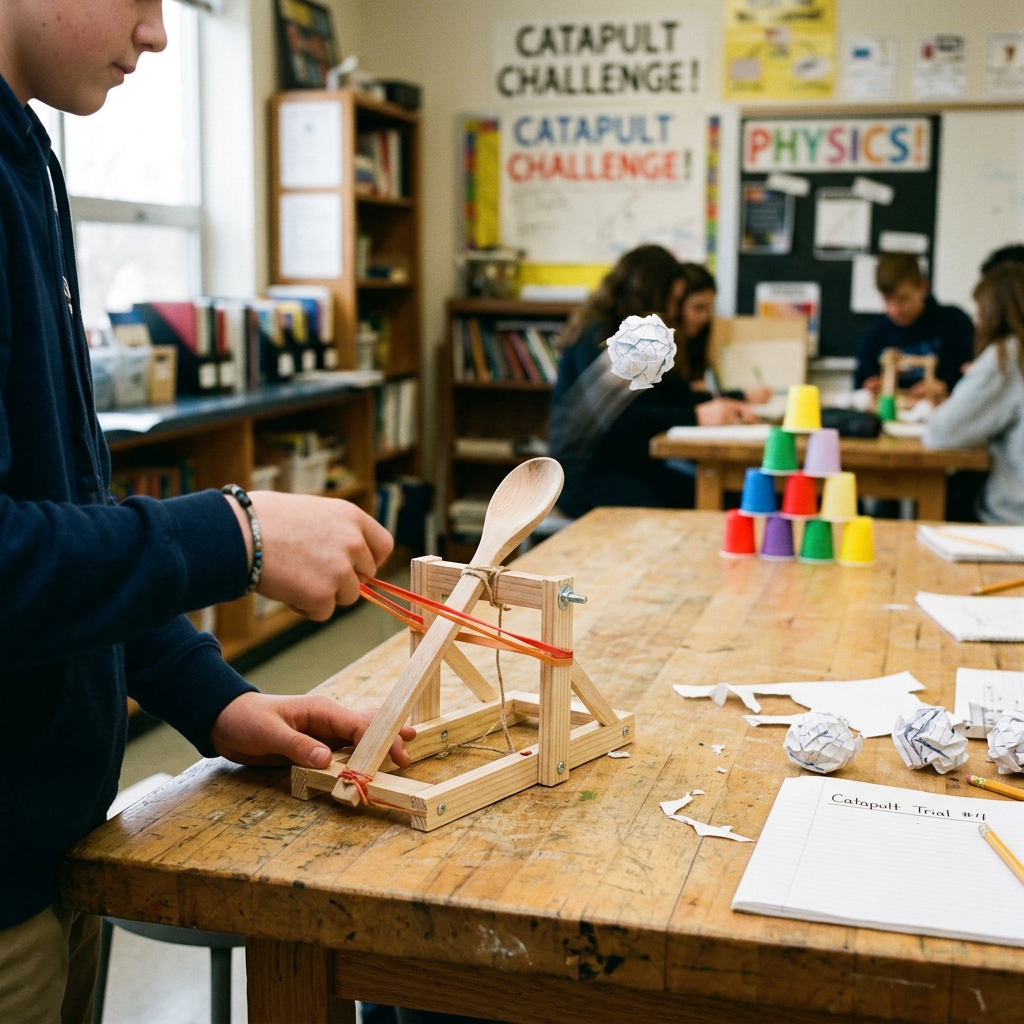
School projects give students the opportunity to turn classroom lessons into exciting hands-on experiences. Instead of only reading about scientific principles, students can build models, perform experiments, and observe how different ideas work in real life. One enjoyable STEM (Science, Technology, Engineering, and Mathematics) activity is building a small catapult that launches lightweight paper balls. This project combines creativity, engineering, physics, and problem-solving in a safe and engaging way.
A catapult is one of the oldest mechanical devices invented by humans. Ancient civilizations used large catapults to launch stones and other objects during battles or to help with construction tasks. Modern classroom catapults are much smaller and much safer. They are designed to launch soft paper balls over short distances, making them perfect for learning scientific concepts without creating unnecessary risks.
Building a miniature catapult allows students to understand how stored energy is converted into motion. They also learn about force, levers, elasticity, accuracy, and engineering design. Every stage of the project from planning and construction to testing and improvement helps develop important academic and practical skills.
The best part of this activity is that it uses inexpensive materials that are easy to find at home or in the classroom. Wooden craft sticks, rubber bands, plastic spoons, cardboard, glue, and paper are enough to build a working model. Students can then compete in friendly challenges by launching paper balls toward targets, measuring distances, or trying to improve the accuracy of their designs.
This project encourages experimentation because there is no single perfect design. Students quickly discover that changing the size of the base, the position of the spoon, or the tension of the rubber bands affects how the catapult performs. These discoveries help them think like engineers who continuously test and improve their inventions.
Project Objectives
The main goal of this project is to build a small catapult capable of launching lightweight paper balls accurately and safely. While constructing the model, students learn how simple machines work and how energy is transferred from one form to another.
The project also aims to strengthen observation skills, encourage teamwork, improve creativity, and develop confidence through practical learning. Students experience the engineering design process by planning, building, testing, evaluating, and improving their creations.
Rather than focusing only on the final result, the project emphasizes learning through experimentation and problem-solving.
Materials and Tools
One advantage of this project is that it requires only simple materials.
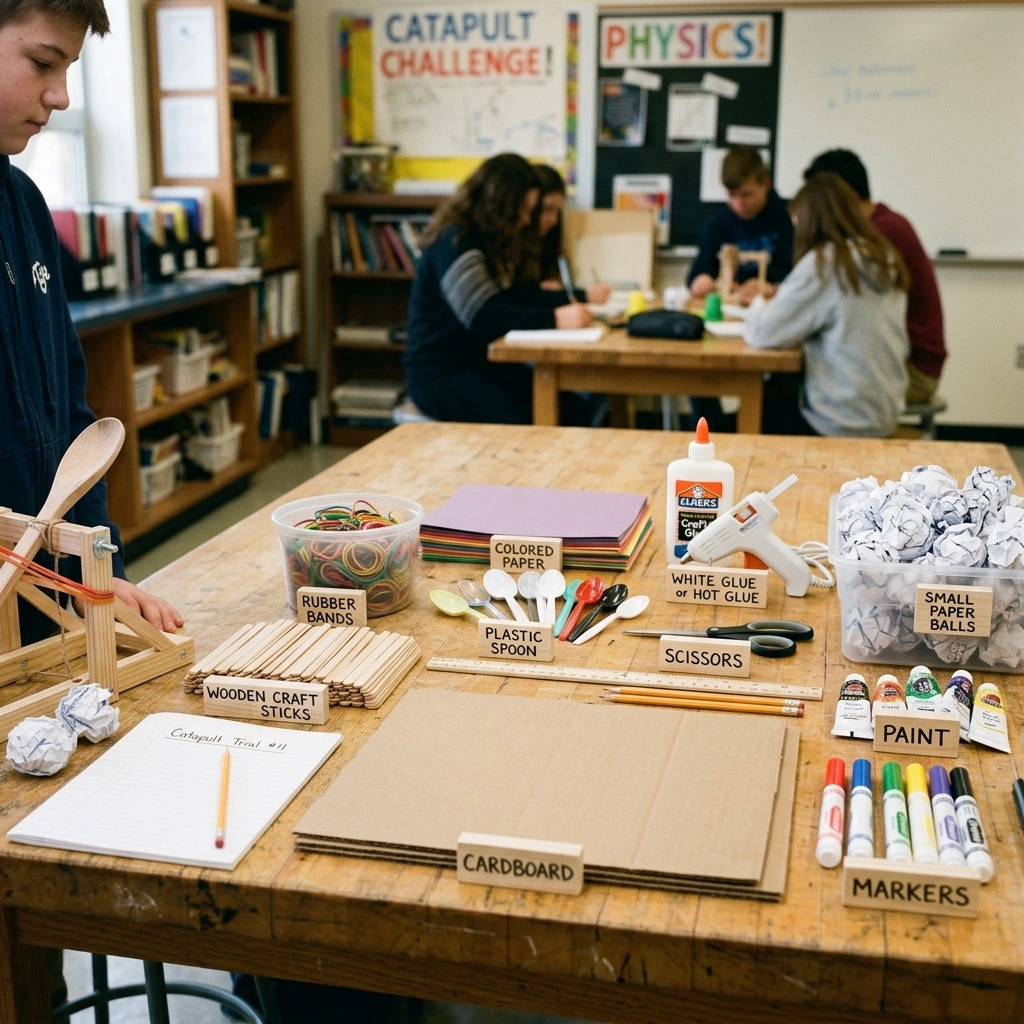
The following items are commonly used:
- Wooden craft sticks
- Rubber bands
- Plastic spoon
- Cardboard
- White glue or hot glue (with adult supervision)
- Scissors
- Ruler
- Pencil
- Colored paper
- Markers or paint
- Small paper balls made from recycled paper
Many of these materials can be recycled, making the project environmentally friendly as well as affordable.
Planning the Design
Every successful engineering project begins with careful planning. Before assembling the catapult, students should draw a simple sketch showing the base, launching arm, spoon, and support structure.
Planning helps answer important questions:
- How large should the catapult be?
- How many craft sticks are needed?
- How will the spoon be attached?
- How can the base remain stable during launching?
- What type of target will be used?
A simple drawing often prevents mistakes during construction and saves time later.
Building the Base
The base provides stability for the entire catapult. Several craft sticks can be stacked together and secured tightly with rubber bands to create a strong foundation.
Another group of sticks is attached vertically to support the launching arm. The stronger the base, the more accurate the launches will be because the structure will not move each time the paper ball is fired.
Students should check that every connection is tight before continuing to the next step.
Constructing the Launching Arm
The launching arm is usually made from a single craft stick with a plastic spoon attached securely to one end. The spoon holds the paper ball before launch.
The opposite end acts as a lever. When the arm is pulled downward, energy is stored in the bent craft stick and stretched rubber bands. Once released, this stored energy pushes the spoon upward rapidly, launching the paper ball into the air.
Finding the correct balance between flexibility and strength is one of the most important parts of the project.
Assembling the Catapult
After the base and launching arm are complete, they are connected carefully. Rubber bands hold the launching arm in place while still allowing it to move freely.
Students should test the movement several times without a paper ball to ensure that the arm swings smoothly and does not become stuck.
Small adjustments at this stage can greatly improve the performance of the finished catapult.
Testing the Catapult
Once the catapult has been assembled, it is time to test its performance. Students should begin by making several small paper balls from recycled paper. These lightweight projectiles are safe to use in the classroom and are ideal for measuring the catapult’s accuracy and distance.
The paper ball is placed carefully inside the plastic spoon. The launching arm is then pulled backward slowly until the desired amount of tension is created. Releasing the arm allows the stored energy to push the spoon forward, sending the paper ball through the air.
The first few launches are considered trial runs. Students should observe how far the paper ball travels, whether it follows a smooth path, and whether the catapult remains stable after each launch. Recording these observations helps identify areas that need improvement.
Quick Overview Table
| Feature | Description |
|---|---|
| Project Name | Small Catapult and Paper Ball Launcher |
| Project Type | STEM Engineering Project |
| Difficulty Level | Easy to Intermediate |
| Recommended Age | 10 years and older |
| Main Materials | Craft sticks, rubber bands, plastic spoon, cardboard, glue, paper |
| Science Concepts | Force, energy, levers, motion, projectile movement |
| Estimated Build Time | 1–2 hours |
| Skills Developed | Engineering, creativity, teamwork, critical thinking |
| Safety Level | Safe with adult supervision |
| Final Goal | Launch paper balls accurately toward a target |
Improving the Design
Very few engineering projects work perfectly the first time. Engineers constantly improve their designs by testing different ideas, and students should do the same with their catapults.
If the paper ball does not travel very far, students can increase the tension by adjusting the rubber bands. If the catapult tips over during launching, they can widen the base or add extra supports. If the spoon bends too much, replacing it with a stronger one may improve performance.
Students may also experiment with different launching angles. A lower angle often produces a faster, flatter flight, while a higher angle sends the paper ball higher into the air. Comparing these results helps students understand how launch angles affect distance.
Every modification teaches an important engineering lesson: small improvements can produce much better results.
The Science Behind the Catapult
Although the model is simple, it demonstrates several important scientific principles.
One of the most important is potential energy. When the launching arm is pulled backward, energy is stored in the bent craft stick and stretched rubber bands. This stored energy remains until the arm is released.
As soon as the arm is released, the stored potential energy changes into kinetic energy, which moves the spoon forward at high speed. The paper ball leaves the spoon and continues moving because of its momentum until gravity gradually pulls it back to the ground.
The catapult also demonstrates the principle of the lever. The launching arm acts as a lever that multiplies force, allowing a small movement of the hand to produce a much faster movement at the end of the spoon.
Students also observe gravity, air resistance, and projectile motion, making this project an excellent introduction to basic physics.
Measuring Performance
To make the project more scientific, students can measure the results of each launch.
Possible measurements include:
- Distance traveled
- Launch angle
- Accuracy
- Number of successful target hits
- Consistency between launches
Students can record their data in a table and compare different designs. This encourages careful observation and introduces the scientific method through experimentation.
Teachers may even organize friendly competitions where teams attempt to hit a target from different distances or achieve the longest successful launch.
Common Challenges
During construction and testing, students may encounter several common problems.
The launching arm may become loose after repeated use. Rubber bands may lose elasticity over time. The base may slide across the table during launching. Sometimes the paper ball may leave the spoon too early or too late.
Fortunately, these challenges are easy to solve through careful observation and small adjustments. Reinforcing weak joints, replacing worn rubber bands, or improving the balance of the base often solves most problems.
Learning to solve these issues develops patience and critical thinking, two important qualities for future engineers.
Safety Guidelines
Even though this classroom catapult launches only lightweight paper balls, safety should always come first. Students should use the catapult responsibly and follow their teacher’s instructions throughout the activity. Before each launch, everyone should make sure the area in front of the catapult is clear.
The catapult should never be aimed at people, animals, windows, or fragile objects. Paper balls are soft, but they can still cause discomfort if they strike someone unexpectedly. Students should also avoid pulling the launching arm back farther than necessary because excessive force may damage the model or cause rubber bands to snap.
Scissors, hot glue guns, and craft knives should be used carefully and only under adult supervision. After the project is finished, all materials should be collected, and the workspace should be cleaned to keep the classroom safe and organized.
Following these simple rules allows everyone to enjoy the activity while learning responsible laboratory and workshop behavior.
Classroom Activities and Challenges
Once all of the catapults have been completed, the class can participate in a variety of exciting challenges. These activities make the project even more enjoyable while encouraging teamwork and friendly competition.
One popular activity is the Target Challenge, where students aim at circles, cups, or boxes placed at different distances. Each successful hit earns points, and accuracy becomes more important than power.
Another activity is the Distance Challenge, where teams compete to see whose paper ball travels the farthest. Students quickly discover that launching farther is not always better if accuracy is lost.
Teachers can also organize an Engineering Improvement Challenge. After the first round of testing, students are given time to improve their catapult. They then compare their original results with their improved design. This demonstrates how engineers use testing and redesign to create better products.
A teamwork competition is another excellent option. Small groups work together to design, build, and test one catapult, encouraging communication, cooperation, and creative thinking.
Educational Benefits
The Small Catapult Project offers many educational benefits beyond science. Students strengthen their engineering skills by designing structures that are both stable and functional. Measuring distances and launch angles develops mathematical thinking, while recording test results improves scientific observation and data collection.
Creativity also plays a major role. Students decorate their catapults with paint, colored paper, stickers, or labels, making each design unique. At the same time, they learn that appearance should never reduce the machine’s performance.
The project encourages persistence because not every launch is successful. Students learn that mistakes are valuable opportunities to improve their designs rather than reasons to give up. This growth mindset is an important lesson that extends far beyond the classroom.
Communication skills improve when students explain how their catapult works, describe the changes they made, and present their results to classmates. Working together also teaches responsibility, leadership, and respect for different ideas.
Real-World Applications
Although this project uses simple classroom materials, the principles behind it are found in many real-world technologies. Engineers design machines that store and release energy in controlled ways, from mechanical launch systems to industrial equipment.
The study of projectile motion is important in fields such as aerospace engineering, sports science, robotics, and even space exploration. Understanding force, energy, and motion helps engineers create safer vehicles, more efficient machines, and advanced robotic systems.
The engineering design process used in this project—planning, building, testing, evaluating, and improving—is the same process followed by professional engineers around the world. By completing this activity, students gain a realistic introduction to how engineering projects are developed.
Ideas for Future Improvements
After completing the first version of the catapult, students can explore many creative improvements. They might design a stronger base using cardboard or lightweight wood, create an adjustable launching arm, or experiment with different spoon sizes to see how they affect performance.
Other possible improvements include adding a simple measuring scale to adjust launch angles, building a removable target board, or decorating the catapult with a theme such as a medieval castle or a space mission.
Students can also compare different building materials and investigate which designs provide the greatest accuracy or distance. These extension activities transform a simple classroom craft into a deeper engineering investigation.
Conclusion
The Small Catapult and Paper Ball Launcher is an engaging school project that combines science, engineering, mathematics, and creativity in one enjoyable activity. Using simple materials such as craft sticks, rubber bands, a plastic spoon, cardboard, and recycled paper, students can build a working model that demonstrates important scientific principles in a safe and memorable way.
Throughout the project, students learn about force, energy, levers, gravity, projectile motion, and the engineering design process. They discover that careful planning, accurate construction, repeated testing, and thoughtful improvements all contribute to a successful design. Rather than expecting perfection on the first attempt, they experience how engineers solve problems through observation, experimentation, and continuous refinement.
The project also develops valuable life skills. Teamwork, communication, creativity, patience, critical thinking, and perseverance are strengthened as students work together to overcome challenges and improve their catapults. Friendly competitions and classroom activities make learning enjoyable while encouraging students to apply scientific knowledge in practical situations.
Perhaps the greatest lesson of all is that meaningful learning often happens through hands-on experience. By designing, building, testing, and improving their own catapult, students become active learners instead of passive observers. They gain confidence in their abilities and develop curiosity about science and engineering, inspiring them to explore even more challenging projects in the future.
In conclusion, building a small catapult and launching paper balls is much more than a simple classroom activity. It is an exciting educational adventure that demonstrates how imagination, careful planning, and scientific thinking can transform ordinary materials into an effective engineering project. The knowledge and skills gained from this experience will continue to benefit students throughout their education and may even inspire the engineers, inventors, and innovators of tomorrow.
