
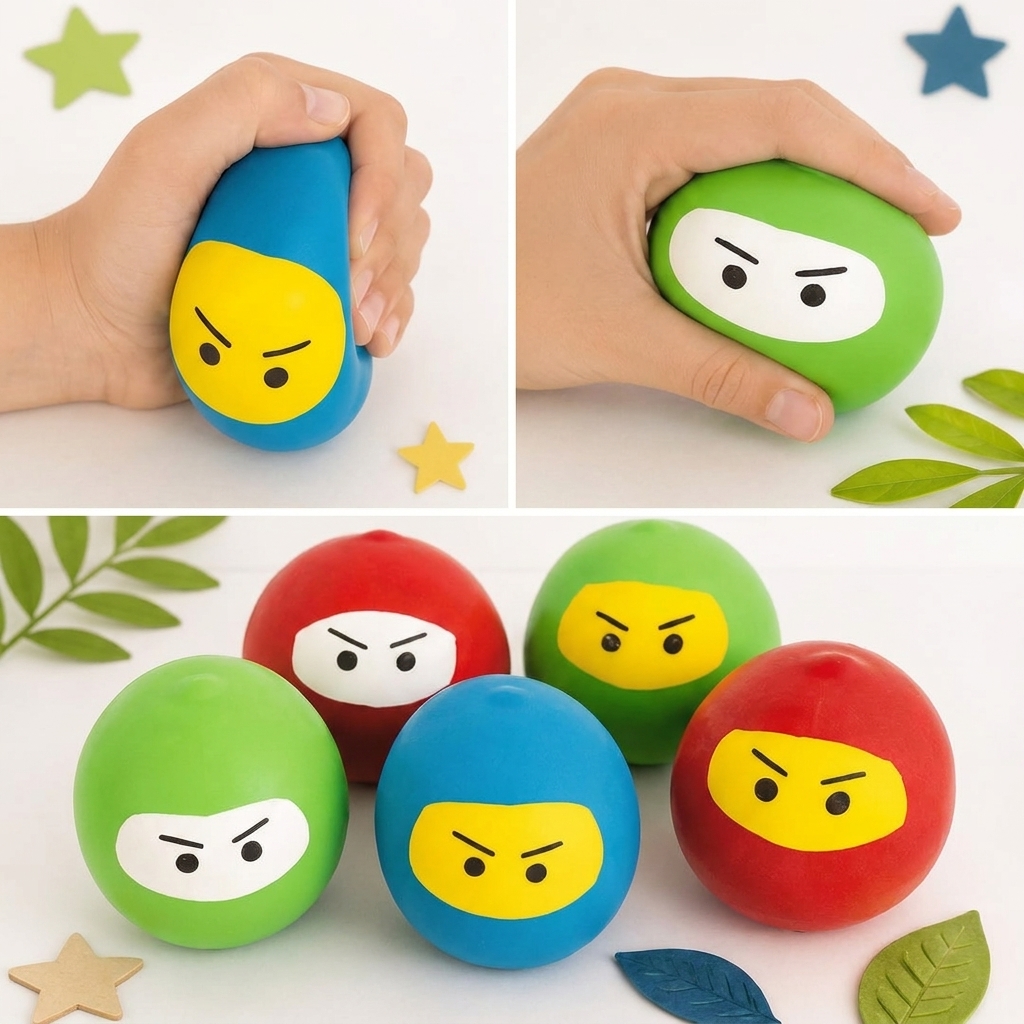
School projects become much more exciting when students can create something with their own hands. Craft activities encourage creativity, improve problem-solving skills, and help children understand basic science and engineering concepts in a fun way. One enjoyable project is making soft paper ninja balls using simple household materials. These lightweight craft balls are designed for safe indoor games, target practice, and imaginative play. They are not weapons; instead, they are soft toys made from paper and tape that encourage creativity and teamwork.
This project is suitable for classrooms, after-school clubs, and home activities. Most of the required materials are inexpensive or recycled, making the activity environmentally friendly as well as educational. Students can experiment with different sizes, colors, and designs while learning about shapes, balance, and construction techniques.
Building soft paper ninja balls also develops fine motor skills. Folding, crumpling, wrapping, and decorating require careful hand movements that improve coordination. At the same time, students practice patience, planning, and attention to detail as they work through each step of the project.
Another advantage of this activity is that it encourages recycling. Old newspapers, scrap paper, and leftover craft supplies can all be transformed into colorful toys instead of being thrown away. This teaches children the importance of reducing waste and finding creative uses for everyday materials.
The finished paper balls can be used in many safe games, such as aiming at cardboard targets, tossing them into baskets, or creating fun obstacle courses. These activities help children improve their coordination while enjoying friendly competition with classmates, friends, or family members.
Project Objectives
The goal of this project is to create a soft, lightweight paper ball that is easy to throw, catch, and use in classroom games. Along the way, students learn about planning, construction, testing, and improvement. They also discover how simple materials can become enjoyable toys through creativity and careful design.
The project encourages teamwork when completed in small groups. Students can compare different designs, discuss improvements, and work together to solve construction challenges.
Materials Needed
Most of the supplies can be found at home or in a classroom.
You will need:
- Recycled paper or newspaper
- Colored paper
- Masking tape or paper tape
- White glue
- Safety scissors
- Markers or colored pencils
- Stickers (optional)
- Lightweight string (optional)
- Ruler
- Pencil
Using recycled materials keeps the project inexpensive while helping protect the environment.
Planning the Design
Before beginning construction, students should decide what size and appearance they want for their paper ball. Some may prefer a small ball that fits comfortably in one hand, while others may create a larger version for tossing games.
A simple sketch can help organize ideas before construction begins. Planning encourages careful thinking and often leads to better final results.
Making the Paper Ball
Begin by crumpling several sheets of recycled paper into a tight ball. Continue adding layers until the ball reaches the desired size. Press firmly so the center remains compact.
Next, wrap the outside with masking tape to help the ball keep its shape. Only a small amount of tape is needed because the goal is to keep the ball lightweight.
Cover the taped surface with colored paper using glue. Smooth the paper carefully to reduce wrinkles and create a neat appearance.
Allow the glue to dry completely before decorating.
Decorating the Ball
Students can personalize their paper balls using markers, stickers, colored patterns, or simple geometric designs. Each ball can have a unique appearance, making classroom activities more colorful and enjoyable.
Some students may create superhero themes, sports designs, animal faces, or abstract artwork. Creativity is encouraged because there is no single correct design.
The important goal is to create a lightweight, attractive craft that is fun to use during games.
Testing the Paper Ninja Ball
After the glue has dried and the decorations are complete, it is time to test the paper ninja ball. Students should begin by gently tossing it from one hand to the other. This simple test checks whether the ball is strong enough to keep its shape and light enough to catch comfortably.
Next, students can throw the ball toward a cardboard target placed a short distance away. If the ball flies smoothly and lands safely without falling apart, the design is successful. If it becomes loose or changes shape, additional layers of paper or tape may be added to strengthen it.
Testing is an important part of every engineering project. It allows students to discover what works well and what can be improved. Rather than viewing mistakes as failures, students learn to see them as opportunities to make their designs even better.
Quick Overview Table
| Feature | Description |
|---|---|
| Project Name | Making Soft Paper Ninja Balls at Home |
| Project Type | School Craft and STEM Activity |
| Difficulty Level | Easy |
| Recommended Age | 7 years and older |
| Main Materials | Recycled paper, colored paper, glue, tape, markers |
| Estimated Time | 45–60 minutes |
| Skills Developed | Creativity, teamwork, fine motor skills, problem-solving |
| Science Concepts | Shape, balance, motion, design, recycling |
| Cost | Very Low |
| Final Goal | Build a safe, lightweight paper ball for indoor games |
Fun Classroom Games
Once everyone has finished making their paper ninja balls, the class can enjoy several fun activities.
One popular game is Target Toss. Students throw their paper balls toward circles drawn on cardboard. Each circle is worth a different number of points, encouraging careful aim rather than powerful throws.
Another enjoyable activity is Basket Challenge, where students try to toss their paper balls into boxes or baskets placed at different distances. Teachers can adjust the difficulty by moving the baskets farther away.
A Relay Race is another exciting option. Teams carry or toss the paper ball through a simple obstacle course before passing it to the next teammate. This activity develops teamwork, coordination, and communication.
Students may also invent their own games using the paper balls. Creating new rules encourages imagination and helps children understand how games are designed.
The Science Behind the Project
Although this project is simple, it introduces several interesting scientific ideas.
The round shape allows the ball to roll and move smoothly. Students observe how different amounts of paper affect the ball’s weight and how weight influences throwing distance.
Balance is another important concept. If one side of the ball is heavier than the other, it may not travel in a straight line. Students learn that evenly distributing materials improves performance.
Motion is also explored. The speed and direction of the paper ball depend on the force used when throwing it. Gentle throws produce short distances, while stronger throws allow the ball to travel farther.
These observations introduce basic physics in a practical and enjoyable way.
Engineering and Design Skills
Every student becomes a young engineer during this project. First, they plan their design. Then they build a prototype, test it, observe the results, and improve it.
This process closely follows the engineering design cycle used by professional engineers. Rather than expecting perfection immediately, students learn that successful inventions often require several improvements before reaching their final form.
Careful observation, creative thinking, and patience become valuable skills throughout the activity.
Environmental Benefits
Using recycled paper is one of the greatest advantages of this project. Old newspapers, magazines, printer paper, and packaging materials can all be reused instead of being thrown away.
Students learn that recycling helps reduce waste, conserve natural resources, and protect the environment. They also discover that useful and enjoyable toys do not need to be expensive.
This lesson encourages responsible habits that can continue throughout their lives.
Working as a Team
Many school projects are completed in groups, making teamwork an essential part of the learning experience.
Students share materials, exchange ideas, and help one another solve problems during construction. Some children may excel at decorating, while others are skilled at building strong paper balls.
Learning to cooperate respectfully prepares students for future classroom projects and real-world situations where teamwork is essential.
Improving the Design
After testing, students can make many creative improvements.
For example, they may experiment with different paper types, create larger or smaller balls, or try alternative decorative patterns. Some may compare tightly packed balls with loosely packed ones to see which performs better during games.
Students can also design colorful storage boxes for their paper balls or create scoreboards for classroom competitions.
These extension activities encourage curiosity and continued learning beyond the original project.
Safety Tips
Although soft paper ninja balls are designed to be safe, students should always follow basic classroom safety rules. The balls should only be thrown during supervised activities and never aimed at another person’s face or at animals. They are intended for target games, tossing activities, and creative play rather than rough play.
When making the paper balls, children should use safety scissors and non-toxic glue. Younger students should ask an adult or teacher for help when cutting paper or using craft supplies. Keeping the work area clean and organized also helps prevent accidents and makes the activity more enjoyable.
If the paper ball becomes damaged after repeated use, it should be repaired or replaced. Loose tape or torn paper can affect its shape and performance during games.
Educational Benefits
This project offers much more than an enjoyable craft activity. It supports learning across several subjects at the same time. In science, students observe how the shape and weight of an object influence its movement. In mathematics, they measure distances, compare sizes, and record scores during games. In art, they decorate their creations using colors, patterns, and imaginative designs.
The activity also develops important life skills. Students improve their fine motor skills while folding, wrapping, and decorating the paper balls. They strengthen their problem-solving abilities by testing different construction methods and making improvements when necessary.
Communication is another valuable skill developed during the project. Students explain their ideas, share suggestions with classmates, and present their finished creations to the class. These experiences help build confidence and encourage active participation in group activities.
Creative Extensions
After completing the basic project, students can continue exploring new ideas.
One extension is to create a target board from recycled cardboard with different point values. Players earn points by landing their paper balls inside the marked areas. Another idea is to build an obstacle course using books, boxes, paper cups, or recycled containers. Students must throw or roll their paper balls through the course while completing different challenges.
Teachers may also organize a design competition where students compare different ball sizes, colors, or construction techniques. Each team can explain why they chose a particular design and discuss what they learned during testing.
For seasonal celebrations, students can decorate the balls with holiday themes, animal faces, sports patterns, or school colors. These creative variations make the project suitable for many classroom events throughout the year.
Connecting the Project to STEM Learning
The Soft Paper Ninja Ball Project is an excellent introduction to STEM education because it combines science, technology, engineering, and mathematics in one simple activity.
Science helps students understand motion, balance, and force. Engineering encourages them to design, build, test, and improve their creations. Mathematics is used when measuring distances, counting points, and comparing results. Technology can even be included if students record slow-motion videos of their throws or create digital presentations about their projects.
This combination of subjects helps students see that classroom knowledge can be applied to real activities. Instead of learning concepts separately, they experience how different subjects work together to solve problems and create useful designs.
Reflection and Evaluation
After the games are finished, students should take time to reflect on what they learned. They can answer questions such as:
- What part of the project was the most enjoyable?
- Which design worked best, and why?
- What challenges did they face during construction?
- How did testing help improve the paper ball?
- What changes would they make if they built another one?
Teachers may ask students to write short reports or present their findings to the class. Reflection encourages deeper thinking and helps students understand the importance of continuous improvement.
Why Hands-On Projects Matter
Hands-on projects make learning memorable because students become active participants rather than passive observers. They discover that creativity and careful planning are just as important as following instructions. Every decision, from choosing materials to decorating the finished ball, allows students to express their ideas while developing practical skills.
Projects like this also encourage curiosity. A simple paper ball can lead to questions about gravity, balance, recycling, materials, and design. These questions inspire students to explore science and engineering beyond the classroom.
Perhaps most importantly, children experience the satisfaction of creating something useful with their own hands. This sense of achievement builds confidence and encourages a lifelong love of learning.
Conclusion
The School Project: Making Soft Paper Ninja Balls at Home is a fun, affordable, and educational activity that combines creativity with practical learning. Using recycled paper and simple craft supplies, students can create safe, lightweight balls that are perfect for indoor games, classroom challenges, and imaginative play.
Throughout the project, students practice planning, building, testing, decorating, and improving their creations. Along the way, they develop valuable skills such as creativity, teamwork, communication, patience, and critical thinking. They also gain a basic understanding of scientific concepts like motion, balance, and force while learning the importance of recycling and responsible use of materials.
The project demonstrates that meaningful learning does not require expensive equipment. Ordinary household materials can become exciting educational tools when combined with imagination and careful design. Friendly competitions and creative games make the experience even more enjoyable while encouraging cooperation and healthy participation.
In the end, this simple craft project is much more than making a paper ball. It is an opportunity for students to explore STEM concepts, strengthen their practical abilities, express their artistic talents, and experience the joy of learning through hands-on discovery. Whether completed at home or in the classroom, the Soft Paper Ninja Ball Project inspires creativity, curiosity, and confidence—qualities that will continue to benefit students throughout their education and beyond.
