
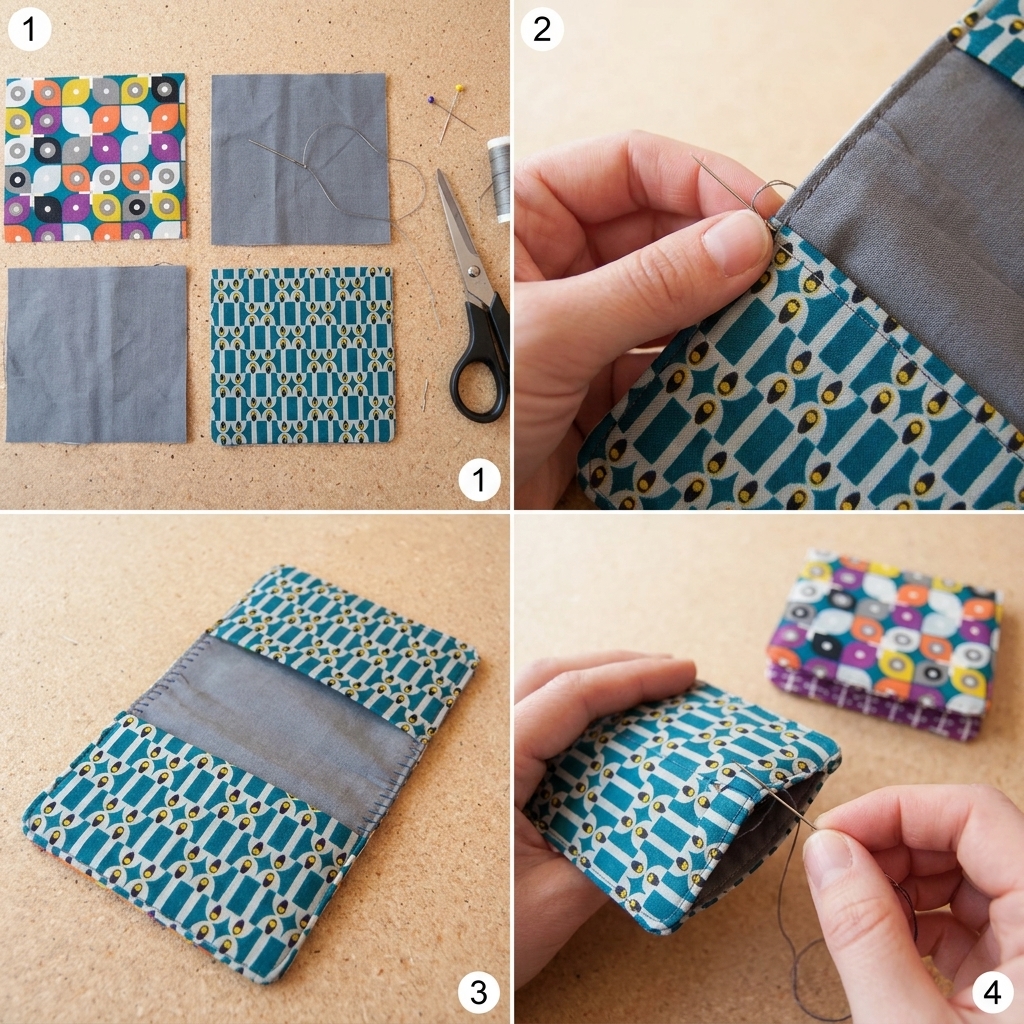
Making a fabric wallet by hand is a simple and enjoyable sewing project for beginners. It does not require a sewing machine, complicated patterns, or expensive supplies. With a few pieces of fabric, a needle, thread, and some patience, you can create a useful handmade wallet at home.
A fabric wallet can be customized with different colors, patterns, pockets, buttons, or embroidery. It can hold cards, folded cash, small notes, or other lightweight items.
This step-by-step guide explains how to make a simple fabric wallet using basic hand-sewing techniques.
Why Make a Fabric Wallet?
A handmade fabric wallet is practical and easy to personalize.
It is also a great project for learning:
- Measuring fabric
- Cutting accurately
- Folding fabric
- Making hems
- Sewing seams
- Attaching buttons
- Adding decorative stitches
Because the project is small, beginners can complete it without spending many hours sewing.
Materials You Will Need
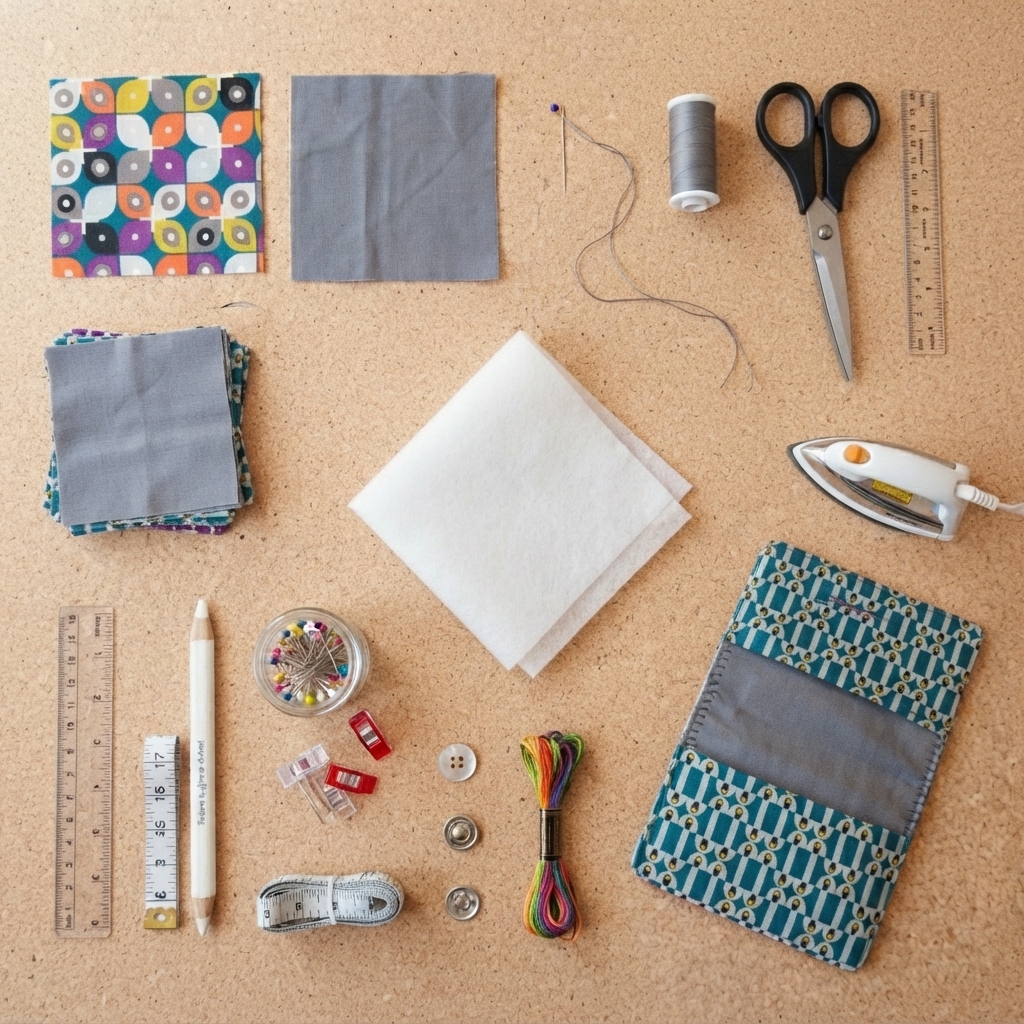
Gather these supplies:
- Cotton or lightweight canvas fabric
- Matching sewing thread
- Hand-sewing needle
- Fabric scissors
- Ruler
- Measuring tape
- Fabric chalk or washable marker
- Straight pins or sewing clips
- Iron and ironing board
- Button or snap closure
- Optional embroidery thread
Choose a medium-weight cotton fabric for your first wallet. It is easy to cut, fold, and sew.
Step 1: Choose the Wallet Size
First, decide how large you want the finished wallet to be.
For a simple folded wallet, you could start with a rectangle approximately 20 cm wide and 25 cm tall.
The size can be changed depending on what you want to carry.
Remember to include extra fabric for seam allowances and folded edges.
Step 2: Cut the Fabric
Use a ruler and fabric marker to draw the pattern on the fabric.
Cut one main rectangle carefully.
You can also cut smaller rectangles if you want to add card pockets.
Before sewing, check that the edges are straight.
Accurate cutting will make the finished wallet look much neater.
Step 3: Prepare the Fabric
Iron the fabric before sewing.
This removes wrinkles and makes measuring and folding easier.
If the fabric is washable, follow its care instructions before beginning the project.
For a more structured wallet, you can add lightweight interfacing between fabric layers. Beginners can skip this step if they want a simpler project.
Step 4: Fold the Wallet
Place the fabric with the side you want to show facing down.
Fold the bottom portion upward to create the main pocket.
Then fold the top portion downward to create the wallet flap.
Press the folds gently with an iron.
Use pins or clips to hold the fabric in place.
Step 5: Finish the Raw Edges
Raw fabric edges can fray.
Fold the edges inward by approximately 1 centimeter and press them flat.
You can secure these folds with small hand stitches.
A simple running stitch works well, although a slip stitch can create a more discreet finish.
Step 6: Make the Card Pocket
If you want a card pocket, cut a smaller rectangle of fabric.
For example, you can make a pocket approximately 10 cm wide and 7 cm tall.
Fold the top edge inward and sew it neatly.
Place the pocket on the inside of the wallet.
Pin the bottom and side edges in place.
Leave the top edge open.
Step 7: Sew the Main Pocket
Fold the main fabric into the wallet shape.
Sew along both side edges using a strong hand stitch.
Backstitch is a good choice because it creates a stronger seam than a simple running stitch.
Keep the stitches small and even.
Make sure you do not accidentally sew across the opening of the pocket.
Step 8: Sew the Card Pocket
If you added a card pocket, sew along its bottom and side edges.
Use small stitches and reinforce the upper corners.
The top should remain open so you can insert and remove cards.
You can add several pockets if you want additional storage.
Step 9: Make the Wallet Flap
Fold the upper section downward to create the flap.
Press the fold carefully.
Check that the flap covers the wallet opening properly.
If necessary, adjust the fold before sewing.
Step 10: Add a Closure
A simple button is an easy closure for a handmade wallet.
Sew the button securely to the front of the wallet.
Then mark the corresponding position on the flap.
Create a small buttonhole by hand.
Alternatively, you can use a snap fastener, hook-and-loop tape, or a fabric tie.
Choose the closure that feels easiest for your skill level.
Step 11: Reinforce Important Areas
Wallets are opened and closed frequently, so some areas need extra strength.
Add a few extra stitches around:
- Pocket corners
- Side seams
- Button attachment
- Flap area
- Closure points
Reinforcing these areas can help your wallet last longer.
Step 12: Trim Loose Threads
Turn the wallet inside out and check all the seams.
Trim loose threads carefully with small scissors.
Do not cut the actual stitches.
Then turn the wallet right side out and gently press it.
Your handmade fabric wallet is now ready to use.
Easy Ways to Decorate Your Wallet
One of the best things about making a fabric wallet is that you can personalize it.
Try adding:
- Embroidered flowers
- Hearts
- Stars
- Initials
- Small buttons
- Fabric appliqué
- Decorative borders
- Colorful stitching
- Ribbons
Chain stitch, blanket stitch, and running stitch can all be used to create simple decorative designs.
Choosing Fabric for a Handmade Wallet
Cotton is one of the easiest fabrics for beginners.
You can also try:
Canvas
Canvas creates a stronger, more durable wallet.
Denim
Old jeans can be recycled into a unique fabric wallet.
Linen
Linen gives the wallet a natural, lightweight appearance.
Felt
Felt is easy to cut and does not fray like woven fabric, making it suitable for simple wallet designs.
Avoid very slippery or stretchy fabrics for your first project.
Tips for Hand Sewing a Wallet
Use a sharp needle that is appropriate for your fabric.
Choose strong thread for the seams.
Keep your stitches small and consistent.
Do not pull the thread too tightly because the fabric can pucker.
Press the fabric before and during construction.
Take your time when measuring and cutting.
If you make a mistake, carefully remove the stitches with a seam ripper and try again.
Common Beginner Mistakes
Making the Wallet Too Small
Remember to allow space for seams, folds, and the items you want to carry.
Forgetting the Pocket Opening
When sewing a pocket, make sure the top remains open.
Weak Seams
Use a strong stitch such as backstitch for areas that will receive regular use.
Uneven Folds
Measure carefully and press the fabric before sewing.
Using Very Thin Fabric
Very lightweight fabric may not provide enough structure. Medium-weight cotton is usually easier for beginners.
Simple Fabric Wallet Variations
Once you have completed a basic wallet, try experimenting with different designs.
Two-Pocket Wallet
Add two card pockets inside.
Zipper Wallet
Add a small zipper pocket for coins.
Fold-Over Wallet
Create a longer flap that folds over the front.
Button Wallet
Use a decorative button and handmade buttonhole.
Recycled Denim Wallet
Use an old pair of jeans to create a sturdy and eco-friendly wallet.
A Great Beginner Sewing Project
A fabric wallet is an excellent first hand-sewing project because it is small and practical.
It gives you an opportunity to practice several basic techniques without requiring a large amount of fabric.
Once you can make one wallet, you can easily create different versions for yourself, family members, or friends.
Final Thoughts
Learning how to make a fabric wallet by hand is a fun way to develop basic sewing skills. With simple materials and a few easy stitches, you can create a useful accessory that reflects your personal style.
Start with a simple rectangular design and medium-weight cotton. Focus on accurate measurements, neat folds, secure seams, and a strong closure.
As your confidence grows, experiment with pockets, recycled fabrics, embroidery, buttons, and different shapes. Your handmade fabric wallet can be simple, colorful, practical, and completely unique.
