
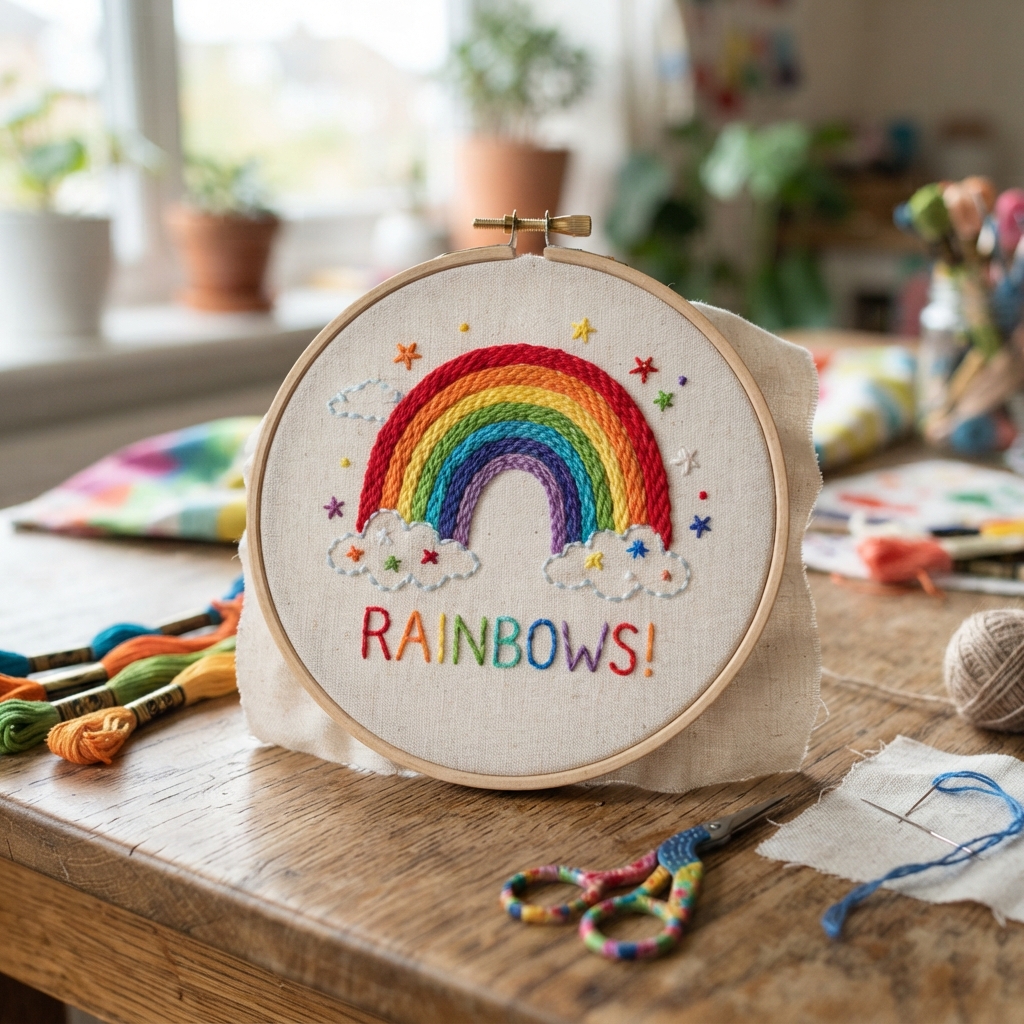
Rainbow embroidery is a colorful and enjoyable craft project for children who are learning basic sewing and embroidery skills. Using bright threads and simple stitches, kids can create a beautiful rainbow design on a piece of fabric while practicing patience, hand coordination, and creativity.
This project can be adapted for different ages and skill levels. Younger children can work with a simple rainbow outline and larger stitches, while older children can experiment with different embroidery techniques and decorative details.
With adult supervision and child-friendly materials, rainbow embroidery can become a fun afternoon activity and a wonderful handmade keepsake.
Why Is Rainbow Embroidery Good for Children?
Embroidery is more than a creative activity. It can help children develop useful skills while having fun.
Rainbow embroidery can encourage:
- Hand-eye coordination
- Fine motor skills
- Concentration
- Patience
- Creativity
- Color recognition
- Following simple instructions
Children can also enjoy the satisfaction of turning a plain piece of fabric into something colorful and personal.
Materials You Will Need
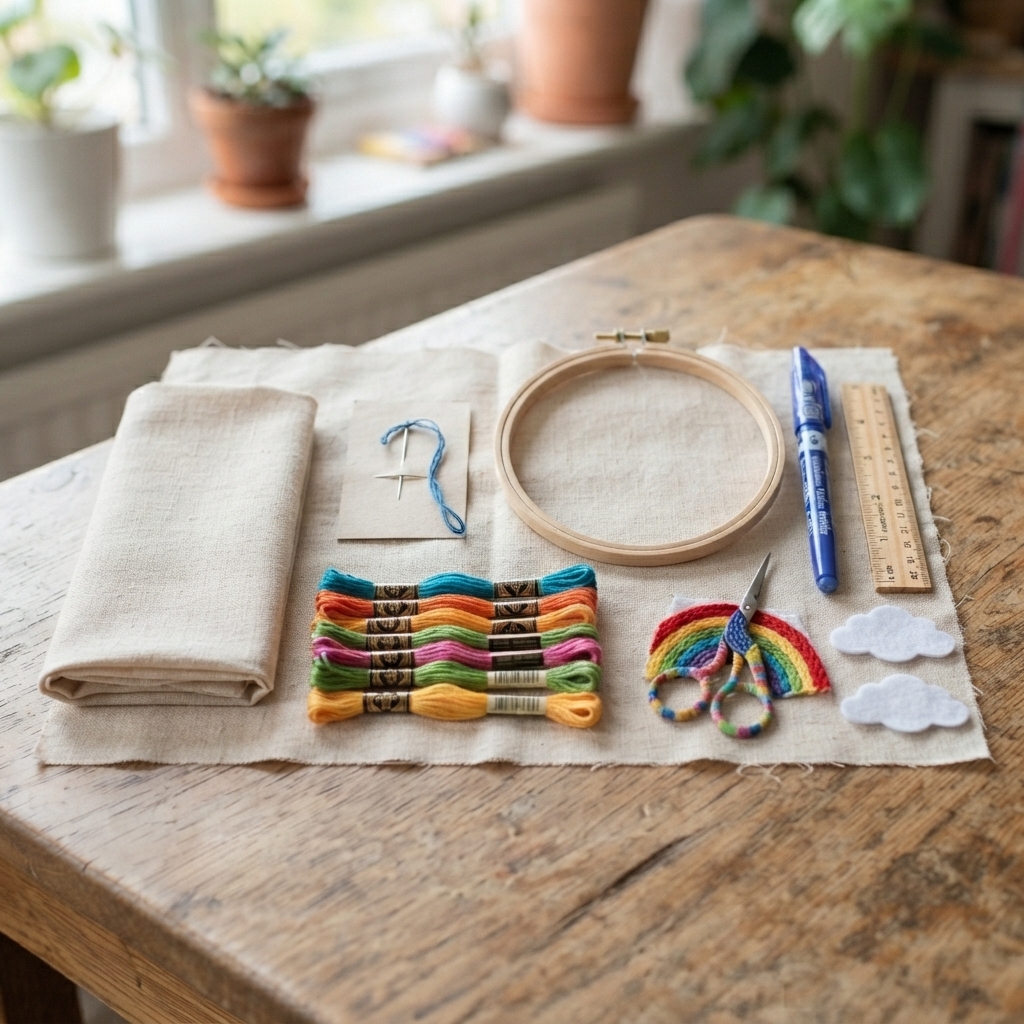
For a simple children’s rainbow embroidery project, gather:
- A piece of cotton fabric
- Child-appropriate embroidery needle
- Colorful embroidery thread
- Embroidery hoop
- Washable fabric marker
- Small scissors
- Ruler
- Optional felt clouds
For younger children, use an embroidery needle and tools appropriate for their age, and provide close adult supervision.
Choosing the Fabric
Cotton fabric is a good choice for children’s embroidery because it is easy to handle and provides a stable surface for stitching.
Choose a light-colored fabric so the rainbow colors are easy to see.
White, cream, pale blue, and light gray can all work well.
Avoid very stretchy or slippery fabrics because they can make the first project more difficult.
Choosing Rainbow Colors
A traditional rainbow usually includes:
- Red
- Orange
- Yellow
- Green
- Blue
- Purple
Children do not have to follow traditional rainbow colors.
Encourage them to experiment with pink, turquoise, gold, or other favorite colors.
The goal is to make a rainbow that feels creative and fun.
Step 1: Prepare the Fabric
Cut a piece of fabric large enough for the rainbow.
Leave extra space around the design.
Place the fabric inside the embroidery hoop.
Gently tighten the hoop until the fabric is smooth.
The fabric should be slightly taut but not stretched too much.
Step 2: Draw the Rainbow
Use a washable fabric marker or pencil to draw a simple rainbow.
Start with a large curved line.
Then draw several smaller curved lines underneath it.
These lines will create the different rainbow stripes.
At the ends of the rainbow, you can add simple clouds.
Do not make the design too complicated. Large, clear shapes are easier for children to stitch.
Step 3: Prepare the Thread
Cut a manageable length of embroidery thread.
For children, shorter pieces can be easier to control and less likely to become tangled.
Depending on the child’s age and the desired appearance, use one or several strands of embroidery floss.
Show the child how to thread the needle and secure the thread safely.
Step 4: Start With the Outer Rainbow
Choose the first color.
Red is often used for the outside stripe.
Use a simple running stitch to follow the first curved line.
Bring the needle up through the fabric and then back down a short distance away.
Continue along the entire curve.
The stitches do not need to be perfect.
Step 5: Add the Orange Stripe
Thread the needle with orange embroidery floss.
Follow the next curved line.
Try to keep the stitches similar in size to the first row.
This helps the rainbow look neat while still maintaining its handmade character.
Step 6: Continue With the Rainbow Colors
Repeat the same process with the remaining colors.
Work through:
- Yellow
- Green
- Blue
- Purple
Children can practice changing thread colors and following curved lines.
If a child prefers different colors, let them create their own unique rainbow.
Step 7: Add Clouds
Clouds are a simple way to finish the rainbow.
You can draw two small cloud shapes at the ends.
There are several ways to decorate them.
For example, use white thread and:
- Running stitch
- Backstitch
- Chain stitch
- Simple filling stitches
Alternatively, cut cloud shapes from felt and sew them onto the fabric with blanket stitch.
Step 8: Add Decorative Details
Once the rainbow is complete, children can add extra details.
Ideas include:
- Small stars
- Hearts
- Flowers
- Butterflies
- Smiling clouds
- Raindrops
- Tiny birds
- Their name or initials
These details allow children to turn the project into their own piece of artwork.
Easy Stitches for Children
Children do not need to learn many embroidery stitches for their first project.
Running Stitch
Running stitch is one of the easiest stitches to learn.
It is perfect for following the curved rainbow lines.
Backstitch
Backstitch creates a stronger continuous line and works well for outlines.
Chain Stitch
Older children can try chain stitch to add decorative borders or cloud details.
Blanket Stitch
Blanket stitch is useful for attaching felt clouds or other fabric shapes.
Make It Easier for Younger Children
For younger children, simplify the project.
Use:
- A larger piece of fabric
- A large, child-appropriate needle
- Thick embroidery thread
- Large rainbow stripes
- Simple running stitches
An adult can draw the rainbow first and help with threading the needle.
The child can then focus on making the stitches.
Make It More Challenging for Older Children
Older children can try additional techniques.
Encourage them to:
- Use several embroidery stitches
- Create patterned rainbow stripes
- Add embroidered flowers
- Make French knots
- Embroider their name
- Add decorative borders
- Experiment with color combinations
They can also design their own rainbow pattern instead of following a template.
Rainbow Embroidery Craft Ideas
The finished rainbow can be used in several creative projects.
Rainbow Wall Art
Place the embroidered fabric in a small embroidery hoop and display it as wall decoration.
Personalized Tote Bag
Embroider a rainbow onto a plain fabric bag.
Pillow Decoration
Add a rainbow to the front of a small pillow cover.
Fabric Bookmark
Create a small rainbow on a fabric bookmark.
Handmade Gift
A child’s embroidered rainbow can make a thoughtful handmade gift for a parent, grandparent, teacher, or friend.
Safety Tips for Children’s Embroidery
Children should use needles and scissors with appropriate adult supervision.
Choose tools suitable for the child’s age and ability.
Keep needles in a safe container when they are not being used.
Teach children to pass scissors safely and avoid running while carrying them.
Never leave a young child alone with sharp sewing tools.
Common Beginner Problems
Tangled Thread
Use shorter pieces of thread and untangle them gently instead of pulling hard.
Uneven Stitches
Children do not need perfectly even stitches. Encourage them to focus on learning and enjoying the activity.
Puckered Fabric
Pull the thread gently rather than tightening it too much.
Difficulty Following Curves
Make the rainbow stripes wide and clearly marked.
Tips for a Successful Project
Keep the first project simple.
Let children choose their own colors.
Demonstrate one stitch at a time.
Praise effort rather than perfection.
Take breaks if the child becomes tired.
Allow children to add their own creative details.
Most importantly, make embroidery a fun experience rather than a test of accuracy.
A Simple Rainbow Embroidery Activity
For an easy afternoon craft, give each child a small piece of cotton fabric and draw a simple rainbow.
Let them choose six or more thread colors.
Help them learn running stitch.
Then allow them to stitch each rainbow stripe.
When the rainbow is finished, they can add clouds, stars, hearts, or their name.
Place the finished embroidery in a small hoop so it can be displayed as handmade artwork.
Final Thoughts
Rainbow embroidery is a colorful and enjoyable way for children to explore basic sewing and embroidery. It combines creativity with useful skills such as hand-eye coordination, concentration, and patience.
Start with a simple rainbow and an easy running stitch. As children become more confident, introduce additional stitches and decorative ideas.
Every child’s rainbow will look different, and that is part of the fun. The finished project is not only a colorful piece of fabric but also a reminder of the creativity and skills they developed while making it.
