
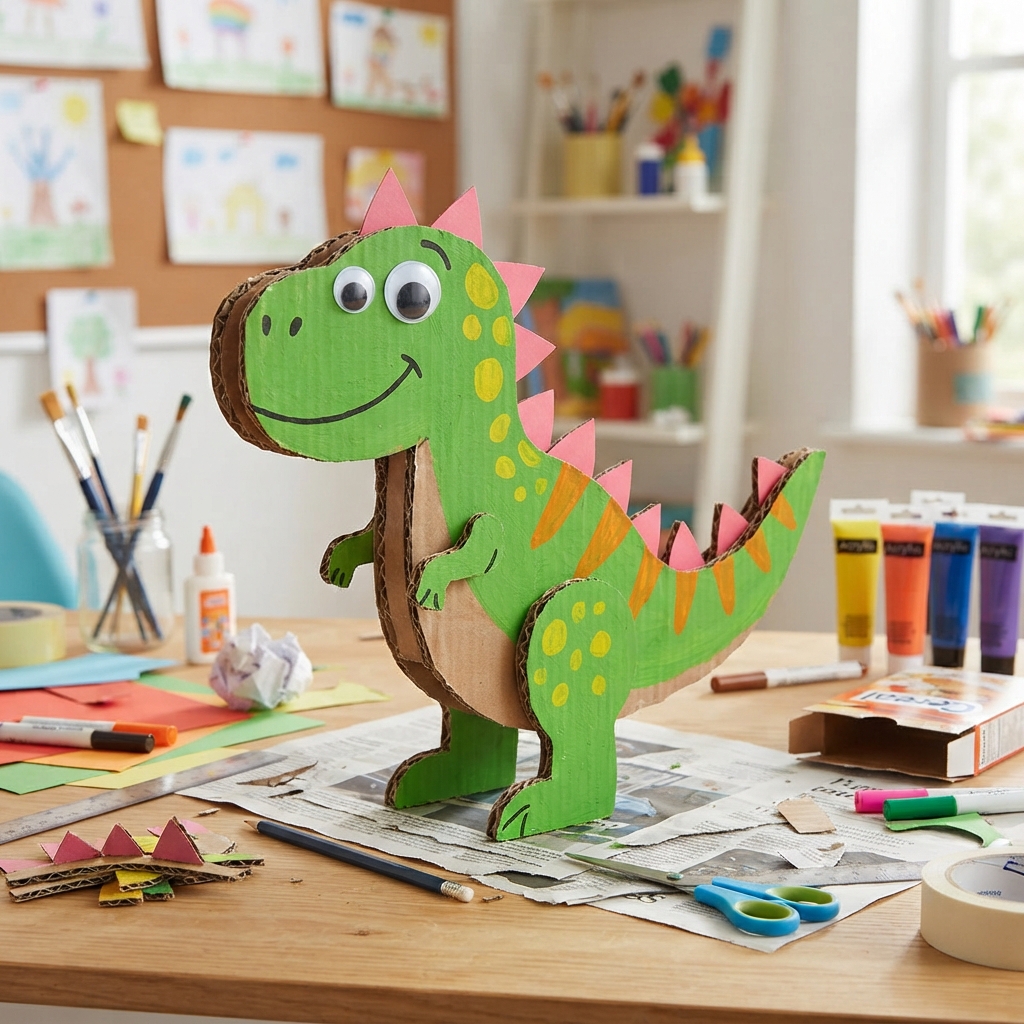
Making a cardboard cartoon dinosaur is a fun, creative, and educational craft project for children. Dinosaurs have fascinated children for generations because of their enormous bodies, unusual shapes, sharp teeth, long tails, and mysterious prehistoric world. With a simple piece of cardboard and a few colorful craft supplies, children can create their own friendly dinosaur character and bring an imaginary prehistoric world to life.
This project is suitable for classrooms, children’s craft sessions, school holidays, rainy afternoons, birthday parties, and creative activities at home. It can also become part of a larger dinosaur-themed project. After making the dinosaur, children can create trees, rocks, mountains, volcanoes, eggs, fossils, and other prehistoric animals to build a complete dinosaur habitat.
One of the best things about a cartoon dinosaur is that it does not have to look realistic. Children can use bright colors, enormous eyes, tiny arms, funny feet, colorful spots, and a huge smile. They can invent a name for their dinosaur and create a personality and story for it. This makes the activity much more than a simple craft project.
Why Make a Cardboard Cartoon Dinosaur?
Making a cardboard dinosaur provides children with an opportunity to learn while having fun. The project encourages creativity because children can decide how their dinosaur should look, what colors to use, and which decorations to add.
The activity also helps develop fine motor skills. Drawing, cutting, folding, gluing, painting, and attaching small pieces require children to use their hands and fingers carefully. These movements can help improve hand-eye coordination.
Cardboard construction also encourages problem-solving. Children need to think about how to attach the head, tail, legs, and other parts. If the dinosaur falls over, they can experiment with different supports until they find a solution.
The craft can also be connected to science lessons. Children can learn about dinosaurs, fossils, prehistoric environments, herbivores, carnivores, and the work of paleontologists while making their own dinosaur.
Materials You Will Need
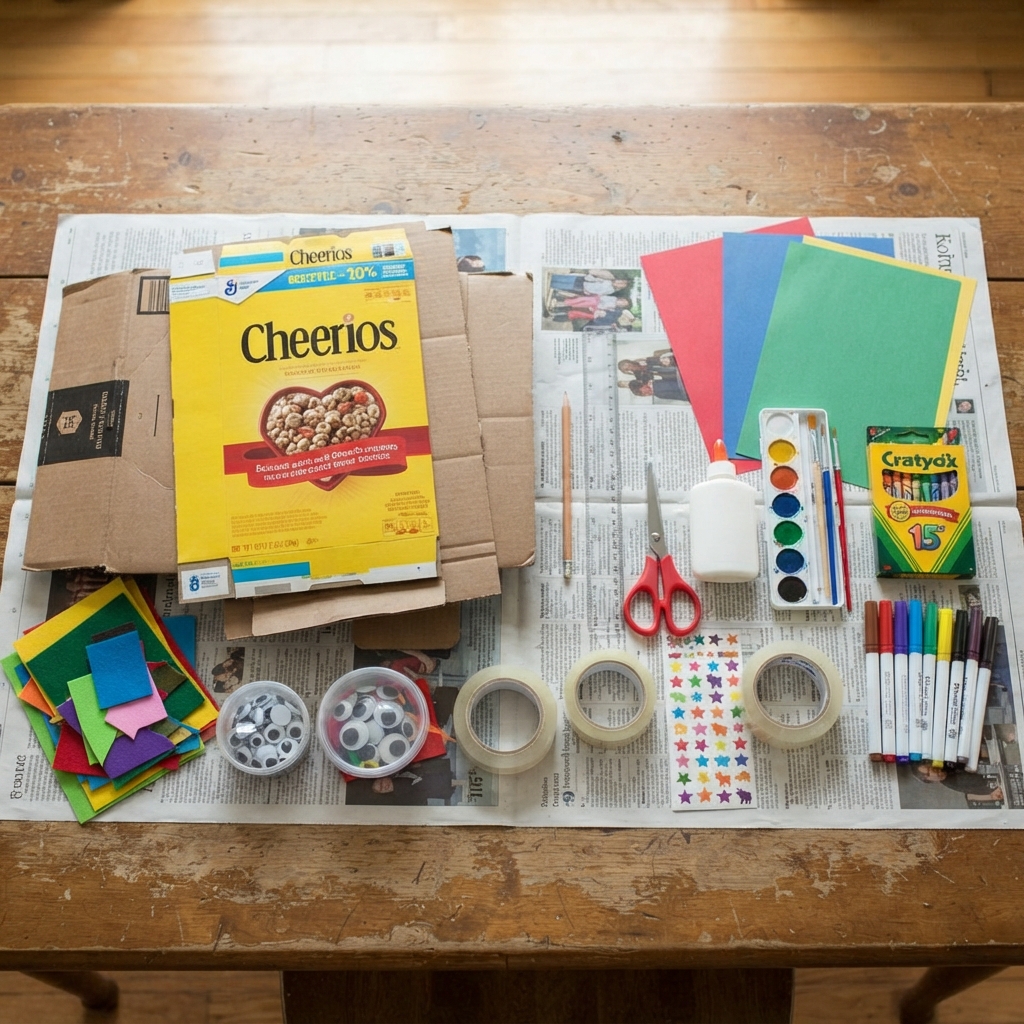
The materials needed for this craft are simple and inexpensive. Many can already be found at home or in a classroom.
You may need:
- A clean piece of cardboard
- Cardboard from a cereal or delivery box
- Pencil
- Ruler
- Child-safe scissors
- Craft glue
- Tape
- Colored paper
- Paint
- Paintbrushes
- Markers or crayons
- Googly eyes
- Cardboard scraps
- Colored foam or felt
- Optional stickers
- Newspaper or scrap paper for protecting the work surface
Recycled cardboard is particularly useful for this project. An old cereal box can become a small dinosaur, while a larger shipping box can be used to make a bigger character.
Children should work with adult supervision when using scissors, glue, paint, or other craft materials.
Step 1: Choose Your Dinosaur
Before beginning, decide what kind of dinosaur you want to make.
Children can choose a famous dinosaur such as a Tyrannosaurus rex, Stegosaurus, Triceratops, or Brachiosaurus. Each dinosaur has different characteristics that can inspire the design.
A T. rex can have a huge head and tiny arms. A Stegosaurus can have large plates along its back. A Triceratops can have three horns and a large frill. A Brachiosaurus can have a long neck and a small head.
Children can also invent their own dinosaur. It could have colorful wings, unusual patterns, a funny tail, or any other imaginative feature.
Encourage children to give their dinosaur a name. A name such as “Dino,” “Spike,” “Rexy,” or “Rainbow” can make the character feel more personal.
Step 2: Draw the Main Dinosaur Shape
Place the cardboard flat on a table.
Use a pencil to draw the main outline of the dinosaur. A simple cartoon dinosaur can have a large oval body, a large head, four legs, and a long tail.
Try drawing the entire dinosaur as one large shape if you want an easy project. Another option is to draw the body, head, legs, and tail separately and attach them later.
The shape does not need to be perfect. Cartoon characters often look more entertaining when their proportions are exaggerated.
For younger children, an adult can draw a simple dinosaur outline for them to cut out and decorate.
Step 3: Cut Out the Dinosaur
Carefully cut around the pencil outline.
If the cardboard is thin, children may be able to cut it using child-safe scissors. Thick cardboard should be cut by an adult or with close supervision.
Try to keep the edges smooth.
Once the dinosaur has been cut out, place it on the table and check its shape. If necessary, make small adjustments to the edges.
If several children are doing the activity together, adults can prepare the cardboard shapes before the craft session. Children can then spend more time decorating and personalizing their dinosaurs.
Step 4: Create the Head
The head is one of the most important parts of a cartoon dinosaur because it gives the character its personality.
Make the head slightly larger than the body for a cute cartoon appearance. A large head can also provide plenty of space for big eyes and a funny mouth.
Children can draw large round eyes, eyebrows, cheeks, and a smiling mouth.
If the head is made separately, attach it to the body using glue or tape. For extra strength, place a small strip of cardboard behind the connection.
Step 5: Add the Tail
The tail can be long, short, straight, or curved.
A long tail works well for many dinosaur designs and gives the character a classic prehistoric appearance.
Draw the tail on cardboard and cut it out if it is not already part of the main body.
Attach the tail securely to the body. A small strip of cardboard behind the joint can provide additional support.
Children can also decorate the tail with stripes, spots, scales, or colorful patterns.
Step 6: Create the Legs
The legs should be strong enough to support the dinosaur if you want it to stand.
Cut four cardboard legs and attach them to the body.
For a cute cartoon dinosaur, use short, thick legs. For a Brachiosaurus-inspired character, make the legs longer.
If the dinosaur is designed as a flat wall decoration, the legs can simply be drawn or glued onto the body.
For a standing dinosaur, add cardboard supports behind the legs or create slots that allow the pieces to fit together.
Step 7: Make the Dinosaur Stand
A simple cardboard support can turn a flat dinosaur into a standing decoration.
Cut a small rectangle of cardboard and fold it into a triangular or rectangular support.
Attach the support to the back of the dinosaur with strong glue or tape.
Make sure the support is wide enough to keep the dinosaur balanced.
Place the finished dinosaur on a stable surface such as a desk, shelf, classroom table, or craft display.
Step 8: Paint the Dinosaur
Now comes one of the most exciting parts: painting.
Children can choose any colors they like. Green and brown can create a natural-looking dinosaur, while purple, blue, pink, orange, or yellow can create a fun cartoon character.
Use a larger brush for the main body and a smaller brush for details.
Paint the entire dinosaur and allow it to dry completely before adding additional decorations.
Children can also use two or three colors. For example, the body could be green, the belly yellow, and the feet orange.
Step 9: Add Colorful Patterns
Once the paint is dry, decorate the dinosaur with patterns.
Children can add:
- Spots
- Stripes
- Zigzags
- Dots
- Stars
- Hearts
- Scales
- Swirls
- Geometric shapes
A green dinosaur could have yellow spots and orange spikes. A blue dinosaur could have purple stripes and white dots.
Using patterns gives every dinosaur a unique appearance.
Step 10: Create a Funny Face
The face brings the cartoon dinosaur to life.
Attach two large googly eyes or draw eyes with markers.
For a cartoon effect, make the eyes large and expressive. Add black pupils and white highlights if desired.
Draw eyebrows above the eyes to create different expressions.
Next, create a mouth. A large smile can make the dinosaur look friendly. An open mouth with paper teeth can make it look more like a T. rex.
Children can even give the dinosaur a surprised, sleepy, excited, or silly expression.
Step 11: Add Dinosaur Spikes or Plates
Many dinosaur crafts look even more exciting with decorations along the back.
Cut small triangles from colored paper or cardboard and glue them along the dinosaur’s back to create spikes.
For a Stegosaurus, use larger plate-shaped pieces instead.
The plates can be painted in different colors or decorated with dots and stripes.
Children can arrange the spikes or plates in different sizes, creating a colorful pattern from the head to the tail.
Step 12: Add Paper Scales
Small paper circles can be used to create scales.
Cut or punch circles from colored paper and glue them onto the body.
Arrange the circles in rows or create random patterns.
Using several shades of the same color can give the dinosaur a more detailed appearance.
Children do not need to cover the whole dinosaur. A few rows of scales can be enough to create an attractive design.
Making a Cartoon T. Rex
A T. rex is one of the most popular choices for a cardboard dinosaur.
Give it a large head, powerful legs, a long tail, and very small arms.
Create a large open mouth and add white paper teeth.
For a friendly cartoon T. rex, give it big round eyes and a wide smile.
Children can also make a funny T. rex by giving it oversized feet, colorful spots, or an unusually tiny pair of arms.
Making a Colorful Stegosaurus
A Stegosaurus is easy to recognize because of the large plates along its back.
Create a wide body, four legs, a long tail, and a relatively small head.
Cut several colorful plates from cardboard or foam.
Arrange the plates from the neck to the end of the tail.
Paint each plate a different color or decorate them with patterns.
This creates a bright and cheerful cartoon dinosaur.
Making a Friendly Triceratops
A Triceratops can be made with a large head, three horns, four legs, and a short tail.
Use cardboard triangles for the horns.
Create a large frill behind the head and decorate it with colorful patterns.
Add big eyes and a friendly smile.
Children can also make the horns different colors to give their character a fantasy appearance.
Create a Dinosaur Family
After making one dinosaur, children may want to create several more.
A dinosaur family can include a large parent dinosaur, another adult, and several small baby dinosaurs.
Each character can have a different color and personality.
For example, the parent might be green and calm, while the baby could be yellow, energetic, and curious.
Children can create names for each dinosaur and invent stories about their adventures.
This turns the craft project into imaginative play.
Make a Prehistoric Dinosaur Habitat
A cardboard dinosaur becomes even more exciting when it has a prehistoric environment.
Use a large piece of cardboard or another box as the background.
Children can make:
- Paper trees
- Ferns
- Rocks
- Mountains
- Volcanoes
- Dinosaur eggs
- Clouds
- Lakes
- Caves
Green paper can be used for plants, while brown cardboard can become tree trunks.
A cardboard volcano can be placed in the background to create a dramatic prehistoric scene.
The dinosaur can then be placed inside its new habitat.
Add Dinosaur Eggs
Dinosaur eggs are another simple decoration.
Crumpled pieces of paper can be shaped into egg forms and covered with white, beige, green, or brown paper.
Children can place several eggs inside a small paper nest.
They can also create a baby dinosaur emerging from an egg.
This is a great opportunity to discuss how scientists use fossils and eggs to learn about prehistoric animals.
Educational Benefits of the Craft
Making a cardboard dinosaur supports several areas of children’s development.
Artistic skills are developed through drawing, painting, cutting, and decorating.
Fine motor skills are practiced when children use scissors, glue, brushes, and small paper shapes.
Problem-solving skills are encouraged when children figure out how to attach different parts and make the dinosaur stand.
The activity can also encourage scientific curiosity. Children may become interested in fossils, paleontology, geology, prehistoric environments, and extinct animals.
Teachers can use the project as part of a larger dinosaur lesson.
Learning About Dinosaurs
While making the craft, children can learn that dinosaurs lived millions of years ago and that scientists study fossils to understand their lives.
They can compare herbivorous and carnivorous dinosaurs and learn how body structures differed between species.
Children can also discover that not every prehistoric animal was a dinosaur. For example, some prehistoric creatures lived in the oceans or flew through the air but belonged to different groups.
This makes the craft an excellent starting point for broader lessons about Earth’s history.
Using Recycled Cardboard
One of the biggest advantages of this project is that it can use recycled materials.
Old cereal boxes, delivery boxes, food packaging, and other clean cardboard can be transformed into colorful dinosaur characters.
Instead of throwing cardboard away, children can turn it into something useful and imaginative.
This teaches children about reuse and encourages them to think creatively about everyday objects.
Organizing a Dinosaur Craft Activity
A dinosaur craft session can be organized for a classroom or children’s party.
Prepare cardboard, paint, paper, glue, and decorations on separate tables.
Children can begin by choosing a dinosaur design. They can then cut, assemble, paint, and decorate their characters.
Once everyone has finished, create a dinosaur exhibition.
Each child can introduce their dinosaur, explain its name, and tell a short story about where it lives.
This combines arts and crafts with communication and imaginative storytelling.
Safety Tips
Safety is important during any children’s craft activity.
Use child-safe scissors and non-toxic glue and paint.
Adults should help younger children cut thick cardboard.
Protect tables with newspaper or scrap paper before painting.
Allow paint and glue to dry fully before moving the finished dinosaur.
Small decorations such as beads, buttons, and tiny plastic pieces can be choking hazards, so they should be kept away from very young children and used only with suitable supervision.
Make sure standing dinosaurs are stable and do not have sharp cardboard edges.
Conclusion
Making a cardboard cartoon dinosaur is a wonderful activity that combines creativity, imagination, recycling, and education. With a simple cardboard box or cereal package, children can create a colorful prehistoric character with a funny face, large eyes, a long tail, and decorative spikes or plates.
The project can be simple enough for young children or expanded into a much larger activity for older children. They can make a T. rex, Stegosaurus, Triceratops, Brachiosaurus, or even invent a completely new dinosaur.
After creating the dinosaur, children can build an entire prehistoric world around it using cardboard, paper, paint, and recycled materials. Trees, rocks, volcanoes, nests, dinosaur eggs, and other animals can turn the craft into an imaginative scene.
Most importantly, there is no single correct way to make a cartoon dinosaur. Children can choose their favorite colors, invent unusual patterns, give their dinosaurs names, and create stories about their adventures.
With a little cardboard, some simple craft supplies, and plenty of imagination, children can transform an ordinary box into a fun prehistoric friend and create a dinosaur world of their own.
