
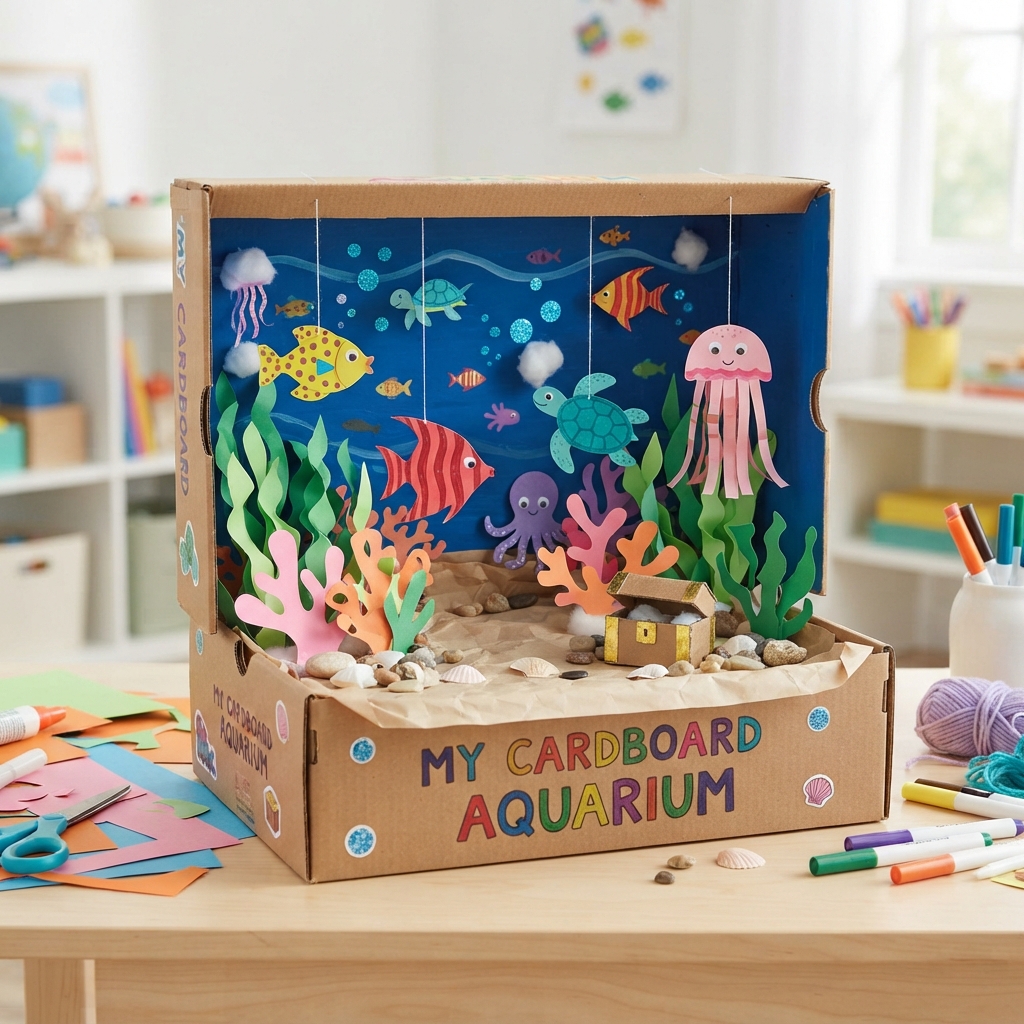
Making a 3D fish tank out of cardboard is a fun, creative, and educational craft project for children. Instead of using real water and live fish, children can create their own underwater world using an ordinary cardboard box, colored paper, paint, yarn, and recycled materials. The finished project can look like a miniature aquarium filled with colorful fish, seaweed, bubbles, shells, and other underwater decorations.
This craft is perfect for classrooms, children’s bedrooms, rainy afternoons, school projects, and creative activity sessions. It is also an excellent way to reuse cardboard boxes that might otherwise be thrown away.
A cardboard fish tank allows children to use their imagination while learning about ocean life. They can choose which fish to create, decide where each creature should swim, and design the underwater environment. The project can be as simple or detailed as the child wants.
Why Make a 3D Cardboard Fish Tank?
A 3D cardboard fish tank is more than a decorative craft. It gives children an opportunity to explore art, design, recycling, and basic science at the same time.
Children can practice cutting, folding, painting, gluing, and arranging objects. They can also learn about different types of fish and other aquatic animals.
The three-dimensional design makes the activity especially exciting. Instead of drawing an aquarium on a flat sheet of paper, children create objects that extend into the space inside the box.
The final result can become a small underwater scene that children can display and continue to play with.
Materials You Will Need
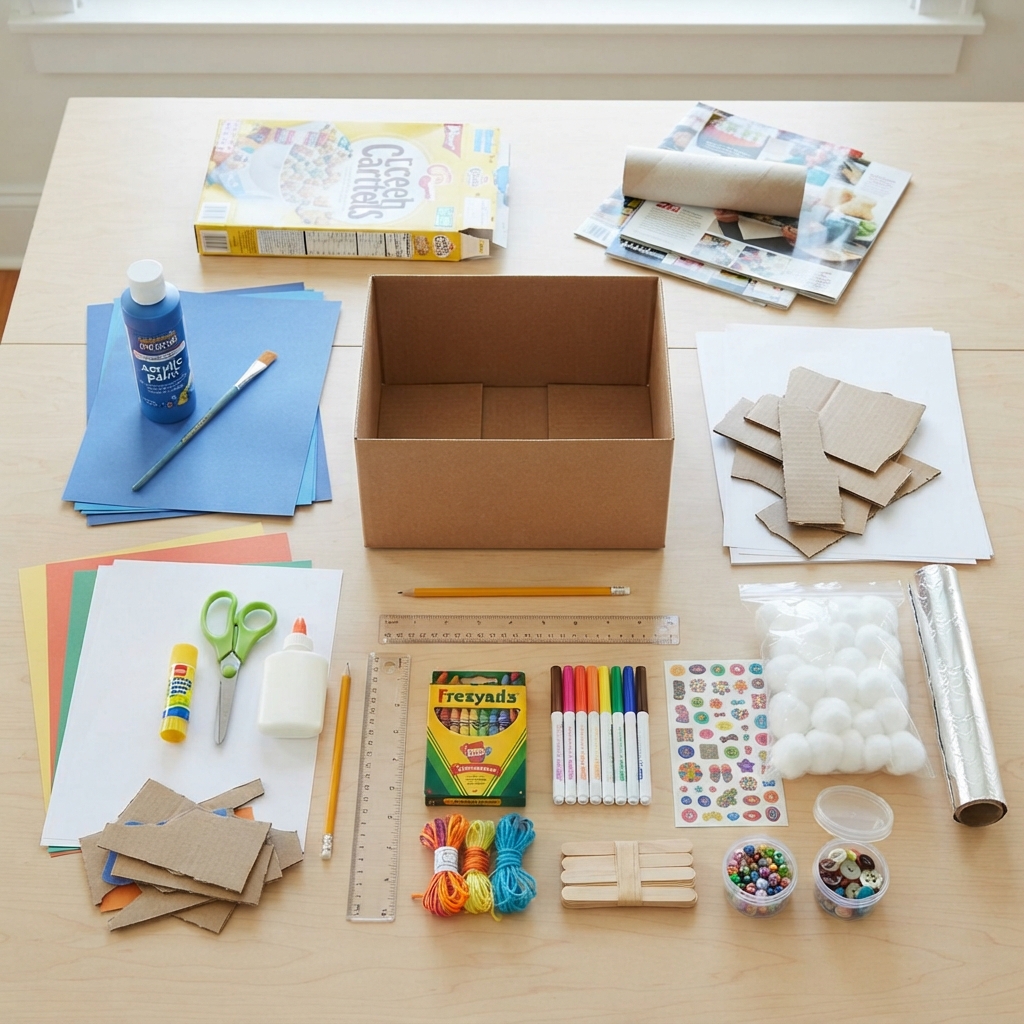
Most of the materials for this project are inexpensive and easy to find.
You may need:
- A small or medium cardboard box
- Blue paint or blue paper
- Colored construction paper
- White paper
- Scissors
- Child-safe glue
- Pencil
- Ruler
- Markers or crayons
- Yarn or thread
- Cardboard scraps
- Cotton balls
- Aluminum foil
- Stickers
- Optional beads or buttons
- Optional craft sticks
You can also collect clean recycled materials such as cereal boxes, paper tubes, packaging cardboard, and magazine pages.
For younger children, adults should help with cutting thick cardboard and supervise the use of scissors and small craft materials.
Step 1: Choose a Cardboard Box
Begin by selecting a suitable cardboard box.
A shoebox is often a good choice because it is large enough to create a small underwater scene but small enough to handle easily.
Place the box so that the open side faces you. This open side will become the front of the aquarium.
If you want to make a larger fish tank, use a larger cardboard box. Make sure the cardboard is strong enough to stand upright.
Remove any tape or unnecessary packaging from the box.
Step 2: Create the Water Background
The inside of the box needs a blue background.
You can paint the back, sides, top, and bottom of the box blue. Alternatively, cover the surfaces with blue construction paper.
Different shades of blue can create a more interesting underwater effect.
For example, use dark blue at the top and lighter blue toward the bottom. This can make the tank look deeper.
Children can also paint small waves or bubbles onto the background.
Allow the paint to dry completely before continuing.
Step 3: Create the Ocean Floor
The bottom of the fish tank can become a sandy ocean floor.
One simple method is to glue tan or yellow paper onto the bottom of the box.
Children can draw small rocks, shells, seaweed, and other objects on the paper.
Another option is to use crumpled brown or beige paper to create texture.
If you use loose materials such as sand or small stones, make sure they are securely contained and appropriate for the child’s age.
Step 4: Make Colorful Fish
Now it is time to create the main characters.
Draw several fish shapes on colored paper or thin cardboard.
Each fish can have a different shape and color.
Cut out the fish carefully and decorate them with markers, crayons, stickers, or small pieces of paper.
Add eyes, fins, scales, and colorful patterns.
Children can create realistic fish or invent imaginary underwater creatures.
For example, one fish could be bright purple with yellow stripes, while another could be orange with blue spots.
Step 5: Give the Fish a 3D Shape
To make the fish look three-dimensional, fold the paper slightly along the middle.
You can also attach a small folded piece of cardboard behind each fish.
This helps the fish stand away from the background instead of appearing completely flat.
Another technique is to fold the fish slightly in half and glue only the center section to the background.
The edges will stick out, creating a simple 3D effect.
Step 6: Make Hanging Fish
One of the most exciting parts of a 3D fish tank is creating fish that appear to swim in the water.
Cut pieces of clear thread, yarn, or thin string.
Attach one end to the top of the cardboard box and the other end to a paper fish.
Hang the fish at different heights.
Some fish can be close to the top, while others can appear deeper in the aquarium.
This creates the illusion that the fish are swimming through different levels of water.
Step 7: Create Seaweed
Seaweed adds color and texture to the underwater scene.
Cut long, wavy strips from green paper.
Bend the strips gently to make them look like underwater plants.
Glue them to the bottom of the box.
You can use several shades of green to make the scene more realistic.
Another option is to use green yarn. Cut several strands and attach them to the ocean floor.
Children can create tall seaweed, short seaweed, or even colorful fantasy plants.
Step 8: Make Colorful Coral
Coral reefs are full of interesting shapes and colors.
Children can make paper coral by cutting branching shapes from pink, orange, purple, or red paper.
Attach the coral to the bottom and sides of the fish tank.
You can also use cardboard tubes or small pieces of crumpled paper to create unusual coral shapes.
This is a good opportunity to explain that coral reefs provide homes for many sea creatures.
Step 9: Add Bubbles
Bubbles make the fish tank look lively.
Cut circles from white or light-blue paper and glue them onto the background.
Use different sizes to create a natural effect.
You can also draw small bubbles with a white marker.
For a shiny effect, use pieces of silver paper.
Place some bubbles near the fish to make it appear as though they are swimming and breathing underwater.
Step 10: Create Rocks and Shells
Rocks can be made from crumpled paper or cardboard.
Paint them gray, brown, or other natural colors.
Paper shells can also be cut into simple shapes and decorated with lines and patterns.
Children can create a collection of rocks and shells along the bottom of the tank.
These small details help make the aquarium look more complete.
Step 11: Add More Sea Creatures
The fish tank does not have to contain only fish.
Children can create:
- Sea turtles
- Jellyfish
- Starfish
- Seahorses
- Crabs
- Octopuses
- Dolphins
- Small sharks
- Rays
Each creature can be made from colored paper or cardboard.
Some can be attached to the background while others can hang from the top of the box.
This creates a busy underwater world full of life.
Step 12: Make a Paper Jellyfish
A paper jellyfish is particularly easy to make.
Cut a rounded shape from colored paper for the jellyfish’s head.
Then cut several thin strips of paper or yarn for its tentacles.
Attach the tentacles underneath the head.
Hang the jellyfish from the top of the box using thread.
When the thread moves slightly, the tentacles can move as well.
Step 13: Add a Background Scene
Children can make the background more interesting by adding underwater details.
Draw small fish in the distance, underwater plants, rocks, bubbles, and coral.
A large sunken treasure chest can also be added.
You can make a treasure chest from small cardboard pieces and decorate it with gold-colored paper.
Children might even add paper coins, pearls, or colorful gems around it.
Making a Treasure-Themed Fish Tank
A treasure theme can turn the aquarium into an underwater adventure.
Create a small cardboard treasure chest and place it on the ocean floor.
Add a paper shipwreck, treasure coins, a treasure map, and colorful jewels.
Children can invent a story about the underwater treasure.
Perhaps a group of fish has discovered an old pirate ship, or an octopus is protecting a hidden treasure chest.
This combines craft-making with imaginative storytelling.
Educational Benefits
Creating a cardboard fish tank can support many learning skills.
Children practice fine motor skills when they cut, fold, glue, and decorate.
They also learn about aquatic environments and different types of sea creatures.
Teachers can use the project to introduce topics such as ocean habitats, food chains, coral reefs, pollution, and marine conservation.
The craft can also encourage children to think about recycling because the main structure is made from cardboard that might otherwise become waste.
Making the Project Eco-Friendly
An eco-friendly fish tank can be made almost entirely from recycled materials.
Use an old delivery box for the aquarium. Reuse magazines for fish colors and patterns. Turn cereal boxes into sea creatures and use leftover yarn for seaweed.
Instead of buying new decorations, children can search for clean craft scraps around the house.
This teaches an important lesson: creativity does not always require new materials.
Safety Tips
Always supervise children when using scissors, glue, and other craft tools.
Use child-safe scissors and non-toxic glue.
Adults should cut thick cardboard when necessary.
Avoid very small decorations with young children because items such as beads and buttons can be choking hazards.
If using string or yarn, keep long pieces away from very young children and make sure hanging decorations are securely attached.
The finished fish tank should be placed somewhere stable where it will not easily fall.
Creative Variations
There are many ways to customize a cardboard fish tank.
Children can create an Arctic ocean with icebergs and polar animals. They can make a tropical coral reef with brightly colored fish. They can design a deep-sea scene with sharks, submarines, and mysterious creatures.
Another idea is to create a night-time aquarium using dark blue or black paper and silver stars.
Older children can create a more detailed ecosystem with different habitats and layers of the ocean.
Conclusion
Making a 3D fish tank out of cardboard is a wonderful craft project that combines creativity, recycling, imagination, and learning. With a simple cardboard box and a collection of colorful materials, children can build an entire underwater world.
From colorful fish and seaweed to coral, bubbles, jellyfish, turtles, and treasure chests, there are countless details that can be added. Hanging fish and other moving decorations make the project even more exciting by creating a sense of depth and movement.
The activity can be enjoyed at home, in classrooms, or during children’s craft sessions. It encourages children to use their hands, experiment with materials, and learn about life beneath the water.
Most importantly, every cardboard fish tank can be different. One child might create a peaceful coral reef, while another might design an exciting pirate treasure scene. With cardboard, paper, and imagination, children can turn a simple box into a colorful underwater adventure that they can proudly display and enjoy.
