
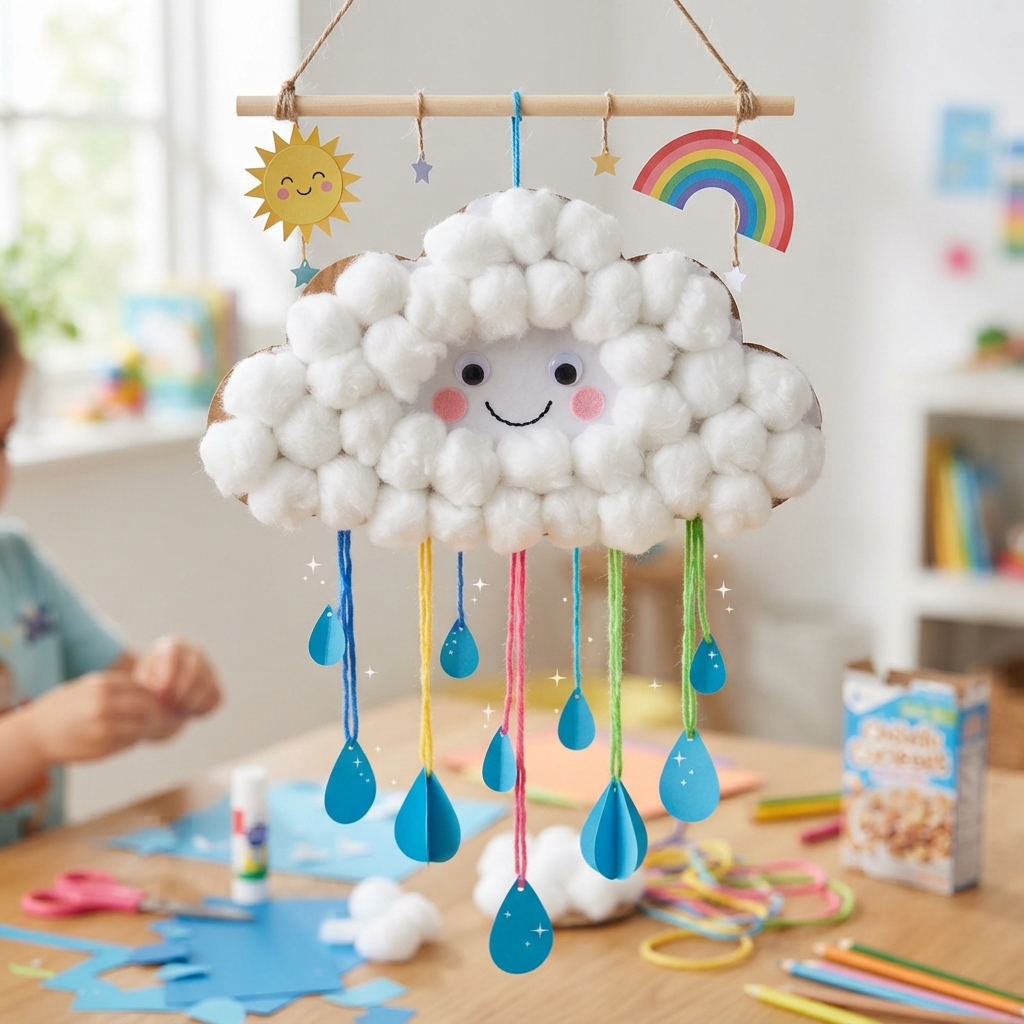
Making a rain cloud out of paper is a simple, creative, and educational craft activity for children. With a few basic materials such as paper, cardboard, cotton, glue, scissors, and colorful string, children can create a beautiful cloud filled with falling raindrops. This project is perfect for classrooms, rainy-day activities, school projects, weather lessons, or creative afternoons at home.
Clouds and rain are familiar parts of everyday life, but children may wonder how they form and why rain falls from the sky. A handmade paper rain cloud provides an enjoyable way to introduce these ideas while allowing children to express their creativity. They can design their cloud in different shapes, add fluffy cotton, and create colorful raindrops hanging underneath.
The finished project can be used as a wall decoration, classroom display, bedroom decoration, or part of a larger weather-themed craft. Children can also create several clouds and combine them with the Sun, rainbow, lightning, and other weather symbols to make a complete sky scene.
Why Make a Paper Rain Cloud?
A paper rain cloud is an excellent craft because it is inexpensive, easy to make, and suitable for different ages. Children can complete a simple version with only a few materials, while older children can add more details and create a three-dimensional model.
The activity also develops important practical skills. Children practice cutting, drawing, gluing, folding, and arranging materials. These activities help strengthen hand-eye coordination and encourage concentration.
The craft can also be connected to science. Parents and teachers can explain the basic water cycle while children make their clouds and raindrops. This turns an ordinary craft into a simple science lesson.
Most importantly, children can use their imagination. Their rain cloud does not have to look exactly like a real cloud. It can be smiling, colorful, decorated with stars, or surrounded by a rainbow.
Materials You Will Need
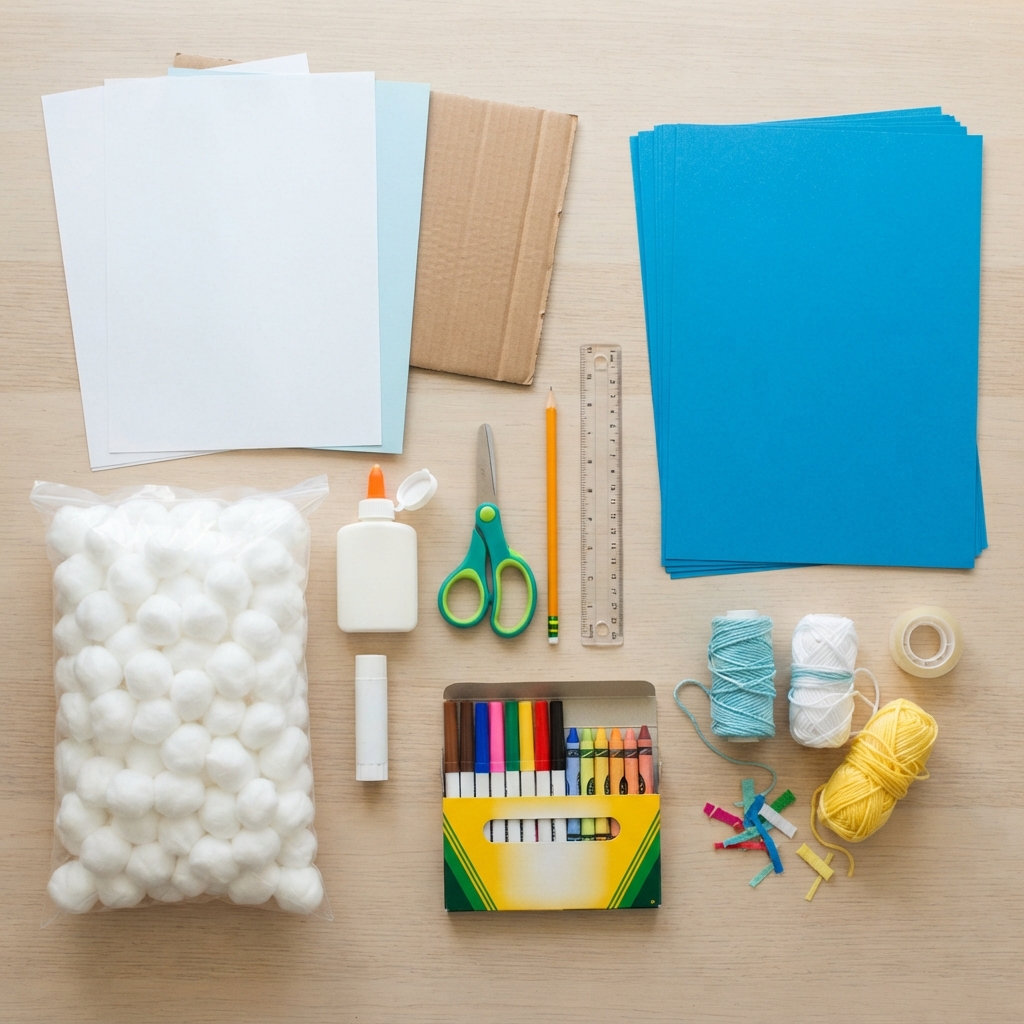
You only need a few inexpensive supplies to make a paper rain cloud.
Basic materials
- White or light-blue paper
- A piece of cardboard
- Cotton balls
- Child-safe scissors
- Glue
- Pencil
- Ruler
- Blue construction paper
- String, yarn, or thread
- Markers or crayons
- Tape
Optional decorations
You can also use:
- Colored paper
- Glitter
- Stickers
- Aluminum foil
- Paint
- Googly eyes
- Sequins
- Small pieces of felt
- Tissue paper
Recycled cardboard from a cereal box or packaging can be used as the base of the cloud. This makes the project inexpensive and teaches children about reusing everyday materials.
Younger children should have adult supervision when using scissors, glue, or other craft supplies.
Step 1: Plan the Cloud
Before cutting anything, decide what kind of rain cloud you want to create.
A simple cloud can have several rounded bumps along the top and bottom. You can make it large and fluffy or small and simple.
Children can sketch the cloud on a piece of paper first.
Ask them to imagine their cloud.
Is it a happy cloud? Is it a storm cloud? Is it a giant cloud over a city? Is it floating above a rainbow?
Planning the design gives children an opportunity to think creatively before beginning the craft.
Step 2: Draw the Cloud Shape
Place a piece of cardboard on a flat surface.
Use a pencil to draw a large cloud shape.
The easiest method is to draw several connected circles or rounded bumps. Make the middle part wider and the sides slightly smaller.
The cloud does not need to be perfectly symmetrical.
A handmade cloud can look more interesting when its shape is slightly uneven.
If younger children have difficulty drawing the outline, an adult can create a simple cloud template for them to follow.
Step 3: Cut Out the Cloud
Carefully cut around the cloud outline.
Use child-safe scissors for thin cardboard or paper.
If the cardboard is thick, an adult should help with the cutting.
Once the cloud has been cut out, check the edges and trim any rough areas.
The cardboard shape will provide a strong base for the rest of the decorations.
For a very simple project, children can skip the cardboard and use thick white paper instead.
Step 4: Cover the Cloud With Cotton
Now comes one of the most enjoyable steps.
Take several cotton balls and gently pull them apart to make them fluffy.
Apply small amounts of glue to the cardboard cloud.
Press the cotton onto the surface.
Continue adding cotton until the entire cloud is covered.
Try not to flatten the cotton too much. Keeping it fluffy gives the cloud a soft, three-dimensional appearance.
Children can overlap pieces of cotton to make some areas look thicker than others.
Step 5: Create Different Types of Clouds
Not all clouds look the same.
Children can experiment with different designs.
A fluffy white cloud can represent a peaceful sky.
A darker cloud can represent rainy or stormy weather.
To make a gray rain cloud, gently add a small amount of gray or blue paint to some cotton before attaching it.
Another option is to use gray tissue paper.
This gives the cloud a completely different appearance.
Step 6: Make the Raindrops
The raindrops are an important part of the project.
Use blue construction paper to make several raindrops.
Draw a simple teardrop shape and cut it out.
Make raindrops in different sizes.
You can also use light blue, dark blue, turquoise, and silver paper to create variety.
Children can decorate the drops with small white lines or dots to make them look shiny.
Step 7: Make Three-Dimensional Raindrops
For a more interesting effect, make some raindrops three-dimensional.
Cut two identical raindrop shapes from paper.
Fold each shape gently down the middle.
Apply glue to one side and attach it to the other raindrop.
When the pieces are opened slightly, the raindrop will have a raised shape.
This simple technique gives the rain cloud more depth.
Step 8: Attach the Raindrops
Cut several pieces of string or yarn.
Make them different lengths.
Attach one end of each string to a paper raindrop.
Then attach the other end underneath the cardboard cloud.
Use tape on the back of the cloud to secure the strings.
Arrange the raindrops so that some hang high and others hang low.
This creates the appearance of rain falling from the cloud.
Make sure the strings are securely attached before displaying the craft.
Step 9: Add a Happy Face
Children may enjoy giving their rain cloud a face.
Draw two large eyes on paper and cut them out.
Glue them onto the cloud.
Then draw a smile underneath.
You can use googly eyes if available.
A happy cloud can make the project look cute and friendly.
For a storm cloud, children can create a surprised or serious expression instead.
This is a great opportunity for children to experiment with emotions and character design.
Step 10: Add a Rainbow
A rainbow can make the rain cloud craft even more colorful.
Cut strips of colored paper in rainbow colors.
Arrange the strips in an arc.
Glue them together at the top.
Attach the rainbow beside or underneath the cloud.
Children can also make a small rainbow from folded paper or tissue paper.
The combination of a fluffy cloud, falling rain, and colorful rainbow creates a cheerful sky scene.
Step 11: Add a Sun
Another useful addition is a paper Sun.
Cut a large yellow circle from paper or cardboard.
Add triangular rays around the outside.
Paint the Sun yellow or orange.
Children can draw a smiling face on it.
Place the Sun next to the cloud to create a complete weather display.
This also allows children to talk about how sunlight helps drive the water cycle.
Step 12: Make Lightning
If children want to create a storm cloud, they can add lightning.
Cut several zigzag lightning shapes from yellow paper.
Glue them underneath the cloud.
Use bright yellow or white paper to make the lightning stand out against a dark cloud.
Children can create several lightning bolts of different sizes.
This can lead to a conversation about thunderstorms and how lightning is produced.
Step 13: Turn It Into a Hanging Decoration
The finished rain cloud can become a hanging decoration.
Attach a strong piece of string to the top of the cardboard cloud.
Tie the string securely.
The cloud can be hung from a suitable hook or display point.
If it is being used in a child’s bedroom, make sure it is securely mounted and out of reach of very young children.
A hanging rain cloud looks especially attractive when the raindrops move gently in the air.
Step 14: Make a Rain Cloud Mobile
A more advanced version is a weather mobile.
Use a cardboard circle or another lightweight frame as the top.
Hang several clouds from it.
Add raindrops, stars, a Sun, a rainbow, and small paper planets.
Use different lengths of string so that the decorations appear at different levels.
This creates a three-dimensional weather scene.
Children can decorate each cloud differently.
Learning About the Water Cycle
A paper rain cloud is a wonderful way to introduce the water cycle.
Explain that water from oceans, rivers, lakes, and other places can be heated by the Sun. Some of the water changes into water vapor and rises into the atmosphere.
As the water vapor cools, it can condense into tiny droplets that form clouds.
When enough water collects in clouds, precipitation can fall as rain.
Children can represent these stages using paper decorations.
For example, they can create a yellow Sun for evaporation, fluffy clouds for condensation, and blue raindrops for precipitation.
This makes an abstract science concept easier to understand.
Educational Benefits
This craft supports several areas of children’s development.
Fine motor skills
Cutting paper, attaching string, gluing cotton, and drawing shapes require careful hand movements.
Creativity
Children decide how their cloud should look and which colors and decorations to use.
Science learning
The project introduces basic concepts related to clouds, rain, weather, and the water cycle.
Language development
Children can describe their cloud, tell stories about rainy weather, or explain how rain forms.
Problem-solving
Children may need to decide how to balance the cloud, attach the strings, or make the raindrops hang correctly.
Using Recycled Materials
This project is also a great opportunity to teach children about recycling.
Instead of buying new cardboard, reuse a cereal box, delivery package, or other clean cardboard.
Old magazines can provide colorful paper for decorations.
Leftover yarn can be used for the hanging raindrops.
Paper packaging can also be turned into clouds, rainbows, and suns.
Using recycled materials shows children that ordinary objects can have a second life.
Creative Rain Cloud Ideas
There are many ways to personalize the project.
Children can create:
- A smiling rain cloud
- A storm cloud
- A rainbow rain cloud
- A colorful fantasy cloud
- A cloud with hanging stars
- A cloud with hearts
- A cloud with butterflies
- A cloud with paper birds
- A weather-themed classroom display
- A complete water-cycle model
They can also write their names or short weather messages on the cloud.
For example, a child might write “Rainy Day” or “Cloudy Sky.”
Safety Tips
Children should use child-safe scissors and non-toxic glue and paint.
Adults should assist with cutting thick cardboard.
Avoid small decorations such as beads and tiny buttons when working with very young children because they can be choking hazards.
Do not use real water or any electrical materials as part of the craft.
If the cloud is going to be hung, make sure it is attached securely.
Keep long strings away from very young children.
Always allow paint and glue to dry completely before handling the finished project.
Conclusion
Making a rain cloud out of paper is a simple and enjoyable activity that combines creativity, science, and imagination. With cardboard, cotton, paper, glue, and string, children can create a fluffy cloud with colorful raindrops falling underneath.
The project can be adapted to suit different ages and abilities. Younger children can make a basic white cloud with blue raindrops, while older children can create a complete weather scene containing clouds, rainbows, sunshine, lightning, and different stages of the water cycle.
The craft is also an excellent way to reuse everyday materials. An old cardboard box, leftover paper, and spare yarn can become a beautiful handmade decoration.
Most importantly, this activity gives children an opportunity to learn through making. As they cut, glue, paint, and decorate, they can discover how clouds and rain are connected to the water cycle. They can also create stories, invent characters, and imagine what happens beyond the clouds.
With a little paper, some fluffy cotton, and plenty of creativity, children can turn a simple craft project into a charming rainy sky that brings learning and imagination together. ☁️🌧️🌈
