Creating a paper fan that spins in the air is one of the most engaging and educational STEM crafts you can try at home, in school, or even while traveling. This Creating a paper fan that spins in the air activity transforms simple paper into a dynamic experiment that demonstrates real physics in action. Whether you call it a DIY paper spinning fan or a paper fan that moves with airflow experiment, the result is the same: a fascinating blend of science, creativity, and motion.
This guide will help you understand how spinning paper toys work, how airflow and aerodynamics affect movement, and how to build multiple spinning paper devices step-by-step. You’ll also learn how to upgrade your designs using real engineering concepts like lift, gravity, and air resistance.
2. Project 1: The Classic Humming Paper Spinner
The first step in Creating a paper fan that spins in the air is understanding how motion can create sound and energy at the same time. The classic humming spinner is a timeless STEM experiment.
Core Concept: Centrifugal Force
When you rotate the spinner using twine, centrifugal force pulls outward while tension pulls inward, creating vibration and sound.
Materials:
- Cardboard circles
- Twine (around 28 inches)
- Markers
- Circle template
Pro Tip (E-E-A-T Insight):
To prevent fraying, lightly burn the ends of the twine using a match (adult supervision required).
The Humming Secret:
As you pull and relax the string rhythmically, the twine twists and untwists rapidly. This vibration produces a humming sound while the spinner rotates. It’s one of the simplest demonstrations of energy transfer in a paper fan that moves with airflow experiment style activity.
3. Project 2: “Folding Frenzy” 3D Paper Spinners
This second version of Creating a paper fan that spins in the air focuses on transforming flat paper into 3D motion art.
Core Concept: Shape Transformation

Flat surfaces can become dynamic 3D objects when properly folded and balanced.
Supplies:
- Two colored sheets of paper
- Glue stick
- Scissors
The Build:
Precision matters. Crisp folds determine how smoothly your DIY paper spinning fan expands and rotates. Uneven folds can cause wobbling or poor balance.
Visual Effects:
Before folding, draw patterns or gradients on the paper. When the spinner rotates, colors blend visually, creating optical illusions that enhance the learning experience.
4. Project 3: Aerodynamic Paper Helicopters
This is where Creating a paper fan that spins in the air becomes a real physics lesson.
Core Concept: Gravity vs Air Resistance
The helicopter falls downward due to gravity, but air resistance pushes against the wings, causing rotation.
Materials:
- Paper helicopter template
- Paper clip (for weight)
Physics Sidebar:
As the helicopter drops, air pushes against angled wings, forcing it to spin. This is a real-world example of lift and drag interaction.
Experimental Variables:
Try changing:
- Wing size
- Paper thickness
- Number of paper clips
Each change affects how fast your paper fan that moves with airflow experiment behaves during descent.
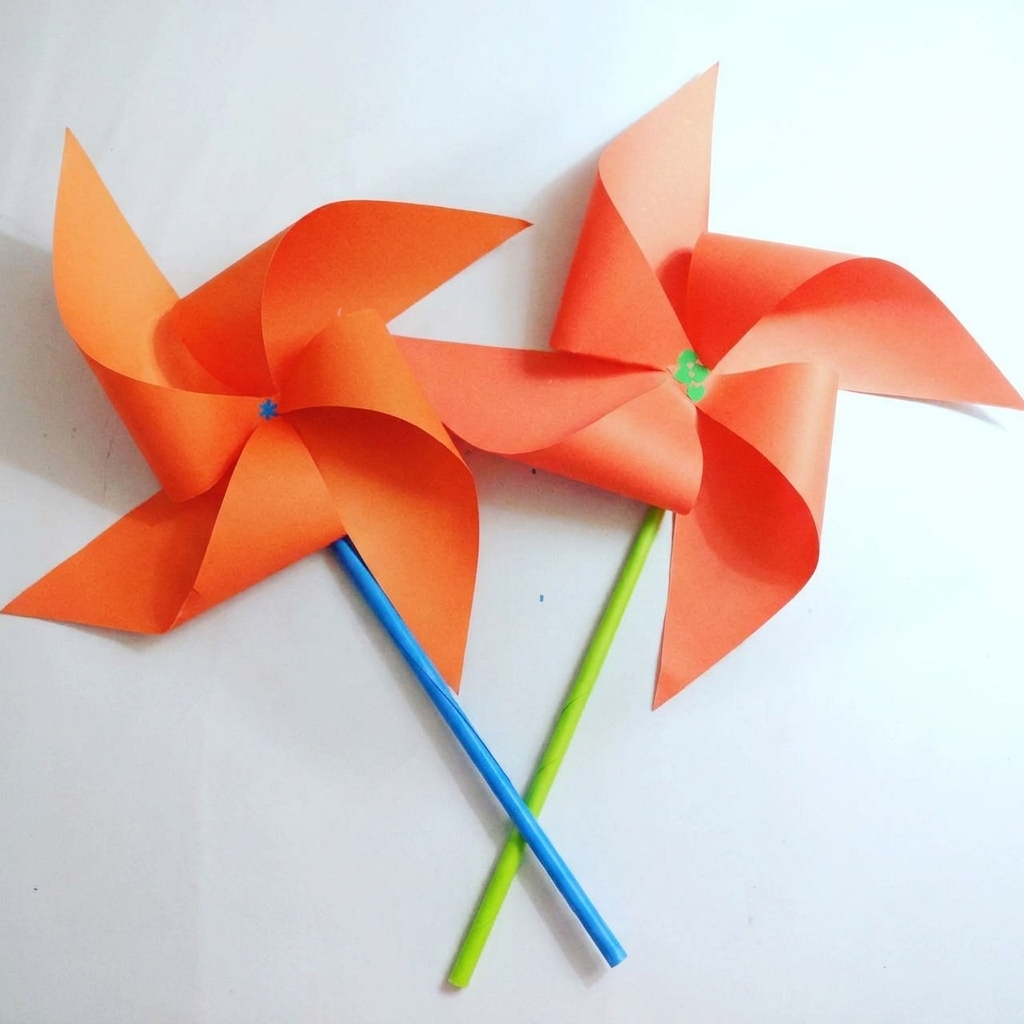
5. Project 4: The 8-Blade Spinning Paper Fan
Now we reach the most visually impressive version of Creating a paper fan that spins in the air.
Core Concept: Multi-Blade Aerodynamics
Multiple blades increase surface area, allowing better airflow capture.
Dimensions:
- Use 8 cm square colored paper pieces
Construction:
Arrange triangles in an anti-clockwise overlapping pattern around a central point. This creates balance and smooth rotation.
The Pivot System:
Use a paper straw and a straightened paper clip to create a low-friction axis. This ensures smooth spinning even with minimal wind.
This is the most advanced DIY paper spinning fan design in this guide.
6. The Advanced Challenge: Build a Table-Top Wind Tunnel
This section elevates Creating a paper fan that spins in the air into an engineering-level experiment.
Budget STEM Project
You can build a wind tunnel for around $30 using:
- Cardboard boxes
- Window fan
- Soda straws
Technical Breakdown:
The Airflow Grid:
Stacked soda straws reduce turbulence and create smooth airflow.
Observation Window:
A clear plastic sheet allows visibility of airflow behavior and spinning objects.
Measuring Lift:
A foam board lever connected to a pen spring can measure upward force generated by airflow.
This turns your paper fan that moves with airflow experiment into a real scientific measurement tool.
7. Comparison Table: At-a-Glance Project Guide
| Project | Difficulty | Key Science Concept | Primary Materials |
| Humming Spinner | Easy | Centrifugal Force | Cardboard, Twine |
| 3D Folded Toy | Medium | Geometry & Motion | Copy Paper |
| Paper Helicopter | Easy | Gravity & Air Resistance | Paper, Paper Clip |
| 8-Blade Spinning Fan | Medium | Aerodynamics | Colored Paper, Straw |
| Wind Tunnel Test | Hard | Lift & Airflow | Cardboard, Fan |
Conclusion
Creating a paper fan that spins in the air is more than just a craft—it’s a complete STEM learning experience. From simple spinning paper toys to advanced airflow experiments, each project demonstrates key scientific principles like aerodynamics, gravity, lift, and centrifugal force.
Whether you’re building a DIY paper spinning fan at home or exploring a paper fan that moves with airflow experiment in a classroom, these activities help transform abstract physics into something visual, interactive, and fun.
Most importantly, these experiments encourage curiosity and engineering thinking. Every fold, spin, and adjustment teaches how small design changes can dramatically impact motion and performance.
So grab your paper, start folding, and turn everyday materials into flying, spinning science magic.