
Introduction: The Magic of Realistic Slime for Children
We present a highly imaginative and realistic slime project that transforms ordinary crafting into a playful, immersive experience for children. This activity focuses on creating dinosaurs, fairy gardens, and enchanted landscapes using custom slime, offering endless possibilities for creativity, sensory play, and fine motor skill development.
Designed for children, this innovative slime activity combines texture, color, and imaginative storytelling, allowing young creators to build miniature worlds that feel alive and interactive. Every slime dinosaur, sparkling fairy, or magical plant contributes to a fully customizable environment, making this project both educational and fun.
Essential Ingredients for Realistic Dinosaur and Fairy Garden Slime
To craft realistic and safe slime suitable for children, we select non-toxic, high-quality materials:
Base Slime Ingredients
- 1 cup white or clear glue (PVA-based, safe for kids)
- ½ cup water
- ½ teaspoon baking soda
- 1–2 tablespoons contact lens solution (boric acid-based, safe in small amounts)
Texture Enhancers
- 1 tablespoon glycerin for stretch and gloss
- ½ teaspoon baby oil for smoothness
- Cornstarch or instant snow powder for a firmer, moldable texture
Color and Visual Effects
- Food coloring (green, brown, pink, and glittery shades)
- Glitter, shimmer powders, or mica pigments
- Miniature beads, foam balls, or sequins for textures
Add-Ons for Themed Worlds
- Toy dinosaurs or fairy figurines
- Small plastic plants or moss
- Tiny rocks, pebbles, or sand for landscaping
Step-by-Step Guide to Making Dinosaur and Fairy Garden Slime
Step 1: Prepare the Slime Base
We begin by pouring glue into a large mixing bowl, followed by water. Mix thoroughly until smooth and uniform.
Add baking soda and stir to prepare the base for activation. Baking soda ensures a stretchy yet firm texture.
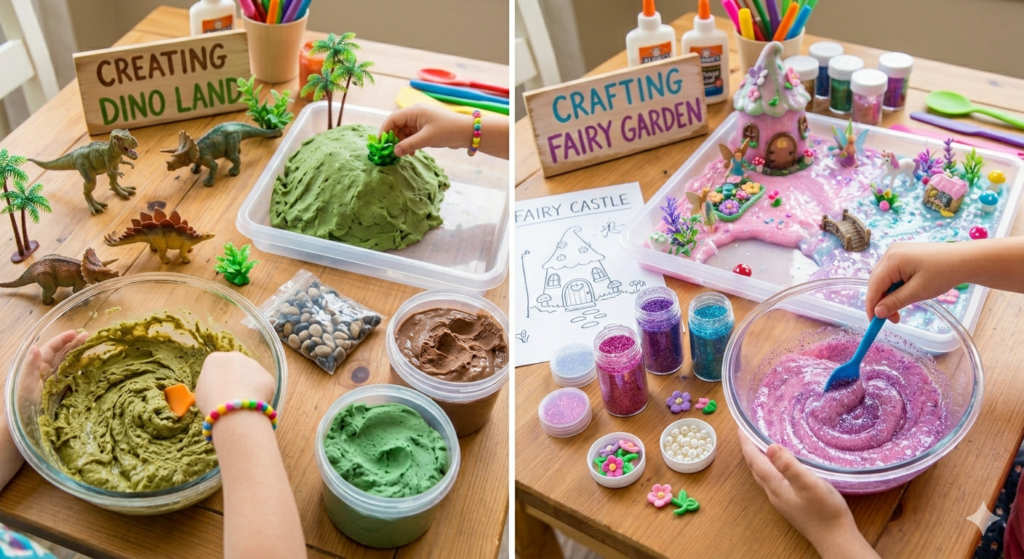
Step 2: Color and Customize
Divide the slime base into several portions to create different colors for various elements. For example:
- Green and brown for dinosaurs and foliage
- Pastel or glittery colors for fairy slime and magical terrain
Mix in glycerin and baby oil to enhance stretchiness and shine. Add glitter or mica powder for a magical effect.
Step 3: Activate the Slime
Slowly add contact lens solution to each portion while stirring. The mixture will begin to thicken and pull away from the sides. Knead with hands until smooth, non-sticky, and pliable.
For firmer slime suitable for sculpting dinosaurs or plants, add a little cornstarch.
Step 4: Sculpting Dinosaurs and Fairy Elements
Use small portions of slime to shape miniature dinosaurs or fairy landscape features. Tips for realism:
- For dinosaurs: elongated tails, spikes, or textured skin using a toothpick or sculpting tool
- For fairy gardens: mushroom caps, flowers, and ponds with pastel-colored slime and glitter accents
Incorporate miniature toys for added realism.
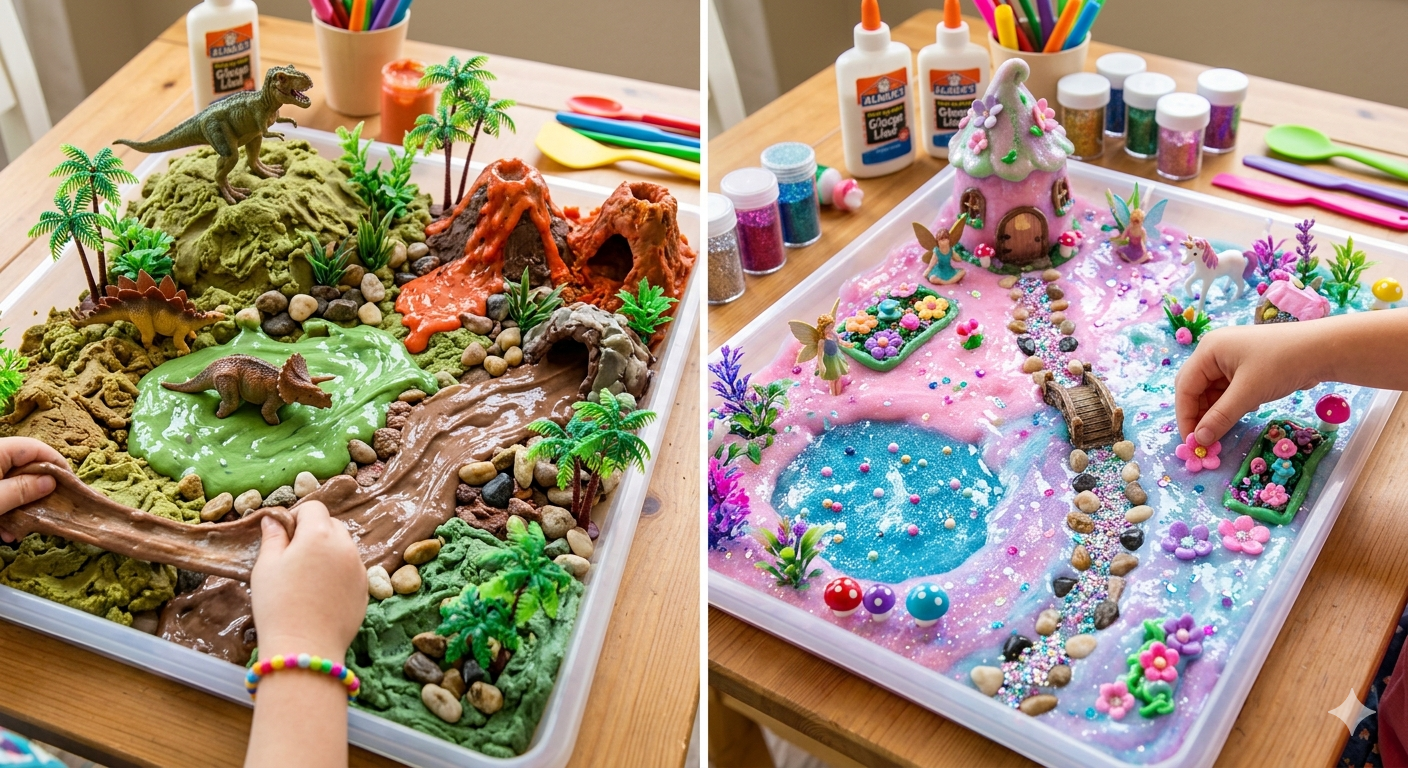
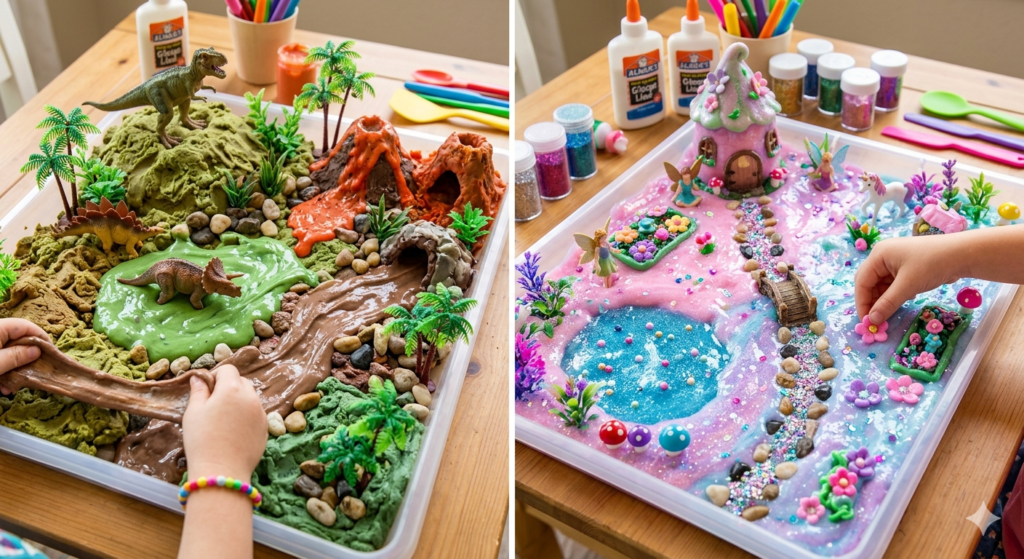
Step 5: Building Enchanted Worlds
Layer your slime on a tray or shallow container to create landscape features:
- Spread green slime for grassy areas
- Add brown or gray slime for rocks and soil
- Place dinosaurs strategically in the environment
- Form fairy homes with pastel slime and glitter
Mix textures by combining smooth, stretchy slime with firm clay-like slime for a dynamic terrain.
Step 6: Adding Interactive Elements
Enhance the sensory experience with:
- Small beads or foam balls to simulate dinosaur eggs
- Tiny glitter or sequins for fairy dust
- Water-based slime puddles to represent lakes or ponds
This creates multi-textured worlds that children can touch, stretch, and reshape.
Safety and Storage Tips for Children’s Slime
- Always supervise children under 10 years
- Use non-toxic glue and coloring
- Wash hands before and after play
- Store slime in airtight containers to maintain texture
- Keep slime away from fabric, carpets, or small children who might ingest it
Educational Benefits of Dinosaur and Fairy Slime Projects
This activity is not only fun but also supports child development:
- Fine motor skills: Sculpting small dinosaurs and fairy elements
- Creativity: Designing unique landscapes and storylines
- Color recognition: Mixing slime colors and creating patterns
- Sensory stimulation: Soft, stretchy, and textured surfaces
- Problem-solving: Arranging elements to create balanced worlds
Advanced Techniques for Hyper-Realistic Slime Worlds
- Layer different slimes for topographical features, like hills, rivers, and volcanoes
- Mix glossy and matte textures for natural appearance
- Add scented oils like mint or citrus to enhance sensory immersion
- Combine slime with clay or foam to strengthen sculpted dinosaurs or structures
Why This Project Inspires Children
1. Engaging Storytelling
Children can create adventures and narratives around dinosaurs or fairy gardens, enhancing imagination.
2. Multi-Sensory Play
Mixing colors, textures, and scents stimulates sight, touch, and smell, making the activity immersive.
3. Customization and Ownership
Each child can personalize their slime world, fostering creativity and confidence.
4. Quick Setup and Clean-Up
This activity requires simple ingredients, minimal tools, and easy storage, making it practical for parents and educators.
Tips for Encouraging Extended Play
- Provide small props and figurines to expand storytelling
- Encourage mixing colors and textures for experimentation
- Photograph completed worlds for a mini portfolio of creations
- Rotate themes, e.g., prehistoric jungle one day, fairy garden the next
Conclusion: Transform Slime Into Magical Worlds for Kids
We have outlined a comprehensive guide to creating realistic slime dinosaurs and fairy gardens, combining creativity, education, and sensory play. This activity transforms basic slime into dynamic miniature worlds, allowing children to explore imagination and tactile experiences safely.
With careful attention to texture, color, and detail, this custom slime project becomes both an engaging craft and a learning tool, inspiring children to innovate and play creatively.