
Introduction: The Magic of Frozen Ponds for Kids
We present a fun and educational craft project that allows children to create frozen pond simulations using slime or gelatin. This activity combines sensory play, creativity, and imaginative storytelling to produce a miniature icy landscape that children can touch, explore, and decorate.
Creating a frozen pond is not only engaging but also teaches color mixing, texture experimentation, and environmental awareness. Using safe, child-friendly ingredients, children can build icy water, submerged elements, and winter-inspired landscapes, making this project both educational and highly enjoyable.
Materials Needed for Frozen Pond Projects
For Slime-Based Frozen Ponds
- 1 cup clear or white glue
- ½ cup water
- ½ teaspoon baking soda
- 1–2 tablespoons contact lens solution (boric acid-based)
- 1 tablespoon glycerin for stretch and shine
- Blue food coloring for realistic water
- Optional: glitter, sequins, or beads to simulate ice crystals
For Gelatin-Based Frozen Ponds
- 1 packet unflavored gelatin
- 1 cup cold water
- ½ cup hot water
- Blue or green food coloring
- Small toy fish, ducks, or pond animals
- Optional: edible glitter or sprinkles
Decorative Add-Ons
- Miniature rocks, pebbles, and moss
- Small plastic plants or reeds
- Tiny fairy figurines or animal figures
Step-by-Step Guide to Making Slime Frozen Ponds
Step 1: Preparing the Slime Base
We start by mixing glue and water in a bowl. Stir until smooth, then add baking soda for a pliable texture.
Add glycerin and blue food coloring, creating a realistic icy water appearance. Glitter can be added to simulate sparkling ice.
Step 2: Activating the Slime
Gradually add the contact lens solution while stirring to thicken the mixture. Knead until the slime is stretchy, smooth, and slightly firm.
For a more solid pond effect, add a small amount of cornstarch, making the slime moldable for miniature landscape features.
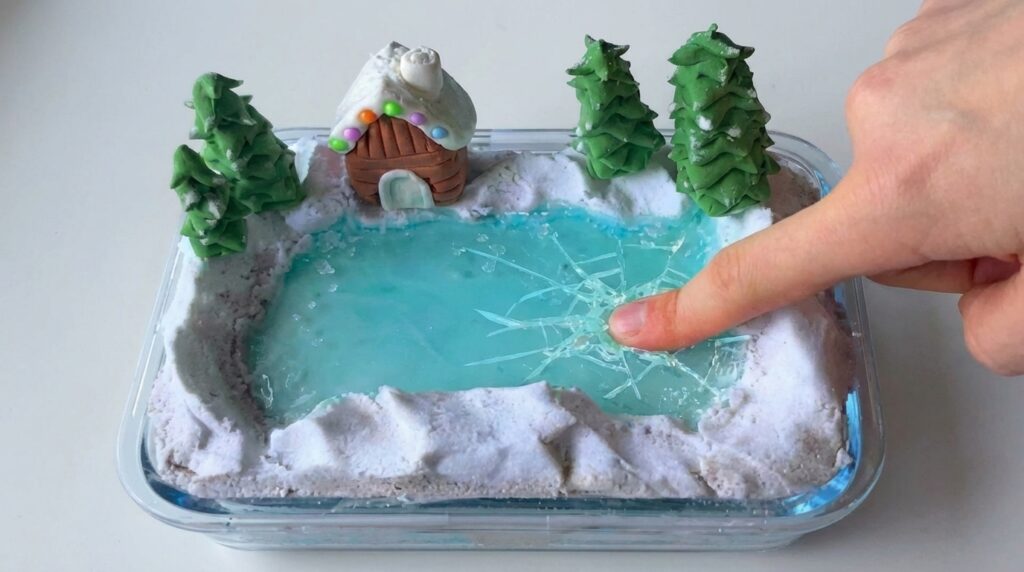
Step 3: Shaping the Frozen Pond
Spread the slime in a shallow tray to form a pond base. Use your hands or small tools to create depressions for ponds, rivers, or icy patches.
Add decorative elements like foam beads as ice chunks, miniature fish, or moss for realism.
Step 4: Adding Interactive Features
Children can sculpt snow mounds, icebergs, or frozen reeds with different slime colors or textures.
Encourage mixing textures for soft ice, frozen mud, or slippery water surfaces.
Step-by-Step Guide to Making Gelatin Frozen Ponds
Step 1: Preparing Gelatin
Dissolve unflavored gelatin in hot water, stirring until fully dissolved. Add cold water to cool the mixture slightly.
Mix in blue or green food coloring and optional edible glitter for a shimmering frozen effect.
Step 2: Pouring the Gelatin Base
Pour the gelatin mixture into a shallow container to create the pond. Allow small toy animals or plants to be gently embedded before it sets.
Step 3: Freezing the Gelatin Pond
Place the pond in the refrigerator for at least 2–3 hours to fully set. For a more realistic ice effect, use a shallow container so the gelatin forms a thin, translucent layer.
Step 4: Decorating the Gelatin Pond
Add additional miniature rocks, moss, or snow-like sprinkles on the surface.
Create frozen textures with small indentations or layered gelatin colors for depth.
Educational Benefits of Frozen Pond Activities
- Sensory Play: Children engage with textures—slime is stretchy, gelatin is wobbly
- Fine Motor Skills: Sculpting miniature features develops hand-eye coordination
- Creativity: Designing ponds, icebergs, and frozen landscapes enhances imagination
- Science Learning: Children explore properties of solids, liquids, and freezing
- Environmental Awareness: Introducing pond animals encourages understanding of ecosystems
Tips for Enhancing Realism in Frozen Ponds
- Use varying shades of blue for water depth
- Embed small pebbles or beads to simulate rocks under ice
- Add white glitter or foam to mimic snow or frost
- Layer multiple colors or textures to create depth and realism
- Use small clear containers for individual ponds for classroom activities
Safety Guidelines for Childre
- Always supervise young children during slime or gelatin play
- Use non-toxic, child-safe ingredients
- Avoid ingestion of slime with boric acid (contact lens solution)
- Wash hands before and after play
- Store slime in airtight containers and gelatin ponds in the refrigerator
Creative Variations for Frozen Pond Projects
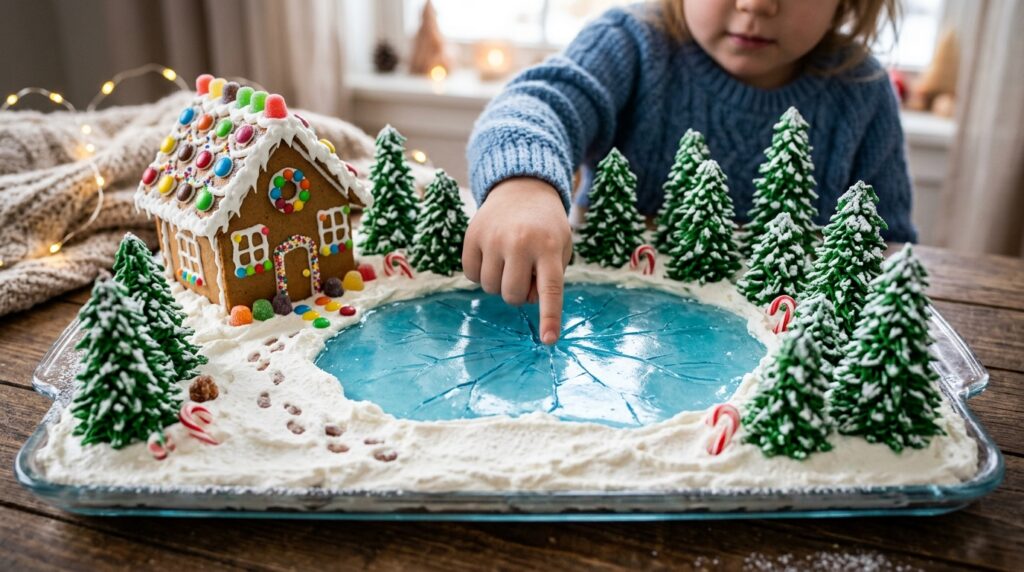
- Winter Wonderland: Add miniature trees and snowman figurines
- Dinosaur Pond: Embed toy dinosaurs partially in “frozen water”
- Fairy Pond: Add pastel-colored glitter slime or edible glitter
- Glow-in-the-Dark Pond: Use glow pigments in slime or gelatin for evening play
- Layered Ice Pond: Alternate layers of clear and colored gelatin to simulate ice depth
Conclusion: Frozen Ponds as a Magical Children’s Craft
Creating frozen ponds with slime or gelatin is a dynamic and educational project that combines sensory play, creativity, and learning. Children can experiment with textures, colors, and embedded elements to produce unique miniature worlds.
This activity encourages imagination, fine motor development, and storytelling, making it perfect for home, classroom, or party crafts.