
Quick Summary Table
| Feature | Details |
| Article Topic | Science Experiment Kids Love: What Melts in the Sun? |
| Category | Outdoor STEM Activities |
| Difficulty Level | Easy |
| Recommended Age | 4–12 Years |
| Time Required | 20–60 Minutes |
| Location | Outdoors in Direct Sunlight |
| Main Learning Concepts | Heat Energy, Melting, Observation |
| Materials Needed | Common Household Items |
| Educational Focus | Science and STEM Learning |
| Number of Activities | 5 Easy Experiments |
Introduction
Science experiment kids love: What melts in the sun? is one of the simplest and most exciting ways to introduce children to scientific thinking. Children are naturally curious about how the world works. They enjoy asking questions, making predictions, and discovering surprising results. A melting experiment combines all these elements into a fun outdoor activity that requires very little preparation.
On a warm sunny day, children can become scientists by testing different objects and observing what happens when sunlight heats them. Some materials melt quickly, while others remain unchanged. This simple investigation helps children understand important scientific concepts such as heat energy, temperature, states of matter, and the effects of sunlight.
One of the best things about melting experiments is that they use everyday items that families already have at home. Ice cubes, chocolate, butter, crayons, and marshmallows can all become tools for scientific discovery.
In this article, you will learn how to conduct five easy melting activities, understand the science behind them, and discover ways to turn a simple outdoor experiment into a meaningful STEM learning experience.
Why Children Love Melting Experiments
Children enjoy activities that create visible changes.
When a solid object slowly transforms into a liquid, the process feels almost magical. The change is easy to observe and encourages children to ask questions such as:
- Why did it melt?
- Why did one object melt faster than another?
- Does sunlight always cause melting?
- What happens if the object is placed in shade?
These questions naturally introduce scientific thinking.
Instant Visual Results
Unlike some science projects that take days, melting experiments often produce results within minutes.
Hands-On Learning
Children actively participate instead of simply watching.
Outdoor Fun
Many melting experiments can be performed outside in fresh air.
Real-World Science
Children learn concepts that apply to everyday life.
Understanding the Science of Melting
Before beginning the activities, it helps to understand what melting is.
Melting occurs when a solid absorbs enough heat energy to change into a liquid.
Every material has a specific melting point.
Some substances melt easily:
- Ice
- Chocolate
- Butter
Others require much higher temperatures:
- Metal
- Glass
- Stone
The sun provides heat energy that can cause certain materials to melt.
The speed of melting depends on several factors:
Temperature
Hotter conditions increase melting speed.
Material Type
Different substances melt at different temperatures.
Surface Area
Smaller pieces often melt faster.
Direct Sunlight
Objects exposed directly to sunlight absorb more heat.
Understanding these principles helps children interpret their observations.
Safety Tips
Before starting any outdoor science activity, review basic safety guidelines.
- Adult supervision is recommended.
- Avoid looking directly at the sun.
- Use sunscreen when necessary.
- Wash hands after handling materials.
- Do not eat experiment items after testing.
- Stay hydrated on hot days.
These simple precautions help ensure a safe learning experience.
Activity 1: Ice Cube Melting Race
Materials
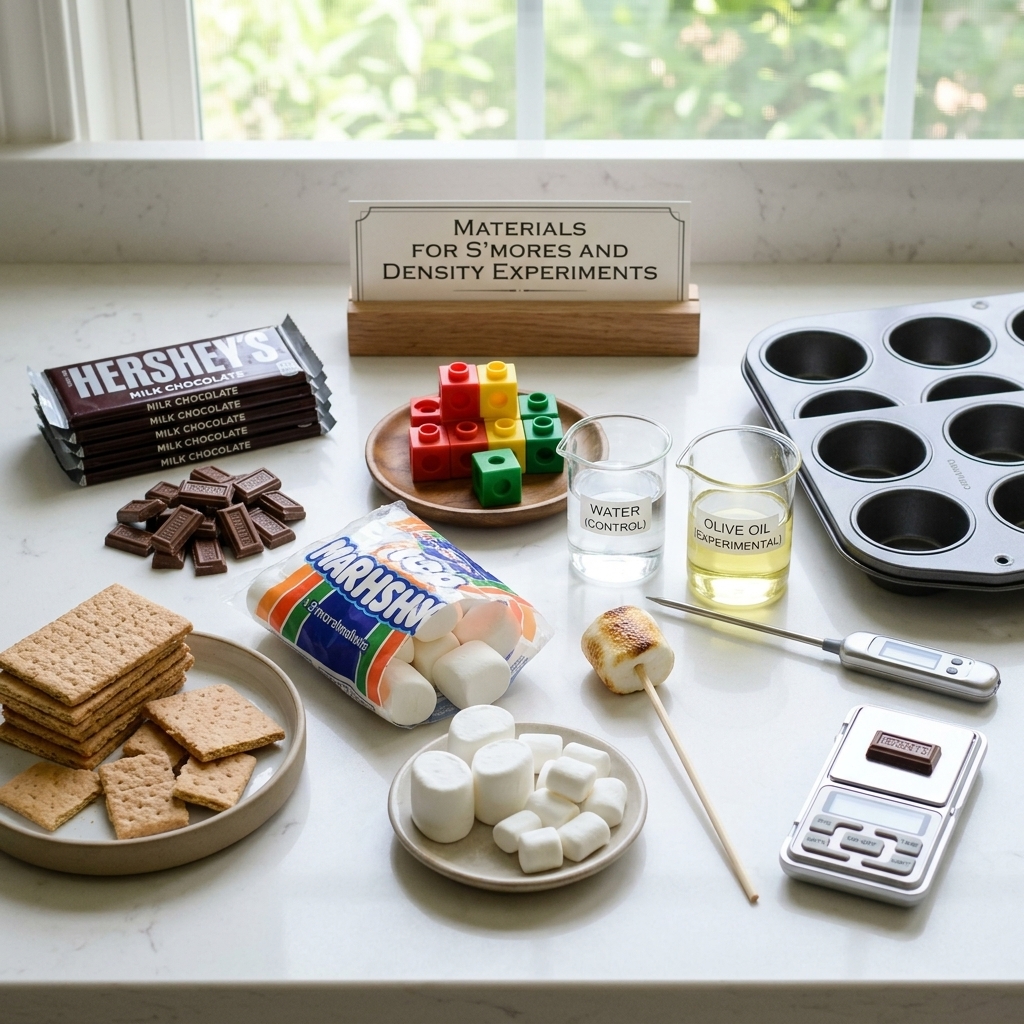
- Several ice cubes
- Paper plates
- Timer
- Notebook
Instructions
- Place ice cubes in different locations.
- Put one in direct sunlight.
- Put one in shade.
- Place another on a metal surface.
- Start the timer.
- Observe and record results.
Questions to Ask
- Which ice cube melts first?
- Which location stays coolest?
- Why do some surfaces speed up melting?
Science Lesson
Different environments transfer heat at different rates.
Metal often heats faster than paper or grass, accelerating melting.
Educational Benefits
- Observation skills
- Data recording
- Scientific comparisons
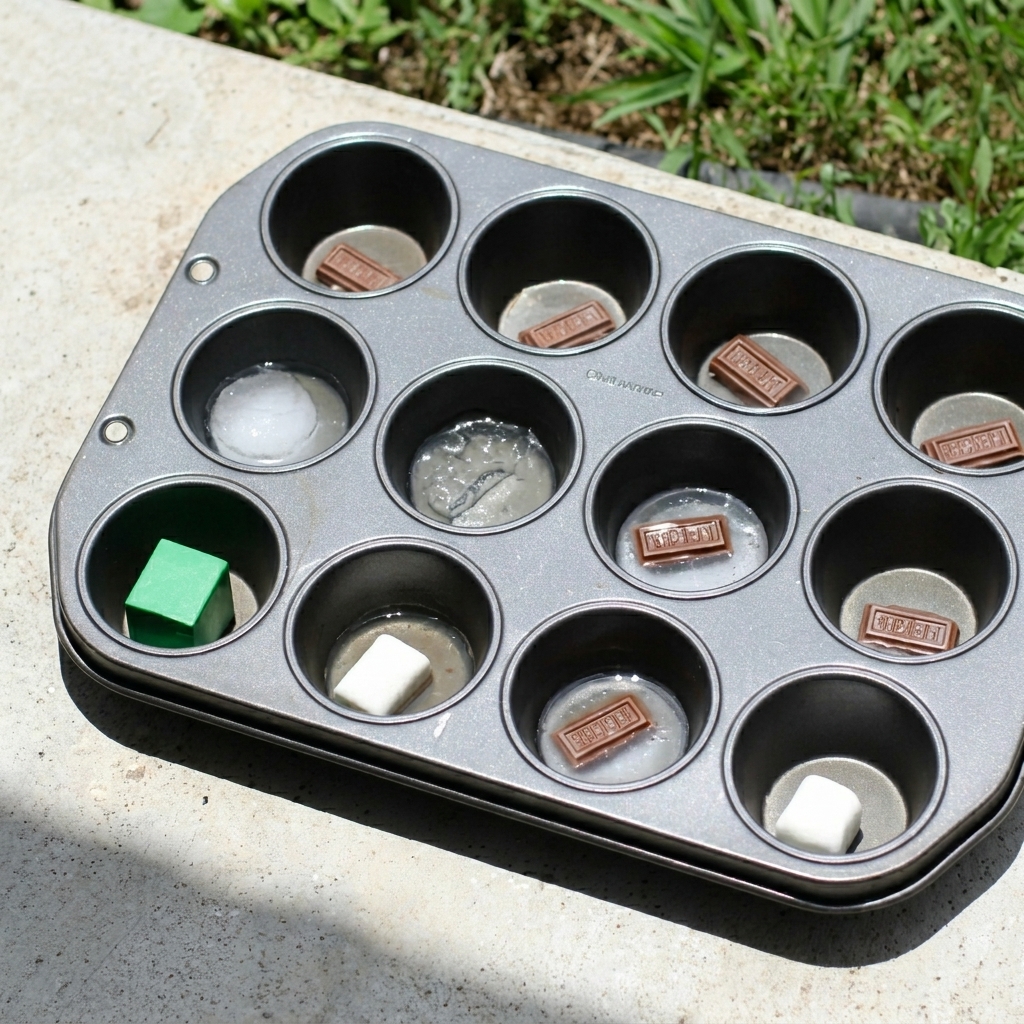
Activity 2: Chocolate Melting Investigation
Materials
- Chocolate chips
- Chocolate bar pieces
- White chocolate
- Paper plates
Instructions
- Place different types of chocolate on separate plates.
- Put them in direct sunlight.
- Observe changes every few minutes.
- Record which chocolate melts first.
Questions to Ask
- Does dark chocolate melt faster?
- Does size affect melting?
- Which chocolate remains solid longest?
Science Lesson
Different chocolates contain varying ingredients and melting points.
Fat content influences melting behavior.
Educational Benefits
- Scientific testing
- Comparison skills
- Understanding material properties
Activity 3: Butter vs. Margarine Challenge
Materials
- Butter
- Margarine
- Small plates
Instructions
- Place equal amounts of butter and margarine on separate plates.
- Put both in sunlight.
- Observe changes over time.
Questions to Ask
- Which melts first?
- Why are the results different?
- How do ingredients affect melting?
Science Lesson
Different fat compositions influence melting rates.
Educational Benefits
- Prediction making
- Scientific observation
- Understanding food science
Activity 4: Crayon Melting Art
Materials
- Old crayons
- Wax paper
- Cardboard
- Sunlight
Instructions
- Arrange crayon pieces on wax paper.
- Place them in direct sunlight.
- Observe how they soften.
- Create colorful melted designs.
Questions to Ask
- Which colors melt first?
- Why do crayons change shape?
- What happens when colors mix?
Science Lesson
Crayons contain wax, which melts when heated.
Educational Benefits
- Art and science integration
- Creativity
- States of matter
Activity 5: Marshmallow Heat Test
Materials
- Marshmallows
- Paper plates
- Sunny location
Instructions
- Place marshmallows in direct sunlight.
- Observe changes every five minutes.
- Compare with marshmallows placed in shade.
Questions to Ask
- Do marshmallows melt completely?
- Do they soften before melting?
- Which location produces the biggest change?
Science Lesson
Heat can alter texture before causing complete melting.
Educational Benefits
- Observation
- Scientific reasoning
- Understanding heat effects
Recording Results Like a Scientist
Scientists carefully document observations.
Encourage children to create a simple chart.
| Object | Prediction | Result |
| Ice Cube | Melts Fast | Melted First |
| Chocolate | Melts Medium | Melted Second |
| Butter | Melts Fast | Melted Quickly |
| Crayon | Melts Slowly | Softened |
| Marshmallow | Softens | Became Sticky |
Recording data helps children identify patterns and improve scientific thinking.
STEM Skills Developed Through Melting Experiments
Observation
Children learn to notice small changes.
Prediction
They practice making educated guesses.
Data Collection
Results can be recorded and analyzed.
Critical Thinking
Children compare outcomes and seek explanations.
Communication
Discussing observations builds scientific vocabulary.
These skills are fundamental components of STEM education.
How Sunlight Produces Heat
Many children wonder why sunlight causes melting.
The answer lies in energy transfer.
The sun releases energy that travels through space as light.
When sunlight reaches Earth, objects absorb some of that energy and convert it into heat.
Dark objects often absorb more heat than light-colored objects.
This principle explains why:
- Black shirts feel hotter.
- Asphalt becomes warm.
- Dark surfaces can accelerate melting.
Children often find this concept fascinating because they experience it every day.
Questions to Encourage Scientific Thinking
During the experiment, ask open-ended questions.
Examples include:
- What do you notice?
- Why do you think this happened?
- What would happen on a cooler day?
- How could we make the experiment different?
- Which material surprised you most?
These conversations help children think like scientists.
Extending the Experiment
Once children complete the basic activities, try additional investigations.
Compare Colors
Test whether dark-colored objects melt materials faster.
Compare Surfaces
Place objects on:
- Concrete
- Grass
- Metal
- Wood
Compare Weather Conditions
Repeat the experiment on different days.
Compare Object Sizes
Test large and small pieces of the same material.
Each variation introduces new opportunities for learning.
Real-World Applications of Melting
Melting is an important process in everyday life.
Examples include:
Cooking
Butter melts when heated.
Transportation
Road materials expand and soften in extreme heat.
Nature
Snow and ice melt during warmer seasons.
Manufacturing
Many products are created using melted materials.
Helping children connect experiments to real life makes science more meaningful.
Common Mistakes and Solutions
Nothing Melts
Possible reasons:
- Weather is too cool.
- Insufficient sunlight.
- Materials have high melting points.
Move objects into stronger sunlight.
Experiment Takes Too Long
Use materials that melt more easily, such as chocolate or ice.
Uneven Results
Ensure materials receive equal sunlight exposure.
These adjustments improve accuracy.
Why Outdoor Science Is Important
Outdoor science activities provide unique benefits.
Children:
- Get fresh air
- Engage with nature
- Develop observation skills
- Stay physically active
- Experience science directly
Combining outdoor play with education creates memorable learning experiences.
Conclusion
Science experiment kids love: What melts in the sun? is an excellent way to introduce children to scientific discovery using simple materials and natural sunlight. Through activities involving ice cubes, chocolate, butter, crayons, and marshmallows, children explore important concepts such as heat energy, temperature, and changes in matter.
These experiments encourage observation, critical thinking, prediction making, and data collection while providing plenty of outdoor fun. Best of all, they demonstrate that science does not require expensive equipment or complicated procedures. Sometimes the most powerful lessons come from everyday objects and a sunny day.
By trying these five easy activities, children can develop a deeper understanding of how heat affects materials while building curiosity and confidence that will support future STEM learning. The result is a hands-on educational experience that combines fun, exploration, and discovery in a way that children truly love.