
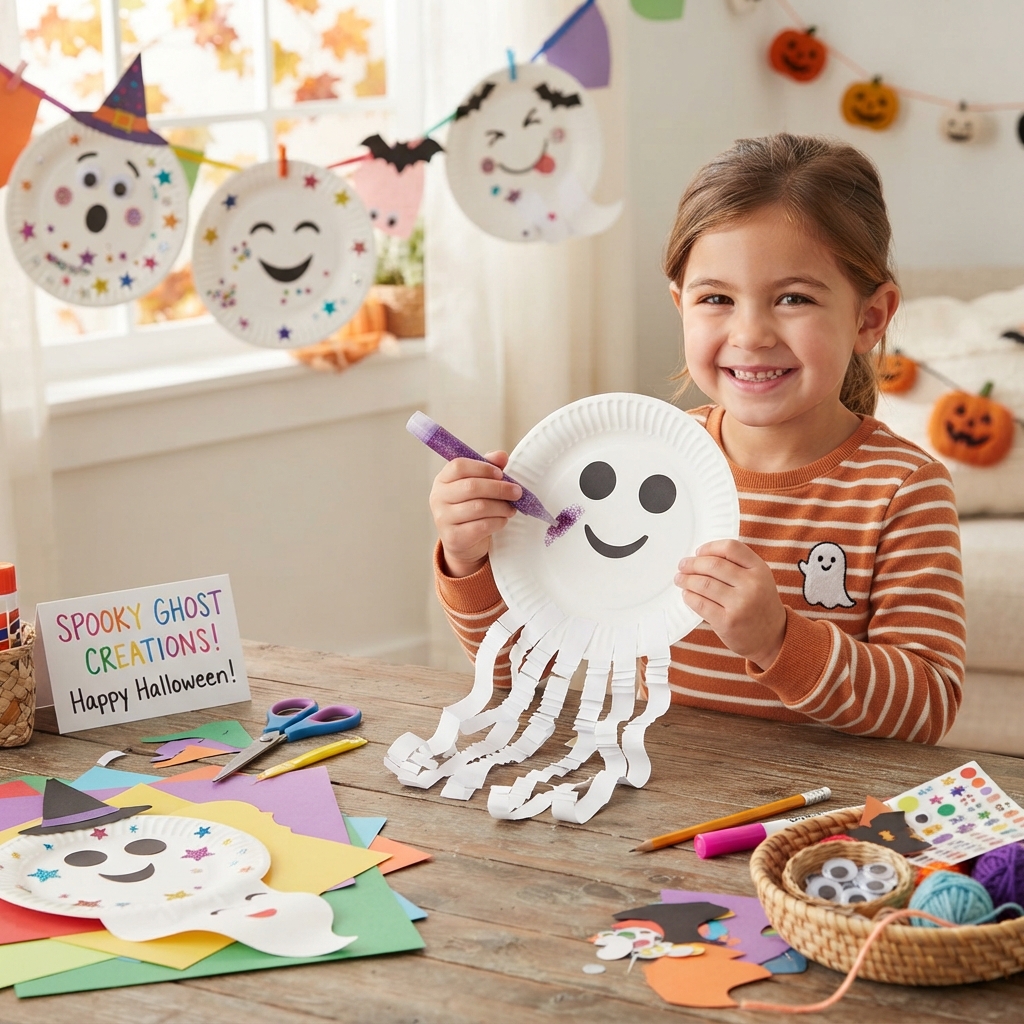
Halloween is one of the most exciting times of the year for children. The costumes, decorations, pumpkins, spooky stories, and colorful treats create an atmosphere full of imagination and fun. While children may enjoy dressing up and collecting candy, Halloween is also a wonderful opportunity to encourage creativity through simple crafts. One especially fun project is a DIY Halloween paper plate ghost, a spooky but friendly decoration that children can make using simple tools and inexpensive materials.
This craft is easy enough for young children, while older kids can personalize their ghosts with different expressions, colors, and decorations. The project does not require expensive equipment or complicated techniques. With a paper plate, some paper, scissors, glue, and markers, children can create a cheerful Halloween decoration in a short time.
Why Choose a Simple Halloween Craft?
Simple crafts are perfect for children because they allow them to focus on creativity rather than complicated instructions. A good children’s craft should be easy to understand, use safe materials, and leave room for personal expression.
The DIY ghost project meets all these requirements. The basic shape is simple, but children can make each ghost completely different. One child might create a happy ghost, while another might make a surprised or sleepy ghost.
Crafting also helps children develop important skills. Cutting paper improves hand coordination, drawing encourages creativity, and assembling different pieces teaches patience and attention to detail.
Most importantly, crafting together can create wonderful family memories during the Halloween season.
Materials You Will Need
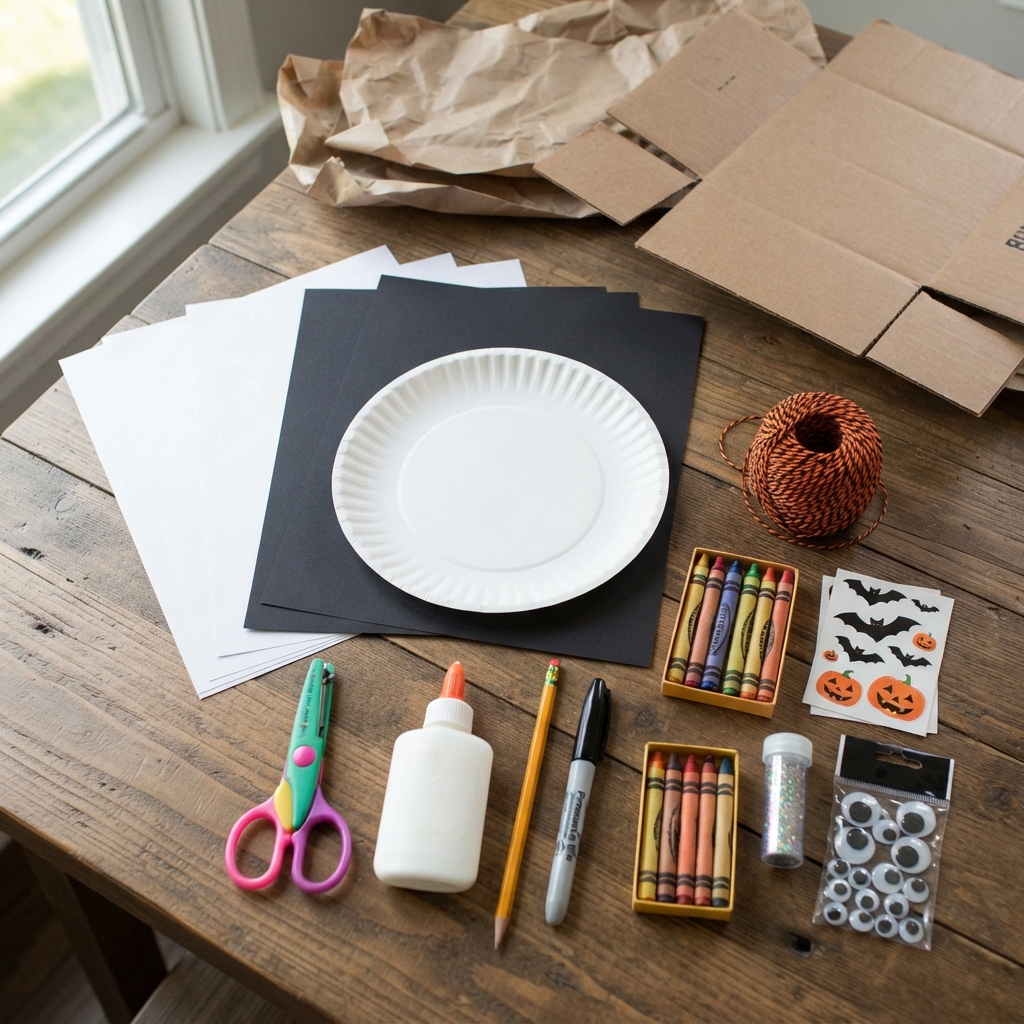
One of the best things about this Halloween craft is that you probably already have most of the supplies at home.
You will need:
- One white paper plate
- White construction paper
- Black construction paper
- Child-safe scissors
- Glue
- A pencil
- Black marker
- String or yarn
- Optional crayons or colored markers
- Optional stickers
- Optional glitter
- Optional googly eyes
You can also use recycled paper or leftover cardboard for some parts of the decoration.
There is no need to purchase special crafting equipment. Ordinary household and school supplies are enough to create a cute Halloween ghost.
Step 1: Prepare the Paper Plate
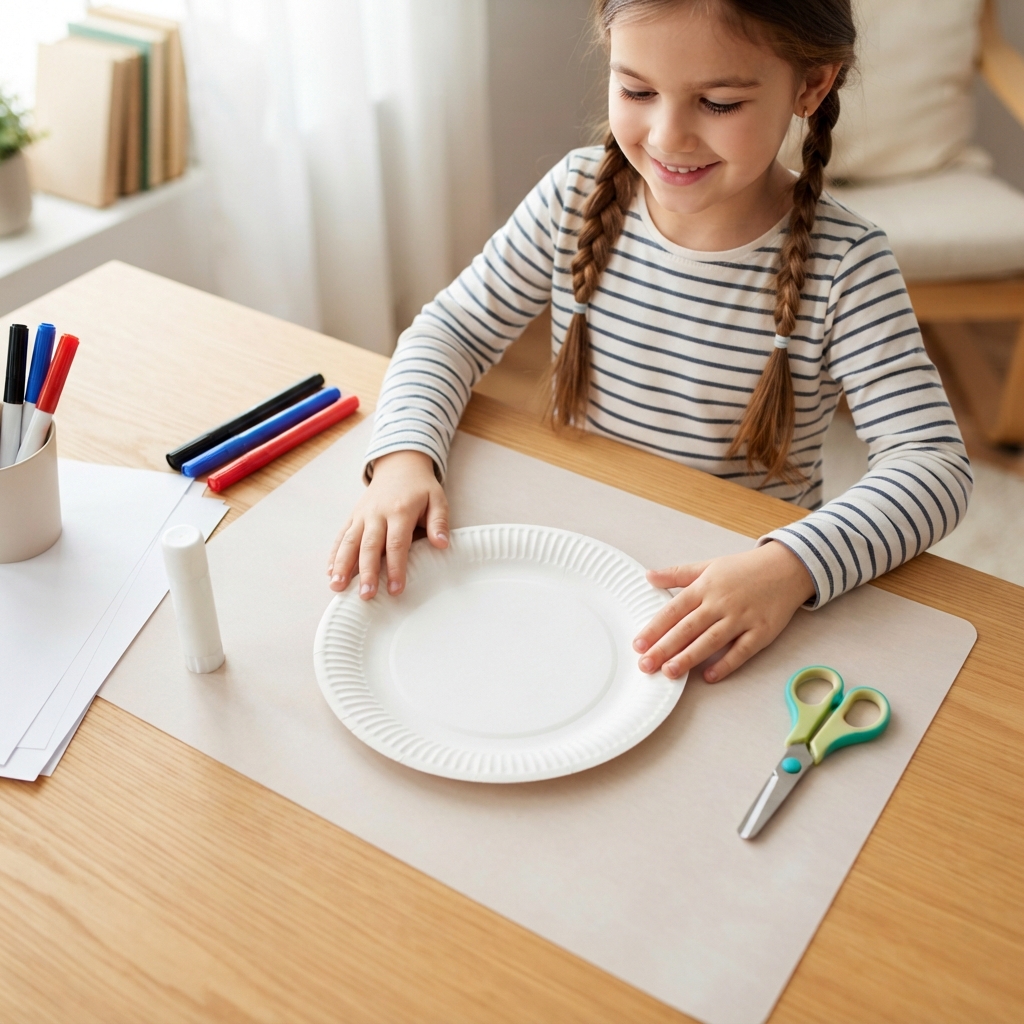
Begin by placing the paper plate on a clean work surface. The plate will become the ghost’s head and upper body.
If the plate has a colorful design, you can cover it with white paper or paint it white. However, a plain white plate is the easiest option.
Ask children to keep their workspace organized. Place scissors, glue, paper, and markers within easy reach.
If younger children are participating, an adult can prepare the materials beforehand and supervise cutting.
Step 2: Create the Ghost’s Body
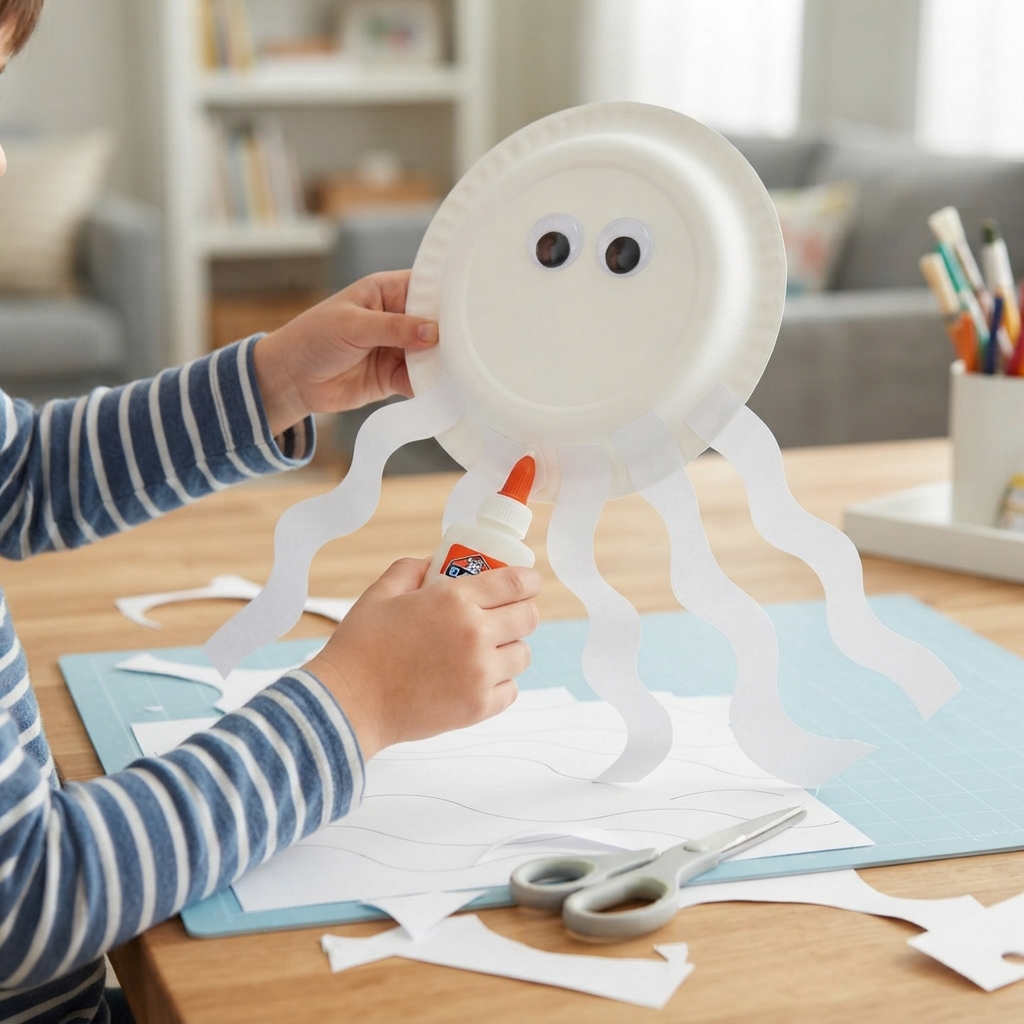
Take a sheet of white construction paper and draw several long, wavy strips. These strips will become the ghost’s flowing body.
Cut along the lines using child-safe scissors.
The strips do not need to be perfectly straight. In fact, uneven and wavy shapes make the ghost look more playful.
You can make four or five strips, depending on how long you want the ghost to be.
Glue the strips around the bottom edge of the paper plate. Let some strips hang down while others curve slightly to the sides.
This creates the illusion that the ghost is floating.
Step 3: Make the Ghost’s Face
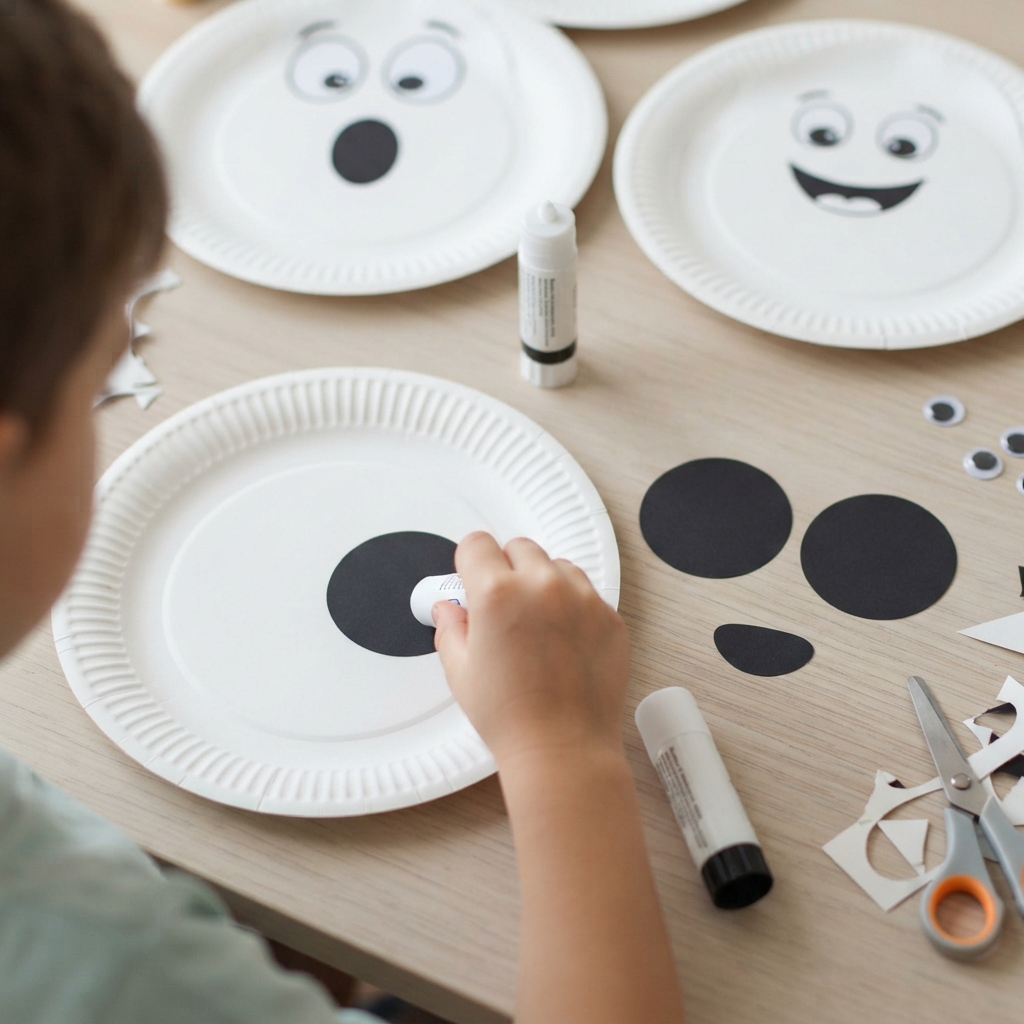
Now comes one of the most enjoyable parts: designing the face.
Cut two large circles or ovals from black paper for the eyes. Glue them onto the paper plate.
Next, cut a small black oval or circle for the mouth.
You can make the mouth open, smiling, surprised, or even shaped like a small oval.
Children can experiment with different facial expressions. A ghost with large round eyes may look surprised, while a ghost with small eyes and a wide smile may look friendly.
If you have googly eyes, you can use those instead of paper eyes. Moving eyes can make the finished craft especially funny.
Step 4: Add a Halloween Message
To make the craft more decorative, add a small Halloween message.
Children can write:
Happy Halloween!
or
Boo!
Another idea is to give the ghost a name. For example, children might call their ghost “Spooky,” “Boo-Boo,” or “Friendly Ghost.”
Writing on the craft adds a small educational element to the activity. Children can practice letters and spelling while decorating.
Step 5: Add Creative Decorations
Although the basic ghost is already finished, the decorating stage is where children can really use their imagination.
Add small stars, pumpkins, bats, moons, or colorful shapes around the ghost.
You can use orange, purple, green, and black paper to create a traditional Halloween color combination.
For a sparkly version, add a small amount of glitter to the edges. Stickers are another easy option.
Children could also draw tiny spiders or spider webs around the ghost.
Remember that the goal is creativity rather than perfection.
Step 6: Turn It into a Hanging Decoration
If you want to display the ghost, make a small hole near the top of the paper plate.
Thread a piece of yarn or string through the hole and tie it securely.
The ghost can then be hung on a bedroom door, classroom wall, window, or Halloween party decoration area.
Several ghosts can be hung together to create a spooky Halloween garland.
You can make ghosts in different sizes and give each one a different expression.
A More Colorful Version
Although traditional ghosts are white, children do not have to follow traditional Halloween colors.
Try making a collection of colorful fantasy ghosts.
Use pale blue paper for one ghost, purple for another, and light green for a third. Add contrasting eyes and colorful decorations.
This variation allows children to explore color combinations while still maintaining the recognizable ghost shape.
A classroom could display an entire wall of colorful ghosts, with each child creating a unique character.
Make a Ghost Family
Another fun idea is to create a ghost family.
Use different-sized paper plates to represent different characters.
A large plate can become a parent ghost, medium plates can become older children, and small plates can become baby ghosts.
Give each character a different facial expression and personality.
Children can invent names and stories for their ghost family. Perhaps one ghost loves Halloween parties, another is afraid of pumpkins, and another enjoys flying around at night.
This turns a simple craft into a storytelling activity.
Create a Ghost Puppet
The paper plate ghost can also become a simple puppet.
Instead of hanging it on the wall, attach a craft stick or clean wooden stick to the back.
Children can hold the stick and move the ghost around while creating stories.
They can make several characters and perform a short Halloween puppet show.
For example, one ghost could meet a friendly pumpkin, a black cat, and a little bat.
This activity combines art, storytelling, speaking, and imaginative play.
Educational Benefits of Halloween Crafts
Halloween crafts are not only entertaining. They can also support children’s development.
Fine Motor Skills
Cutting, drawing, gluing, and handling small decorations require controlled hand movements. These activities can help children practice fine motor coordination.
Creativity
There is no single correct way to decorate a ghost. Children are free to choose colors, expressions, accessories, and patterns.
Concentration
Completing a craft requires children to follow several steps. This encourages them to pay attention and work patiently.
Language Skills
When children name their creations and invent stories, they practice vocabulary and communication.
Social Skills
Group crafting encourages children to share supplies, discuss ideas, and admire each other’s creations.
Halloween Classroom Activity
This ghost craft works especially well as a classroom activity.
Teachers can prepare the basic materials before the lesson. Each child can receive one paper plate and several pieces of construction paper.
After completing their ghosts, students can write their names on them and display them around the classroom.
The teacher can turn the activity into a small Halloween art exhibition.
Students can walk around the room and describe their favorite ghost. This encourages them to appreciate different artistic ideas.
Safety Tips for Children
Although this craft uses simple tools, children should still be supervised appropriately.
Use scissors designed for children, especially with younger kids. Adults can help with difficult cutting tasks.
Choose non-toxic glue and washable markers whenever possible.
If using glitter, beads, buttons, or other small decorations, make sure they are appropriate for the children’s age. Small pieces should not be given to very young children who may put objects in their mouths.
Keep the workspace clean and remove scraps after the activity.
Safety should always come before decoration.
How to Make the Craft More Eco-Friendly
You can make this Halloween project even more environmentally friendly by reusing materials.
Instead of buying new decorations, use leftover paper, old magazines, cardboard packaging, or previously used craft materials.
An old cardboard box can be cut into shapes for pumpkins or bats. Scraps of white paper can become the ghost’s body.
Reusing materials teaches children that everyday objects can have a second life.
It also makes crafting less expensive.
A Halloween Craft Party Idea
This project can become the centerpiece of a small Halloween craft party.
Prepare a table with paper plates, construction paper, markers, glue, scissors, stickers, yarn, and other decorations.
Give each child the freedom to create their own ghost.
After everyone finishes, organize a mini exhibition. Children can explain what they named their ghosts and tell a short story about them.
You could even create simple categories such as:
- Funniest Ghost
- Friendliest Ghost
- Most Creative Ghost
- Spookiest Ghost
- Most Colorful Ghost
The goal should be participation and creativity rather than competition.
More Ideas for Personalizing the Ghost
There are countless ways to make the craft unique.
Add a tiny paper hat to create a witch ghost. Give the ghost a bow tie for a fancy Halloween character. Add a paper crown for a ghost king or queen.
You can also create a superhero ghost by adding a small paper cape.
For a silly version, give the ghost oversized ears, funny eyebrows, or a giant smile.
Children might also create ghosts representing their favorite animals. A cat ghost could have paper ears and whiskers, while a bat ghost could have wings.
These variations show children that one simple craft can inspire many different designs.
Conclusion
A DIY Halloween paper plate ghost is a brilliant craft idea for children because it is simple, inexpensive, creative, and fun. With only a few basic materials and tools, children can transform an ordinary paper plate into a friendly Halloween character.
The project is flexible enough for homes, classrooms, libraries, parties, and community activities. Younger children can focus on simple cutting and gluing, while older children can create detailed characters, write stories, and design entire ghost families.
Beyond the finished decoration, the real value of the activity is the creative process. Children get the opportunity to make decisions, experiment with shapes and colors, practice fine motor skills, and express their personalities.
Halloween does not need to be complicated or expensive to be memorable. Sometimes the most enjoyable activities begin with simple materials sitting around the house. A paper plate, a piece of black paper, some glue, and a child’s imagination can become a cheerful ghost that brings Halloween spirit to any room.
So gather your simple craft supplies, clear a table, and invite the children to start creating. Make one friendly ghost—or make an entire spooky family. Add silly faces, colorful decorations, funny names, and imaginative stories. The possibilities are endless, and every handmade ghost can become a special part of the Halloween celebration.
