
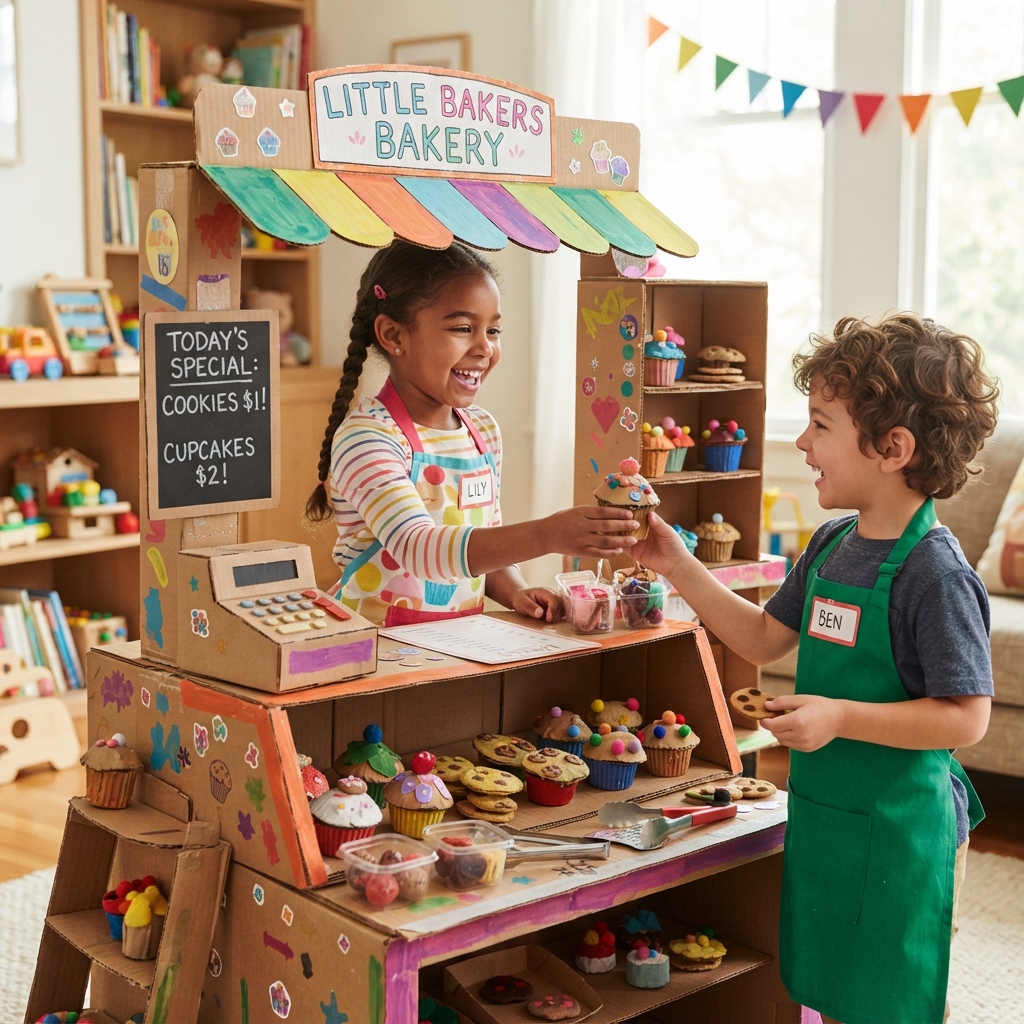
A cardboard bakery is a wonderful craft project that combines creativity, imagination, and hands-on learning. With a few recycled cardboard boxes, colorful paper, markers, and glue, children can build their very own bakery filled with delicious-looking pretend treats. This exciting activity encourages storytelling, role-playing, and artistic expression while teaching valuable skills like cutting, folding, decorating, and organizing.
Whether your child dreams of becoming a baker or simply enjoys making crafts, a cardboard bakery is a delightful project that can provide hours of creative fun.
Why Make a Cardboard Bakery?
Children love pretending to run shops and restaurants. A cardboard bakery lets them become bakers, cashiers, or customers while learning through play.
This project helps children:
- Improve fine motor skills by cutting and gluing.
- Develop creativity through decorating and designing.
- Practice counting while pretending to sell baked goods.
- Build communication skills through role-playing.
- Learn about teamwork when crafting with friends or family.
- Reuse recyclable materials in a fun and eco-friendly way.
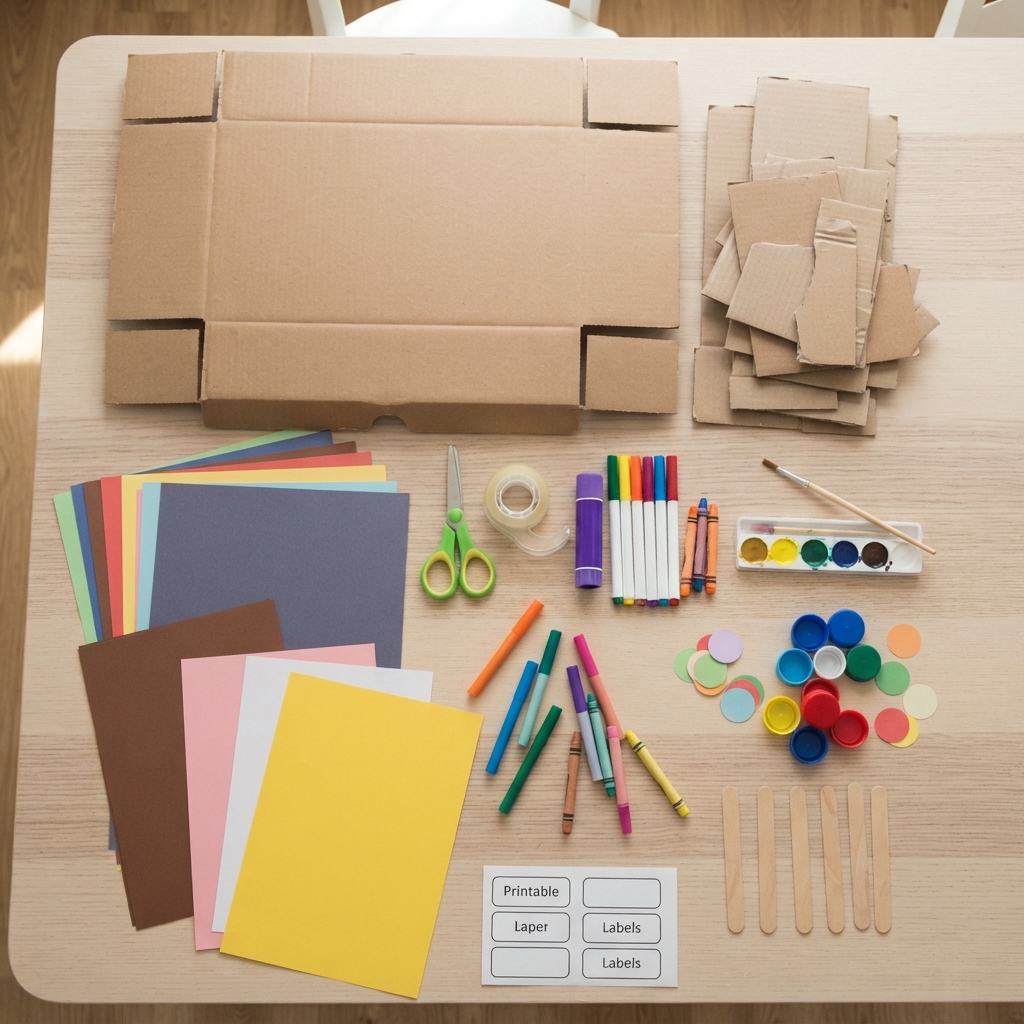
Materials You’ll Need
Most of the supplies can be found around the house.
- Large cardboard box
- Small cardboard pieces
- Colored construction paper
- Brown, pink, white, and yellow paper
- Child-safe scissors
- Glue stick or craft glue
- Tape
- Markers or crayons
- Paint (optional)
- Bottle caps or paper circles for decorations
- Popsicle sticks
- Printable labels (optional)
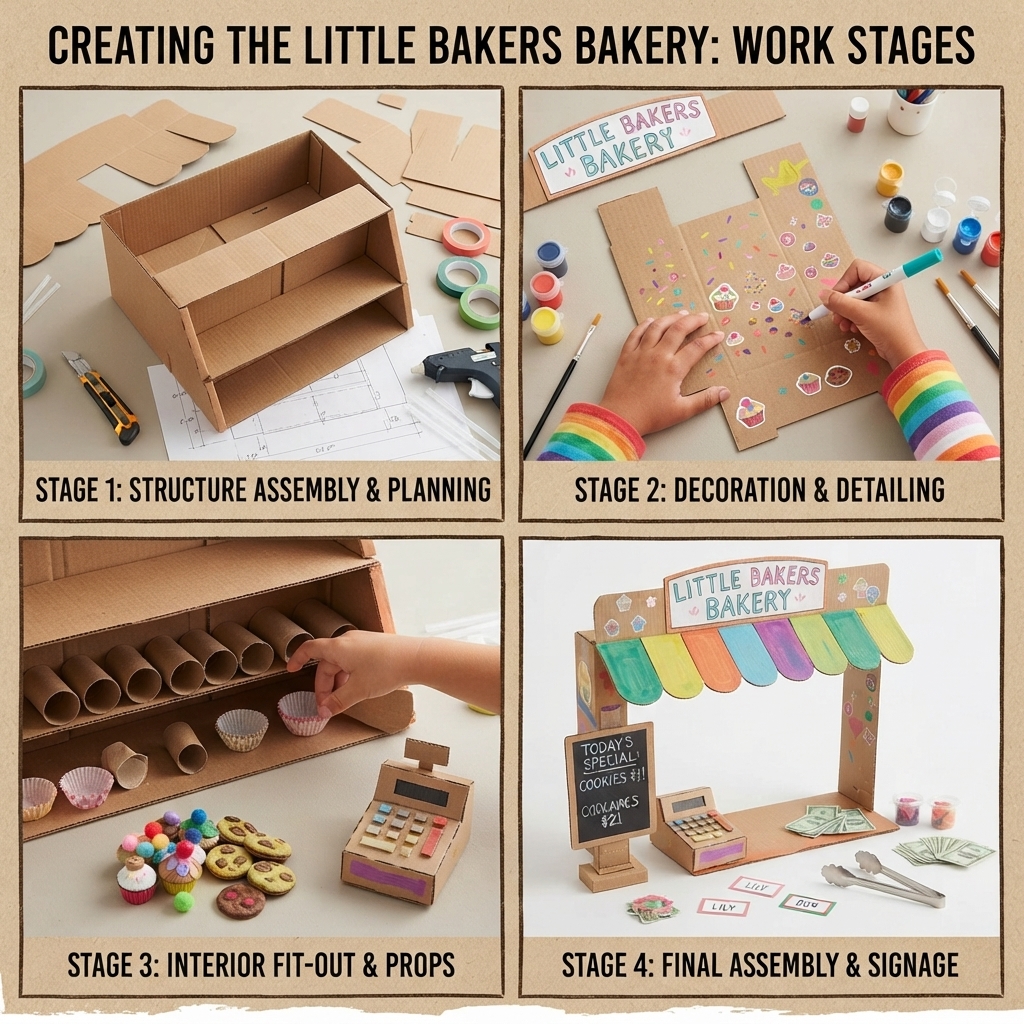
Step 1: Build the Bakery Stand
Choose a sturdy cardboard box to become the bakery counter.
Cut a large serving window in the front so customers can “buy” baked goods. Fold the top to create a little roof or awning.
Decorate the outside with bright colors and write a cheerful bakery name like:
- Sweet Treat Bakery
- Happy Bread Shop
- Little Bakers
- Sunshine Bakery
- Rainbow Cakes
Children can draw windows, flowers, hearts, or colorful stripes to make the bakery inviting.
Step 2: Make Bakery Shelves
Use strips of cardboard to create shelves inside the bakery.
Glue them securely so they can hold pretend bread, cookies, cakes, and pastries.
The shelves help children organize their bakery just like a real shop.
Step 3: Create Pretend Bread
Roll brown paper into long shapes to make baguettes.
Use folded cardboard covered with brown paper to create:
- Bread loaves
- Croissants
- Rolls
- Pretzels
Draw small lines on the bread to make it look freshly baked.
Step 4: Craft Colorful Cakes
Cut circles and rectangles from cardboard.
Cover them with colored paper to create layered cakes.
Decorate with:
- Paper sprinkles
- Pom-poms
- Glitter
- Cotton balls for whipped cream
- Paper cherries
- Foam stickers
Each cake can have its own fun design.
Step 5: Make Cookies and Donuts
Cut small circles from cardboard.
Decorate them using markers and colored paper.
Create:
- Chocolate cookies
- Sprinkle donuts
- Heart-shaped cookies
- Star cookies
- Rainbow donuts
Children love inventing new bakery treats.
Step 6: Add Cupcakes and Muffins
Roll small paper strips into cupcake wrappers.
Glue colorful paper circles on top.
Decorate them with:
- Paper frosting
- Tiny beads
- Stickers
- Glitter stars
Arrange them neatly on the shelves.
Step 7: Create Bakery Signs
Every bakery needs signs.
Make signs such as:
- Fresh Bread
- Today’s Special
- Welcome
- Open
- Delicious Cakes
- Fresh Cookies
Children can also create tiny price tags using small pieces of cardboard.
Step 8: Make a Cash Register
Fold a small cardboard box into a pretend cash register.
Draw buttons and a display screen.
Add:
- Cardboard coins
- Paper money
- Receipts
- Shopping bags made from paper
Now customers can pay for their tasty treats.
Step 9: Decorate the Bakery
Make the bakery extra cheerful with decorations.
Ideas include:
- Paper balloons
- Flower pots
- Bunting flags
- Window boxes
- Welcome mat
- Bakery menu
- Chalkboard sign
- Paper clock
Every decoration makes the bakery feel more realistic.
Fun Pretend Play Ideas
Once the bakery is finished, children can enjoy many imaginative games.
They can:
- Bake pretend bread.
- Take customer orders.
- Count money.
- Pack bakery boxes.
- Decorate cakes.
- Create new recipes.
- Deliver bread to neighbors.
- Host a pretend birthday party.
Role-playing helps build confidence and communication skills.
Learning Benefits
A cardboard bakery offers many educational opportunities.
Children practice:
- Counting
- Sorting
- Color recognition
- Creative thinking
- Problem-solving
- Social interaction
- Fine motor development
- Imaginative storytelling
It also introduces simple ideas about businesses, food, and customer service.
Eco-Friendly Crafting
This project teaches children that old cardboard can become something exciting.
Instead of throwing away boxes, they can transform them into a beautiful bakery filled with handmade treats.
Recycling through crafts helps children understand the importance of protecting the environment while having fun.
Tips for Parents and Teachers
To make the activity even more enjoyable:
- Read a story about baking before starting.
- Play cheerful music while crafting.
- Encourage children to invent bakery names.
- Let each child design unique treats.
- Use safe, child-friendly materials.
- Display the finished bakery in the classroom or playroom.
Celebrate every child’s creativity and imagination.
Conclusion
A cardboard bakery is a fantastic craft that blends art, recycling, and imaginative play into one exciting activity. Children enjoy building the bakery, creating pretend cakes and bread, decorating every corner, and serving happy customers. Best of all, this simple project transforms everyday cardboard into a magical play space where creativity rises just like fresh bread in the oven. With endless decorating ideas and countless role-playing adventures, a cardboard bakery is sure to become one of every child’s favorite DIY projects.
