Looking for a fun science experiment that combines learning, creativity, and excitement? A DIY lava lamp activity is the perfect project for kids, parents, teachers, and anyone who loves hands-on STEM learning. This colorful experiment transforms ordinary household ingredients into a mesmerizing display of floating bubbles that look just like a real lava lamp.
What makes this activity so popular is its simplicity. You don’t need expensive science kits or special equipment. With a few common supplies such as water, oil, food coloring, and an effervescent tablet, you can create an exciting bubbling reaction in just a few minutes.
Beyond being entertaining, a DIY lava lamp activity provides an excellent opportunity to introduce children to basic scientific concepts. Kids can observe density differences, chemical reactions, and liquid behavior while having fun. It’s an ideal project for classrooms, homeschool lessons, rainy afternoons, science fairs, or family activity nights.
In this complete guide, you’ll learn how to create your own DIY lava lamp activity in five easy steps. We’ll also explore the science behind the experiment, educational benefits, safety tips, creative variations, troubleshooting solutions, and much more.
Get ready to create a colorful bubbling masterpiece while discovering the fascinating science hidden inside this simple experiment.
Quick Overview Table
Feature
Details
Activity Name
DIY Lava Lamp Activity
Difficulty Level
Easy
Recommended Age
5+ Years
Time Required
10–20 Minutes
Cost
Budget-Friendly
Materials Needed
Water, Oil, Food Coloring, Tablet
Learning Focus
Science, STEM, Density
Mess Level
Low
Adult Supervision
Recommended
Reusable
Yes
What Is a DIY Lava Lamp Activity?
A DIY lava lamp activity is a simple science experiment that mimics the movement of a traditional lava lamp using household ingredients.
The experiment typically uses:
Water
Vegetable oil
Food coloring
Effervescent tablets
When combined correctly, these ingredients create colorful bubbles that rise and fall through the liquid, producing a mesmerizing lava lamp effect.
Children love watching the moving colors, while educators appreciate the opportunity to teach scientific concepts through hands-on learning.
Why Kids Love DIY Lava Lamp Activities
There are many reasons this experiment remains one of the most popular science projects for children.
Bright Colors
Kids enjoy mixing and observing vibrant colors.
Exciting Movement
The bubbling action keeps children engaged.
Easy Setup
The project requires minimal preparation.
Safe Ingredients
Most materials are commonly found in kitchens.
Educational Value
Children learn while having fun.
A DIY lava lamp activity successfully combines entertainment and education into one memorable experience.
This step often fascinates children because the movement appears magical.
Experiment with Colors
Try:
One color
Multiple colors
Layered color effects
The visual possibilities are endless.
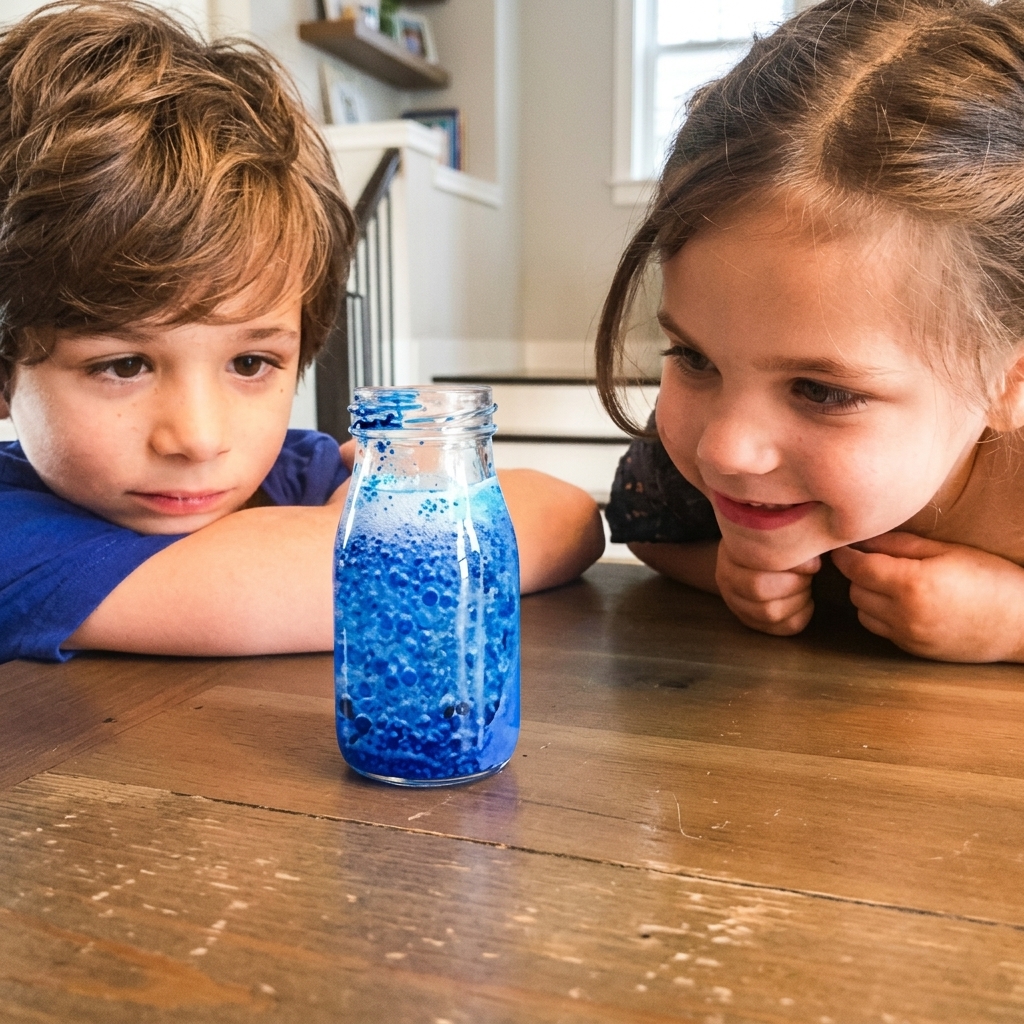
Step 4: Add the Effervescent Tablet
Now comes the exciting part of the DIY lava lamp activity.
Break an effervescent tablet into smaller pieces.
Drop one piece into the container.
Immediate Reaction
The tablet begins dissolving.
Soon you’ll observe:
Bubbles forming
Colored water rising
Colorful blobs moving upward
Continuous bubbling action
Children are often amazed by the transformation.
Scientific Explanation
The tablet releases carbon dioxide gas.
These gas bubbles attach to colored water droplets.
The bubbles lift the droplets upward through the oil.
When the gas escapes:
The droplets become heavier
They sink back down
The cycle repeats until the tablet is fully dissolved.
Step 5: Observe and Explore
Now it’s time to enjoy the results.
Watch the colorful bubbles move throughout the container.
Encourage children to observe:
Bubble size
Movement speed
Color patterns
Reaction duration
Ask Questions
Which color moved fastest?
What happens when the tablet finishes?
How can we restart the reaction?
Observation helps reinforce scientific thinking.
Educational Benefits of a DIY Lava Lamp Activity
This simple experiment offers numerous educational advantages.
Teaches Density
Children see density differences in action.
Introduces Chemical Reactions
The bubbling demonstrates gas production.
Encourages Observation
Kids learn to notice details and patterns.
Supports STEM Learning
Science, technology, engineering, and math concepts are introduced naturally.
Develops Curiosity
Children often ask deeper scientific questions after completing the experiment.
Creative Variations to Try
Once you’ve mastered the basic project, explore creative alternatives.
Rainbow Lava Lamp
Use multiple food coloring shades.
Create:
Rainbow effects
Layered colors
Multicolor bubbles
Glitter Lava Lamp
Add glitter to the water.
The result:
Sparkling movement
Extra visual appeal
Glow-Inspired Lava Lamp
Use a flashlight beneath the container.
This creates:
Dramatic lighting
Enhanced visibility
Fun nighttime effects
Holiday-Themed Lava Lamp
Choose colors based on celebrations.
Examples:
Christmas
Red
Green
Halloween
Orange
Purple
Valentine’s Day
Pink
Red
Easter
Pastel colors
Ocean Lava Lamp
Use:
Blue coloring
Ocean-themed decorations
Perfect for marine science units.
Classroom Applications
Teachers frequently use DIY lava lamp activities because they fit many educational goals.
Science Lessons
Topics include:
Density
Liquids
Chemical reactions
STEM Projects
Supports inquiry-based learning.
Group Activities
Encourages teamwork and discussion.
Science Fair Demonstrations
Creates eye-catching presentations.
Students often remember lessons better when they participate actively.
Common Mistakes and Solutions
Too Much Water
Problem:
The reaction appears weak.
Solution:
Maintain roughly 75% oil and 25% water.
Not Enough Food Coloring
Problem:
Colors look faded.
Solution:
Add several additional drops.
Tablet Too Large
Problem:
Reaction becomes too intense.
Solution:
Break tablets into smaller pieces.
Using an Opaque Container
Problem:
Difficult to observe bubbles.
Solution:
Always use clear containers.
Shaking the Bottle
Problem:
Oil and water become cloudy.
Solution:
Allow liquids to separate before continuing.
Safety Tips
Although this project uses common household materials, safety is important.
Adult Supervision
Recommended for younger children.
Do Not Drink Contents
The mixture is not safe to consume.
Use Child-Safe Containers
Plastic bottles are ideal for young children.
Wash Hands Afterward
Good hygiene habits should always be encouraged.
Store Tablets Properly
Keep unused tablets out of reach of small children.
Why This Activity Is Perfect for STEM Learning
The DIY lava lamp activity checks all the boxes for effective STEM education.
Science
Explores density and reactions.
Technology
Encourages experimentation.
Engineering
Involves designing and testing setups.
Mathematics
Includes measurement and observation.
The project transforms abstract concepts into visible experiences.
How to Extend the Learning Experience
Take the activity beyond basic observation.
Keep a Science Journal
Record:
Predictions
Observations
Results
Compare Different Oils
Try:
Vegetable oil
Canola oil
Olive oil
Discuss differences.
Test Different Tablet Sizes
Observe how reaction intensity changes.
Measure Reaction Duration
Use a timer.
Introduce simple data collection.
Create Hypotheses
Ask:
“What will happen if we add more coloring?”
This promotes scientific thinking.
Fun Facts About Real Lava Lamps
Children often enjoy learning about actual lava lamps.
Invented in the 1960s
Lava lamps became popular decorative items.
Real Lava Lamps Use Wax
Unlike this experiment, commercial lava lamps contain wax and special liquids.
Heat Creates Movement
A light bulb warms the wax, causing it to rise and fall.
They Became Cultural Icons
Lava lamps remain popular around the world.
Understanding the difference between real lava lamps and the DIY version adds educational value.
Frequently Asked Questions
How long does the experiment last?
The bubbling usually lasts several minutes per tablet piece.
Can I reuse the bottle?
Yes. Add another tablet piece to restart the reaction.
What type of oil works best?
Vegetable oil is affordable and effective.
Is food coloring necessary?
It creates the colorful effect but is not essential for the reaction itself.
Can this be used for science fairs?
Absolutely. It makes an engaging demonstration project.
Final Thoughts
A DIY lava lamp activity is one of the easiest and most exciting science experiments you can do at home or in the classroom. Using simple household ingredients, children can create a colorful bubbling display while learning important scientific concepts such as density, liquid separation, and chemical reactions.
The five easy steps make this activity accessible for beginners, while the endless possibilities for customization keep it fresh and engaging. Whether you’re teaching STEM concepts, planning a rainy-day project, or simply looking for a fun educational activity, this experiment delivers both entertainment and learning.
Gather your supplies, follow the steps, and enjoy watching science come to life in a colorful, bubbling lava lamp adventure.