

Handmade play clay is one of the most enjoyable craft projects for children. Soft, colorful, and easy to shape, homemade play clay gives kids endless opportunities to create animals, flowers, food, vehicles, and imaginative characters. Unlike many store-bought options, homemade play clay can be made with simple kitchen ingredients, making it an affordable and engaging activity for families, classrooms, and daycare centers.
This hands-on project encourages creativity, problem-solving, and sensory exploration while giving children the joy of making both the play clay and the creations that follow.
Why Children Love Handmade Play Clay
Children naturally enjoy squishing, rolling, flattening, and molding soft materials. Homemade play clay is perfect for curious little hands because it is easy to manipulate and comes in a variety of bright colors.
Kids love this project because it is:
- Soft and fun to touch
- Easy to shape into different objects
- Available in many colorful shades
- Great for imaginative play
- Suitable for individual or group activities
- Fun to make and even more fun to use
Every child can create something unique using their imagination.
Benefits of Playing with Homemade Clay
Making and using play clay supports many areas of child development.
Some important benefits include:
- Strengthening fine motor skills
- Improving hand and finger muscles
- Developing hand-eye coordination
- Encouraging creativity and imagination
- Building patience and concentration
- Supporting problem-solving skills
- Promoting sensory exploration
- Encouraging teamwork during group activities
These skills help prepare children for writing, drawing, and many everyday tasks.
Materials You’ll Need
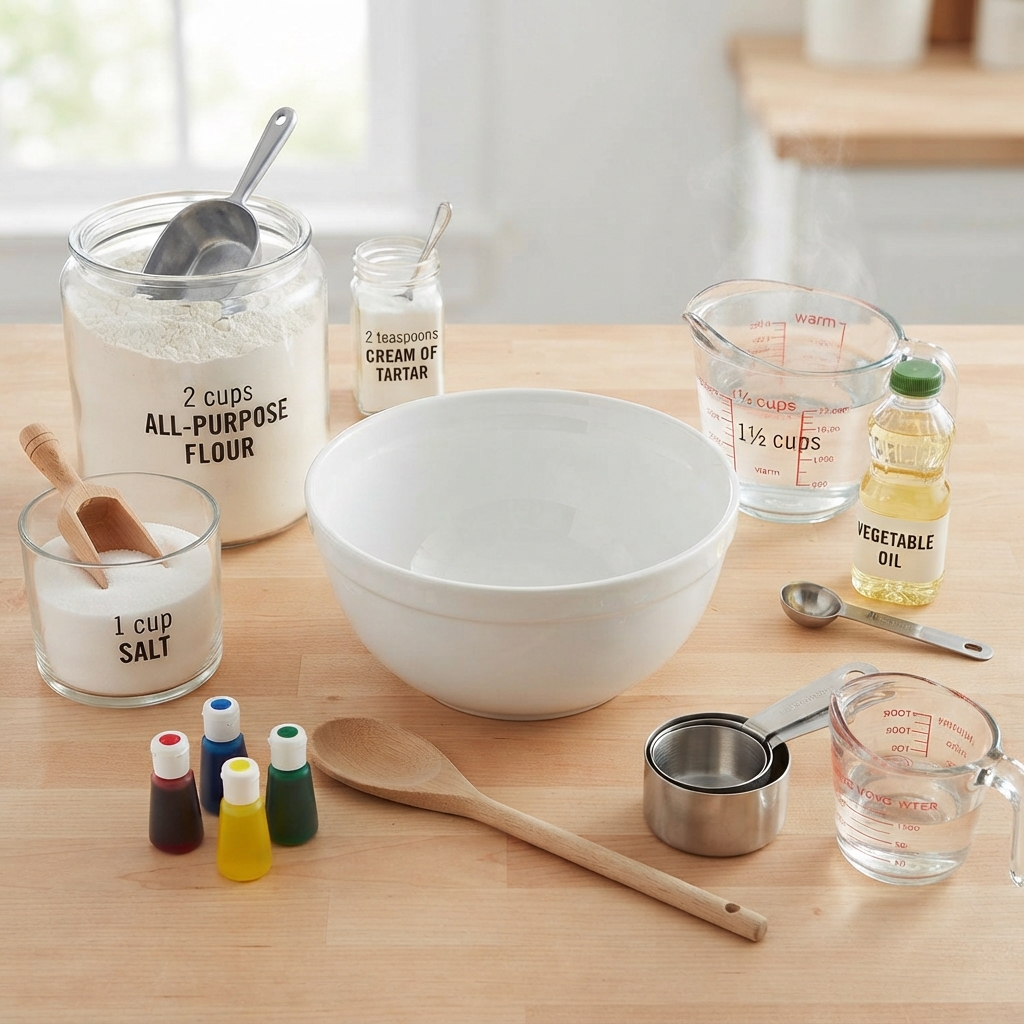
Making homemade play clay requires only a few common ingredients.
You will need:
- 2 cups all-purpose flour
- 1 cup salt
- 2 tablespoons vegetable oil
- 2 teaspoons cream of tartar (optional, for a smoother texture)
- 1½ cups warm water
- Food coloring
- Mixing bowl
- Spoon
- Measuring cups
Optional decorations include:
- Glitter
- Natural scents such as vanilla or peppermint
- Biodegradable confetti
Step 1: Mix the Dry Ingredients
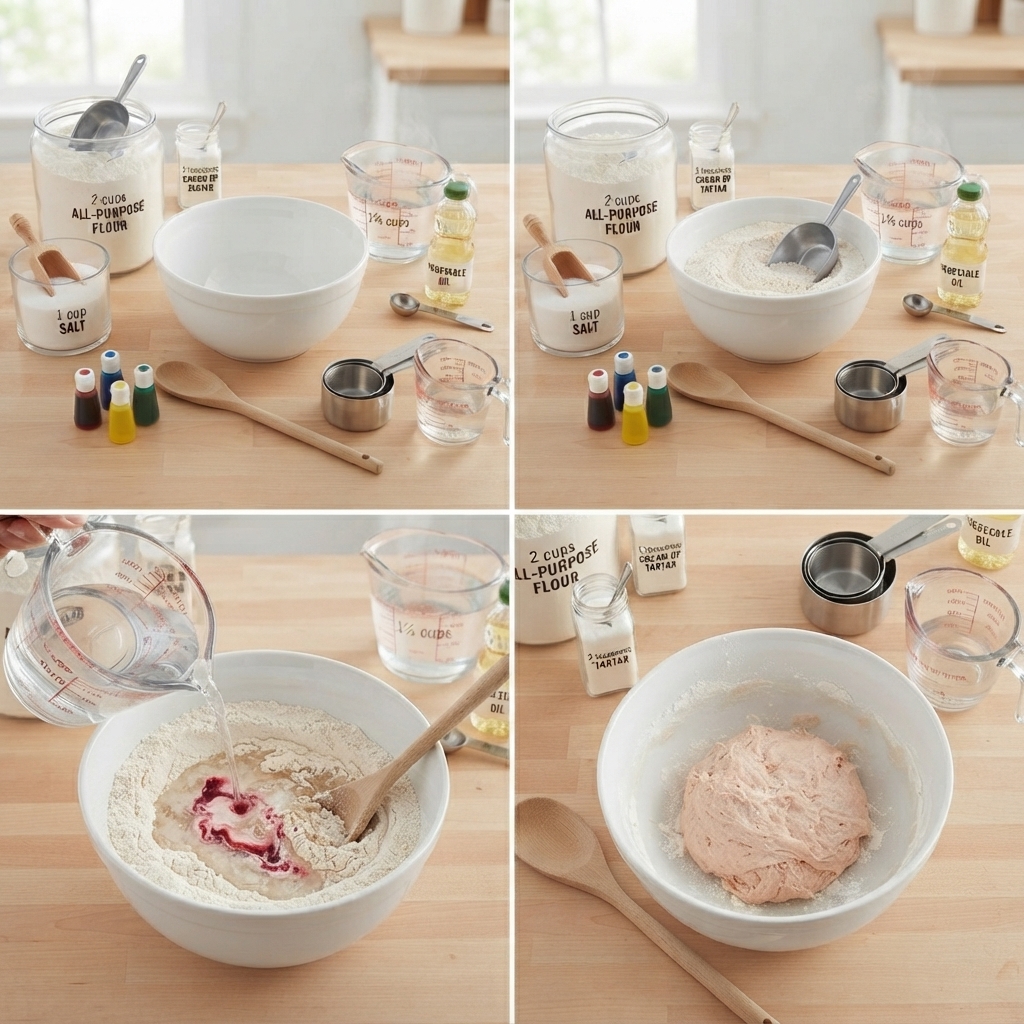
In a large bowl, combine the flour, salt, and cream of tartar.
Stir everything together until the ingredients are evenly mixed.
Step 2: Add the Wet Ingredients
Pour in the vegetable oil and warm water.
Mix thoroughly until the dough begins to come together.
Step 3: Add Color
Divide the dough into several portions.
Add a few drops of food coloring to each piece and knead until the color is evenly distributed.
Popular colors include:
- Red
- Orange
- Yellow
- Green
- Blue
- Purple
- Pink
Children enjoy choosing their favorite colors and even mixing new shades.
Step 4: Knead the Dough
Continue kneading each piece until it becomes soft, smooth, and stretchy.
If the dough feels sticky, add a little more flour.
If it feels dry, add a few drops of water.
Step 5: Start Creating
Now the fun begins!
Children can use cookie cutters, rolling pins, plastic knives, or simply their hands to shape the clay into amazing creations.
Creative Ideas for Play Clay
The possibilities are almost endless.
Children can make:
Friendly Animals
Create lions, elephants, turtles, butterflies, dogs, cats, and dinosaurs.
Garden Flowers
Roll colorful petals and green stems to build beautiful bouquets.
Fruits and Vegetables
Shape apples, bananas, strawberries, carrots, and pumpkins.
Pretend Food
Make pizzas, cupcakes, cookies, sandwiches, and ice cream cones.
Vehicles
Build cars, trains, airplanes, rockets, and boats.
Fantasy Creatures
Create dragons, unicorns, fairies, and magical monsters.
Educational Opportunities
Homemade play clay can support many learning activities.
Learning Colors
Children identify and mix different colors.
Counting Practice
Count clay balls, petals, or pretend cookies.
Shape Recognition
Practice circles, squares, triangles, hearts, and stars.
Letter Formation
Roll clay into letters and words.
Number Practice
Shape numbers and solve simple math problems.
Storytelling
Create characters and invent imaginative stories.
These activities combine creativity with early learning.
Classroom Activities
Teachers can use homemade play clay in many exciting ways.
Ideas include:
- Alphabet building
- Number games
- Animal modeling
- Seasonal crafts
- Science lessons about shapes
- Collaborative sculpture projects
- Storytelling stations
- Sensory play centers
The activity adapts easily to different ages and learning levels.
Safety Tips
Keep the activity enjoyable by following a few simple guidelines.
- Always use non-toxic food coloring.
- Supervise young children.
- Remind children that the clay is for play, not for eating.
- Wash hands before and after playing.
- Store the clay in airtight containers to keep it soft.
Proper storage helps the play clay last for several weeks.
Fun Variations
Children love experimenting with different types of homemade clay.
Try making:
- Glitter play clay
- Scented play clay
- Neon-colored clay
- Pastel clay
- Rainbow clay
- Marble-effect clay
- Nature-inspired clay using herbs or spices
- Holiday-themed clay in seasonal colors
Each variation offers a new sensory experience.
Displaying Clay Creations
Finished models can be displayed before being reused or recycled into new creations.
Children can:
- Build a miniature zoo
- Create a flower garden
- Design a pretend bakery
- Make a dinosaur world
- Build a small town
- Display their sculptures during classroom art shows
Sharing their work helps children feel proud of their achievements.
Tips for Success
Help children enjoy the best play clay experience by following these helpful suggestions.
- Prepare all ingredients before starting.
- Encourage creativity instead of perfection.
- Allow children to choose their own colors.
- Provide a variety of simple tools.
- Praise every unique creation.
- Make cleanup part of the activity to encourage responsibility.
Every creation is a reflection of a child’s imagination.
Conclusion
Making handmade play clay is a simple, affordable, and exciting project that children truly love. From mixing colorful dough to shaping imaginative creations, this activity combines art, sensory play, and educational learning in one enjoyable experience.
Whether children are building animals, flowers, pretend food, or magical creatures, homemade play clay encourages creativity, strengthens fine motor skills, and inspires hours of imaginative fun. With just a few everyday ingredients and a little imagination, families and teachers can create memorable learning experiences that children will enjoy again and again.
