
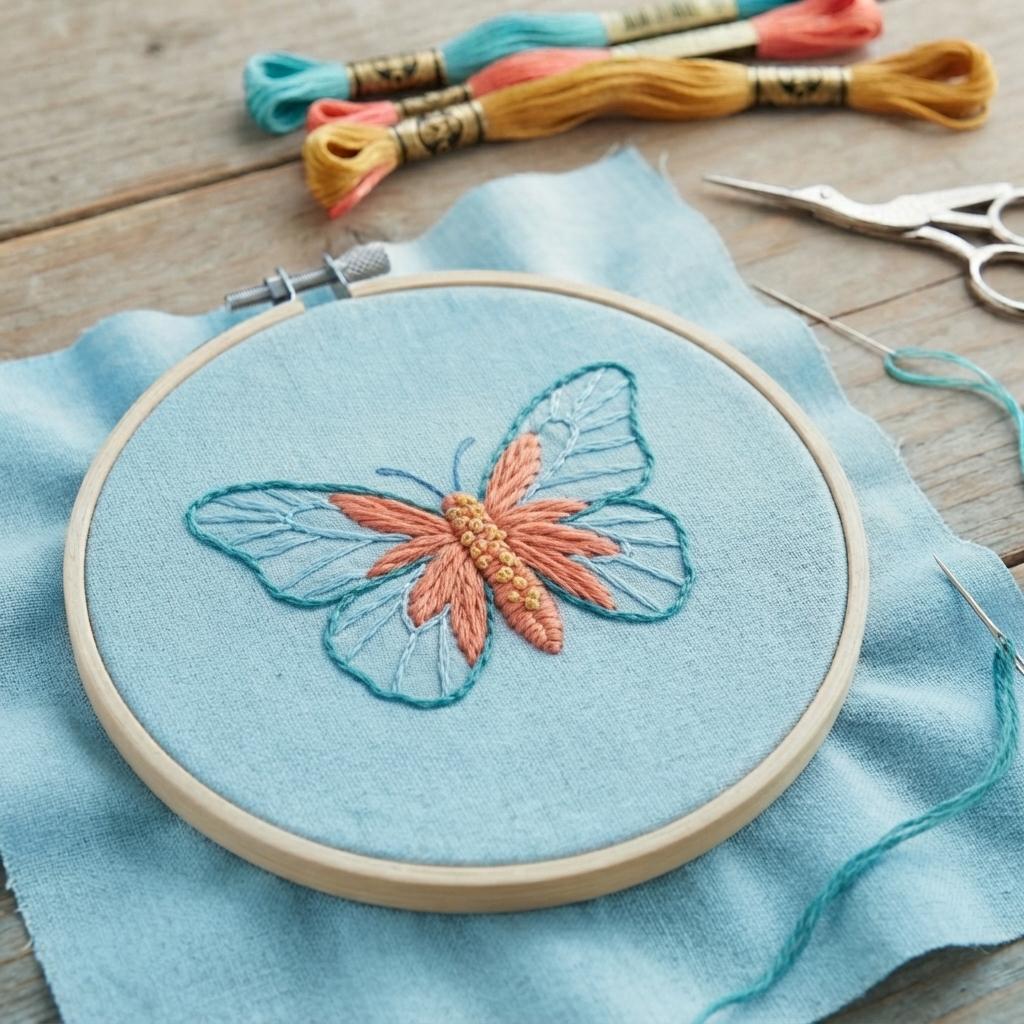
Embroidering a butterfly on fabric is a fun and creative project for beginners. Butterflies are made from simple shapes, curves, and colorful details, making them perfect for practicing basic embroidery stitches.
With a small piece of fabric, embroidery thread, a needle, and a few simple stitches, you can create a beautiful butterfly design by hand. The finished embroidery can be used to decorate clothing, bags, pillow covers, bookmarks, wall art, and handmade gifts.
This step-by-step guide explains how to draw and embroider a simple butterfly using beginner-friendly techniques.
Why Embroider a Butterfly?
A butterfly is an excellent design for learning embroidery because you can experiment with colors and different stitch styles.
This project helps you practice:
- Drawing simple embroidery patterns
- Threading a needle
- Making outlines
- Creating curved lines
- Filling small shapes
- Combining embroidery stitches
- Choosing colorful thread
- Adding decorative details
You can make your butterfly realistic, simple, geometric, or completely imaginative.
Materials You Will Need
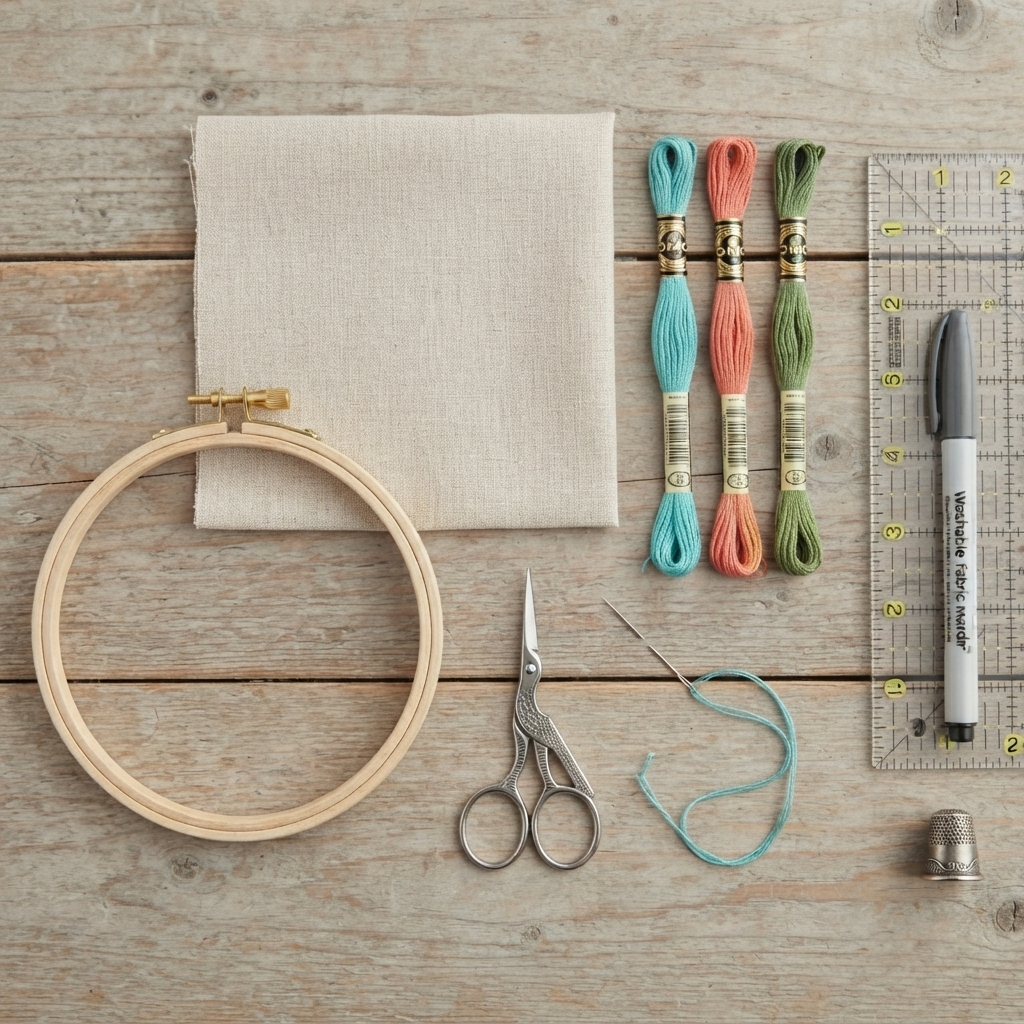
Gather these supplies:
- Cotton or linen fabric
- Embroidery needle
- Embroidery floss
- Small scissors
- Embroidery hoop
- Washable fabric marker or pencil
- Ruler
- Optional thimble
Medium-weight cotton is a good choice for beginners because it is stable and easy to stitch.
Choosing Butterfly Colors
One of the most enjoyable parts of butterfly embroidery is choosing the colors.
You can use traditional butterfly colors such as:
- Yellow
- Orange
- Blue
- Purple
- Pink
- Red
You can also create a rainbow butterfly using several colors.
Choose a dark color for the outline and brighter colors for the wings if you want the design to stand out.
Step 1: Prepare the Fabric
Cut a piece of fabric large enough for your butterfly and leave some extra space around the design.
Place the fabric in an embroidery hoop.
Pull the fabric gently until it is smooth and slightly taut.
Do not stretch the fabric too tightly.
Step 2: Draw the Butterfly
Use a washable fabric marker or pencil to draw a simple butterfly.
Start by drawing a small body in the center.
Add two upper wings and two lower wings.
Keep the shapes simple and symmetrical.
You can also draw small patterns inside the wings, such as circles, lines, hearts, or dots.
Do not worry about making the butterfly perfectly symmetrical. Small differences can make a handmade design look charming.
Step 3: Thread the Needle
Cut approximately 40–50 centimeters of embroidery floss.
Separate the floss into individual strands if desired.
Use fewer strands for delicate details and more strands for bold lines and filled areas.
Thread the needle and tie a small knot at the end.
Step 4: Embroider the Butterfly Outline
Start with the butterfly’s body and outer wings.
Backstitch is an excellent choice for creating a clear outline.
Bring the needle up through the fabric.
Insert it back down a short distance away.
Bring it up again and continue following the drawn line.
Keep the stitches small, especially around curves.
Step 5: Stitch the Butterfly Body
Use a darker thread for the body.
You can create the body with:
- Backstitch
- Satin stitch
- Stem stitch
- Small running stitches
For a simple design, use backstitch to outline the body and fill the inside with short stitches.
Step 6: Add the Antennae
Use one or two strands of embroidery floss to create the antennae.
Backstitch works well for this detail.
Make the antennae slightly curved.
Because they are thin lines, use small stitches.
Step 7: Fill the Upper Wings
Choose a bright color for the upper wings.
Satin stitch is a good choice for filling small areas.
Make parallel stitches close together until the area is covered.
Follow the shape of the wing rather than stitching randomly.
For a simpler project, you can leave the wings unfilled and decorate them with outlines instead.
Step 8: Fill the Lower Wings
Choose another color for the lower wings.
Repeat the same technique.
You can use a different color to create contrast.
For example, try blue on the upper wings and purple on the lower wings.
A rainbow combination can also create a cheerful design.
Step 9: Add Wing Patterns
Now you can add decorative details to the butterfly wings.
Try using:
- French knots
- Running stitch
- Chain stitch
- Small circles
- Dots
- Curved lines
- Tiny flowers
- Hearts
Use contrasting colors so the details are easy to see.
Step 10: Add Chain Stitch Details
Chain stitch is useful for creating decorative curved lines.
Bring the needle up through the fabric.
Insert it near the starting point and bring it back up farther along the design.
Keep the working thread underneath the needle.
Pull gently to form a loop.
Continue creating connected loops along the wing pattern.
Step 11: Add French Knots
French knots are perfect for small dots and decorative accents.
Bring the needle to the front of the fabric.
Wrap the thread around the needle once or twice.
Insert the needle close to where it came up.
Pull gently to create a small knot.
Add several knots to the wings for a playful effect.
Step 12: Add the Butterfly Legs
If you want a more detailed butterfly, add six small legs.
Use a dark embroidery thread.
Backstitch works well for these fine lines.
Keep them small and simple.
Step 13: Finish the Embroidery
Look over the entire butterfly.
Check for loose threads or areas that need additional stitches.
When you are satisfied with the design, turn the fabric over.
Secure the thread with a small knot or several tiny securing stitches.
Trim the excess thread.
Remove the fabric from the hoop.
How to Make a Rainbow Butterfly
For a colorful project, use several shades of embroidery floss.
For example, you could use:
- Red
- Orange
- Yellow
- Green
- Blue
- Purple
Use different colors for sections of the wings.
You can also create a gradient by using light and dark versions of the same color.
This is especially fun for children’s craft projects.
Easy Butterfly Embroidery Stitches
Several beginner-friendly stitches work particularly well.
Backstitch
Great for outlines, antennae, legs, and body details.
Running Stitch
Useful for simple decorative lines.
Chain Stitch
Creates beautiful curved patterns and borders.
Satin Stitch
Ideal for filling small wing sections.
French Knots
Perfect for dots and tiny decorative details.
Butterfly Embroidery Project Ideas
Once you finish your butterfly, you can use it to decorate many things.
Try adding it to:
- Tote bags
- Pencil cases
- Fabric wallets
- Pillow covers
- Aprons
- Clothing
- Fabric bookmarks
- Handkerchiefs
- Wall decorations
- Handmade gifts
You can also embroider several butterflies together to create a garden scene.
Simple Butterfly Garden Design
For a larger project, draw several butterflies with flowers and leaves.
Use different colors for each butterfly.
Add green stems and leaves using stem stitch or backstitch.
Small French knots can represent flower centers.
This creates a cheerful garden scene that can be framed as handmade wall art.
Common Beginner Mistakes
Using Too Much Thread
Long pieces of thread can easily tangle.
Work with shorter lengths.
Pulling the Thread Too Tight
Excessive tension can cause the fabric to wrinkle.
Pull gently until each stitch lies flat.
Making the Pattern Too Detailed
Start with a simple butterfly.
Add more details after you become comfortable with basic stitches.
Using Large Stitches on Curves
Small stitches make curves smoother and easier to control.
Forgetting to Secure the Thread
Always secure the thread at the back when you finish a section.
Tips for Beautiful Butterfly Embroidery
Choose colors that work well together.
Keep your stitches relatively even.
Use small stitches around curves.
Follow the natural shape of the wings.
Experiment with different stitch types.
Do not worry if your butterfly is not perfectly symmetrical.
Hand embroidery is meant to have a personal, handmade appearance.
Final Thoughts
Embroidering a butterfly on fabric is a colorful and enjoyable project for beginners. It gives you the opportunity to practice several basic embroidery stitches while creating a beautiful design.
Start with a simple butterfly outline and use backstitch to define the shape. Then experiment with satin stitch, chain stitch, running stitch, and French knots to add colorful wing patterns.
Once you become comfortable with the technique, try making rainbow butterflies, butterfly gardens, personalized clothing, decorative bags, or handmade gifts. With a little patience and creativity, a simple piece of fabric can become a beautiful work of embroidered art.
