
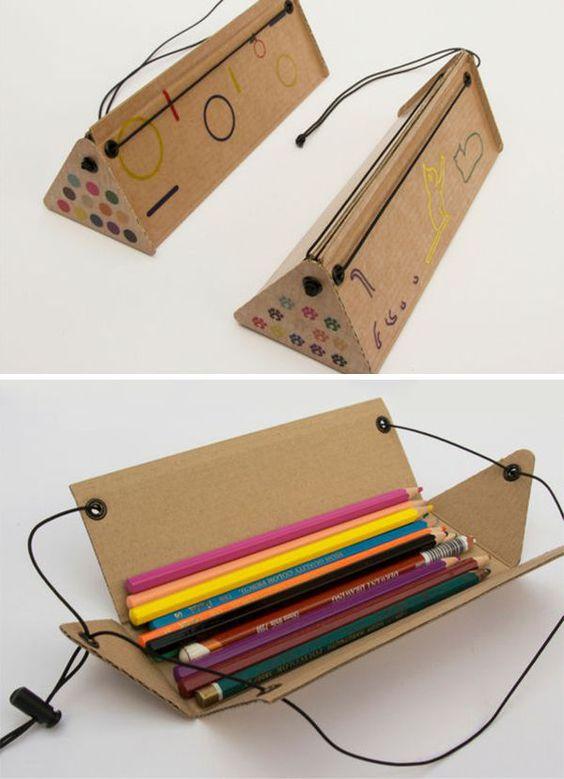
Making a school pencil case out of cardboard is a fun, creative, and eco-friendly craft that children will enjoy. Instead of buying a new pencil case, kids can transform ordinary cardboard into a colorful and practical organizer for their school supplies. This simple DIY project encourages creativity, improves fine motor skills, and teaches children the importance of recycling.
Whether you’re a teacher planning a classroom activity, a parent looking for a weekend craft, or a student who loves making handmade projects, this cardboard pencil case is easy to build and customize.
Why Make a Cardboard Pencil Case?
Creating a pencil case from cardboard offers many benefits for children.
This activity helps them:
- Develop creativity and imagination.
- Practice cutting, folding, and gluing.
- Improve fine motor skills.
- Learn about recycling and sustainability.
- Build confidence by creating something useful.
- Organize their school supplies in a handmade case.
Every finished pencil case is unique and reflects the child’s personal style.
Materials You’ll Need
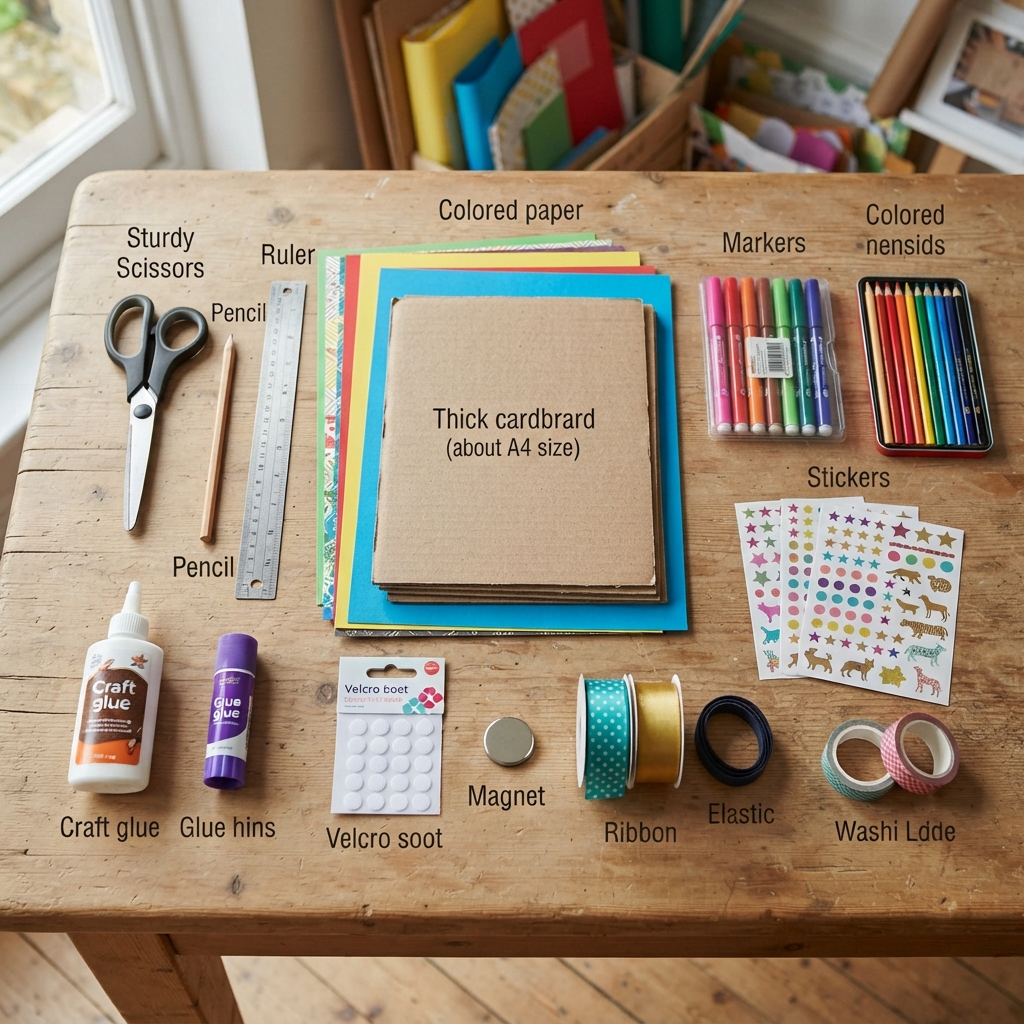
Gather these simple supplies before you begin:
- Thick cardboard
- Colored paper or cardstock
- Scissors
- Craft glue or a glue stick
- Pencil
- Ruler
- Markers or colored pencils
- Stickers
- Washi tape (optional)
- Velcro dots or a small magnet (optional)
- Ribbon or an elastic band for the closure
Most of these materials can be found at home or in a classroom.
Step 1: Draw the Template
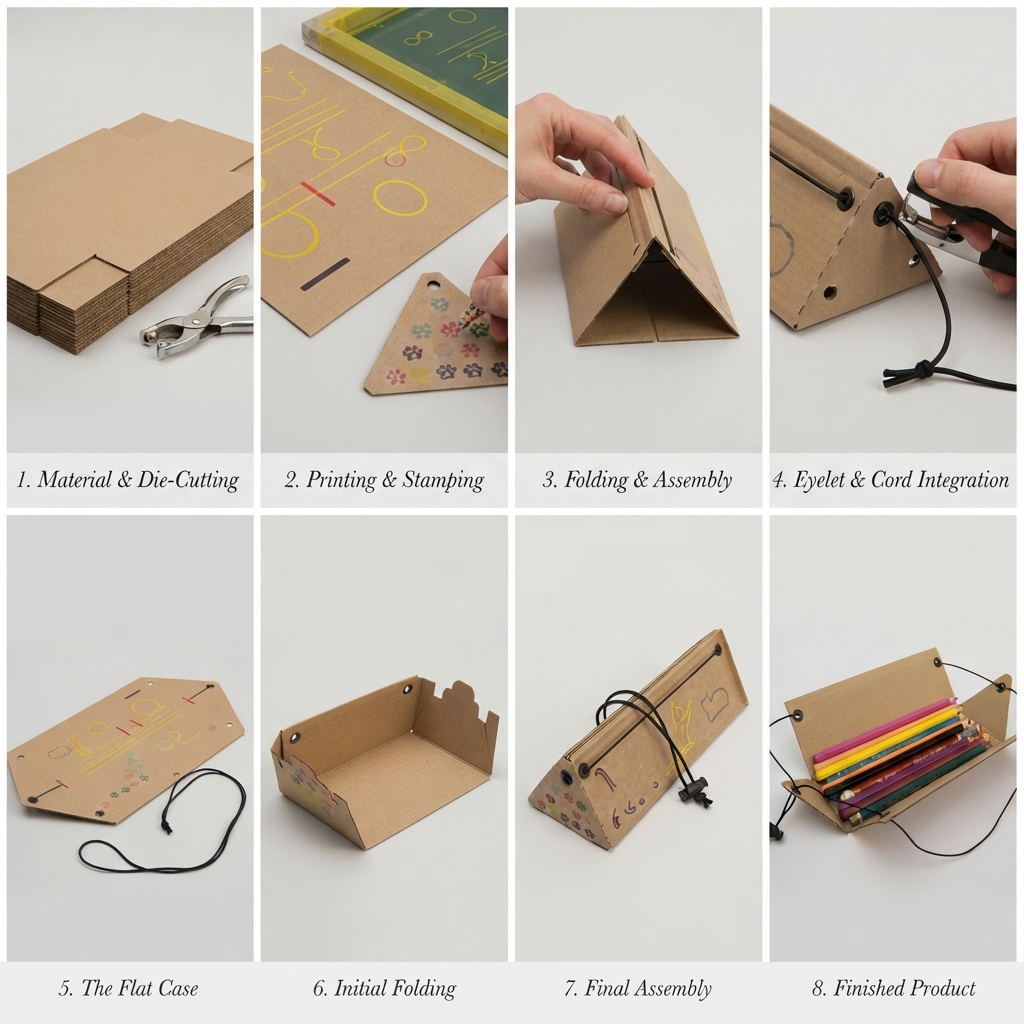
Use a ruler and pencil to draw the pieces of the pencil case on the cardboard.
You will need:
- One base
- Two side panels
- One front panel
- One back panel
- One lid
Measure carefully to ensure all the pieces fit together neatly.
Step 2: Cut Out the Pieces
Carefully cut along the lines using scissors.
Young children should ask an adult for help with this step if needed.
Clean cuts make the final pencil case stronger and easier to assemble.
Step 3: Assemble the Pencil Case
Glue the side panels to the base first.
Then attach:
- The front panel
- The back panel
- The lid
Hold each section in place for a few moments while the glue begins to dry.
Allow the entire pencil case to dry completely before decorating it.
Step 4: Cover with Colored Paper
Cover the outside of the cardboard with colorful paper.
You can choose:
- Solid colors
- Patterned scrapbook paper
- Wrapping paper
- Glitter paper
Smooth the paper carefully to remove wrinkles and bubbles.
Step 5: Add a Closure
A closure helps keep pencils and other supplies safely inside.
You can use:
- Velcro dots
- An elastic band
- A ribbon
- A button and string
- A small magnetic closure
Choose the option that is easiest for the child’s age and skill level.
Step 6: Decorate Your Pencil Case
Now it’s time to make your pencil case unique.
Decorate it with:
- Stickers
- Drawings
- Glitter
- Foam shapes
- Stars
- Hearts
- Flowers
- Animal designs
- Cartoon characters
Let children express their creativity and create their own special design.
Creative Design Ideas
Rainbow Pencil Case
Decorate with colorful rainbow stripes, fluffy clouds, and a smiling sun.
Animal Pencil Case
Turn the pencil case into a panda, fox, cat, owl, or bear.
Space Pencil Case
Add rockets, planets, astronauts, and sparkling stars.
Dinosaur Pencil Case
Decorate with dinosaurs, volcanoes, and prehistoric plants.
Flower Garden Pencil Case
Cover the case with flowers, butterflies, bees, and leaves.
Superhero Pencil Case
Use bold colors, lightning bolts, shields, and comic-style graphics.
Personalize Your Pencil Case
Make the project even more special by adding:
- Your name
- Your initials
- Your class
- Your favorite colors
- Inspirational words
- Fun drawings
Personal touches make every pencil case one of a kind.
Educational Benefits
This craft develops many valuable skills.
Children practice:
- Measuring
- Cutting
- Folding
- Gluing
- Planning
- Problem-solving
- Creative thinking
- Fine motor coordination
Craft activities also encourage patience and attention to detail.
Classroom Activity Idea
Teachers can organize a cardboard pencil case workshop during back-to-school season.
Each student creates and decorates a personalized pencil case. When finished, students can display their projects before using them to store pencils, markers, and erasers throughout the school year.
This activity encourages creativity while giving children a useful school accessory.
An Eco-Friendly Craft
This project teaches children how everyday materials can be reused instead of thrown away.
Old shipping boxes, cereal boxes, and other clean cardboard packaging can become beautiful pencil cases, helping reduce waste while encouraging sustainable habits.
Tips for Success
For the best results:
- Use sturdy cardboard.
- Measure carefully before cutting.
- Apply glue evenly.
- Allow enough drying time.
- Reinforce the corners for extra strength.
- Decorate after the glue has dried.
- Encourage children to create their own unique designs.
These simple tips will help create a durable and attractive pencil case.
Conclusion
Learning how to make a school pencil case out of cardboard is a fun and rewarding craft for children of all ages. Using simple materials and a little imagination, kids can create a practical school accessory while improving their creativity, fine motor skills, and understanding of recycling. Whether completed at home, in the classroom, or during a craft workshop, this eco-friendly project combines learning, creativity, and hands-on fun in one enjoyable activity.
