
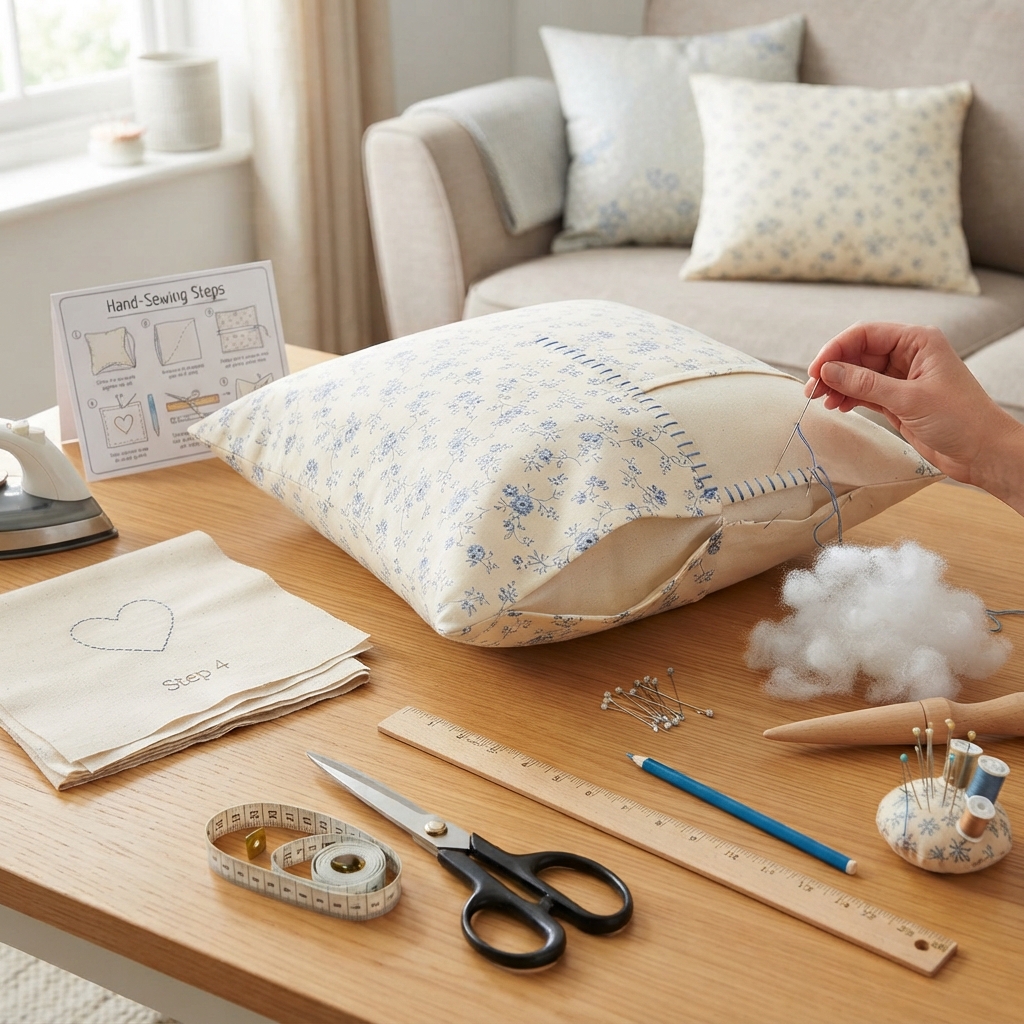
Learning how to sew a decorative pillow by hand is a fun and rewarding project for beginners. You do not need a sewing machine or advanced sewing skills to create a beautiful pillow for your bedroom, living room, nursery, or reading corner.
With a few pieces of fabric, a needle, thread, stuffing, and some patience, you can make a soft pillow that matches your personal style. You can also decorate it with embroidery, buttons, appliqué, ribbons, or colorful stitching.
This step-by-step guide explains how to make a simple decorative pillow completely by hand.
Why Make a Pillow by Hand?
A handmade pillow can add color and personality to any room.
It is also an excellent beginner sewing project because it helps you practice:
- Measuring fabric
- Cutting fabric
- Making seams
- Hand sewing
- Creating neat corners
- Adding stuffing
- Closing an opening
- Decorating fabric
You can choose almost any color or pattern, making each pillow unique.
Materials You Will Need
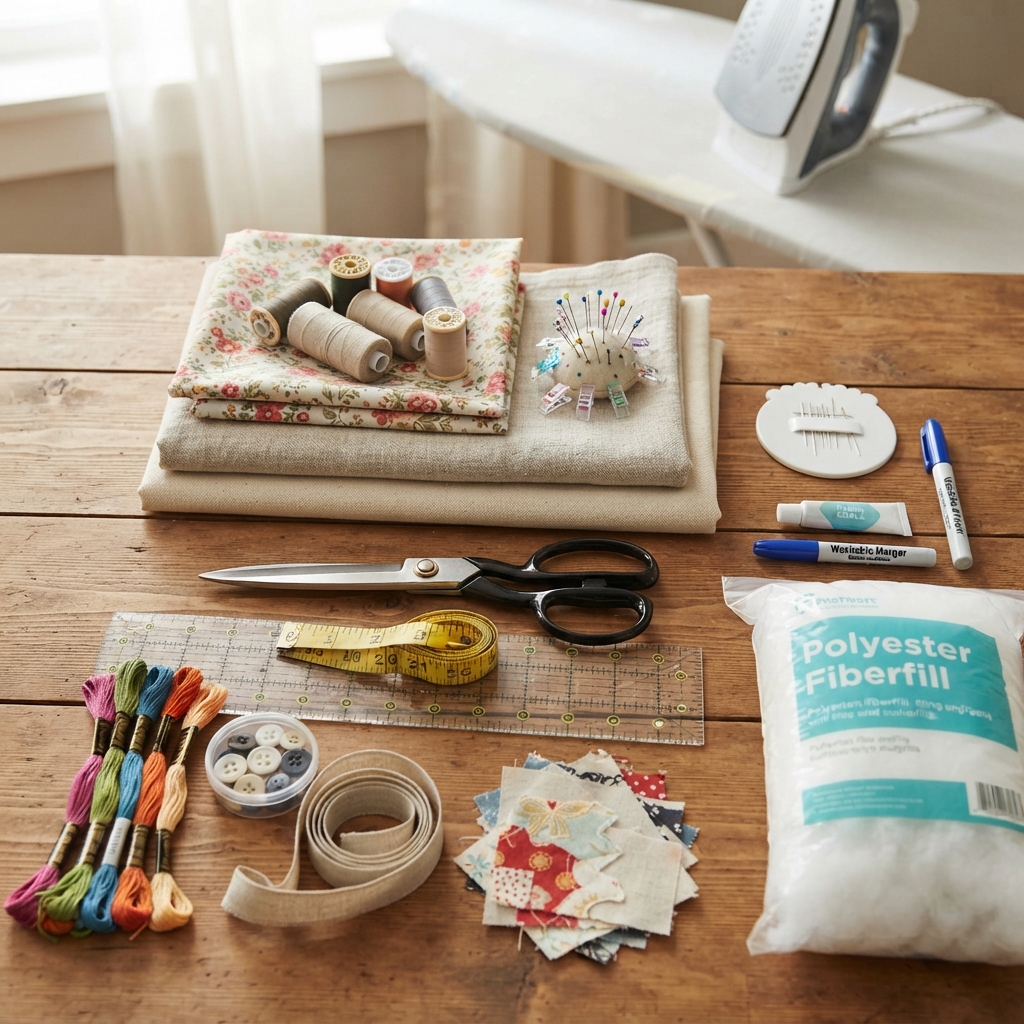
Gather these basic supplies:
- Cotton, linen, canvas, or another suitable fabric
- Sewing thread
- Hand-sewing needle
- Fabric scissors
- Measuring tape
- Ruler
- Fabric chalk or washable marker
- Straight pins or sewing clips
- Iron and ironing board
- Polyester fiberfill or suitable pillow stuffing
- Optional embroidery thread
- Optional buttons, ribbons, or appliqué fabric
For a first project, medium-weight cotton is an excellent choice because it is easy to cut and sew.
Step 1: Choose the Pillow Size
Decide how large you want your pillow to be.
A simple beginner pillow could measure approximately 40 × 40 centimeters when finished.
You can make a smaller pillow for a chair or a larger cushion for a sofa.
Remember to include extra fabric for the seam allowance when cutting.
Step 2: Cut Two Pieces of Fabric
Cut two identical squares of fabric.
For a 40 × 40 cm finished pillow, you might cut two pieces approximately 42 × 42 cm to allow for a 1 cm seam on each side.
Use a ruler to mark straight lines before cutting.
Check that both pieces are the same size.
Accurate cutting helps create a neat finished pillow.
Step 3: Prepare the Fabric
Wash the fabric first if appropriate for its care instructions.
Iron both pieces to remove wrinkles.
Place the fabric on a flat surface and check that the edges are straight.
If you plan to add embroidery or appliqué, decorate the front piece before sewing the pillow together.
Step 4: Add a Decorative Design
This step is optional, but it is a great way to personalize your pillow.
You can decorate the front piece with:
- Flowers
- Hearts
- Stars
- Butterflies
- Leaves
- Initials
- Simple geometric patterns
Try using running stitch, chain stitch, blanket stitch, or other beginner-friendly embroidery techniques.
You can also attach felt shapes or fabric appliqué.
Step 5: Place the Fabric Together
Put the two fabric pieces together with their right sides facing each other.
The decorative side should be facing inward at this stage.
Align all four edges.
Secure the pieces with pins or sewing clips.
Leave an opening of approximately 10–15 centimeters along one side.
This opening will allow you to turn the pillow right side out and add the stuffing.
Step 6: Start Sewing
Thread your needle with approximately 40–50 centimeters of strong thread.
Tie a small knot at the end.
Start near one end of the opening.
For the main seams, use a strong stitch such as backstitch.
Make small, even stitches along the seam line.
Try to keep the seam allowance consistent.
Step 7: Sew Around the Pillow
Continue sewing along the first side.
Turn the fabric carefully at the corner and continue along the next side.
Repeat around the remaining sides.
Remember to leave the planned opening unsewn.
Reinforce the stitches at both ends of the opening so they do not come loose.
Step 8: Sew Neat Corners
Corners can make a handmade pillow look much more professional.
When approaching a corner, sew carefully and keep the seam straight.
After sewing, you can trim a small amount of excess fabric from the corner, being careful not to cut the stitches.
This reduces bulk when you turn the pillow right side out.
Step 9: Turn the Pillow Right Side Out
Carefully turn the pillow cover through the opening.
Use your fingers to gently push the corners outward.
You can use a blunt-ended tool to help shape the corners, but avoid sharp objects that could puncture the fabric.
Press the cover lightly with an iron if appropriate for the fabric.
Step 10: Add the Stuffing
Begin filling the pillow with polyester fiberfill.
Add small amounts at a time.
Push the stuffing into the corners first.
Then gradually fill the center.
Do not overfill the pillow because excessive stuffing can make the seams stretch.
Continue adding stuffing until the pillow reaches your preferred firmness.
Step 11: Close the Opening
Once the pillow is filled, fold the raw edges of the opening inward.
Press the fold if needed.
Use a slip stitch or ladder stitch to close the opening neatly.
Make small stitches and keep them close together.
When you reach the end, secure the thread with a small knot and hide the thread inside the pillow if possible.
Step 12: Shape the Pillow
Gently squeeze and shape the pillow.
Move the stuffing around until it is distributed evenly.
Check the corners and edges.
If one area feels too empty, add a little more stuffing before completely closing the opening.
Decorative Ideas for Your Pillow
Once you understand the basic construction, you can experiment with different decorations.
Embroidery
Add simple embroidered flowers, leaves, hearts, stars, or initials.
Buttons
Sew decorative buttons onto the front of the pillow.
Make sure buttons are securely attached, especially if the pillow may be used around young children.
Appliqué
Cut shapes from felt or fabric and sew them onto the pillow using blanket stitch or another decorative stitch.
Ribbons
Add ribbons around the edges or create small bows.
Patchwork
Combine several fabric pieces to create a colorful patchwork pillow.
Choosing the Right Fabric
Different fabrics create different styles.
Cotton
Cotton is easy to sew and comes in many colors and patterns.
Linen
Linen creates a natural, elegant appearance.
Canvas
Canvas makes a sturdy decorative cushion and works well for more structured designs.
Velvet
Velvet can create a luxurious appearance, although it can be more challenging for beginners to handle.
For your first project, cotton is usually the easiest option.
Tips for Better Hand Sewing
Use a sharp needle suitable for your fabric.
Choose strong thread for the main seams.
Keep stitches small and consistent.
Do not pull the thread too tightly.
Press the fabric before sewing.
Measure twice before cutting.
Practice your chosen stitches on scrap fabric before working on the finished pillow.
Common Beginner Mistakes
Forgetting the Seam Allowance
Remember to leave extra fabric around the edges when cutting.
Sewing the Opening Closed Too Early
Leave enough space to turn the pillow and add stuffing.
Overfilling the Pillow
Too much stuffing can put pressure on the seams.
Uneven Corners
Take your time when sewing around corners.
Using Weak Stitches
The main seams need to be strong enough to hold the stuffing inside.
Easy Pillow Variations
Once you have made a basic pillow, you can try different designs.
Heart-Shaped Pillow
Cut two heart-shaped pieces and sew them together.
Star Pillow
Create a star template and use it to cut the fabric.
Animal Pillow
Make a simple cat, bear, fish, or butterfly shape.
Personalized Pillow
Add a name or initials using embroidery.
Seasonal Pillow
Use colors and decorations for holidays, birthdays, or different seasons.
A Simple Project for Beginners
If this is your first time sewing a pillow, start with a square design.
A square pillow has straight edges and simple corners, making it easier to learn the basic techniques.
Once you are comfortable with the process, experiment with circles, hearts, stars, animals, and other shapes.
Final Thoughts
Sewing a decorative pillow by hand is an enjoyable project that allows beginners to practice important sewing skills while creating something useful for the home.
Start with medium-weight cotton, a simple square shape, and strong hand stitches. Take your time when measuring, cutting, sewing, and stuffing the pillow.
As your skills improve, add embroidery, appliqué, buttons, ribbons, or colorful fabrics to make your pillows unique.
With a little patience and creativity, you can turn simple pieces of fabric into beautiful handmade cushions that add warmth and personality to any room.
