
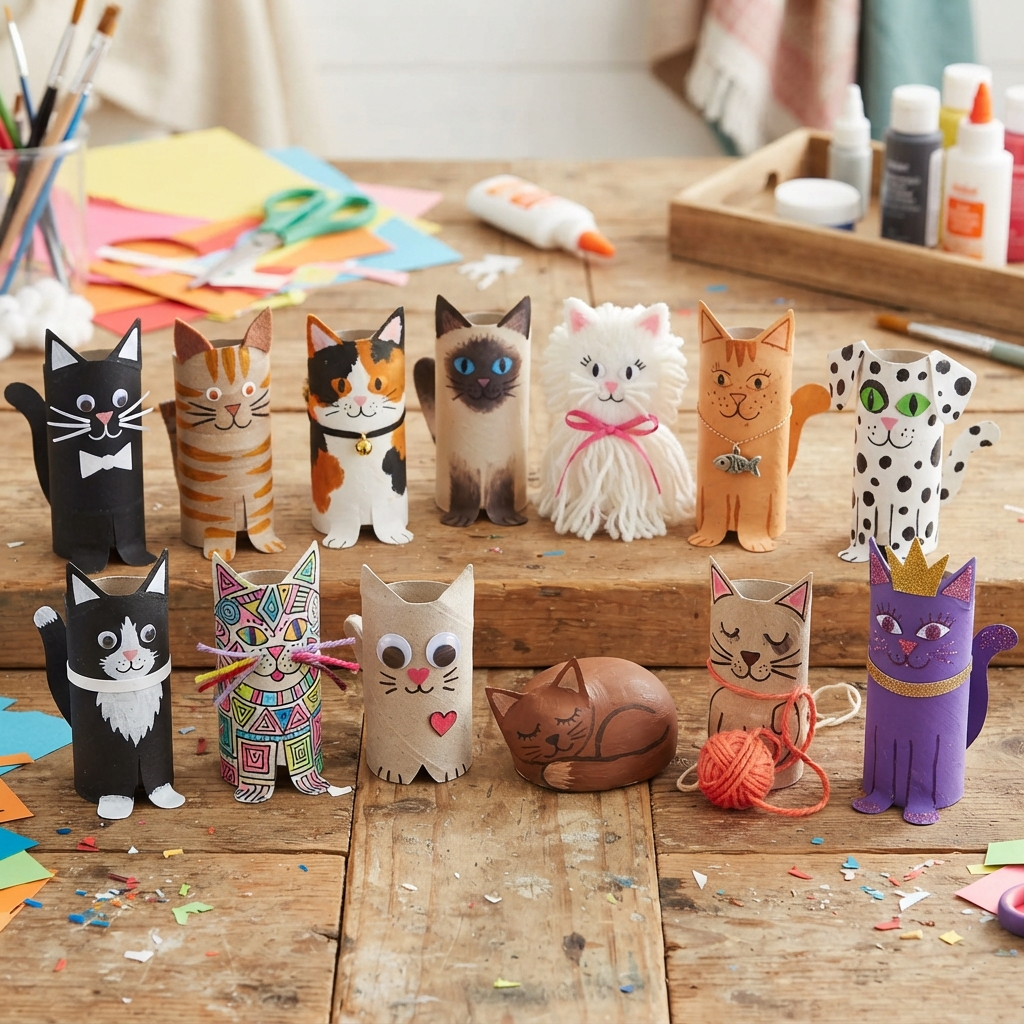
Paper rolls are one of the simplest materials to transform into adorable crafts. Instead of throwing away empty toilet paper rolls or paper towel tubes, you can turn them into cute cats with just a few basic supplies. These projects are inexpensive, creative, and perfect for children, families, classrooms, and anyone who enjoys making handmade decorations.
Cats are especially fun to make because their recognizable features—pointed ears, whiskers, tails, paws, and expressive faces—can be created using simple shapes. With paper, paint, markers, glue, and a little imagination, an ordinary cardboard tube can quickly become a colorful cat character.
In this article, you will discover 13 brilliant and easy-to-make paper roll cat crafts. Each idea has its own personality, from a classic black cat to a playful kitten, a sleepy cat, and even a cat pencil holder. Most projects can be completed with materials you probably already have at home.
Why Make Cats from Paper Rolls?
Paper roll crafts offer several benefits. First, they are affordable because the main material is something that would normally be recycled or thrown away. Second, the cylindrical shape of a paper roll already provides a perfect body for a standing cat.
These crafts are also excellent for developing children’s creativity and fine motor skills. Cutting, folding, gluing, drawing, and decorating require concentration and hand coordination. Children can also experiment with colors and patterns while creating their own imaginary cats.
Paper roll cats are useful beyond simple crafts. Finished creations can become toys, classroom decorations, party decorations, pencil holders, or small handmade gifts.
Before beginning, gather some empty paper rolls, colored paper, scissors, glue, markers, paint, pencils, and optional decorative materials such as yarn, buttons, stickers, or pom-poms.
1. Classic Paper Roll Cat
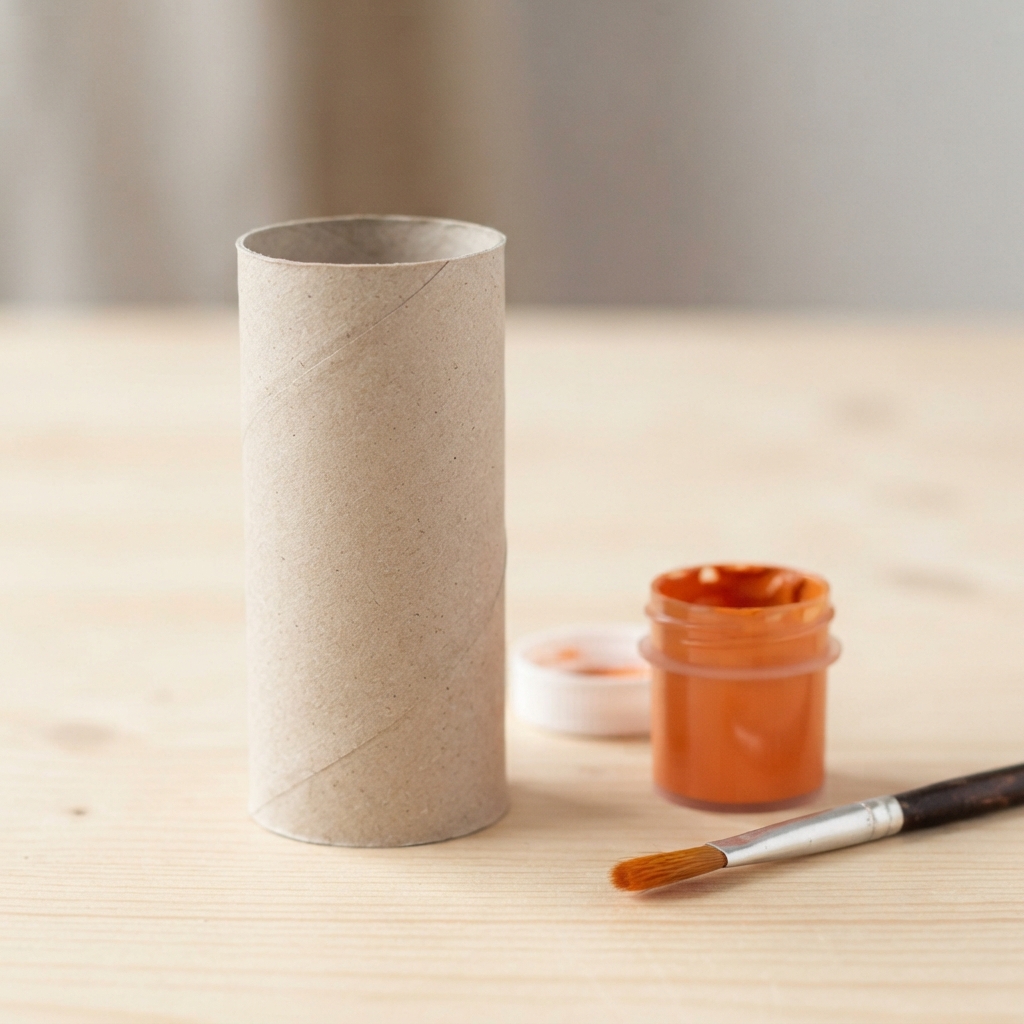
The classic paper roll cat is the perfect project for beginners. Start by covering a cardboard roll with colored paper or painting it in your favorite color.
To create the ears, cut two small triangles from paper and glue them to the top of the roll. Draw two eyes, a small triangular nose, a smiling mouth, and several whiskers.
Add two paper paws near the bottom and attach a long paper or yarn tail at the back. You can make the cat orange, gray, white, brown, black, or any color you like.
This simple design is ideal for young children because it does not require complicated cutting or special materials.
2. Cute Black Cat
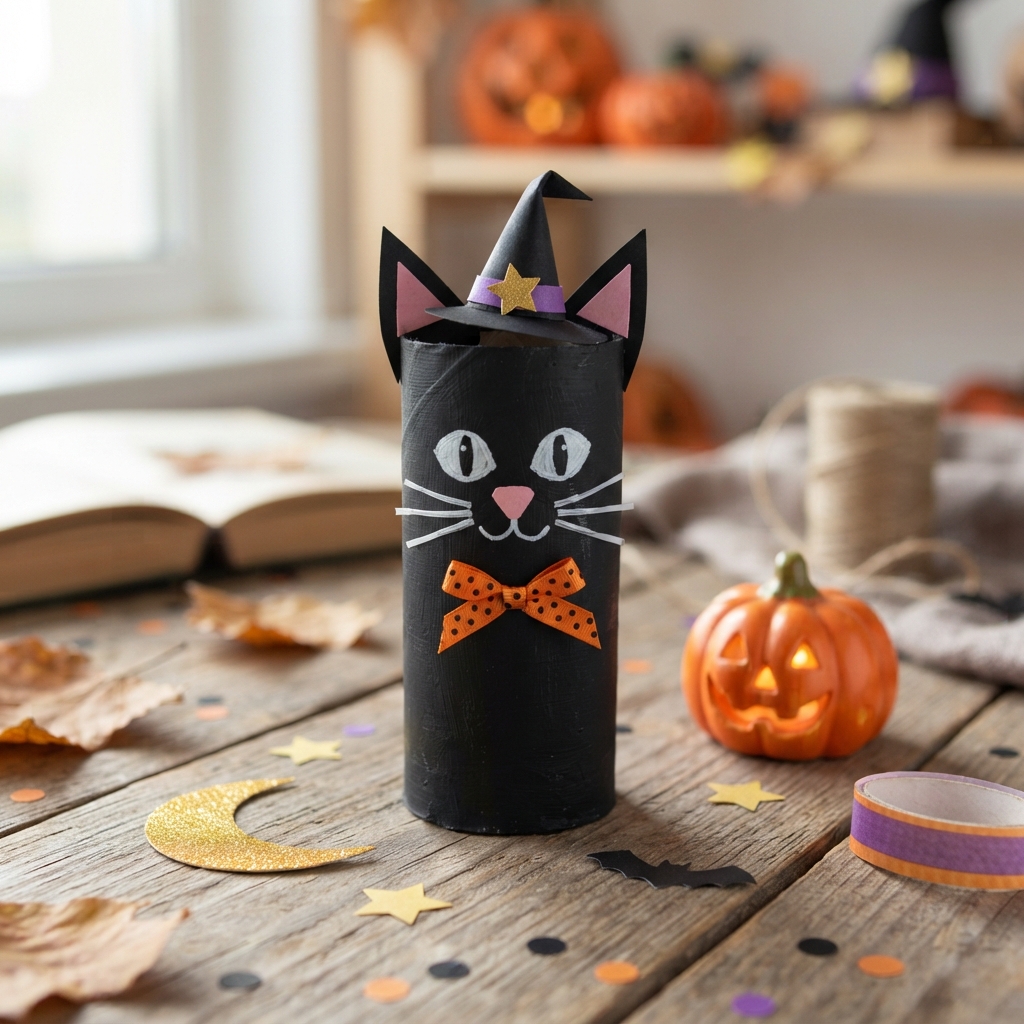
A black cat made from a paper roll is perfect for Halloween or everyday decoration. Paint the cardboard tube black and let it dry completely.
Cut two pointed ears from black paper and add smaller colored triangles inside them. Glue on large white eyes or draw them with a white marker.
Use white paper or a white gel pen to create the whiskers. A small pink or orange nose adds a charming contrast.
For a Halloween version, place a tiny paper witch hat on the cat’s head. You can also add a small moon, stars, or pumpkins around the cat to create a festive display.
3. Colorful Rainbow Cat
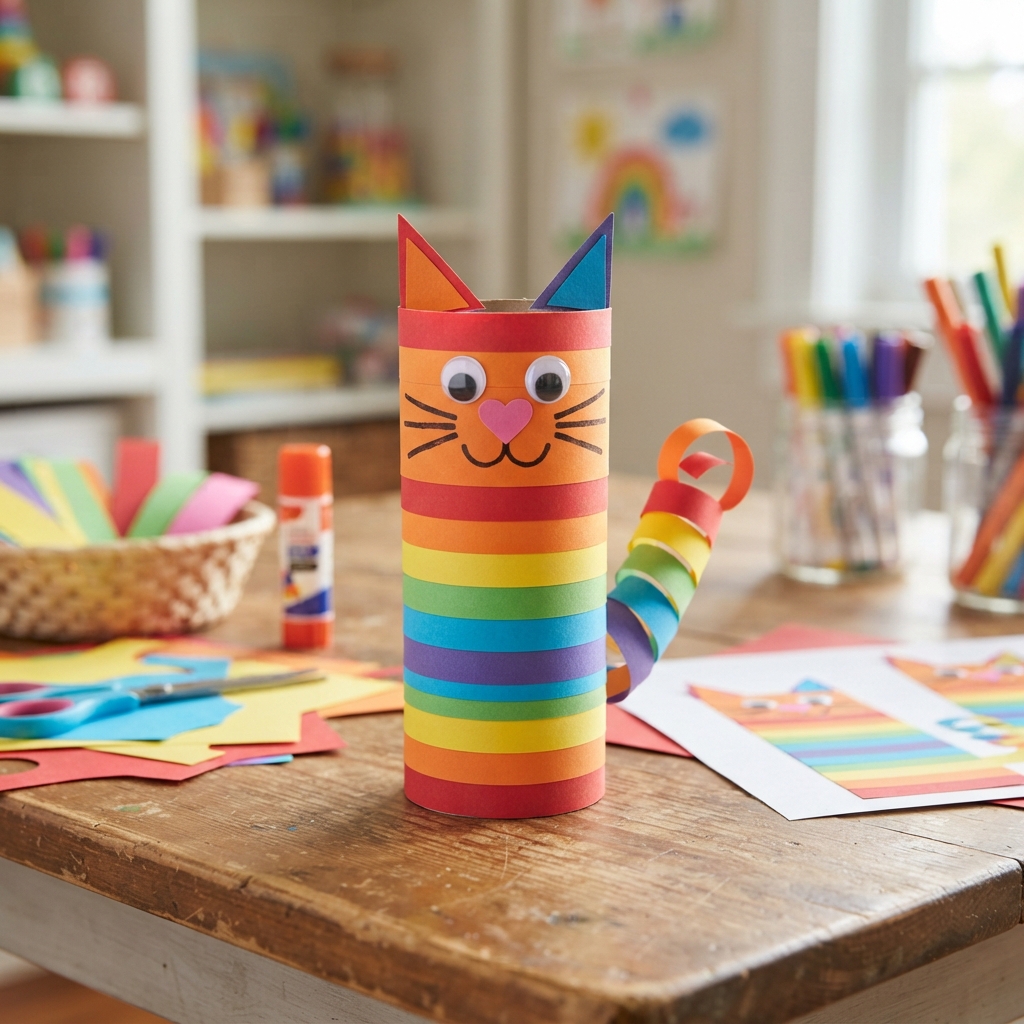
Why settle for one color when you can make a rainbow cat? Cover the paper roll with strips of brightly colored paper.
Use red, orange, yellow, green, blue, and purple strips to create a cheerful pattern. You can arrange them horizontally, vertically, or diagonally.
Add ears, eyes, a nose, whiskers, and a curly tail. Children can choose their own color combinations, making every rainbow cat unique.
This project is especially useful for teaching children about colors while encouraging them to experiment with patterns.
4. Sleeping Cat
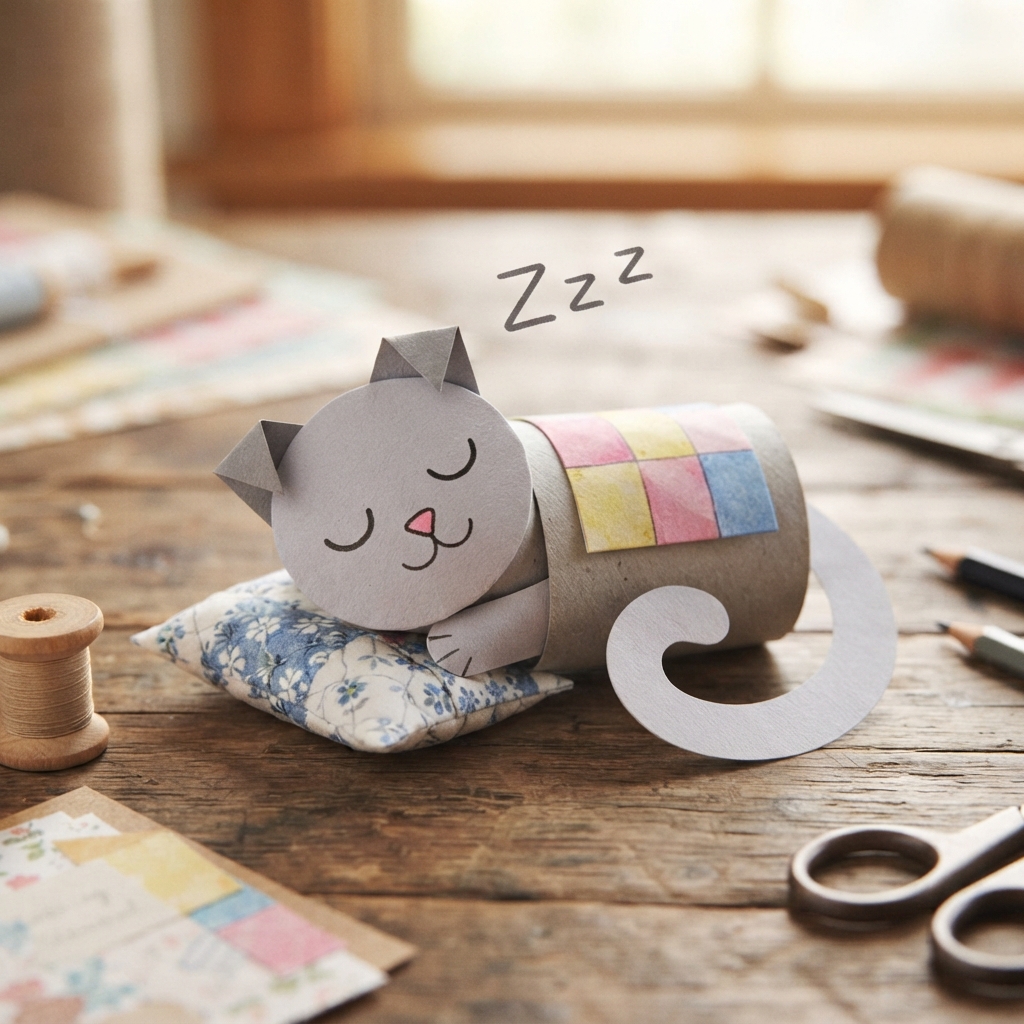
A sleeping cat is one of the easiest and cutest designs to create. Cover the paper roll with a soft color such as light gray, cream, pink, or blue.
Instead of drawing open eyes, make two curved lines to represent closed eyes. Add a tiny nose and a peaceful smile.
Create small folded ears and attach a curled tail to the side. For an extra-cute effect, make a tiny paper blanket or pillow and place the cat next to it.
You can also write “Zzz” above the cat to make it look as if it is dreaming.
5. Striped Tabby Cat
Create a traditional tabby cat using a paper roll and simple paper strips. Begin with a gray, brown, cream, or orange base.
Cut several narrow strips of darker paper and glue them around the body. Add additional stripes to the forehead and tail.
Draw large eyes, a small nose, and several whiskers. The stripes can be straight, curved, thick, or thin.
This craft is a great opportunity for children to observe real cats and recreate their patterns using paper.
6. Paper Roll Cat Pencil Holder
Turn your cat craft into something useful by making a pencil holder. Choose a sturdy cardboard tube and decorate the outside as a cat.
Paint or cover the tube, then add ears, eyes, whiskers, and a nose. Keep the bottom open or attach a circular piece of cardboard to create a closed base.
Once finished, the cat can hold pencils, crayons, colored markers, or paintbrushes.
This is an excellent school craft because children can create a useful desk accessory while practicing their crafting skills. Make several cats in different colors to organize different types of stationery.
7. Fluffy Cat with Yarn
For a cat with extra texture, combine a paper roll with yarn. Cover the cardboard tube with glue and carefully wrap yarn around it.
You can use white yarn for a fluffy white cat, gray yarn for a soft gray kitten, or several colors for a playful design.
Once the body is covered, add paper ears, eyes, a nose, and whiskers. Use a small piece of yarn to create the tail.
This project introduces children to different textures and materials. It can also become a fun sensory craft.
8. Paper Roll Kitten Family
Instead of making just one cat, create an entire kitten family. Use several paper rolls and decorate each one differently.
Make a large cat for the parent and smaller cats for the kittens. Give each character a different color, pattern, and facial expression.
You might create a mother cat, father cat, and three playful kittens. Children can invent names and personalities for each character.
The finished family can be displayed on a shelf or used for storytelling and imaginative play.
9. Funny Cat with Big Eyes
For a humorous craft, create a cat with oversized eyes. Cover the roll with any color you like and attach two large circular eyes.
You can make the eyes googly, colorful, sleepy, surprised, or crossed for a funny expression.
Add a tiny nose, long whiskers, and oversized ears. A curled paper tail completes the character.
This project is particularly enjoyable because changing the facial features completely changes the personality of the cat. Children can make several funny cats and compare their expressions.
10. Cat with a Paper Crown
Turn an ordinary paper roll cat into a royal character by adding a crown.
Create the body using colored paper or paint. Add the usual cat features, then cut a small crown from yellow or gold paper.
Decorate the crown with colorful dots, stars, or tiny paper jewels. Attach it to the top of the cat’s head.
You can call the character the “King Cat” or “Queen Cat” and create a small royal family with several paper roll characters.
This craft is perfect for imaginative storytelling and pretend play.
11. Halloween Pumpkin Cat
Combine two fun themes by making a Halloween pumpkin cat.
Start with an orange or black paper roll. Create cat ears and add a spooky face. Then make a small pumpkin from orange paper and place it beside the cat.
You can add a tiny witch hat, a paper cape, bats, stars, or a miniature broom.
For a simpler version, decorate the cat with a pumpkin pattern using markers. This project makes a fun Halloween decoration for a classroom, bedroom, or party table.
12. Cat with a Long Curly Tail
Make the tail the main feature of this playful paper roll cat. Decorate the body in your favorite color and attach a long strip of paper to the back.
Curl the paper strip around a pencil before gluing it in place. When you remove the pencil, the paper will keep a fun spiral shape.
Add pointed ears, eyes, a nose, and whiskers. You can make the tail extremely long or create a small spiral tail.
This design teaches children how simple paper shapes can be transformed into interesting three-dimensional details.
13. Personalized Paper Roll Cat
The final idea is to let children design their own completely personalized cat. Instead of following a specific pattern, provide different craft supplies and let their imagination take over.
They can choose the cat’s color, eye shape, ear size, whisker length, tail style, and decorations. Add bows, paper flowers, stickers, buttons, yarn, glitter, or small paper accessories.
Children can even give their cats names and write a tiny story about them.
A personalized cat is particularly meaningful because there is no “wrong” design. Every creation becomes an original character.
Simple Materials You Can Use
Most paper roll cat crafts require only a few supplies:
- Empty toilet paper rolls or cardboard tubes
- Colored construction paper
- White paper
- Non-toxic paint
- Markers or crayons
- Child-safe scissors
- Glue
- Pencil
- Yarn
- Googly eyes
- Pom-poms
- Stickers
- Optional glitter and decorative materials
You do not need to buy everything. Recycled packaging, newspaper, magazines, fabric scraps, and leftover wrapping paper can also be useful.
Helpful Tips for Making Paper Roll Cats
Before starting, make sure the cardboard rolls are clean and dry. If children are participating, choose child-safe scissors and non-toxic glue or paint.
When making ears, try folding the top edges of the paper roll inward to create built-in ears. This technique can make the cat look three-dimensional without requiring extra cardboard.
For stronger decorations, allow painted surfaces to dry completely before adding paper pieces.
You can also create different facial expressions. Large round eyes can make a cat look surprised, while curved closed eyes can make it look sleepy. A wide smile creates a cheerful character.
If you want your cats to stand securely, attach a cardboard circle to the bottom. This is especially helpful when making pencil holders or larger decorations.
Turning the Craft into a Learning Activity
Paper roll cats can become more than an art project. Teachers and parents can use them as educational tools.
For example, children can count the cats, sort them by color, identify patterns, or practice describing each character. Older children can write short stories about their handmade cats.
You can also use the cats to introduce basic concepts such as recycling. Explain that cardboard rolls are reusable materials and that turning waste into crafts can reduce unnecessary waste.
Another fun activity is to make cats representing different emotions. One cat might look happy, another surprised, another sleepy, and another sad. Children can then discuss how facial expressions communicate feelings.
Conclusion
Making cats from paper rolls is a simple, inexpensive, and creative activity that can be enjoyed by children and adults alike. With just a cardboard tube and a few basic craft supplies, you can create an entire collection of charming cat characters.
The 13 paper roll cat ideas in this article offer plenty of inspiration. You can start with a classic cat, experiment with a rainbow design, create a sleepy kitten, make a useful pencil holder, or invent an entirely new character.
The best part is that these projects leave plenty of room for imagination. There is no need to make every cat look realistic. Different colors, patterns, expressions, accessories, and tails can transform the same basic paper roll into completely different characters.
So, before throwing away your next empty paper roll, save it for a craft project. Gather some paper, glue, markers, and paint, and start creating your own adorable paper roll cat collection. It is a fun way to recycle everyday materials while encouraging creativity, storytelling, and hands-on learning.
