

Making a small cardboard beehive is a simple, creative, and educational craft project that children and adults can enjoy. With a few inexpensive materials, you can transform ordinary cardboard into a charming little beehive decorated with bees, flowers, and colorful details. This project is perfect for school activities, nature-themed crafts, spring projects, classroom decorations, or simply a fun afternoon at home.
A cardboard beehive can also be a great way to teach children about bees and their important role in nature. While creating the craft, children can learn about honeybees, pollination, honey production, and the importance of protecting insects. The project encourages creativity while also introducing an interesting science topic.
In this article, you will learn how to make a small cardboard beehive step by step. You will also discover ideas for decorating it, making tiny cardboard bees, creating a miniature garden around the hive, and adapting the project for different ages.
Why Make a Cardboard Beehive?
Cardboard crafts are popular because they are inexpensive, accessible, and easy to customize. Most families already have cardboard boxes, cereal boxes, or packaging materials at home. Instead of throwing them away, you can reuse them to create something interesting.
A cardboard beehive is especially useful for children because it combines art and learning. Kids can practice cutting, folding, gluing, painting, and decorating while learning about the natural world.
The finished beehive can be used as a classroom decoration, a centerpiece for a nature project, or part of a larger display about insects. You can even make several small hives and create an entire cardboard bee garden.
Materials You Will Need
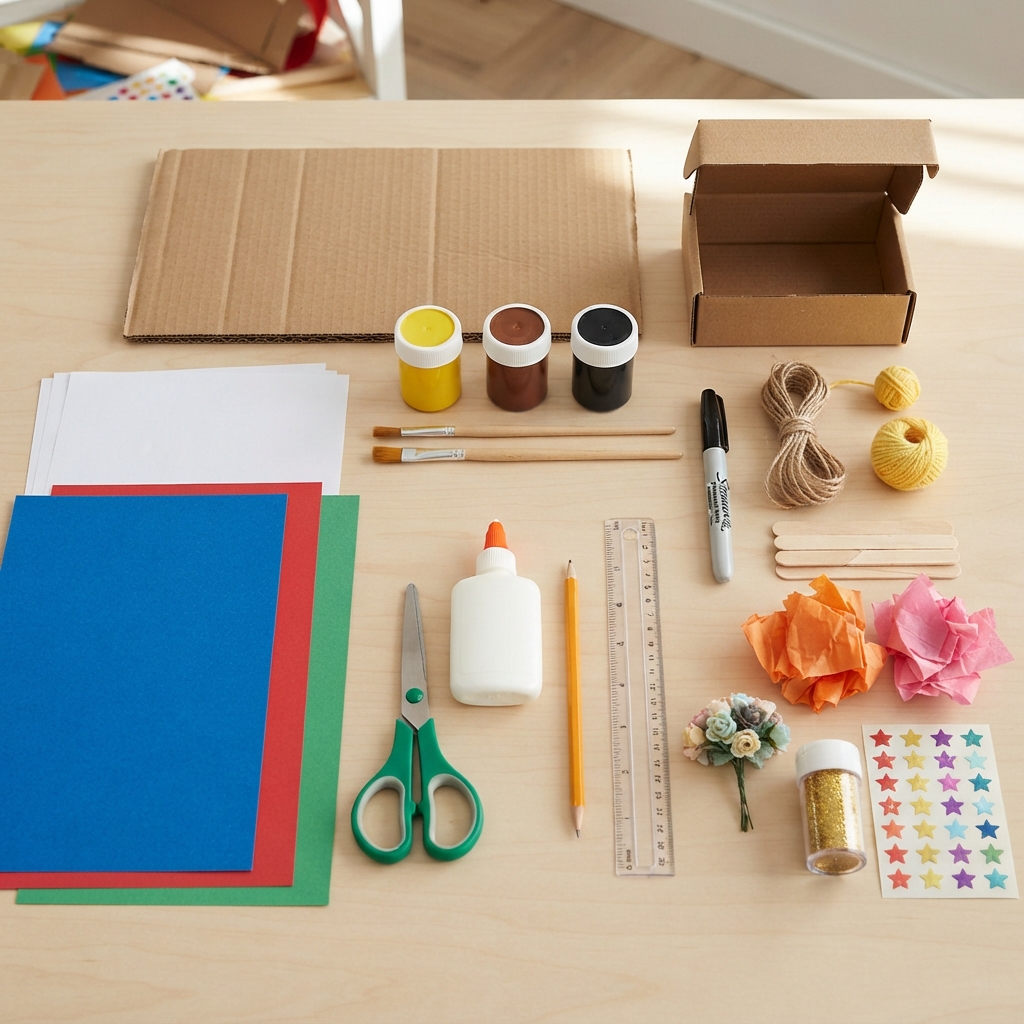
Before beginning the project, collect the materials you need. You do not have to use exactly the same supplies. Feel free to substitute materials based on what you already have.
Here are some useful materials:
- A piece of thick cardboard
- A small cardboard box or recycled packaging
- Yellow paint or yellow paper
- Brown or black paint
- White paper
- Colored paper
- Scissors
- Child-safe glue
- A pencil
- A ruler
- Paintbrushes
- Black marker
- String or yarn
- Optional craft sticks
- Optional tissue paper
- Optional small artificial flowers
- Optional glitter or stickers
For younger children, an adult should help with cutting thicker cardboard. Children can then concentrate on painting, gluing, and decorating.
Choosing the Right Cardboard

The type of cardboard you use depends on the size and shape of the beehive you want to make.
A cereal box is excellent for a lightweight craft. It can easily be cut, folded, and covered with paper. Thicker shipping-box cardboard is stronger and is useful if you want the beehive to stand independently.
For a very small beehive, you can use a cardboard toilet-paper roll as part of the structure. You can also combine several pieces of cardboard to create a more detailed model.
Before cutting, make sure the cardboard is clean and dry. Remove any loose tape or unnecessary labels.
Step 1: Design the Beehive
Start by deciding how large you want your beehive to be. A small hive can be approximately the size of a large cup, while a larger classroom model can be much bigger.
Draw the basic shape on your cardboard. A simple beehive can look like a rounded or slightly cone-shaped structure.
One easy method is to create a small cylinder from cardboard and add a curved roof. Another method is to use an existing small cardboard box and cover it with yellow paper.
You do not need a perfect shape. Handmade crafts often look more attractive when they have a little personality.
Step 2: Create the Main Structure
If you are using a cardboard box, you can keep it mostly intact and simply cover the outside.
If you are building the hive from flat cardboard, cut a rectangular piece for the body. Roll or fold it into a rounded shape and glue the edges together.
For the roof, cut a large circle from cardboard. Remove a small triangular section from the circle and bring the edges together. Glue them so that the piece forms a cone-like roof.
Place the roof on top of the main body. Make sure it fits securely.
Another simple option is to make the entire hive from a paper-covered cardboard cylinder and place a semicircular piece of cardboard on top.
Step 3: Cover the Hive
Once the cardboard structure is complete, cover it with yellow paper or paint it yellow.
Yellow is a traditional color for a bee-themed craft because it reminds us of honeybees. You can use bright yellow, golden yellow, or a softer natural shade.
If you use paint, apply a thin layer first and allow it to dry. Add a second layer if the cardboard is still visible.
If you prefer paper, measure the cardboard structure and cut a piece of yellow paper large enough to cover it. Glue the paper carefully around the hive.
Allow the glue or paint to dry before continuing.
Step 4: Add the Hive Stripes
Now it is time to give your cardboard beehive its distinctive appearance.
Use brown or black paper strips, paint, or a marker to create horizontal lines around the hive. The lines do not need to be perfectly straight.
If you are working with children, letting them draw the stripes themselves can make the activity more enjoyable. They can create thick stripes, thin stripes, wavy lines, or even colorful patterns.
For a more natural-looking hive, use different shades of brown and yellow rather than making every stripe identical.
Step 5: Make the Hive Entrance
A beehive needs an entrance where bees can enter and leave. You can create one easily with black paper or a black marker.
Cut a small black semicircle or oval and glue it near the bottom of the hive. Alternatively, draw the entrance directly onto the cardboard.
You can make the entrance slightly larger if you plan to place miniature cardboard bees around it.
For an educational project, you can add a small label saying “Bee Entrance.”
Step 6: Make Tiny Cardboard Bees
A beehive looks much more exciting when it has bees flying around it.
To make a simple cardboard bee, draw a small oval shape on yellow paper or thin cardboard. Cut it out and add two or three black stripes.
Draw tiny eyes and a smile with a black marker. Then cut two small wings from white paper.
Glue the wings onto the back of the bee.
You can make several bees in different sizes. Some can be placed on the hive, while others can hang from strings above it.
For a three-dimensional effect, bend the wings slightly upward before gluing them.
Step 7: Add Hanging Bees
Hanging bees are a fun way to make your craft look lively.
Cut several short pieces of string or yarn. Attach one end to a cardboard bee and the other end to the top of the hive.
Use different lengths of string so that the bees appear to be flying at different heights.
You can also hang bees from a cardboard cloud or a simple branch-shaped piece of cardboard.
This idea works especially well for classroom displays.
Step 8: Create Flowers Around the Hive
Bees need flowers, so creating a small garden around your cardboard beehive makes the model more realistic.
Cut flower shapes from colorful paper. You can make simple five-petal flowers using pink, red, purple, blue, or white paper.
For the centers, use small circles of yellow paper.
Attach the flowers to green paper stems or craft sticks. Arrange them around the bottom of the hive.
You can also make paper grass by cutting thin strips of green paper and folding them slightly upward.
This turns your small beehive into a miniature garden scene.
Step 9: Add Honeycomb Decorations
Honeycomb is one of the most recognizable features associated with bees.
To make a honeycomb pattern, draw several connected hexagons on yellow or golden paper. Carefully cut the pattern out and glue it onto the front of the hive.
You can also draw individual hexagons using a ruler and pencil.
For a raised effect, cut several individual hexagons from cardboard and glue them onto the hive. Paint them yellow or gold after the glue dries.
This gives the project more texture and makes it look more detailed.
Step 10: Make a Cardboard Honey Pot
Another fun addition is a miniature honey pot.
Cut a small jar or pot shape from cardboard. Cover it with yellow or brown paper and add a label such as “Honey.”
You can place the pot beside the beehive.
For a more decorative effect, add a small piece of yellow tissue paper over the top and secure it with string.
This helps children understand the connection between bees, honeycombs, and honey production.
Safety Tips for Children
Although this is a simple craft, children should still use materials safely.
Young children should have adult supervision when using scissors, especially when cutting thick cardboard. Use child-safe scissors whenever possible.
Glue should be used carefully, and children should avoid putting craft materials in their mouths.
If you use paint, choose washable, non-toxic children’s paint.
Keep small decorative pieces away from very young children because they can be choking hazards.
A good approach is for adults to prepare difficult cardboard pieces before the activity begins. Children can then enjoy the creative parts of the project.
Educational Benefits of the Craft
Making a cardboard beehive offers more than entertainment. It can help children develop several useful skills.
Cutting and gluing improve hand coordination. Drawing patterns encourages creativity. Measuring cardboard introduces basic mathematical concepts.
The project can also become a science lesson.
While making the hive, explain that bees collect nectar from flowers and help pollinate many plants. Children can learn that pollination is an important natural process that helps plants produce fruits and seeds.
You can discuss the different roles of bees in a colony and explain that honeybees live together in organized communities.
This makes the craft a wonderful combination of art, science, and environmental education.
Creative Ways to Customize the Beehive
There are many ways to make your cardboard beehive unique.
You can create a rainbow-colored hive using several shades of yellow, orange, and brown. You can also decorate it with small paper leaves, butterflies, ladybugs, and flowers.
For a classroom project, each child can make one bee and attach it to a large cardboard hive.
Another idea is to write positive messages on the bees, such as “Be Kind,” “Help Nature,” or “Protect Bees.”
For a spring craft, use bright flowers and green grass. For an autumn display, add paper leaves in orange, red, and brown.
You can even create a night-time beehive using dark blue paper and tiny paper stars.
Turning the Project Into a Nature Display
If you want to make a larger project, create an entire cardboard garden around your beehive.
Start with a large piece of cardboard as the base. Cover it with green paper to represent grass.
Place the beehive in the center. Add flowers, leaves, trees, butterflies, and bees around it.
You could also create a small sign saying “Welcome to the Bee Garden.”
This type of display can be used for a school science fair, classroom project, library decoration, or children’s nature exhibition.
Using Recycled Materials
One of the best things about this project is that it can be made mostly from recycled materials.
Old cereal boxes can become the hive. Packaging cardboard can become the bees and flowers. Used paper can be turned into decorations.
Small pieces of leftover yarn can become hanging strings.
Reusing materials teaches children that everyday objects can have a second life. Instead of throwing everything away, we can look for creative ways to transform unwanted materials into useful or decorative objects.
This makes the craft both enjoyable and environmentally friendly.
Common Mistakes to Avoid
One common mistake is using cardboard that is too thin for the main structure. If the hive keeps collapsing, reinforce the inside with extra cardboard.
Another problem can be applying too much glue. Excess glue can make paper wrinkled and take longer to dry. Use a small amount and spread it evenly.
Do not worry if your hive is not perfectly symmetrical. A handmade craft does not need to look like a factory-made object.
Finally, allow each layer of paint or glue to dry before adding more decorations. Working too quickly can cause pieces to move or fall off.
Ideas for Different Age Groups
Younger children can make a very simple version using a cardboard tube, yellow paper, black stripes, and a few paper bees.
Older children can create a more detailed structure with a roof, honeycomb pattern, flowers, hanging bees, and a miniature honey pot.
Teenagers can turn the activity into a larger science project by researching bee colonies, pollination, and environmental conservation.
Teachers can also divide students into groups. One group can build the hive, another can make bees, and another can create flowers and plants.
Together, the students can create a large collaborative bee habitat.
Conclusion
Making a small cardboard beehive is an easy and enjoyable craft that combines creativity, recycling, and learning. With simple materials such as cardboard, paper, paint, glue, and markers, you can create a colorful miniature hive decorated with bees, flowers, honeycombs, and other natural elements.
The project is flexible enough for different ages and skill levels. Beginners can make a basic hive with yellow and black stripes, while experienced crafters can build a detailed bee garden with hanging insects and three-dimensional decorations.
Most importantly, this activity provides an opportunity to talk about the fascinating world of bees. Children can learn why bees matter, how pollination works, and why protecting insects and their habitats is important.
Whether you make the project at home, in a classroom, or as part of a school exhibition, a small cardboard beehive can become much more than a simple craft. It can be a colorful reminder of creativity, nature, recycling, and the important little creatures that help our world grow.
