

Making a rotating flower from colored paper is a fun, simple, and creative craft project for children. It combines colorful paper, basic shapes, and a little movement to create a flower that can spin or rotate when gently touched or moved by air. This project is perfect for classrooms, children’s craft sessions, school holidays, rainy afternoons, birthday parties, and creative activities at home.
Flowers are naturally interesting to children because they come in many beautiful colors, shapes, and sizes. A paper flower allows children to explore these ideas without needing real plants or complicated materials. By adding a simple rotating mechanism, the craft becomes even more exciting. Instead of making an ordinary flat flower, children can create a moving decoration that appears to dance or spin.
The project is also inexpensive. Colored paper, cardboard, glue, scissors, and a simple fastener are usually enough. Children can choose their favorite colors and experiment with different petal shapes. They can make one flower or create an entire garden of colorful rotating flowers.
Why Make a Rotating Paper Flower?
A rotating flower is more than a pretty decoration. It gives children an opportunity to combine art with simple engineering.
When children cut and arrange the petals, they practice creativity and fine motor skills. When they attach the flower to a paper fastener or another simple rotating point, they begin to understand how movement and balance work.
The activity also encourages problem-solving. Children may discover that the flower does not rotate properly if the petals are too heavy or if the center is attached too tightly. They can make adjustments and try again.
The finished flower can be displayed on a desk, classroom bulletin board, bedroom wall, or craft table. It can also become part of a larger paper garden.
Materials You Will Need
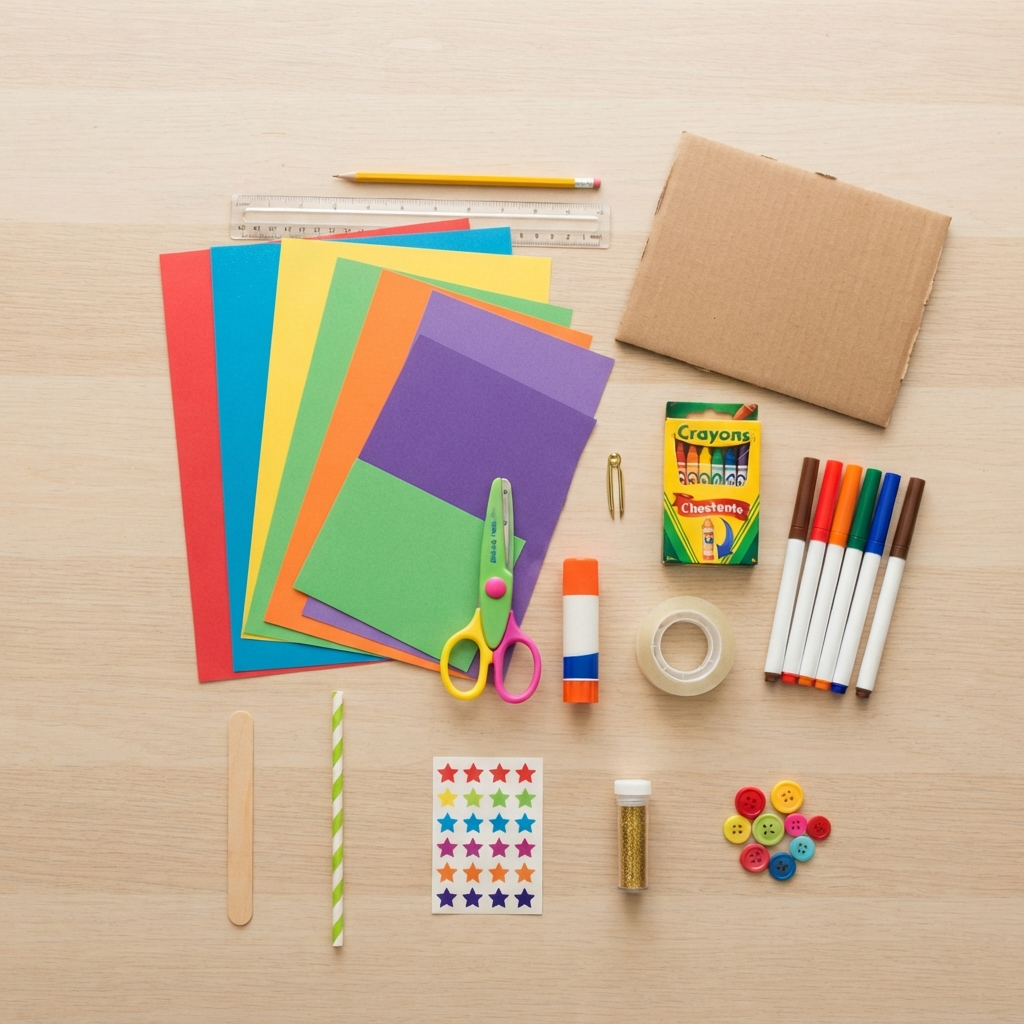
The materials for this project are simple and inexpensive.
You may need:
- Colored construction paper
- Cardboard
- Pencil
- Ruler
- Child-safe scissors
- Glue
- Tape
- Markers or crayons
- A paper fastener or split pin
- Optional wooden craft stick
- Optional straw
- Optional stickers
- Optional glitter
- Optional buttons or paper circles
Choose several colors for the petals, leaves, and center of the flower.
For an eco-friendly version, use clean cardboard from cereal boxes or packaging for the flower base.
Children should have adult supervision when using scissors or small craft materials.
Step 1: Choose Your Flower Colors
Before beginning, decide what colors you want to use.
You can make a traditional flower with red, yellow, pink, or purple petals. You can also create a fantasy flower using bright blue, green, orange, and pink.
Using two or three colors can create an attractive layered effect.
For example, you could use yellow petals with an orange center. Another option is to alternate pink and purple petals.
Encourage children to experiment with color combinations rather than trying to copy a real flower exactly.
Step 2: Draw the Petals
Place a piece of colored paper on a flat surface.
Draw several petal shapes with a pencil.
The petals can be round, pointed, oval, heart-shaped, or teardrop-shaped.
Try to make the petals approximately the same size so that the finished flower stays balanced.
For a simple flower, prepare six to eight petals.
Older children can make more petals for a fuller flower.
You can also create two sets of petals: large petals for the bottom layer and smaller petals for the top layer.
Step 3: Cut Out the Petals
Carefully cut around each petal.
Use child-safe scissors and take your time.
Try to cut smoothly around the curves.
If children are young, an adult can draw simple petal templates for them.
Once all the petals are ready, arrange them on the table.
Check whether you have enough petals to create a full circle.
Step 4: Create the Flower Center
The center of the flower can be made from a circle of colored paper or cardboard.
Trace a cup or small lid onto paper and cut out the circle.
Yellow, orange, brown, or black can work well for the center.
You can decorate the center with dots, small circles, lines, or a spiral pattern.
For a three-dimensional effect, glue several small paper circles on top of the center.
Step 5: Arrange the Petals
Place the petals around the flower center.
Arrange them so that they overlap slightly.
Make sure the petals are evenly spaced.
This is important because a balanced arrangement helps the flower rotate smoothly.
Try different layouts before gluing anything.
Children can experiment with six, eight, or ten petals.
Once you are happy with the arrangement, mark the center point lightly with a pencil.
Step 6: Attach the Petals
There are several ways to attach the petals.
For a simple flower, glue the inner end of each petal around the center.
However, if you want the flower to rotate more freely, it can be helpful to create a central cardboard support.
Place the petals around a small cardboard circle and attach them carefully.
Do not add too much glue near the rotating point.
The center should remain flexible enough to move.
Step 7: Make the Rotating Center
The easiest rotating mechanism uses a paper fastener, also called a split pin or brad.
Make a small hole in the center of the flower.
You can use the tip of a pencil or another safe tool to make the hole. Young children should have adult assistance.
Place the paper fastener through the center of the flower and into a cardboard backing.
Do not tighten it too much.
The flower needs a small amount of space to rotate.
Test the flower gently with your fingers.
If it moves smoothly, the mechanism is working.
Step 8: Add a Cardboard Backing
A cardboard backing gives the flower stability.
Cut a small circle or square of cardboard.
Place it behind the flower.
Insert the paper fastener through both the flower and the cardboard.
Secure the fastener at the back.
The cardboard should support the flower without preventing it from turning.
If the flower is too loose, adjust the fastener slightly.
If it is too tight, loosen it.
Step 9: Make the Flower Spin
Now test the rotating flower.
Gently push one of the petals with your finger.
The flower should turn around its center.
You can also gently blow on it to see whether it moves.
A lighter flower will usually rotate more easily than a heavy one.
If the petals are too thick or have too many decorations, the flower may not spin well.
This is a useful opportunity for children to experiment with weight and balance.
Step 10: Add a Stem
The rotating flower can be attached to a stem.
Use a green paper strip, cardboard tube, straw, or wooden craft stick.
Wrap green paper around a piece of cardboard or use a green straw as the stem.
Attach the stem to the back of the flower.
Make sure the stem does not interfere with the rotating center.
If you want the flower to stand on a table, place the stem into a cardboard base.
Step 11: Make Paper Leaves
A flower looks even better with leaves.
Draw leaf shapes on green paper.
Cut them out and fold them gently down the center.
Glue the leaves onto the stem.
You can use several shades of green to create more variety.
Children can draw small veins on the leaves using a green or dark-colored marker.
Step 12: Create a Three-Dimensional Flower
To make the flower more interesting, bend the petals slightly upward.
You can gently curl the edges around a pencil.
Do not press too hard because thin paper can tear.
The curved petals give the flower a more natural appearance.
You can also layer smaller petals over larger petals.
When the flower rotates, the different layers create a beautiful moving effect.
Step 13: Decorate the Petals
Once the flower is assembled, children can decorate each petal.
They can add:
- Dots
- Stripes
- Hearts
- Stars
- Swirls
- Small circles
- Glitter
- Stickers
- Tiny paper shapes
For example, a pink flower could have white dots on every petal.
A yellow flower could have orange stripes.
A rainbow flower could have a different color on every petal.
There are no strict rules for decoration.
Making a Rainbow Rotating Flower
A rainbow flower is especially attractive.
Choose six or more colors and assign one color to each petal.
Arrange them around the center in rainbow order.
Use a yellow or white center.
When the flower rotates, the different colors create a cheerful spinning effect.
This version is ideal for classrooms and children’s parties.
Making a Sunflower
Children can also create a paper sunflower.
Use yellow or orange paper for the petals.
Make the petals long and pointed.
Create a large brown center.
Add green leaves and a green stem.
The sunflower can be placed in a paper garden with other flowers.
Children can learn about real sunflowers while making the craft.
Make a Whole Paper Garden
One rotating flower can become the beginning of a larger project.
Children can create several flowers in different colors and sizes.
Add green stems, leaves, grass, butterflies, bees, clouds, and a paper Sun.
Use a large piece of cardboard as the garden background.
Some flowers can rotate while others can remain still.
The result becomes a colorful handmade garden.
Educational Benefits
Making a rotating flower provides many educational benefits.
Fine motor skills
Children practice cutting, folding, gluing, and attaching small pieces.
Creativity
They choose their own colors, shapes, patterns, and decorations.
Basic engineering
The rotating center introduces children to simple mechanisms.
Problem-solving
Children can experiment with balance, weight, and movement.
Science
The project can lead to conversations about real flowers, plant growth, pollination, wind, and movement.
Learning About Real Flowers
While making the craft, children can learn about the parts of a real flower.
A flower usually contains petals, a center, reproductive structures, and often a stem and leaves.
Children can compare their paper flower with a real flower.
They can also learn that flowers attract pollinators such as bees and butterflies.
This connection between craft and nature makes the activity more meaningful.
Using Recycled Materials
The project can easily become an eco-friendly craft.
Use cardboard from old cereal boxes for the backing.
Reuse leftover wrapping paper for colorful petals.
Old magazines can provide interesting patterns.
Paper tubes can become stems.
Using recycled materials teaches children that useful craft supplies can come from objects that might otherwise become waste.
Safety Tips
Children should use child-safe scissors and non-toxic glue.
Adults should supervise younger children when making holes or using paper fasteners.
Paper fasteners have small metal parts, so they should be used carefully.
Avoid very small decorations with young children because they may be choking hazards.
Keep the work area clean and allow glue to dry before moving the finished flower.
If the flower is attached to a stick, make sure the end is not sharp.
Creative Variations
There are many ways to customize a rotating paper flower.
Children can make:
- Rainbow flowers
- Sunflowers
- Daisies
- Fantasy flowers
- Giant flowers
- Mini flowers
- Butterfly flowers
- Seasonal flowers
- Birthday flowers
- Classroom garden flowers
They can also write positive words in the center of each flower, such as “Smile,” “Happy,” or “Kind.”
Conclusion
Making a rotating flower from colored paper is a wonderful craft project that combines creativity, movement, and simple engineering. With colored paper, cardboard, glue, scissors, and a paper fastener, children can create a beautiful flower that turns gently around its center.
The project can be adapted for different ages and abilities. Younger children can make simple flowers with large petals, while older children can experiment with layered petals, three-dimensional designs, balanced shapes, and different rotating mechanisms.
The activity also provides opportunities for learning. Children can practice fine motor skills, explore colors and shapes, and discover basic ideas about balance and movement. At the same time, they can learn about real flowers, plants, pollination, and nature.
The finished flower can become a colorful decoration or part of a larger paper garden. Children can make several flowers, add leaves and stems, and create a complete scene filled with butterflies, bees, clouds, and sunshine.
Most importantly, this craft gives children the freedom to create something unique. There is no single correct color, shape, or design. Every child can make a flower that reflects their own imagination.
With a few sheets of colored paper and a simple rotating mechanism, an ordinary craft project can become a beautiful moving flower that brings color, creativity, and a little bit of magic to any children’s activity. 🌸🌀
