Have you ever wondered how engineers design strong bridges using simple materials? One of the most creative and exciting STEM activities for students is building a bridge with plastic straws. This hands-on project teaches important engineering concepts while encouraging creativity, teamwork, and problem-solving skills.
Whether you are preparing a science fair project, classroom challenge, or home STEM activity, building a bridge with plastic straws is a fun and affordable way to explore structural engineering. Students learn how bridges distribute weight, why certain shapes are stronger, and how careful design can improve stability.
Many teachers and parents love this project because it combines science, technology, engineering, and math into one engaging experience. Best of all, most materials are inexpensive and easy to find at home or school.
If you are looking for STEM project tips, building a bridge with plastic straws is a practical way to explore engineering concepts while developing creativity and critical thinking skills. In this complete guide, you will learn the best techniques, design ideas, common mistakes, and expert tips to create a strong and successful straw bridge.
Why Building a Bridge with Plastic Straws Is a Great STEM Activity
STEM activities help students connect classroom learning with real-world applications. Building a bridge with plastic straws introduces children to basic engineering principles through hands-on experimentation.
Students discover:
- How weight distribution works
- Why triangles create stronger structures
- The importance of balance and support
- How engineers solve design problems
- The effects of compression and tension
This project also improves communication and teamwork when students work together in groups.
Because plastic straws are lightweight and flexible, they are ideal for testing different bridge designs without expensive materials.
Quick Overview Table
| Category | Details |
| Project Type | STEM Engineering Activity |
| Difficulty Level | Easy to Medium |
| Recommended Age | 8+ Years |
| Main Materials | Plastic straws, tape, glue |
| Skills Learned | Engineering, design, math |
| Estimated Time | 1–2 Hours |
| Best Bridge Shape | Triangle truss design |
| Learning Focus | Weight distribution and stability |
Essential Materials for the Project
Before starting your bridge project, gather all the necessary supplies.
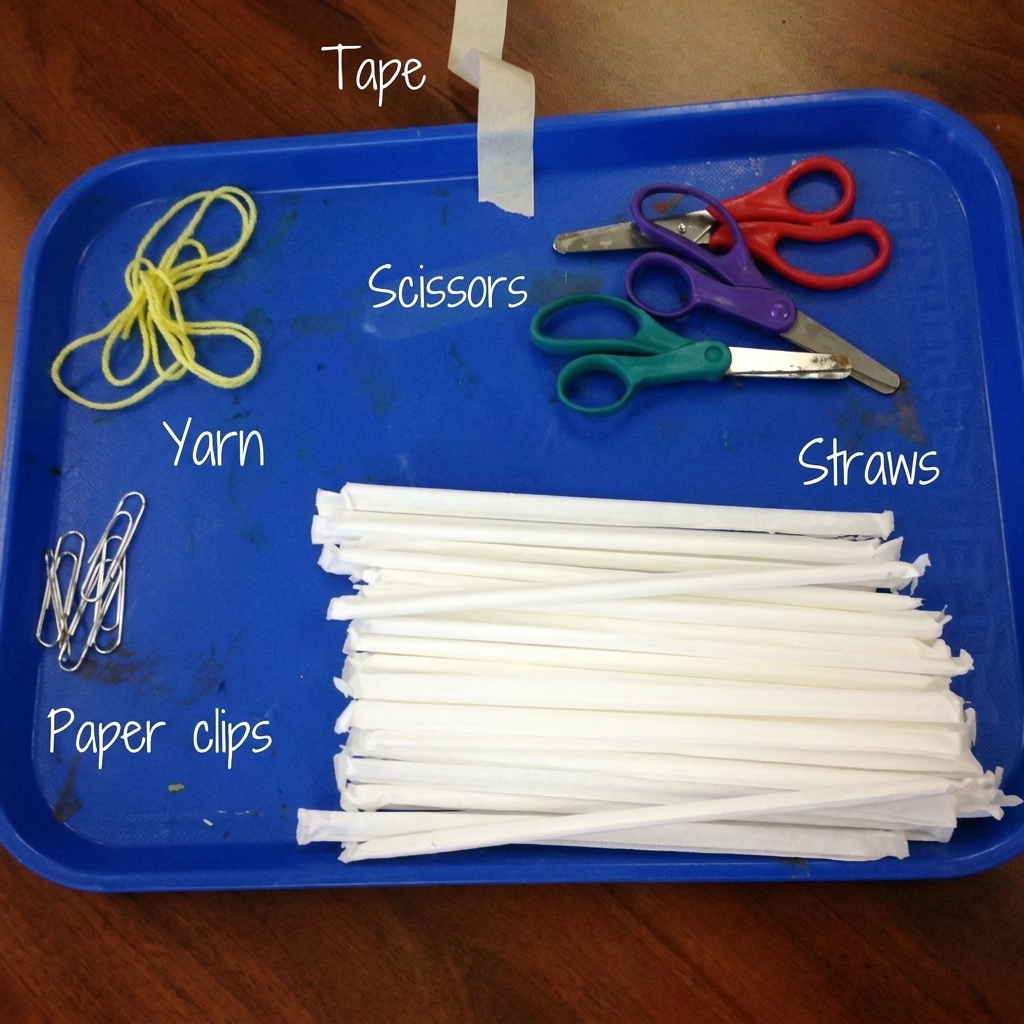
Basic Materials
- Plastic straws
- Tape or hot glue
- Scissors
- Ruler
- Cardboard base
- String (optional)
- Paper clips
- Small weights or coins for testing
You can also use colorful straws to make the project more visually attractive.
Smart Material Alternatives
If you do not have plastic straws available, try these substitutes:
- Paper straws
- Bamboo sticks
- Drinking stirrers
- Rolled paper tubes
However, plastic straws usually work best because they are lightweight yet flexible enough for creative designs.
Understanding Bridge Engineering Basics
Before building a bridge with plastic straws, it is helpful to understand a few simple engineering concepts.
Compression and Tension
Bridges experience two major forces:
- Compression pushes materials together
- Tension pulls materials apart
A strong bridge balances these forces evenly.
For example:
- The top of the bridge may experience compression
- The bottom may experience tension
Understanding these forces helps students create stronger structures.
Why Triangles Make Bridges Stronger
Triangles are one of the strongest shapes used in engineering.
Unlike squares or rectangles, triangles do not easily collapse when pressure is applied.
That is why many real bridges use triangular truss systems.
When building a bridge with plastic straws, adding triangle patterns can greatly improve strength and stability.
Best Types of Straw Bridge Designs
Different bridge styles provide different levels of strength.
Here are the most popular options for school STEM projects.
1. Beam Bridge
A beam bridge is the simplest design.
It uses a flat horizontal surface supported by pillars underneath.
Advantages
- Easy to build
- Good for beginners
- Requires fewer materials
Disadvantages
- Not ideal for heavy weight
- Can bend easily
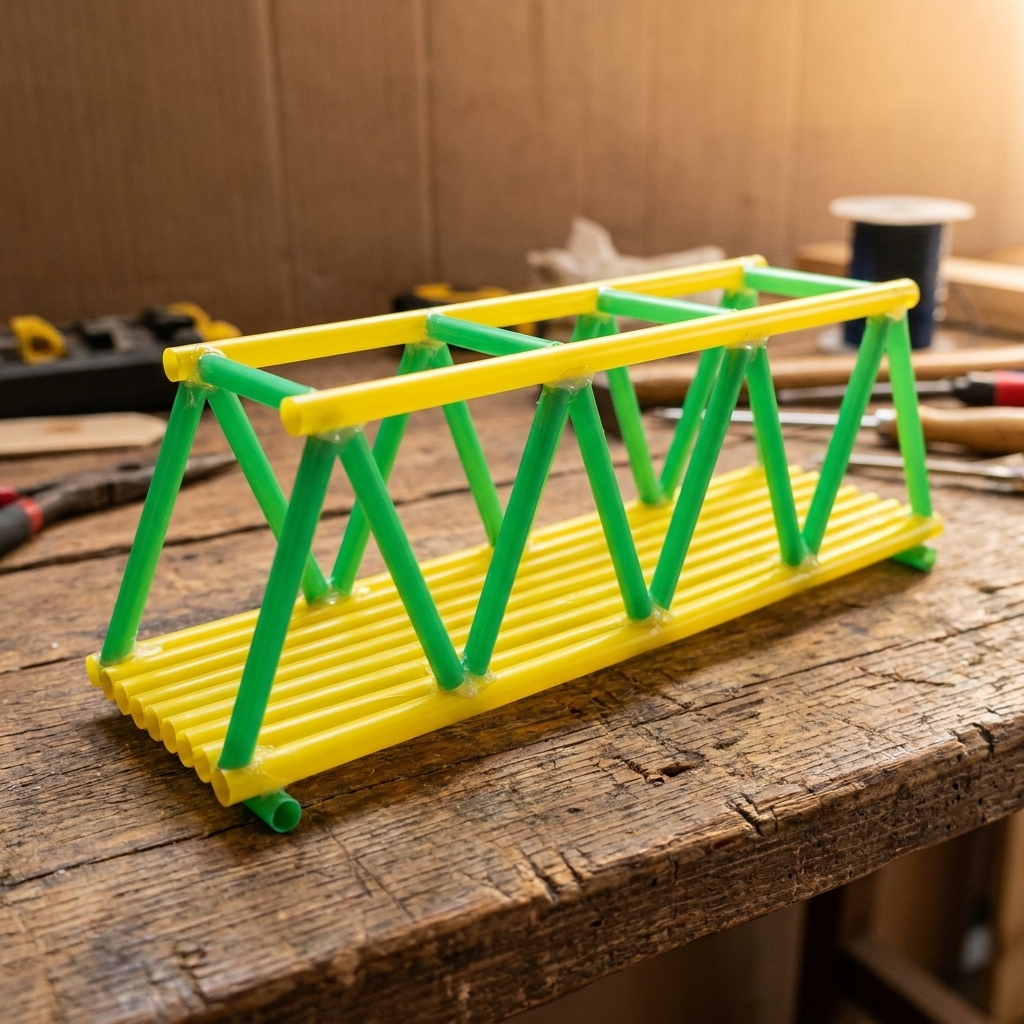
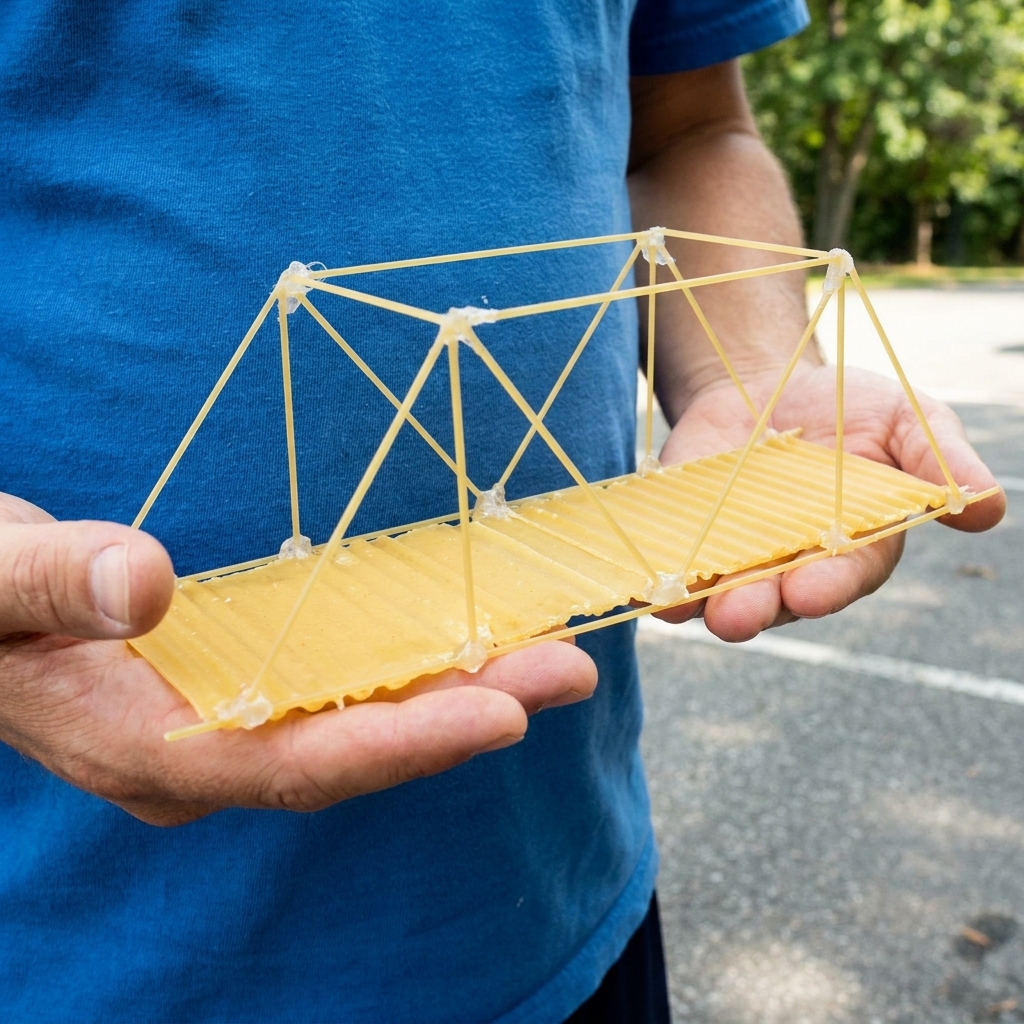
2. Truss Bridge
A truss bridge uses interconnected triangles for support.
This is often the strongest option when building a bridge with plastic straws.
Advantages
- Excellent weight support
- Very stable
- Common in engineering competitions
Disadvantages
- Takes more time to assemble
- Requires careful measurements
3. Arch Bridge
An arch bridge uses curved supports underneath the bridge deck.
Advantages
- Attractive design
- Strong under pressure
Disadvantages
- Harder to construct with straws
- Requires advanced planning
Step-by-Step Guide: Building a Bridge with Plastic Straws
Follow these steps to create a successful bridge project.
Step 1: Plan Your Design
Sketch your bridge before building.
Decide:
- Length of the bridge
- Width
- Type of bridge
- Number of supports
Planning reduces mistakes during construction.
Step 2: Build the Base
Create two strong sides using straws and tape.
Make sure both sides are equal in size for balance.
Use a ruler for accurate measurements.
Step 3: Add Triangle Supports
Connect straws diagonally to form triangles.
This step is very important because triangles increase strength.
The more balanced the triangles, the more stable the bridge becomes.
Step 4: Reinforce Weak Areas
Check joints carefully.
Add extra tape or glue to loose connections.
Weak joints are one of the biggest reasons straw bridges fail during testing.
Step 5: Test the Bridge
Place small weights slowly on top of the bridge.
Observe:
- Where bending occurs
- Which sections are strongest
- Whether the bridge remains balanced
Testing helps students improve future designs.
Common Mistakes to Avoid
Many students make simple errors when building a bridge with plastic straws.
Here are the most common problems.
Using Too Few Supports
Without enough support beams, bridges collapse quickly.
Solution:
Add triangle trusses along the sides and underneath.
Poor Tape Connections
Loose tape weakens the structure.
Solution:
Wrap joints tightly and reinforce corners.
Uneven Design
If one side is taller or wider, the bridge may tilt.
Solution:
Measure carefully before attaching pieces.
Overloading the Bridge
Adding too much weight too quickly can break the structure.
Solution:
Test gradually using small objects first.
Tips to Make Your Straw Bridge Stronger
Want your bridge to hold more weight?
Try these expert tips.
Double the Straws
Tape two or three straws together for stronger support beams.
This increases durability significantly.
Use Cross-Bracing
Cross-bracing adds diagonal supports between sections.
This helps prevent twisting and bending.
Build a Wide Base
A wider bridge base improves balance and stability.
Narrow bridges collapse more easily under pressure.
Distribute Weight Evenly
Place weights in the center slowly rather than dropping them suddenly.
This reduces stress on weak points.
STEM Learning Benefits
Building a bridge with plastic straws provides valuable educational benefits beyond engineering.
Students improve:
- Critical thinking
- Problem-solving
- Creativity
- Measurement skills
- Teamwork
- Scientific observation
The activity also teaches patience and persistence because students often redesign their bridges multiple times.
Fun Classroom Challenge Ideas
Teachers can turn this activity into an exciting classroom competition.
Weight-Holding Contest
Students compete to see which bridge can hold the most coins or books.
Longest Bridge Challenge
Teams build the longest bridge that can remain stable without collapsing.
Limited Materials Challenge
Students receive a small number of straws and tape pieces to encourage creative engineering solutions.
Environmental Discussion Opportunity
This project also creates opportunities to discuss recycling and sustainability.
Teachers can encourage students to:
- Reuse plastic materials
- Reduce waste
- Explore eco-friendly engineering ideas
Using recycled straws makes the activity more environmentally responsible.
Safety Tips for Students
Although this project is generally safe, a few precautions are important.
- Use scissors carefully
- Supervise hot glue guns
- Avoid sharp straw edges
- Keep small materials away from young children
Adult supervision is recommended for younger students.
Why STEM Projects Matter
Hands-on STEM activities prepare students for future careers in science, technology, engineering, and mathematics.
Projects like building a bridge with plastic straws make learning interactive and memorable.
Instead of simply reading about engineering, students experience real problem-solving through experimentation.
This active learning approach increases engagement and confidence.
Final Thoughts
Building a bridge with plastic straws is one of the best STEM activities for school projects because it combines creativity, science, engineering, and teamwork into one exciting challenge.
Students learn valuable concepts like structural stability, weight distribution, compression, and tension while having fun creating their own designs.
Whether you choose a beam bridge, truss bridge, or arch bridge, the project encourages innovation and hands-on discovery. With careful planning, strong supports, and creative problem-solving, students can build surprisingly strong structures using simple materials.
If you are looking for an engaging classroom activity or science fair idea, building a bridge with plastic straws is a practical and educational way to explore engineering concepts while inspiring curiosity and imagination.