
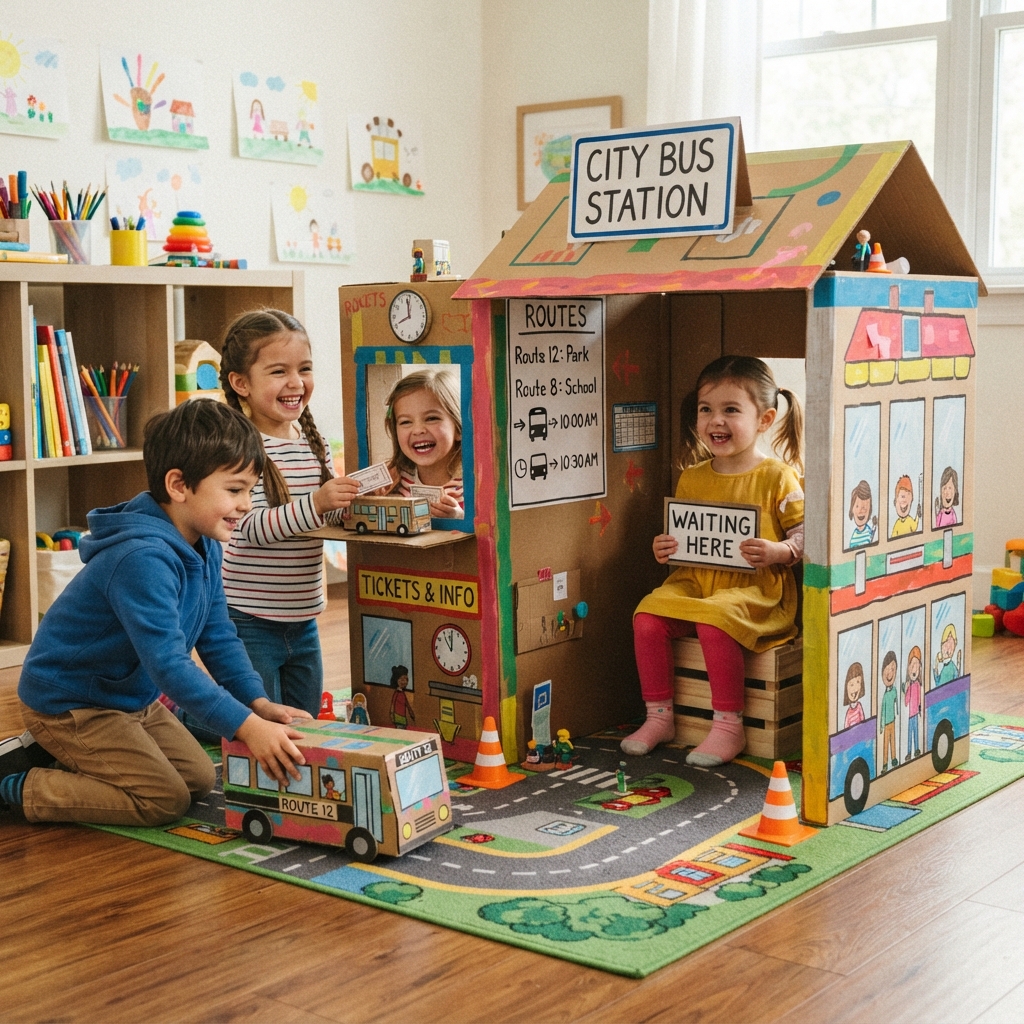
A cardboard bus station is a fun and educational craft project that lets children build a busy transportation hub using recycled materials. With cardboard boxes, colorful paper, markers, and glue, kids can design bus stops, waiting areas, ticket booths, buses, and road signs. This hands-on activity encourages creativity, problem-solving, and imaginative play while helping children learn how public transportation works.
Whether completed at home, in the classroom, or during a community craft event, a cardboard bus station offers hours of creative fun and learning.
Why Make a Cardboard Bus Station?
Children often enjoy watching buses travel through towns and cities. Creating a miniature bus station allows them to explore transportation while developing artistic and practical skills.
This project helps children:
- Improve fine motor skills through cutting, folding, and gluing.
- Develop creativity by designing buildings and vehicles.
- Learn about public transportation and road safety.
- Practice counting and organizing.
- Build communication skills through role-playing.
- Encourage recycling by reusing cardboard materials.
Materials You’ll Need
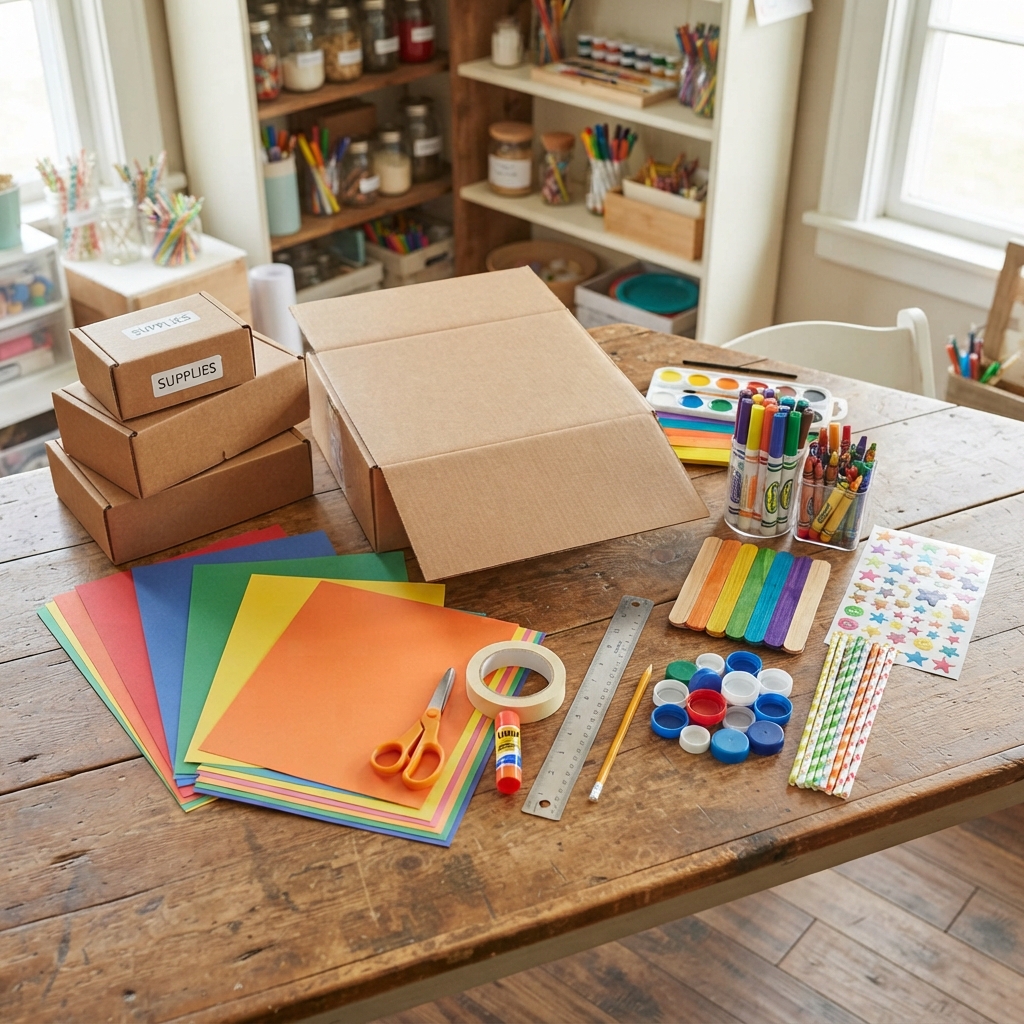
Gather these simple supplies before getting started:
- Large cardboard box
- Small cardboard boxes
- Colored construction paper
- Child-safe scissors
- Craft glue or tape
- Markers and crayons
- Paint (optional)
- Popsicle sticks
- Bottle caps
- Ruler
- Pencil
- Paper straws
- Stickers for decoration
Most of these materials can be collected from your recycling bin.
Step 1: Build the Bus Station
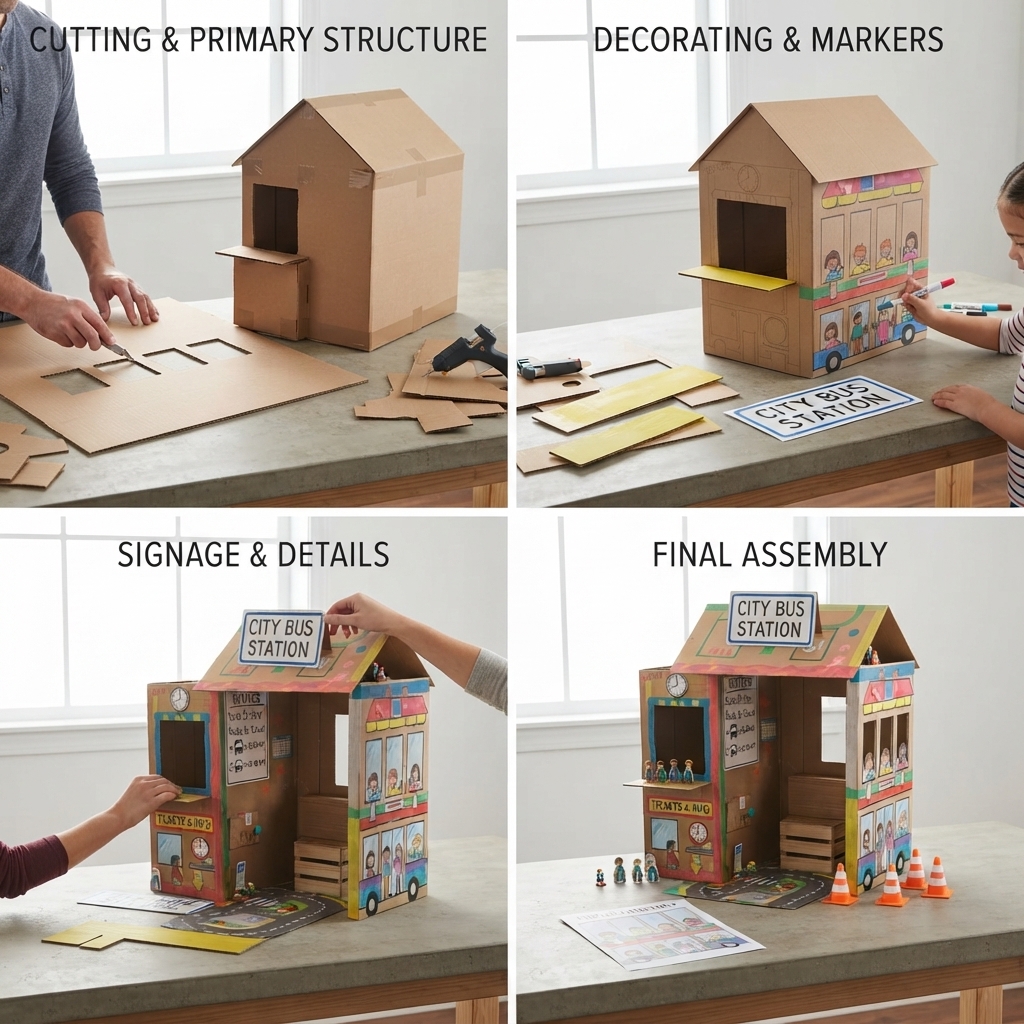
Choose a large cardboard box to become the main station building.
Cut out large windows and an entrance. Decorate the outside with bright colors and add a colorful sign that says:
City Bus Station
You can also create a roof using folded cardboard to protect waiting passengers.
Step 2: Create Bus Platforms
Cut long strips of cardboard to make bus platforms where passengers can board.
Label each platform with numbers such as:
- Platform 1
- Platform 2
- Platform 3
- Platform 4
Draw bus parking lines to help buses stop in the correct place.
Step 3: Build a Ticket Booth
Use a small cardboard box to create a ticket office.
Decorate it with:
- Ticket window
- Price board
- Timetable
- Information sign
Children can make pretend bus tickets from colorful paper.
Step 4: Make Cardboard Buses
Create several buses using small rectangular cardboard boxes.
Decorate them with:
- Windows
- Doors
- Headlights
- Wheels made from bottle caps
- Route numbers
- Bright colors
Children can invent different bus routes around their miniature town.
Step 5: Add Waiting Areas
Create benches using folded cardboard or popsicle sticks.
Add:
- Bus stop signs
- Trash bins
- Flower pots
- Shelters
- Information boards
Passengers will have a comfortable place to wait.
Step 6: Design Roads
Use black or gray paper to create roads around the station.
Add:
- Crosswalks
- Traffic lights
- Road arrows
- Bus lanes
- Parking spaces
Road markings help children learn about safe transportation.
Step 7: Make Road Signs
Create colorful road signs, including:
- Bus Stop
- One Way
- Stop
- Speed Limit
- School Zone
- Parking
- Pedestrian Crossing
Glue each sign onto paper straws or popsicle sticks.
Step 8: Add People and Decorations
Draw cartoon passengers, bus drivers, and station workers.
Decorate the station with:
- Trees
- Flowers
- Streetlights
- Clocks
- Flags
- Bicycle racks
- Maps
- Benches
These details make the station lively and welcoming.
Step 9: Enjoy Pretend Play
After completing the project, children can enjoy many exciting role-playing activities.
They can:
- Drive buses.
- Sell tickets.
- Help passengers.
- Announce bus departures.
- Organize bus schedules.
- Direct traffic.
- Collect tickets.
- Create new bus routes.
Pretend play encourages imagination, teamwork, and communication.
Learning Benefits
A cardboard bus station offers many educational opportunities.
Children practice:
- Fine motor coordination
- Creative thinking
- Problem-solving
- Counting
- Reading simple signs
- Communication
- Organization
- Social interaction
- Understanding transportation systems
The project also teaches children about road safety and the importance of public transportation.
Eco-Friendly Crafting
One of the best features of this activity is using recycled materials.
Old cardboard boxes, paper scraps, bottle caps, and paper tubes become buses, buildings, signs, and decorations instead of being thrown away.
Children learn that recycling helps protect the environment while inspiring creativity.
Tips for Parents and Teachers
To make the project even more enjoyable:
- Read a story about buses or transportation before crafting.
- Discuss basic road safety rules.
- Encourage children to invent bus routes and station names.
- Play transportation-themed games after finishing the station.
- Display the completed project in the classroom or playroom.
- Let children explain how passengers travel through their station.
Celebrate every child’s imagination and creative ideas.
Conclusion
A cardboard bus station is an engaging craft project that combines creativity, learning, and imaginative play. Children enjoy designing stations, building buses, creating road signs, and acting as drivers, passengers, and ticket sellers. Along the way, they strengthen artistic abilities, communication skills, and their understanding of transportation. Best of all, this eco-friendly activity transforms simple recycled cardboard into a bustling miniature bus station where every journey begins with creativity and fun.
