
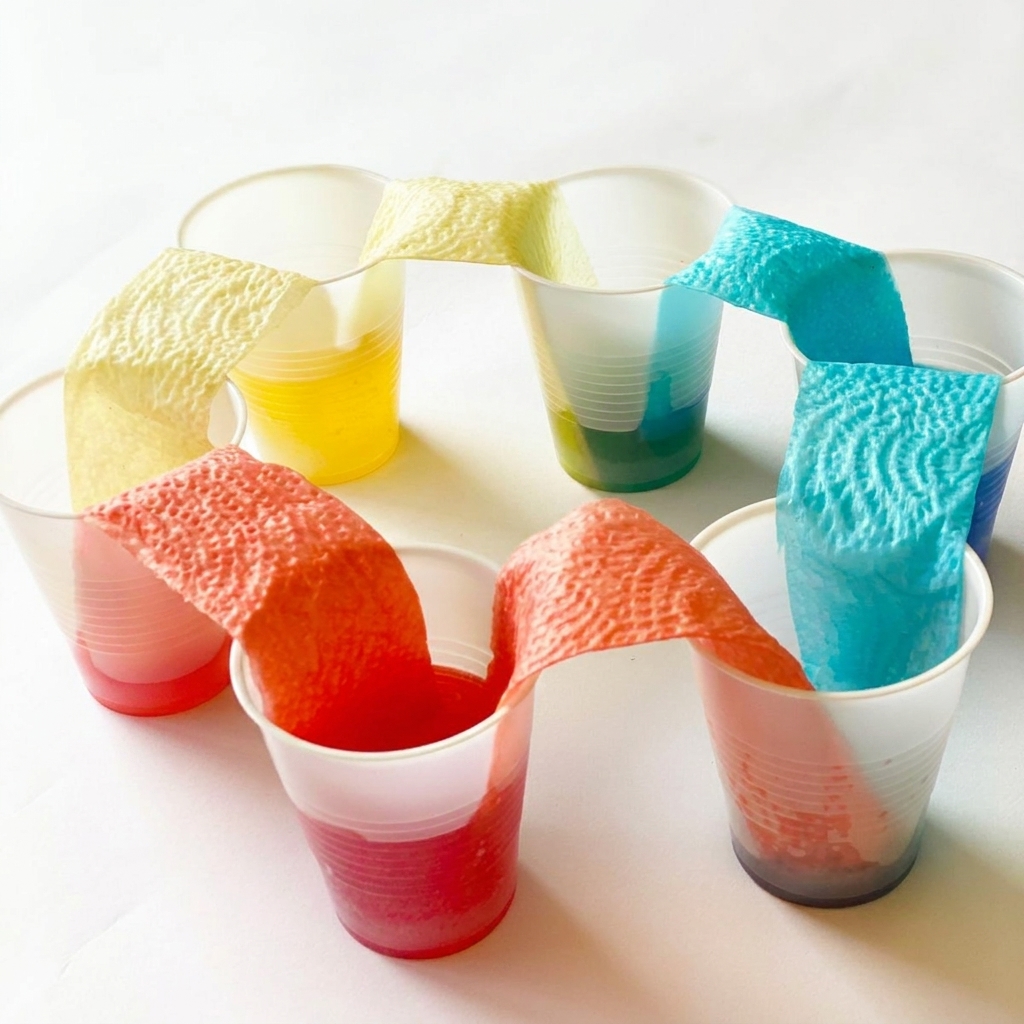
The color transfer between cups experiment, often called the walking water experiment, is one of the most exciting and visually appealing science activities for children. Using only water, food coloring, paper towels, and a few cups, kids can watch colored water seemingly “walk” from one cup to another. This magical-looking experiment introduces important scientific concepts such as capillary action, water absorption, and color mixing in a simple, hands-on way.
Perfect for classrooms, homeschool lessons, or family science time, this experiment encourages children to make predictions, observe carefully, and discover how water moves through absorbent materials. It also blends science with creativity as children watch primary colors combine to create new shades
Quick Overview Table
| Feature | Details |
| Experiment | Color Transfer Between Cups (Walking Water) |
| Activity Type | Science Experiment |
| Age Group | 4–12 years |
| Difficulty | Easy |
| Time Required | 30–90 minutes |
| Main Materials | Cups, water, food coloring, paper towels |
| Science Topic | Capillary Action and Color Mixing |
| Indoor/Outdoor | Indoor |
| Adult Supervision | Recommended |
| STEM Skills | Observation, Prediction, Scientific Thinking |
What Is the Color Transfer Between Cups Experiment?
The color transfer between cups experiment demonstrates how water can travel through paper towels without being poured. Colored water slowly moves from one cup to another by climbing through the tiny spaces inside the paper towel fibers. As the water reaches an empty cup, it begins to collect there, creating the appearance that the water has “walked.”
If different colors start in separate cups, they eventually meet in the empty cups and mix together to create new colors. This combination of water movement and color mixing makes the experiment both educational and entertaining.
Why Children Love This Experiment
Children enjoy activities that seem almost magical, and this experiment delivers exactly that. Watching water climb upward and travel into another cup surprises many young learners.
Some reasons children love this activity include:
- Watching water appear to move on its own.
- Seeing new colors form naturally.
- Making predictions about what will happen.
- Using bright food coloring.
- Observing changes over time.
Unlike fast science demonstrations, this experiment unfolds gradually, encouraging patience and careful observation.
Materials You’ll Need
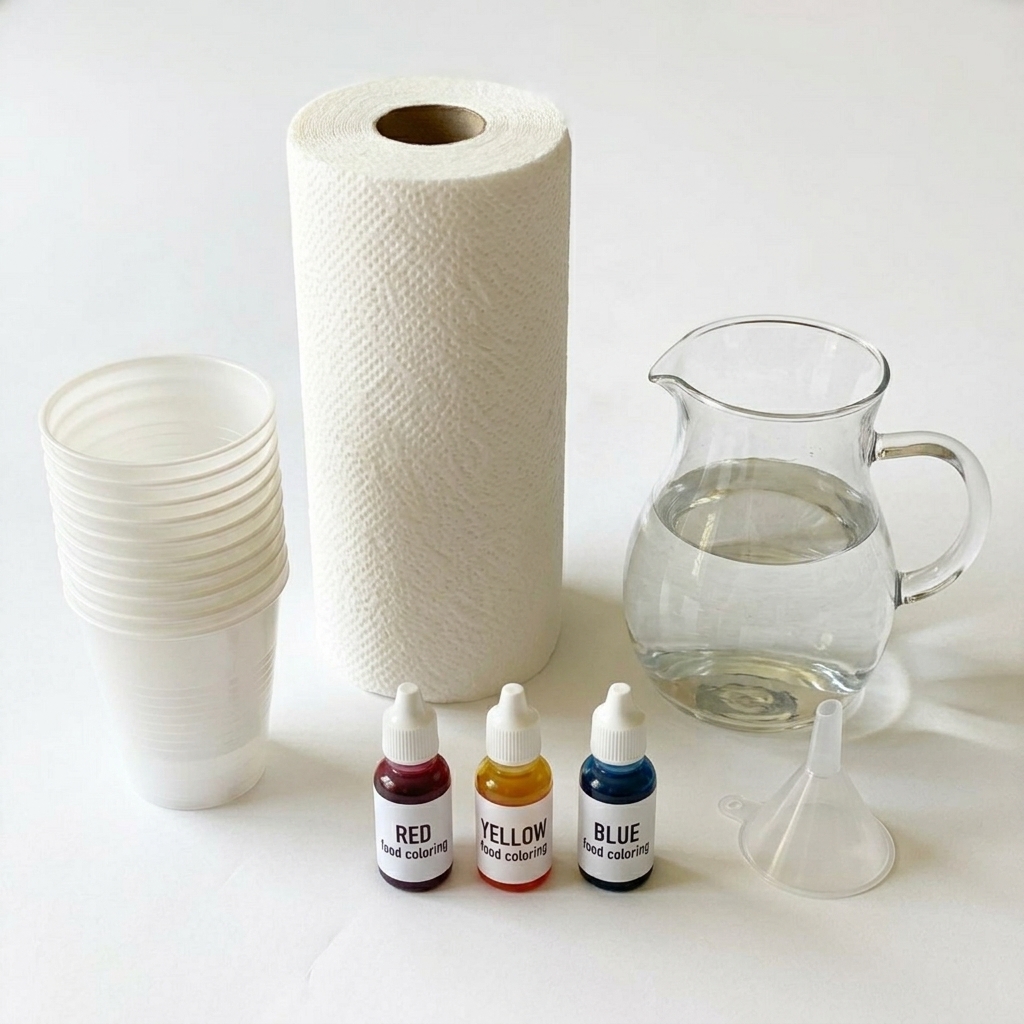
Gather these simple household supplies before beginning.
Essential Materials
- 6 or 7 clear plastic or glass cups
- Water
- Red food coloring
- Blue food coloring
- Yellow food coloring
- Paper towels
Optional Materials
- Tray to catch spills
- Measuring cup
- Spoon
- Notebook
- Camera
- Colored pencils
Clear cups make it easier to observe the water levels and color changes.
Step-by-Step Instructions
Step 1: Arrange the Cups
Place six cups in a straight line or in a circle.
Alternate between filled and empty cups.
For example:
- Cup 1: Water
- Cup 2: Empty
- Cup 3: Water
- Cup 4: Empty
- Cup 5: Water
- Cup 6: Empty
Step 2: Add Food Colorin
Color each water-filled cup.
Example:
- Cup 1: Red
- Cup 3: Yellow
- Cup 5: Blue
Use several drops of food coloring for bright results.
Step 3: Prepare the Paper Towels
Fold paper towels into long strips.
Each strip should reach comfortably between two neighboring cups.
Step 4: Connect the Cups
Place one end of each paper towel into a cup with colored water and the other end into the neighboring empty cup.
The paper towels should bridge every pair of cups.
Step 5: Wait and Observe
Within 15 to 30 minutes, colored water begins climbing the paper towels.
Over the next hour, water slowly transfers into the empty cups.
Eventually:
- Red and yellow create orange.
- Yellow and blue create green.
- Blue and red create purple.
Children enjoy watching the empty cups gradually fill with colorful water.
The Science Behind the Experiment
The experiment works because of capillary action.
Capillary action is the process by which water moves through very small spaces without needing pumps or gravity.
Paper towels contain countless tiny fibers with microscopic gaps between them.
Water molecules cling to these fibers and also stick to one another. As water climbs through the paper towel, it pulls more water along behind it.
This continuous movement allows the water to travel from one cup to another.
Understanding Capillary Action
Capillary action occurs because of two important forces:
Adhesion
Water molecules are attracted to the paper towel fibers.
They cling to the surface of the fibers.
Cohesion
Water molecules are also attracted to one another.
They stick together, forming a continuous chain.
Together, adhesion and cohesion allow water to move upward and across the paper towel.
Why Does the Water Stop?
The water continues moving until the levels in connected cups become nearly equal.
Once the water levels balance, the movement slows dramatically because there is no longer a significant difference driving the flow.
This natural balancing process is another fascinating concept children can observe.
Learning About Color Mixing
Besides learning about water movement, children also discover how primary colors combine.
Primary colors include:
- Red
- Blue
- Yellow
When mixed, they create secondary colors:
- Red + Yellow = Orange
- Yellow + Blue = Green
- Blue + Red = Purple
Children can compare the new colors with their predictions and discuss why the mixtures look different depending on the amounts used.
Educational Benefits
This experiment supports learning across several subjects.
Science
Children explore:
- Capillary action
- Water movement
- Absorption
- Color mixing
- Observation
Mathematics
Students practice:
- Measuring water
- Comparing water levels
- Estimating time
- Recording observations
Art
Children learn about:
- Primary colors
- Secondary colors
- Color combinations
This makes the experiment an excellent cross-curricular activity.
Critical Thinking
Encourage questions such as:
- Why did the water move upward?
- Which color traveled fastest?
- Why did new colors appear?
- Would different paper towels work the same way?
These discussions strengthen scientific reasoning.
Real-Life Examples of Capillary Action
Capillary action occurs in many everyday situations.
Examples include:
Plants
Water travels from roots to leaves through tiny tubes inside stems.
Paper Towels
Paper towels absorb spills by drawing water into their fibers.
Sponges
Sponges soak up liquids through tiny pores.
Paintbrushes
Paint moves through the brush bristles using capillary action.
Soil
Water spreads through soil to reach plant roots.
These examples help children connect the experiment to the natural world.
Fun Variations
Once children complete the basic experiment, try these creative ideas.
Rainbow Circle
Arrange seven cups in a circle.
Create a complete rainbow of colors.
Different Paper Towels
Compare:
- Thick paper towels
- Thin paper towels
- Recycled paper towels
Observe which transfers water fastest
Warm vs. Cold Water
Compare whether water temperature changes the speed of movement.
Different Cup Sizes
Use large and small cups.
Measure how long each setup takes to balance.
Questions Children Can Investigate
Encourage scientific inquiry by asking:
- Which color moves the fastest?
- Does paper towel thickness matter?
- Does folding the towel differently change the results?
- What happens if one cup starts with more water?
- Can three colors mix together?
- What happens if no food coloring is added?
Recording predictions and results reinforces the scientific method.
Common Mistakes
Sometimes the experiment doesn’t work as expected.
Here are common problems.
Paper Towels Too Short
Both ends must remain submerged in the water.
Too Little Water
The cups should contain enough water for the towels to absorb.
Weak Food Coloring
Use several drops for bright, easy-to-see results.
Cups Too Far Apart
The paper towel should connect the cups without stretching too tightly.
Safety Tips
This activity is generally very safe.
Remember to:
- Protect surfaces from food coloring stains.
- Wash hands after handling food coloring.
- Clean spills immediately.
- Supervise young children.
- Use plastic cups if breakage is a concern.
Food coloring can stain clothing, so wearing old clothes or an apron is a good idea.
Extending the Learning
Expand the experiment with related STEM activities.
Children can:
- Draw the color changes.
- Keep a science journal.
- Measure transfer times.
- Create graphs of water levels.
- Research plant water transport.
- Compare different absorbent materials.
These activities strengthen observation and communication skills.
Why Teachers Love This Experiment
Teachers appreciate the color transfer experiment because it is:
- Affordable.
- Easy to prepare.
- Highly visual.
- Safe.
- Suitable for group work.
- Connected to science and art standards.
Students enjoy watching the gradual changes and discussing their observations with classmates.
Frequently Asked Questions
Why does the water move upward?
Water molecules stick to the paper towel fibers (adhesion) and to each other (cohesion), creating capillary action that pulls the water upward and across.
How long does the experiment take?
Initial movement is often visible within 15–30 minutes, while complete color transfer and mixing usually take 1–3 hours, depending on the setup.
Can I use coffee filters instead of paper towels?
Yes. Coffee filters, paper towels, and some absorbent fabrics all demonstrate capillary action, though the speed may vary.
Why are my colors muddy?
Using too much food coloring or unequal amounts of different colors can create darker, less vibrant mixtures.
Can I repeat the experiment?
Absolutely. Try different colors, paper towel types, water temperatures, or cup arrangements to compare the results.
Conclusion
The color transfer between cups experiment is a simple yet captivating science activity that demonstrates the remarkable process of capillary action while introducing children to the basics of color mixing. Using only cups, water, food coloring, and paper towels, young learners can observe water “walking” from one container to another and discover how primary colors combine to form new shades.
Beyond its colorful appearance, this experiment encourages careful observation, prediction, problem-solving, and scientific thinking. It also helps children connect classroom concepts to real-life examples, such as how plants transport water and how absorbent materials work.
Whether performed at home, in a classroom, or during a homeschool STEM lesson, this hands-on activity offers an engaging blend of science and creativity. It reminds children that even ordinary household materials can reveal extraordinary scientific principles, making learning both memorable and fun.
