
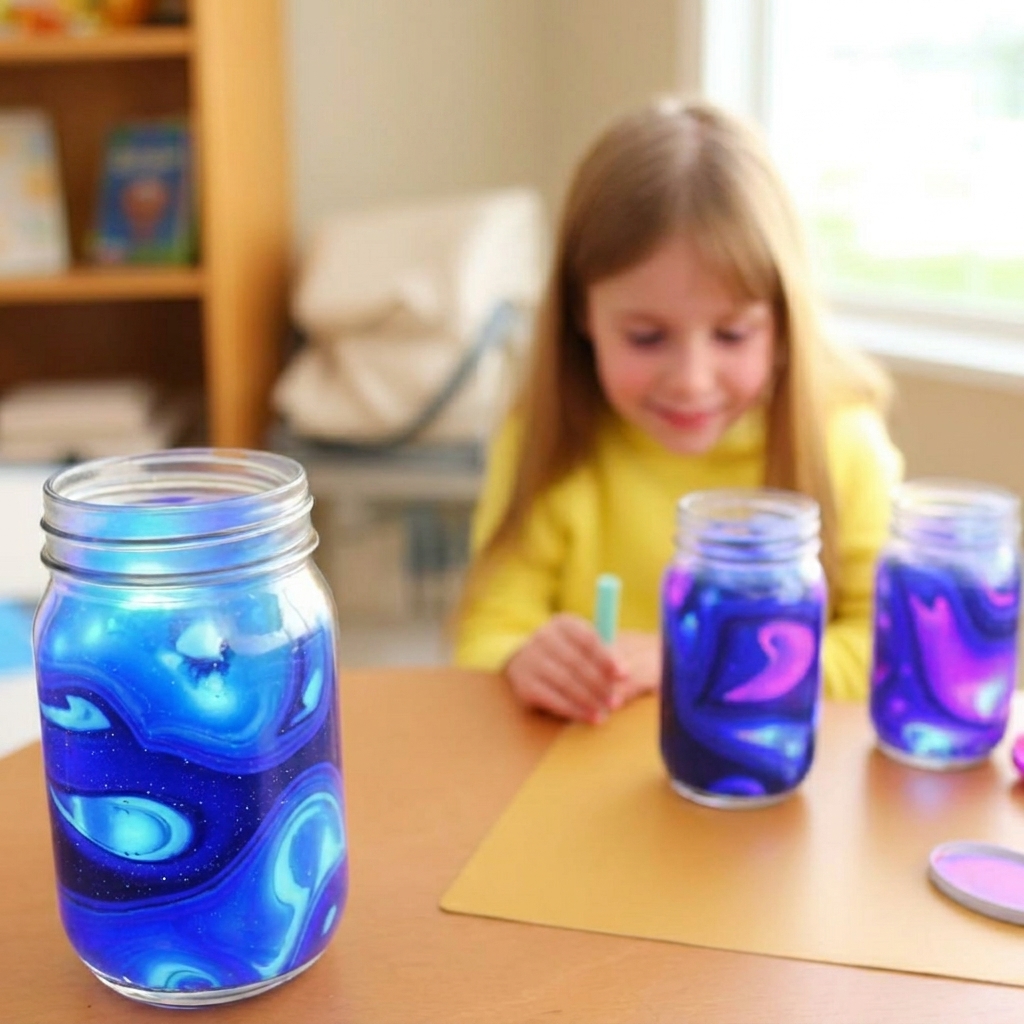
Designing a space galaxy inside a jar is one of the most exciting and creative STEM craft projects for children and families. This colorful activity combines art, science, and imagination to create a miniature universe that looks like a real galaxy floating inside a glass container.
Children are naturally fascinated by space. They dream about stars, planets, nebulae, and distant galaxies. By creating a galaxy in a jar, they can bring a piece of the universe into their own homes. The project is simple enough for beginners while still offering endless opportunities for creativity.
Unlike many crafts that are quickly forgotten, a galaxy jar becomes a decorative keepsake that children can proudly display. It also encourages curiosity about astronomy and the wonders of the universe.
This article explains how designing a space galaxy inside a jar works, explores its educational benefits, and provides seven easy steps for creating a stunning cosmic masterpiece.
Summary Table
| Feature | Details |
| Project Name | Designing a Space Galaxy Inside a Jar |
| Activity Type | STEM Craft Project |
| Difficulty Level | Easy |
| Recommended Age | 6–14 Years |
| Time Required | 30–60 Minutes |
| Main Materials | Jar, cotton, water, colors, glitter |
| Learning Focus | Astronomy, creativity, color mixing |
| Skills Developed | Observation, imagination, fine motor skills |
| Cost | Low |
| Fun Level | Very High |
What Is a Space Galaxy Jar?
A space galaxy jar is a decorative craft that recreates the appearance of a colorful galaxy using simple household materials.
The project typically uses:
- A clear glass jar
- Cotton balls
- Water
- Food coloring or paint
- Glitter
When layered correctly, these materials create swirling clouds of color that resemble nebulae and star fields found in outer space.
The finished jar looks like a miniature galaxy captured inside a glass container.
Why Kids Love Designing a Space Galaxy Inside a Jar
1. It Feels Like Creating a Mini Universe
Children enjoy creating things that seem magical. A galaxy jar gives them the feeling of building their own universe.
They can choose colors, patterns, and glitter effects that make their galaxy unique.
This creative freedom makes the project highly engaging.
2. It Combines Art and Science
The project introduces scientific ideas while remaining artistic and fun.
Children learn about:
- Galaxies
- Stars
- Nebulae
- Space exploration
At the same time, they experiment with color combinations and artistic design.
3. The Results Look Amazing
One reason children love this activity is that the final result looks impressive.
Even simple galaxy jars often appear beautiful and professional.
This boosts confidence and encourages further creativity.
4. It Encourages Imagination
Kids can invent stories about their galaxies.
They may imagine:
- Unknown planets
- Alien civilizations
- Space adventures
- New star systems
This transforms a simple craft into a storytelling experience.
5. It Is Easy and Affordable
Most materials are inexpensive and easy to find at home.
This makes the activity accessible to families, classrooms, and community groups.
Materials Needed
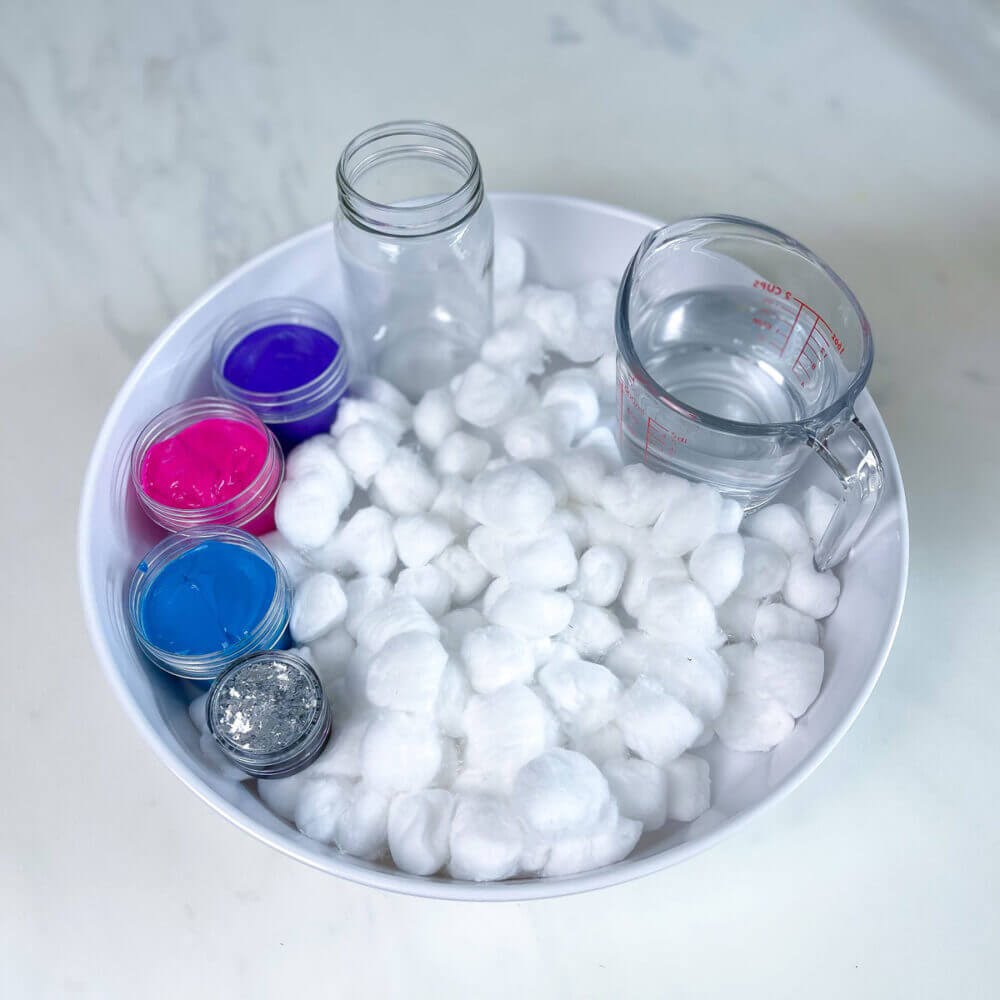
Before starting, gather the following materials:
- Clear glass or plastic jar
- Cotton balls
- Water
- Blue food coloring
- Purple food coloring
- Pink food coloring
- Silver or multicolored glitter
- Spoon or stick for mixing
Optional materials:
- Glow-in-the-dark glitter
- Small decorative stars
- LED light base
The Science Behind a Galaxy Jar
Although it is a craft project, designing a space galaxy inside a jar demonstrates several scientific concepts.
Color Mixing
Children learn how different colors combine to create new shades and visual effects.
Light Reflection
Glitter reflects light, creating the appearance of distant stars.
Layering
The cotton and colored water create depth, similar to the layered appearance of real nebulae.
Astronomy Inspiration
The project sparks discussions about:
- Galaxies
- Star formation
- Space exploration
- The universe
How 7 Easy Steps Work
Step 1: Fill the Jar Partially with Water
Begin by filling about one-third of the jar with water.
This creates the first layer of the galaxy.
Step 2: Add the First Color
Add several drops of food coloring.
Blue and purple are popular choices because they resemble images of real galaxies.
Stir gently.
Step 3: Add Glitter
Sprinkle glitter into the colored water.
The glitter will represent stars and cosmic dust.
This instantly creates a magical appearance.
Step 4: Add a Layer of Cotton
Place cotton balls into the jar.
Pull them apart slightly before adding them.
The cotton absorbs the colored water and creates cloud-like formations.
Step 5: Repeat with New Colors
Add another layer of water and choose a different color.
Purple, pink, and blue combinations often create the most dramatic effects.
Add more glitter after each layer.
Step 6: Continue Layering
Alternate:
- Water
- Color
- Glitter
- Cotton
Continue until the jar is nearly full.
These layers create depth and complexity.
Step 7: Seal and Display
Close the jar tightly.
Gently rotate it to admire the galaxy effect from different angles.
Place it near natural light or under a small lamp for maximum visual impact.
Educational Benefits
Encourages Scientific Curiosity
Children become interested in:
- Space
- Astronomy
- Scientific observation
This curiosity often leads to further lerning.
Improves Fine Motor Skills
Handling small materials helps develop:
- Hand-eye coordination
- Precision
- Control
These skills are valuable for many educational activities.
Develops Creativity
Every galaxy jar is unique.
Children make decisions about:
- Colors
- Patterns
- Layering techniques
This promotes artistic expression.
Supports Problem-Solving
Kids learn how to:
- Adjust colors
- Improve layering
- Fix design mistakes
These experiences strengthen critical thinking.
Tips for the Best Galaxy Jar
Use Multiple Colors
A variety of colors creates a more realistic galaxy effect.
Avoid Overfilling
Leave a small amount of space at the top.
This helps preserve the layered appearance.
Stretch the Cotton
Fluffing the cotton creates more realistic cosmic clouds.
Use Different Glitter Sizes
Mixing large and small glitter pieces produces a richer star field.
Experiment Freely
No two galaxies are alike.
Encourage children to explore different combinations.
Classroom Applications
Teachers often use galaxy jars in:
- Astronomy units
- Science fairs
- STEM workshops
- Art projects
The activity makes abstract space concepts easier to understand.
Students enjoy learning because the lesson feels like a creative adventure.
Family Activity Benefits
Designing a space galaxy inside a jar is perfect for family bonding.
Parents and children can:
- Choose colors together
- Discuss space facts
- Compare galaxy designs
The activity encourages teamwork and conversation.
Creative Variations
Children can expand the project by creating:
- Planet-themed jars
- Glow-in-the-dark galaxies
- Rainbow galaxies
- Solar system jars
- Alien world displays
These variations keep the activity fresh and exciting.
Long-Term Learning Impact
Activities like galaxy jars help children develop:
- Curiosity
- Creativity
- Observation skills
- Scientific thinking
- Confidence
The project demonstrates that learning can be fun, artistic, and hands-on.
Conclusion
Designing a space galaxy inside a jar is an engaging project that combines creativity, science, and imagination. Using simple materials, children can create a beautiful miniature universe while learning about color, light, and astronomy.
The seven easy steps make the project accessible for beginners, while the endless design possibilities keep it exciting for experienced crafters. Whether used at home, in school, or during a STEM workshop, this activity inspires curiosity and wonder about the universe.
By transforming an ordinary jar into a sparkling galaxy, children discover that science and creativity can work together to create something truly magical.
