
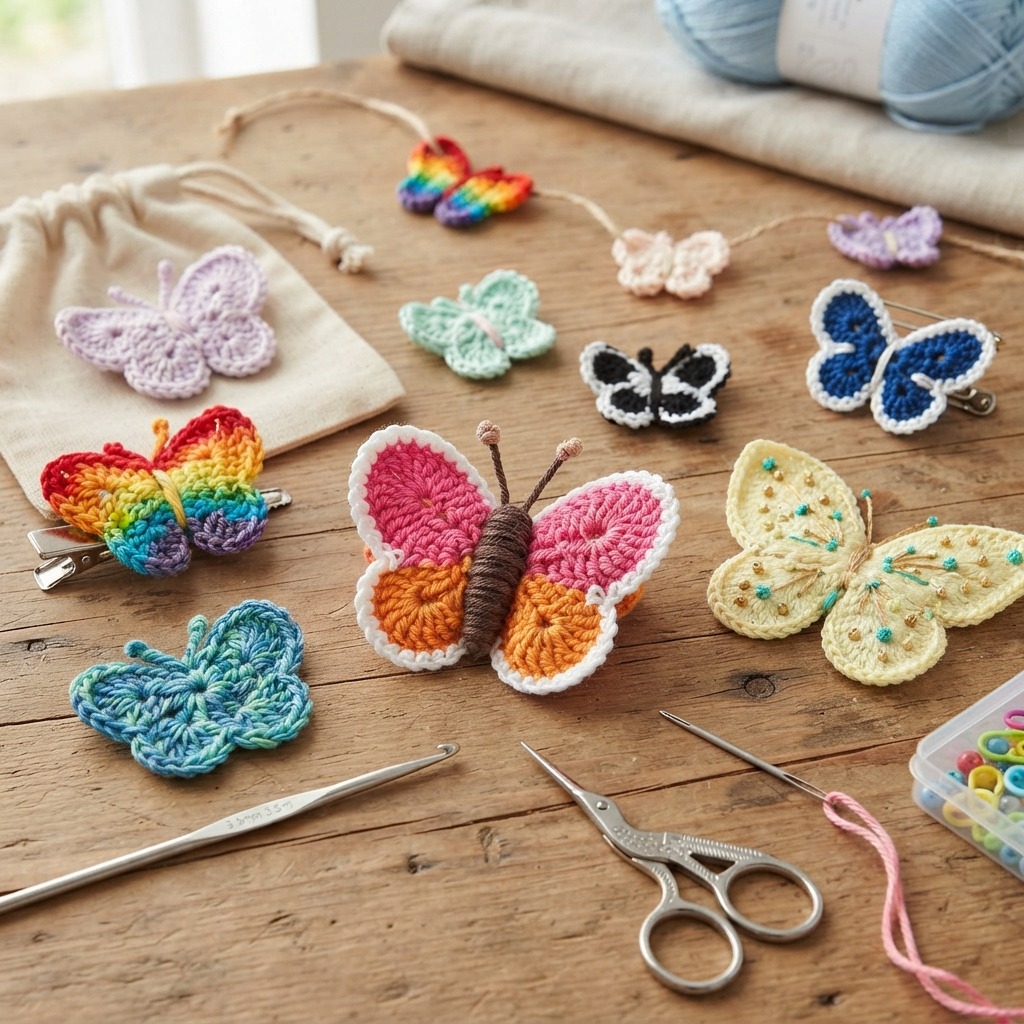
A crocheted butterfly is a charming handmade project that can add color and beauty to almost anything. It is a wonderful craft for beginners because it can be made with a small amount of yarn and a few basic crochet stitches. Once you learn the simple technique, you can create butterflies in different sizes, colors, and styles.
Crocheted butterflies are perfect for decorating bags, hats, scarves, blankets, hair accessories, cards, gifts, and home decorations. They can also be used to make colorful garlands, wall art, brooches, and seasonal decorations.
One of the best things about crochet butterflies is the freedom to experiment. You can use bright rainbow colors for a playful design, soft pastel shades for a delicate look, or darker colors for an elegant decoration. Whether you are making one butterfly or an entire collection, this project is an enjoyable way to practice crochet while creating something beautiful.
Why Make a Crocheted Butterfly?
There are many reasons to try making a crocheted butterfly. First, it is a relatively quick project. A small butterfly can often be completed much faster than a large crochet item such as a blanket or sweater.
Second, butterflies are versatile. You can attach them to almost any handmade project. A simple crochet bag can become more colorful with a butterfly decoration, while a plain hat can be transformed with a small handmade butterfly.
Crocheted butterflies also make lovely gifts. You can make several butterflies in different colors and use them to decorate presents, greeting cards, or gift bags.
This project is also an excellent way to use leftover yarn. Because butterflies are small, you do not need much material.
Materials You Will Need
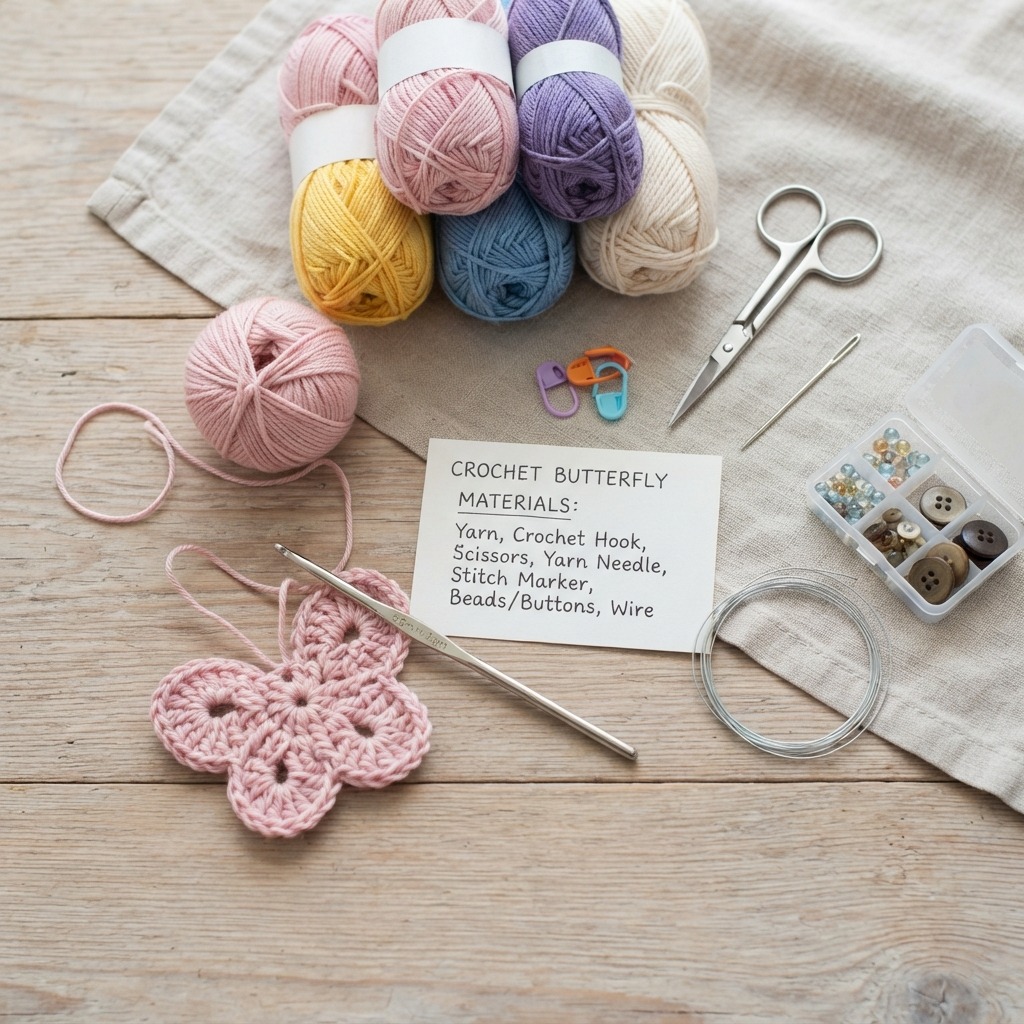
To make a simple crocheted butterfly, gather these materials:
- Yarn in one or more colors
- A crochet hook suitable for your yarn
- Scissors
- A yarn needle
- Stitch marker, if needed
- Optional beads or buttons
- Optional wire for shaping the antennae
Cotton yarn is a popular choice because it creates neat stitches and holds its shape well. Acrylic yarn can also be used, especially when you want a wide range of bright colors.
For a small butterfly, use a lightweight or medium-weight yarn and an appropriately sized hook.
Choosing Your Colors
Color is one of the most exciting parts of making a crocheted butterfly.
You can make the entire butterfly in one color or combine several shades.
For a bright and cheerful butterfly, try yellow, pink, blue, orange, and purple.
For a soft design, choose pastel pink, lavender, cream, light blue, and mint green.
You can also create realistic-looking butterflies by using dark edges with lighter colors in the center.
Another fun idea is to make the two wings symmetrical but use different colors for each pair.
Basic Crochet Skills
A crocheted butterfly can be made using several basic stitches.
You should know how to make:
- Chain stitches
- Slip stitches
- Single crochet
- Double crochet
- Half double crochet
The exact stitches can vary depending on the pattern, but the basic construction is usually simple.
If you are a beginner, practice the stitches on a small sample before starting the butterfly.
Step 1: Create the Center
Start by creating a small center for the butterfly.
You can make a magic ring or create a short chain and join it into a circle.
Work several single crochet stitches into the center.
This small circle becomes the body area from which the wings will develop.
Keep the stitches relatively tight so that the center remains firm.
Step 2: Crochet the First Wing
The wings are the most recognizable part of a butterfly.
Begin by attaching your yarn to the center section.
Create a few chain stitches and work several double crochet or half double crochet stitches into the center.
The taller stitches help create a wider, rounded wing.
Continue working around the center until you have created the first upper wing.
You can make the wing as large or small as you like.
Step 3: Make the Second Wing
After completing the first wing, repeat the process on the opposite side.
Try to make the second wing approximately the same size and shape as the first.
Symmetry is important because it gives the butterfly a balanced appearance.
Do not worry if the wings are not perfectly identical. Small differences can make handmade butterflies look charming and natural.
Step 4: Create the Lower Wings
A butterfly usually has two larger upper wings and two smaller lower wings.
Create the lower wings using fewer stitches than the upper wings.
You can use a combination of chain stitches, single crochet, and double crochet to create a smaller rounded shape.
Repeat on the other side.
The four wings should now surround the center of the butterfly.
Step 5: Add a Decorative Border
A contrasting border can make your butterfly look much more attractive.
Choose a second yarn color and work single crochet or slip stitches around the edges of the wings.
For example, use purple for the wings and white for the border.
You can also add a dark border to create a stronger contrast.
Take your time when working around the curves so the edge remains smooth.
Step 6: Shape the Wings
After completing the crochet work, gently arrange the wings with your fingers.
If the wings curl or look uneven, lightly block the butterfly.
To block a crochet butterfly, carefully shape it into the desired position and secure it temporarily on a suitable surface. Allow it to dry according to the yarn’s care instructions.
Blocking can help the wings lie flat and show their shape more clearly.
Step 7: Make the Butterfly Body
The center of the butterfly can be emphasized with a contrasting color.
You can crochet a small narrow piece and sew it along the center.
Alternatively, use yarn to wrap around the middle of the butterfly several times.
This creates the appearance of a butterfly body and also helps hold the wings together.
Black or dark brown yarn can create a realistic appearance, while colorful yarn produces a playful design.
Step 8: Add Antennae
A butterfly looks even cuter with small antennae.
The easiest method is to use yarn.
Cut two short pieces of yarn and attach them to the top of the body.
You can tie small knots at the ends to create rounded tips.
Another option is to crochet two tiny chains and attach them to the head.
If the butterfly is intended for a young child, make sure the antennae are securely attached and avoid sharp wire.
Step 9: Add Decorative Details
Now you can personalize your butterfly.
Try adding:
- Small beads
- Embroidered dots
- Buttons
- Tiny flowers
- Contrasting borders
- Sequins
- Colorful stitches
You can create symmetrical patterns on the wings or make each wing slightly different.
For a more natural appearance, use small embroidered dots and lines to imitate butterfly wing markings.
Making a Simple Flat Butterfly
A flat butterfly is one of the easiest versions for beginners.
Instead of creating a three-dimensional body, crochet the wings and center as one flat piece.
This type of butterfly works especially well as an applique.
You can sew it onto a bag, hat, sweater, blanket, pillow, or scarf.
Flat butterflies are also useful for making greeting cards and decorations.
Making a Three-Dimensional Butterfly
If you want a more realistic butterfly, you can shape the wings so that they rise slightly from the center.
After finishing the butterfly, gently fold or curve the wings upward.
You can secure the center with a few stitches to hold the shape.
This creates a butterfly that looks more lively and dimensional.
Crochet Butterfly Hair Accessories
Small butterflies make beautiful hair decorations.
Attach a crochet butterfly to:
- A hair clip
- A headband
- A hair elastic
- A scrunchie
Choose bright colors for children’s accessories or pastel shades for a delicate adult design.
Make sure the butterfly is firmly attached so it does not easily come loose.
Crochet Butterfly Bag Decorations
A butterfly can turn a simple crochet or fabric bag into a unique accessory.
Make a medium-sized butterfly and sew it securely onto the front of the bag.
You can use a contrasting color so that the butterfly stands out.
Several small butterflies can also be arranged across the bag to create a garden-inspired design.
Crochet Butterfly Garland
If you need a decoration for a party, bedroom, classroom, or craft area, create several butterflies and connect them with yarn.
Use different colors and sizes to create a cheerful garland.
You can space the butterflies evenly or arrange them in groups.
A butterfly garland can be especially beautiful for spring-themed decorations.
Crochet Butterfly Brooch
A small butterfly can also become a pretty brooch.
Attach a brooch pin securely to the back of the butterfly.
Choose a sophisticated color combination such as cream and gold, navy and white, or burgundy and pink.
A handmade butterfly brooch can be worn on a jacket, scarf, bag, or hat.
Crochet Butterfly Keychain
Small butterflies can make adorable keychains.
Create a sturdy butterfly using tight stitches and attach a small metal keychain ring to the center.
Choose bright colors to make the butterfly easy to see.
You can also add a small tassel or bead beneath the butterfly.
Tips for Beginners
When making your first crocheted butterfly, keep the design simple.
Do not use too many colors at once. Two or three colors are usually enough to create an attractive design.
Keep your stitches consistent and count them carefully.
If your wings look uneven, gently reshape them before finishing the project.
Remember that blocking can help improve the final shape.
Secure all yarn ends carefully, especially if the butterfly will be attached to clothing or accessories.
Common Mistakes to Avoid
One common mistake is making the wings different sizes. Count your stitches carefully and repeat the same process on both sides.
Another problem is using a hook that is too large for the yarn. This can create loose stitches and make the butterfly difficult to shape.
Avoid adding too many heavy decorations because they can make the wings lose their shape.
If you are adding beads or buttons, make sure they are securely attached.
Finally, do not rush the finishing stage. Neatly weaving in yarn ends and shaping the wings can make a big difference.
Creative Crochet Butterfly Ideas
Once you are comfortable with the basic butterfly, experiment with different projects.
Make tiny butterflies for greeting cards.
Create large butterflies for wall decorations.
Use several butterflies to decorate a wreath.
Attach butterflies to a crochet basket.
Make a butterfly-themed baby blanket.
Create butterfly hair clips for children.
Make a collection of butterflies in different colors and arrange them in a shadow box.
You can even create a garden-themed wall display using crochet flowers, leaves, bees, and butterflies.
How to Make Butterflies for Gifts
Crocheted butterflies are small enough to make excellent handmade gifts.
You can create a set of colorful butterflies and place them in a small gift box.
Another idea is to attach a butterfly to a handmade card.
For a birthday gift, choose the recipient’s favorite colors.
For a spring celebration, use pastel shades.
For a nature lover, create realistic butterfly colors inspired by real species.
The personal touch makes handmade gifts especially meaningful.
Selling Crocheted Butterflies
If you enjoy crochet and want to make small handmade products, butterflies can be a good option.
They require relatively little yarn and can be made in many styles.
You can sell them as:
- Hair accessories
- Brooches
- Bag decorations
- Keychains
- Appliques
- Home decorations
- Gift embellishments
When making items for sale, pay attention to neat finishing, secure attachments, and consistent quality.
Offering several color combinations can also give customers more choices.
Final Thoughts
Making a crocheted butterfly is a fun and creative project that is suitable for beginners and experienced crocheters. With a small amount of yarn and a few basic stitches, you can create a beautiful decoration in many different colors and sizes.
The simple design can be adapted in countless ways. You can make flat butterflies for appliques, three-dimensional butterflies for decorations, or tiny butterflies for keychains and hair accessories.
Experiment with colors, borders, wing shapes, and decorative details to create your own unique designs. Once you become comfortable with the basic technique, you can make an entire collection of crocheted butterflies for gifts, home decor, accessories, or handmade products.
Most importantly, enjoy the creative process. Crochet gives you the freedom to transform ordinary yarn into something colorful, personal, and beautiful.
