
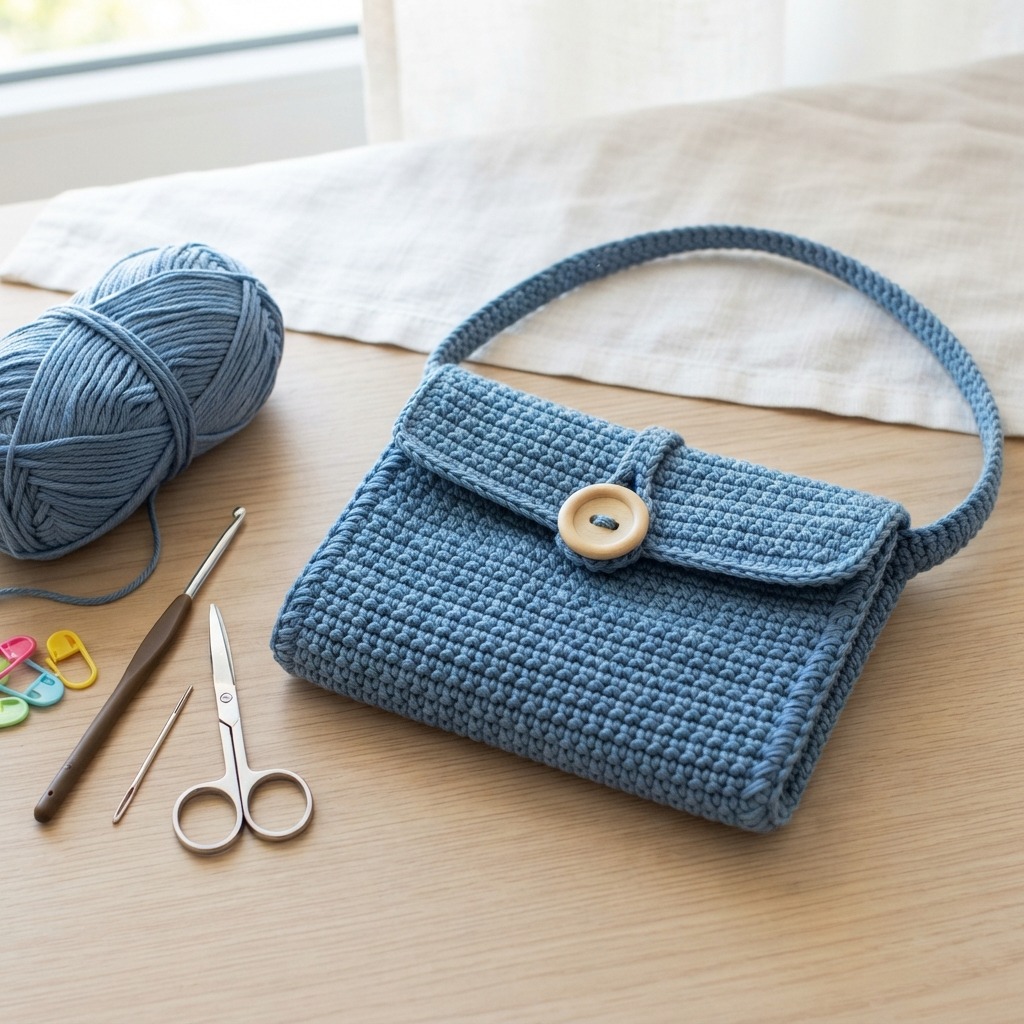
Crochet is a wonderful craft for creating beautiful, useful, and personalized accessories. If you are new to crochet, making a small crochet bag is an excellent project to start with. It does not require a large amount of yarn, and the basic shape can be created with a few simple stitches. Once you learn the basic technique, you can experiment with different colors, handles, decorations, and sizes.
A small crochet bag can be used as a purse, phone bag, coin pouch, gift bag, or little accessory bag. It can also make a lovely handmade gift for a friend, sister, mother, or child. Best of all, you can choose yarn colors that match your personal style.
Why Make a Small Crochet Bag?
There are many reasons to try this project. First, a small bag is usually quicker to make than a large crochet project. Beginners can practice their stitches without becoming overwhelmed by a huge pattern.
Second, crochet bags are practical. You can use a small bag to carry your phone, keys, cards, money, cosmetics, or other small items. A handmade bag is also more personal than something bought from a store.
Finally, making your own crochet bag gives you complete creative freedom. You can choose bright colors for a fun summer bag, neutral shades for everyday use, or several colors for a playful striped design.
Materials You Will Need
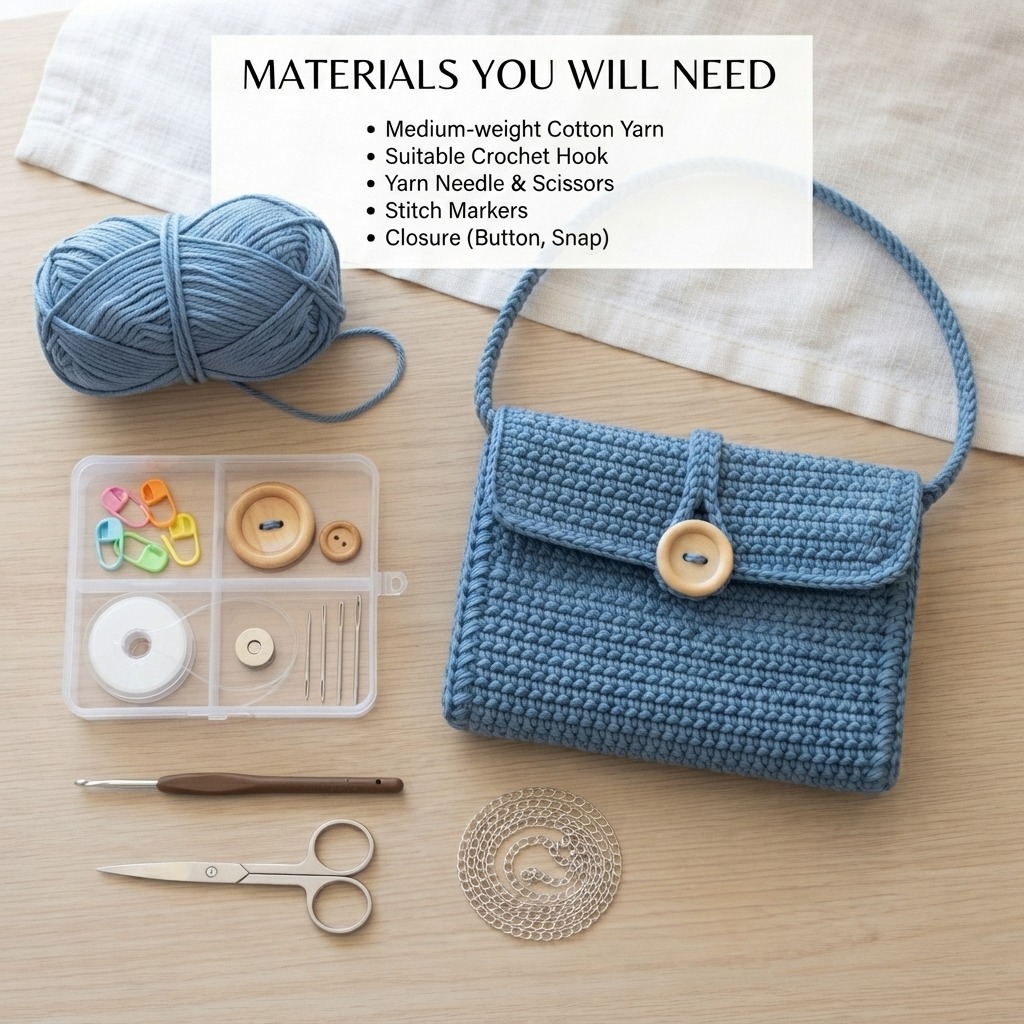
Before starting, gather a few simple supplies:
- Medium-weight cotton or acrylic yarn
- A crochet hook suitable for your yarn
- Scissors
- A yarn needle
- Stitch markers, if needed
- A button, snap, or zipper for the closure
- Optional: a chain, yarn strap, or crochet handle
Cotton yarn is an especially good choice for a small crochet bag because it is strong and usually holds its shape well. Acrylic yarn can also work beautifully and gives you many color options.
Choosing the Right Yarn
The yarn you choose can change the appearance and durability of your finished bag. For a firm everyday bag, choose cotton or a sturdy cotton blend. If you want a softer and lighter bag, acrylic yarn may be a good option.
For beginners, it is usually easier to work with a medium-weight yarn in a light or medium color. Very dark yarn can make individual stitches difficult to see.
You do not need expensive yarn for this project. A small crochet bag is a great way to use leftover yarn from previous projects.
Basic Crochet Stitches
A small crochet bag can be made with simple stitches. If you are a beginner, learn these basic techniques first:
Chain stitch: This creates the foundation chain and can also be used for straps.
Single crochet: This is a simple, tight stitch that creates a firm fabric, making it excellent for bags.
Slip stitch: This is useful for joining rounds and finishing your work.
You can also use half double crochet or double crochet if you want a more open or decorative texture.
Step 1: Make the Foundation Chain
Start by making a slip knot and placing it on your crochet hook. Create a chain of approximately 20 stitches for a small rectangular bag.
The exact number of chains depends on the size you want. If you want a wider bag, make more chains. If you want a smaller phone pouch, use fewer chains.
Try to keep your chain stitches relatively even. Avoid pulling them too tightly because this can make the first row difficult to crochet.
Step 2: Crochet the First Row
Insert your hook into the second chain from the hook and make a single crochet. Continue making one single crochet into each chain across the row.
When you reach the end, chain one and turn your work.
This first row forms the foundation of one side of the bag. Do not worry if your edges look slightly uneven at first. With practice, your tension will become more consistent.
Step 3: Continue Building the Bag
Continue working rows of single crochet. At the end of every row, chain one and turn.
Keep crocheting until the piece is approximately twice as tall as you want the finished bag to be. For example, if you want your finished bag to be about 15 centimeters tall, crochet a piece around 30 centimeters long before folding it.
This method creates a simple folded bag with a front, back, and opening at the top.
For a more decorative design, you can change colors every few rows. You could also create stripes by alternating two or three colors.
Step 4: Fold the Crochet Piece
Once you reach the desired length, place the crochet piece flat on a table.
Fold the bottom section upward, leaving enough space at the top for the flap. The folded section becomes the main body of your bag.
Make sure the side edges line up evenly.
If necessary, use stitch markers to hold the sides together while you prepare to sew them.
Step 5: Join the Sides
Use a yarn needle and matching yarn to sew the two side edges together.
You can use a simple whip stitch or mattress stitch. Work carefully from the bottom toward the top, keeping the stitches secure.
When you reach the opening, fasten off the yarn and weave the loose end through several stitches so that it does not come undone.
Repeat the process on the other side.
You now have the basic shape of your small crochet bag.
Step 6: Make the Bag Flap
The top section that you left unfolded can become a simple flap.
You can leave it rectangular or shape it into a point. A pointed flap can give the bag a more stylish appearance.
For a rounded flap, decrease stitches gradually near the edges as you crochet. For a simple beginner design, however, a rectangular flap is perfectly fine.
You can also add a decorative border around the flap using single crochet or slip stitches.
Step 7: Add a Closure
A closure helps keep your belongings safely inside the bag.
One of the easiest options is a button. Sew a button onto the front of the bag and crochet a small loop on the flap. The loop can fit around the button to keep the bag closed.
You can also use a snap button, magnetic closure, zipper, or simple crochet tie.
Choose the closure according to the style and purpose of your bag.
Step 8: Make a Crochet Strap
A small crochet bag looks even better with a handmade strap.
To make a simple strap, crochet a chain long enough to fit comfortably over your shoulder or around your wrist. Then work several rows of single crochet across the chain to make the strap stronger.
Another option is to make a thick chain and attach it directly to both sides of the bag.
For a stronger strap, crochet several rows rather than using only a thin chain. A wider strap is generally more comfortable and durable.
Step 9: Attach the Strap
Position the strap evenly on both sides of the bag.
Use a yarn needle to sew each end securely to the bag. Make several passes through the attachment points to strengthen them.
This step is important because the strap receives more tension than many other parts of the bag.
Before using the bag, gently pull the strap to make sure the attachment points are secure.
Step 10: Add Decorative Details
Now comes the fun part. You can personalize your small crochet bag in many different ways.
Try adding:
- Crochet flowers
- Small hearts
- Bows
- Buttons
- Beads
- Tassels
- Pom-poms
- Embroidered designs
- Colorful stripes
- Decorative borders
For a cute summer bag, pastel colors and crochet flowers can create a cheerful appearance. For an elegant design, choose one or two neutral colors and add a simple button.
Easy Color Ideas
Color can completely change the look of a crochet bag.
For a soft and feminine style, try combinations such as cream and pink, white and lavender, or beige and light blue.
For a cheerful design, combine yellow, orange, turquoise, and pink.
If you prefer a classic look, black, white, brown, beige, navy, or gray are excellent choices.
You can also make a rainbow bag by changing colors every few rows.
Tips for Beginners
If this is your first crochet bag, do not worry about making it perfect. Handmade projects often have small differences that make them unique.
Keep your tension consistent throughout the project. If your stitches become very tight or loose, the bag may change shape.
Count your stitches regularly, especially during the first few rows. Losing or adding stitches can make the sides uneven.
Use stitch markers when necessary. They are especially helpful when working in rounds or marking important points.
Choose a simple pattern for your first bag. Once you understand the basic construction, you can try more complicated designs.
How to Make the Bag Stronger
A small crochet bag should be strong enough to hold the items you plan to carry.
Using cotton yarn and tight stitches can create a sturdy fabric. You can also add a fabric lining inside the bag.
To add a lining, cut two pieces of fabric that match the size of the crochet bag. Sew them together along the sides and bottom, then carefully attach the lining inside the crochet bag.
A lining can also help prevent small objects from slipping through the crochet stitches.
Ideas for Different Small Crochet Bags
Once you understand the basic method, you can create many variations.
Mini Phone Bag
Make a narrow rectangular bag that is just large enough for a phone. Add a long shoulder strap and a button closure.
Small Coin Purse
Create a very small pouch using tight stitches. Add a zipper or snap closure.
Mini Gift Bag
Use colorful yarn to create a tiny bag for chocolates, jewelry, or another small gift.
Children’s Crochet Bag
Choose bright colors and decorate the bag with flowers, stars, hearts, animals, or cute buttons.
Simple Evening Bag
Use elegant yarn colors and a decorative chain strap to create a small bag for special occasions.
Common Mistakes to Avoid
Beginners sometimes make a few simple mistakes when creating crochet bags.
One common problem is uneven edges. This often happens when stitches are accidentally added or skipped. Counting stitches at the end of each row can help.
Another problem is making the strap too thin. A thin strap may stretch when the bag is filled. Make the strap wide and strong enough for its intended use.
It is also important to secure your yarn ends properly. Loose ends can unravel the bag over time.
Finally, do not make the bag too large for the amount of yarn you have. Measure your project as you work and keep some yarn available for sewing and finishing.
Final Thoughts
Making a small crochet bag is a simple and enjoyable project for beginners. With just some yarn, a crochet hook, and a few basic stitches, you can create a useful handmade accessory.
The best thing about crochet is the opportunity to personalize every detail. You can experiment with colors, sizes, stitches, handles, closures, and decorations until you create a bag that matches your style.
Start with a simple rectangular design and practice your single crochet stitches. Once you become comfortable, try stripes, flowers, textured stitches, different shapes, and more advanced patterns.
A handmade crochet bag can be more than just a useful accessory. It can also be a thoughtful gift, a creative project, or even a small handmade product to sell online. With a little practice and imagination, one simple crochet bag can become the beginning of many beautiful crochet creations.
