
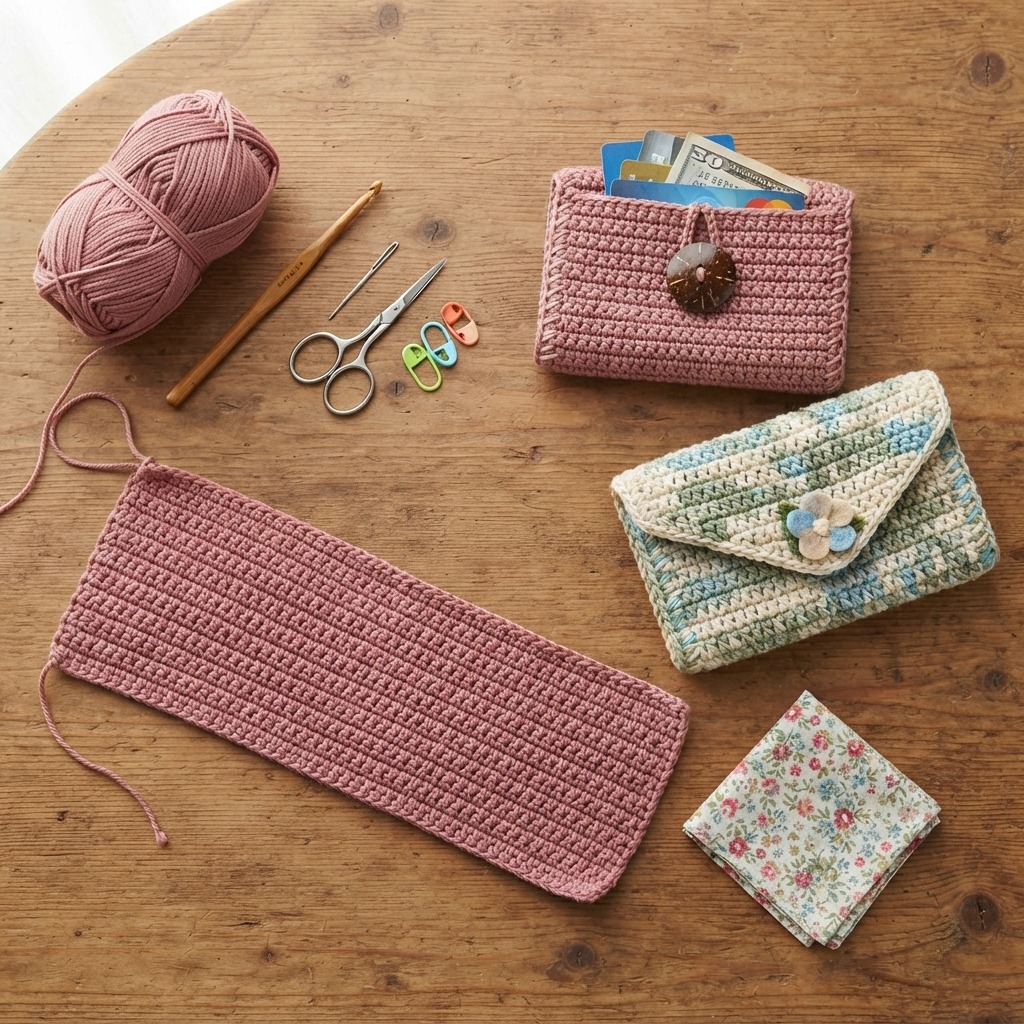
A crochet wallet is a practical, stylish, and enjoyable handmade project that beginners can easily try. Unlike larger crochet projects, a wallet requires only a small amount of yarn and can often be completed in a short time. With a crochet hook, some yarn, and a few basic stitches, you can create a useful accessory for carrying cards, coins, cash, or small personal items.
Making your own crochet wallet also gives you the freedom to choose your favorite colors, textures, decorations, and closures. You can create a simple everyday wallet, a colorful children’s wallet, a small coin purse, or an elegant card holder.
This project is especially useful for anyone who enjoys handmade crafts and wants to create something that is both beautiful and functional.
Why Make a Crochet Wallet?
There are many reasons to make a crochet wallet instead of buying one. First, crochet allows you to create a completely personalized design. You can choose colors that match your clothes, favorite bag, or personal style.
Second, a crochet wallet is an excellent beginner project. It is smaller than a handbag and does not require complicated construction. It gives beginners an opportunity to practice important crochet skills while creating something useful.
A handmade wallet can also make a thoughtful gift. You can create one for a friend, family member, teacher, or child and customize it with their favorite colors.
Finally, crochet wallets can be made from leftover yarn. This makes them an inexpensive and creative way to use small amounts of yarn from previous projects.
Materials You Will Need
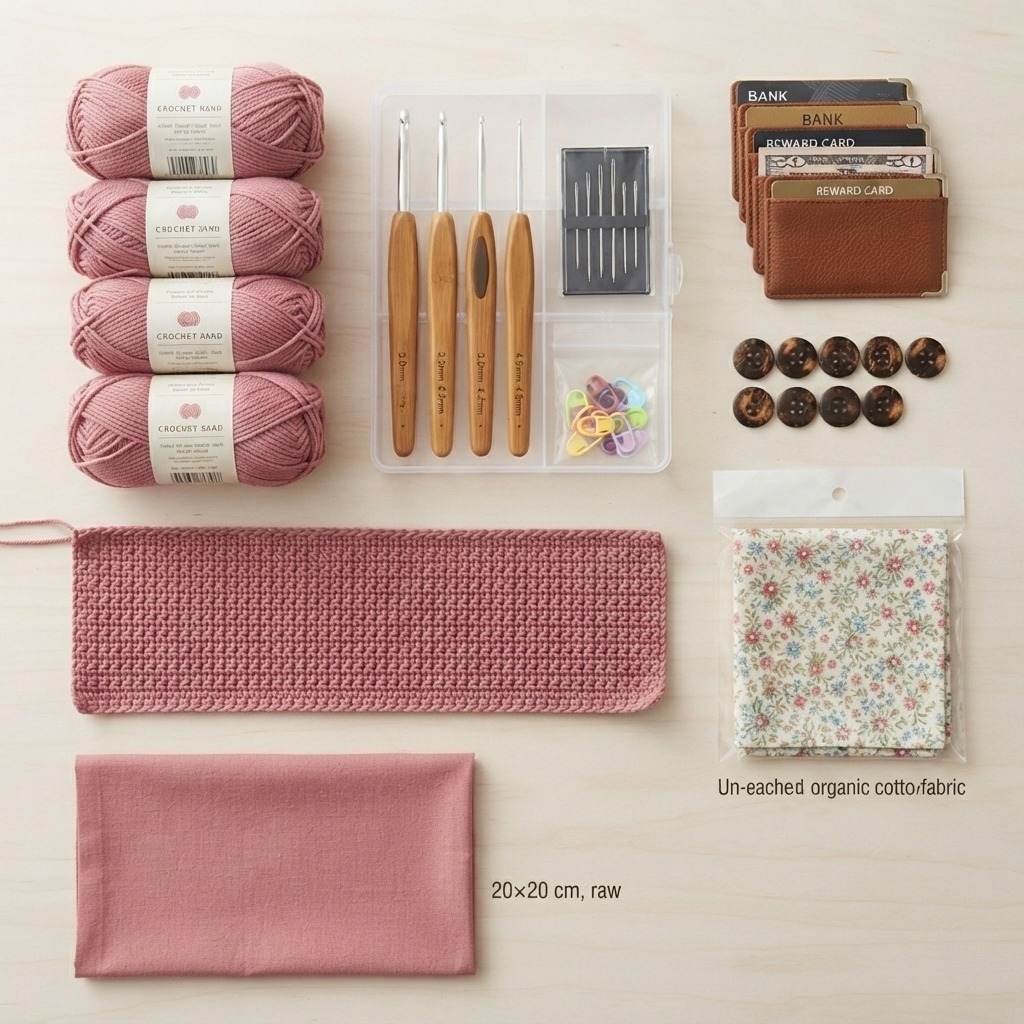
To make a simple crochet wallet, gather the following supplies:
- Medium-weight cotton or acrylic yarn
- A crochet hook suitable for your yarn
- Scissors
- A yarn needle
- Stitch markers, if needed
- One button, snap, or magnetic closure
- Optional fabric for lining
- Optional zipper
- Optional decorative buttons, beads, or crochet flowers
Cotton yarn is often a good choice because it creates a firm fabric that holds its shape. Acrylic yarn is another useful option because it comes in many colors and is easy to work with.
Choosing Yarn for Your Wallet
The yarn has a big influence on the final appearance and strength of your wallet.
For an everyday wallet, choose a strong yarn that does not stretch too much. Cotton is particularly suitable for this purpose. If you want a softer wallet, you can use acrylic yarn.
Beginners may find it easier to work with a medium-weight yarn in a light color because the stitches are easier to see.
You can use one color for a classic wallet or combine several colors to create stripes, blocks, or decorative patterns.
Basic Crochet Stitches
You do not need advanced crochet skills to make a simple wallet. The most useful stitches are:
Chain stitch: Used to create the foundation chain.
Single crochet: Creates a firm fabric that works well for wallets and bags.
Slip stitch: Useful for joining pieces and finishing edges.
Half double crochet: Can be used when you want a slightly softer texture.
If you are completely new to crochet, practice these stitches on a small piece of yarn before beginning the wallet.
Step 1: Create the Foundation Chain
Start with a slip knot on your crochet hook.
Make a chain of around 25 stitches for a medium-sized wallet. The exact number depends on the size you want.
For a card holder, use fewer chains. For a wallet designed to hold cash and several cards, make a longer foundation chain.
Try to keep your chain stitches even. Avoid making them extremely tight because this can make it difficult to crochet into the chain during the first row.
Step 2: Crochet the First Row
Insert your hook into the second chain from the hook and make a single crochet.
Continue making one single crochet into each chain until you reach the end.
Chain one and turn your work.
You now have the beginning of the wallet body.
Step 3: Build the Wallet Body
Continue crocheting rows of single crochet.
At the end of every row, chain one and turn.
Keep working until the piece is approximately twice the height you want your finished wallet to be.
For example, if you want the main wallet section to be around 10 centimeters tall, you can crochet a piece approximately 20 centimeters long and fold it in half.
Keep checking the size as you work. The wallet should be large enough to hold the items you plan to carry without being unnecessarily bulky.
Step 4: Fold the Wallet
Place your finished crochet rectangle flat on a table.
Fold the bottom section upward to create the main pocket.
Leave the remaining section at the top to create a flap.
Make sure the sides are aligned evenly.
You can use stitch markers to hold the folded section in place while you prepare to sew the sides.
Step 5: Sew the Sides
Thread your yarn needle with a matching piece of yarn.
Sew the two sides of the wallet together using a whip stitch or mattress stitch.
Work carefully and keep your stitches secure.
Once you reach the top of the pocket, fasten off the yarn and weave the loose end through several stitches.
Repeat the process on the opposite side.
Your wallet should now have a pocket with an opening at the top.
Step 6: Create the Flap
The upper section of the crochet rectangle can become the wallet flap.
For the easiest design, keep the flap rectangular.
If you want a more decorative appearance, you can shape the flap into a point or rounded edge.
You can also crochet a border around the flap using slip stitches or single crochet.
A contrasting border is an easy way to make a simple wallet look more interesting.
Step 7: Add a Button Closure
A button is one of the easiest ways to close a handmade crochet wallet.
Sew a button onto the front of the wallet.
Then create a small crochet loop on the flap. The loop should be large enough to fit comfortably around the button.
To make the loop, attach yarn to the flap, crochet several chain stitches, and connect the chain back to the flap with a slip stitch.
Test the closure before cutting your yarn.
Other Closure Ideas
You are not limited to buttons. There are several other options.
A snap button gives the wallet a simple and practical closure.
A magnetic snap can create a more professional-looking finish.
A zipper is a good choice for a wallet designed to hold coins.
A crochet tie can be used for a simple handmade design.
You can also add a small loop and decorative button if you want the wallet to have a vintage or rustic appearance.
Step 8: Add Card Slots
If you want your wallet to hold cards, you can create one or more small pockets.
One simple method is to crochet separate small rectangles and sew them onto the inside of the wallet.
Make each pocket slightly larger than the card it needs to hold.
You can create two, three, or more card slots depending on the size of the wallet.
Make sure the pockets are securely attached along their bottom and side edges.
Step 9: Add a Coin Pocket
A small coin pocket can make your crochet wallet much more useful.
You can crochet a small rectangle, fold it into a pocket, and sew it onto the inside of the wallet.
Add a zipper, button, or snap to keep coins secure.
For a simple coin purse, you can also make a separate small crochet pouch and attach it to the wallet.
Step 10: Add a Fabric Lining
A fabric lining is optional, but it can make the wallet stronger and more durable.
Choose a lightweight cotton fabric that complements the color of your crochet.
Cut two pieces of fabric to match the inside dimensions of the wallet. Sew them together around the sides and bottom, leaving the top open.
Place the lining inside the crochet wallet and carefully sew it into position using a needle and thread.
A lining can also help prevent cards, coins, and small objects from slipping through the crochet stitches.
Creative Color Ideas
One of the most enjoyable parts of making a crochet wallet is choosing colors.
For a soft feminine style, try pink, cream, lavender, or light blue.
For a modern look, use black, white, gray, beige, or navy.
For a cheerful summer wallet, combine yellow, turquoise, orange, and pink.
You can also create a rainbow wallet by changing yarn colors every few rows.
Another attractive idea is to use one main color and add a contrasting border around the flap and edges.
Crochet Wallet Decoration Ideas
A simple wallet can become much more attractive with a few handmade decorations.
Try adding:
- Crochet flowers
- Hearts
- Stars
- Small bows
- Buttons
- Beads
- Embroidery
- Tassels
- Pom-poms
- Decorative borders
For a children’s wallet, animal faces can be especially cute. You could turn the front of the wallet into a cat, bear, bunny, or frog.
For an adult wallet, simple geometric patterns or elegant neutral colors may create a more sophisticated appearance.
Tips for Making a Strong Wallet
A wallet needs to be sturdy because it may be opened and closed frequently.
Use relatively tight stitches to create a firm fabric.
Avoid using very loose stitches unless you plan to add a lining.
Secure all yarn ends carefully so that they do not unravel.
Reinforce the points where buttons, straps, or other closures are attached.
If you add card pockets, sew them securely along all necessary edges.
For an especially durable wallet, consider adding a fabric lining.
Easy Crochet Wallet Variations
Once you understand the basic design, you can experiment with different styles.
Simple Card Holder
Make a small rectangular crochet piece and fold it to create one or two card pockets. This is a quick project that uses very little yarn.
Zipper Coin Wallet
Crochet a small rectangle, fold it into a pouch, and sew a zipper along the opening. This is perfect for coins and small items.
Long Crochet Wallet
Make a wider and taller wallet with multiple card slots, a cash compartment, and a coin pocket.
Children’s Crochet Wallet
Use bright colors and add a cute animal face, flower, heart, or other decoration.
Mini Wrist Wallet
Add a small crochet loop or strap so that the wallet can be carried around the wrist.
Common Beginner Mistakes
One common mistake is changing the number of stitches from one row to another. This can make the wallet wider or narrower as you work.
To avoid this, count your stitches regularly.
Another mistake is using yarn that is too soft or stretchy. This may cause the wallet to lose its shape. A sturdy yarn is usually a better choice.
Beginners may also make the button loop too large or too small. Always test the loop with the button before finishing it.
Finally, do not rush the finishing process. Neatly weaving in yarn ends and securely attaching the closure can make a big difference in the final appearance.
How to Turn Crochet Wallets Into Handmade Gifts
A crochet wallet can be an excellent handmade gift.
Choose the recipient’s favorite colors and add a personalized decoration. You could make a matching crochet keychain or small pouch to create a complete gift set.
For birthdays, holidays, or special occasions, place the wallet inside a small handmade gift bag.
You can also create several wallets in different colors and give them to friends or family members.
Selling Handmade Crochet Wallets
If you enjoy making crochet wallets, you may also consider selling them.
Simple, attractive designs can be suitable for handmade markets, craft fairs, social media pages, and online shops.
When creating wallets to sell, focus on neat stitching, strong closures, attractive color combinations, and useful designs.
You can offer different sizes and styles so customers have several options.
Adding small personalized details can also make your handmade wallets more appealing.
Final Thoughts
Making a crochet wallet is a fun and practical project that is suitable for beginners and experienced crocheters alike. With a small amount of yarn and a few basic stitches, you can create a useful accessory that reflects your personal style.
Start with a simple rectangular wallet and practice your single crochet stitches. Once you feel comfortable, experiment with card slots, coin pockets, colorful stripes, decorative borders, buttons, zippers, and fabric linings.
The beauty of handmade crochet is that there are no limits to creativity. A basic wallet can become a colorful fashion accessory, a thoughtful gift, or even a handmade product to sell.
With patience, practice, and a little imagination, you can turn a few simple crochet stitches into a beautiful wallet that is both useful and unique.
