
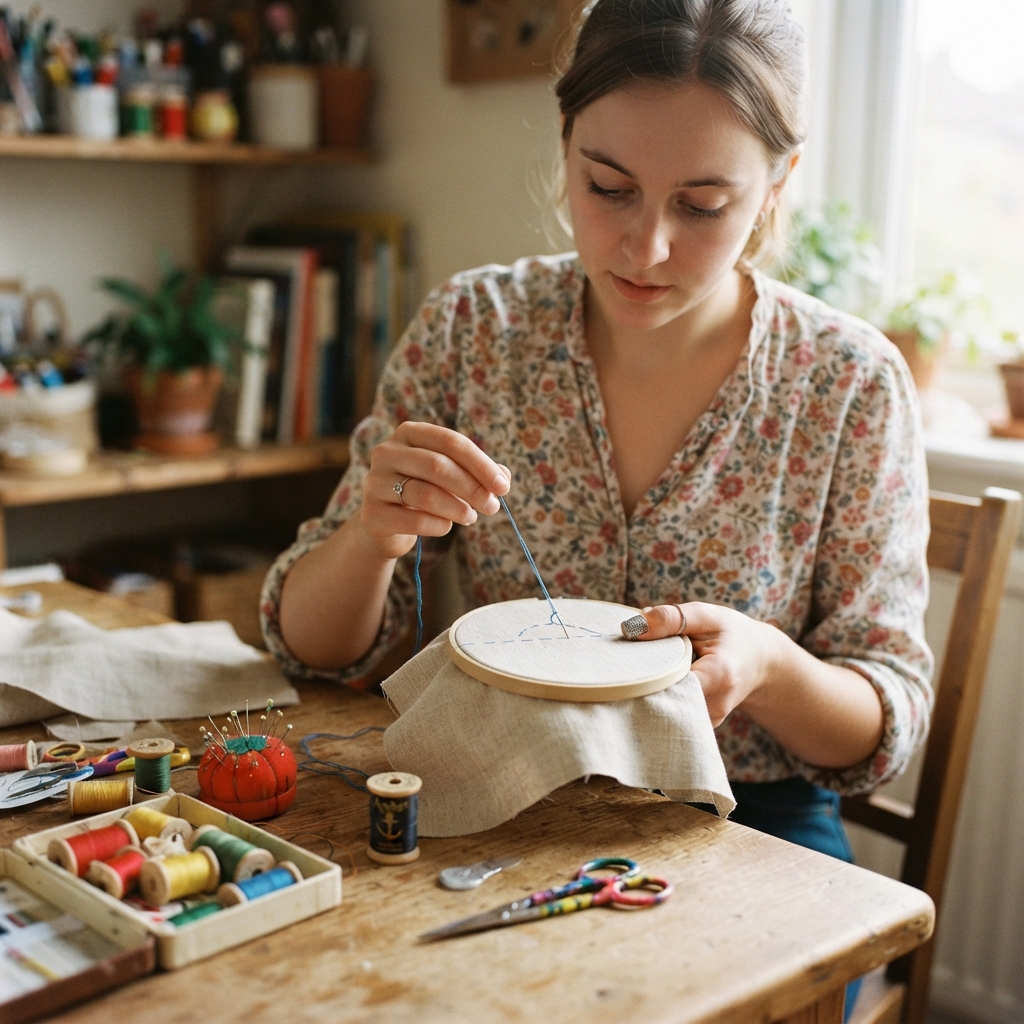
Hand sewing is a useful and creative skill that anyone can learn with a little practice. You do not need a sewing machine or expensive equipment to get started. A needle, thread, fabric, and a pair of scissors are enough to begin learning the basics.
Whether you want to repair clothes, make simple decorations, or create handmade projects, understanding basic hand-sewing techniques gives you a strong foundation. This beginner’s guide explains the essential tools, how to prepare your materials, and several simple stitches you can practice at home.
Why Learn Hand Sewing?
Hand sewing is useful in everyday life. It can help you repair a small tear, sew on a button, fix a loose hem, or personalize your clothes.
It is also a relaxing craft that encourages patience and creativity. Beginners can work slowly and learn one technique at a time.
Once you understand the basics, you can make simple projects such as fabric bookmarks, small pouches, decorative pillows, tote bags, and handmade gifts.
Essential Hand-Sewing Tools
You do not need a large collection of supplies to start.
Sewing Needles
Choose sharp hand-sewing needles that are appropriate for your fabric. A medium-size general-purpose needle is a good choice for beginners.
Sewing Thread
Cotton thread is suitable for many basic sewing projects. Choose a thread color that matches your fabric when you want the stitches to blend in.
For decorative work, you can use colorful embroidery floss.
Fabric
Medium-weight cotton is one of the easiest fabrics to practice with. It is stable, easy to handle, and available in many colors and patterns.
Avoid very stretchy or slippery fabric while you are learning.
Fabric Scissors
Sharp fabric scissors make cutting easier and produce cleaner edges.
Pins
Pins can temporarily hold fabric layers together before you sew them.
Measuring Tape and Ruler
These tools are useful when you need to measure fabric accurately.
Thimble
A thimble can protect your finger when pushing a needle through thicker materials. It is optional for beginners.
Step 1: Prepare Your Workspace
Choose a clean, comfortable, and well-lit place for sewing.
Place your fabric, thread, needles, and scissors where they are easy to reach.
Good lighting is particularly important because small stitches can be difficult to see.
Keep your needles and pins in a pincushion or small container when they are not being used.
Step 2: Learn How to Thread a Needle
Cut a piece of thread about 40–50 centimeters long.
Hold one end of the thread and guide it through the eye of the needle. If the thread is difficult to insert, cut the end cleanly or slightly dampen it.
Pull the thread through until you have enough length to sew comfortably.
For basic sewing, you can use a single strand of thread. For stronger seams, some projects may require a doubled thread.
Step 3: Make a Simple Knot
To secure your thread, make a small knot at the end.
One easy method is to wrap the end of the thread around your finger, roll it between your fingers, and pull it into a knot.
The knot should be secure but not excessively large.
Step 4: Learn the Running Stitch
The running stitch is one of the simplest hand-sewing stitches.
Bring the needle up through the fabric from the back.
Make a small straight stitch by pushing the needle down through the fabric.
Bring the needle back up a short distance away and repeat.
Continue along the line.
Try to keep the stitches approximately the same size.
Uses for Running Stitch
Running stitch can be used for:
- Simple seams
- Decorative stitching
- Basic repairs
- Quilting
- Fabric crafts
- Temporary stitching
It is an excellent stitch for beginners to practice.
Step 5: Learn the Backstitch
The backstitch is stronger than a basic running stitch and creates a continuous-looking line.
Bring the needle up through the fabric.
Make one stitch forward, then bring the needle up a short distance ahead.
Insert the needle back into the end of the previous stitch.
Continue repeating this movement.
Backstitch is useful for seams, outlines, and embroidery designs.
Step 6: Learn the Whip Stitch
The whip stitch wraps around the edge of the fabric.
Place two fabric pieces together. Bring the needle up near the edge and pass the thread diagonally over the edge.
Insert the needle again and repeat.
This creates a series of diagonal stitches along the edge.
Whip stitch can be useful for joining fabric pieces and working with felt.
Step 7: Learn the Blanket Stitch
The blanket stitch is a decorative way to finish fabric edges.
Bring the needle up near the edge of the fabric. Keep the working thread below the needle as you pull the stitch through.
Repeat the process at regular intervals.
Blanket stitch is especially popular for felt crafts, fabric decorations, and appliqué projects.
Step 8: Practice Sewing a Straight Seam
Take two small pieces of cotton fabric and place them together with their edges aligned.
Use pins if necessary to keep them in position.
Draw a straight line about 1 centimeter from the edge.
Sew along the line using a backstitch.
When you reach the end, secure the thread with a small knot on the back.
This simple exercise teaches you how to join two pieces of fabric.
Step 9: Practice Sewing Curves
Once you are comfortable with straight lines, practice sewing curves.
Draw a circle, wave, or simple leaf shape on a scrap of fabric.
Use small stitches to follow the curved line.
Smaller stitches make it easier to control the thread around tight curves.
This exercise is especially useful if you want to learn decorative embroidery later.
Common Hand-Sewing Mistakes
Beginners often make a few simple mistakes, and that is completely normal.
Using Thread That Is Too Long
Long thread can easily become tangled. Start with shorter pieces until you become comfortable.
Pulling the Thread Too Hard
Excessive tension can cause the fabric to wrinkle. Pull the thread gently until the stitch lies flat.
Making Stitches Uneven
Try to keep your stitches similar in length and spacing. They do not need to be perfect.
Sewing Without Preparing the Fabric
Measure and cut carefully before sewing. Accurate preparation makes the final project much easier.
Choosing Difficult Materials
Avoid thick, slippery, or stretchy fabrics when practicing. Begin with simple cotton.
A Simple First Hand-Sewing Project
Once you have practiced the basic stitches, try making a small fabric heart.
Draw a heart template on paper and cut out two fabric hearts.
Place the pieces together and sew around the edges using a running stitch or blanket stitch.
Leave a small opening and add a little stuffing.
Then sew the opening closed.
You can decorate the finished heart with embroidery, buttons, ribbons, or beads.
Tips for Becoming a Better Sewer
Practice regularly instead of trying to learn everything at once.
Start with simple projects and gradually increase the difficulty.
Keep your stitches small and consistent.
Choose good-quality thread and needles that match your fabric.
Take your time and avoid pulling the thread too tightly.
Most importantly, do not be afraid of mistakes. Removing a few stitches and trying again is a normal part of learning.
Hand Sewing for Children
Hand sewing can also be an enjoyable educational craft for older children. It can help develop patience, concentration, creativity, and fine motor skills.
Children should always have appropriate adult supervision when using needles, pins, and scissors.
Simple projects using felt are often a good starting point because the fabric is easy to handle and does not fray easily.
What to Learn Next
After mastering the basic stitches, you can explore more hand-sewing techniques.
Consider learning:
- Chain stitch
- Stem stitch
- Satin stitch
- French knots
- Simple hemming
- Button sewing
- Appliqué
- Decorative embroidery
- Basic clothing repairs
Each technique will give you more confidence and allow you to create a wider variety of projects.
Final Thoughts
Learning the basics of hand sewing is easier than many beginners expect. With a few simple tools and regular practice, you can quickly become comfortable with a needle and thread.
Start with the running stitch, then move on to backstitch, whip stitch, and blanket stitch. Practice on scrap fabric before beginning a real project.
With patience and creativity, these basic techniques can become the foundation for repairs, decorations, handmade gifts, and many enjoyable sewing projects.
