
Quick Overview Table
| Topic | Details |
| Focus Keyword | Star of David quilling |
| Craft Type | Paper Quilling Art |
| Skill Level | Beginner to Intermediate |
| Materials Needed | Quilling paper strips, glue, quilling tool, tweezers, cardstock |
| Time Required | 30–90 minutes |
| Main Project | Decorative Star of David Design |
| Number of Lessons | 6 Easy Craft Lessons |
| Best For | DIY Decor, Handmade Gifts, Educational Crafts |
| Cost | Low Budget |
| Finished Result | Beautiful Paper Quilling Artwork |
Introduction
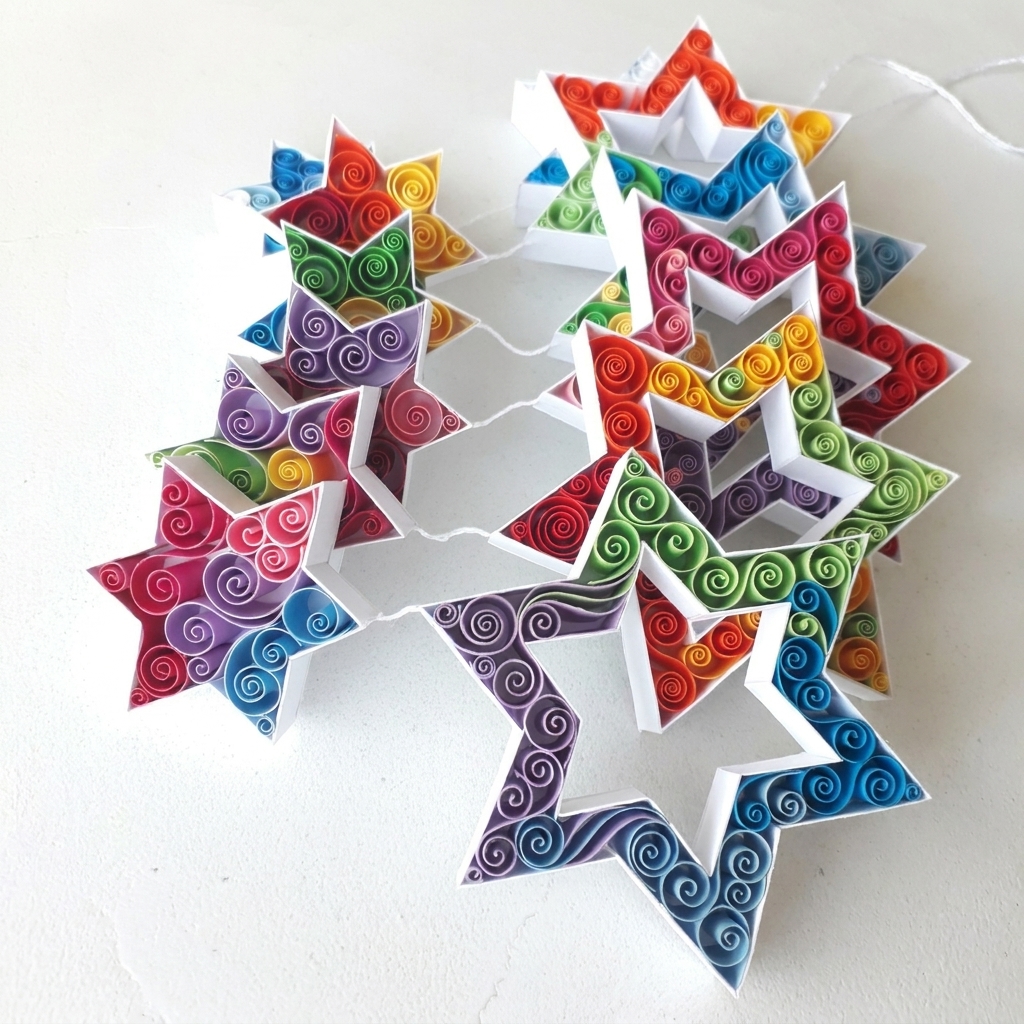
Paper quilling is one of the most beautiful and relaxing paper crafts that anyone can learn. Using thin strips of paper, crafters create elegant shapes, patterns, and designs that transform ordinary paper into impressive works of art. Among the many popular quilling projects, Star of David quilling stands out as a meaningful and visually stunning craft.
The Star of David, also known as the Magen David, is a six-pointed star formed by two overlapping triangles. Its symmetrical shape makes it ideal for paper quilling because the design naturally lends itself to balanced patterns, intricate coils, and decorative details. Whether you are a beginner looking for a simple project or an experienced crafter seeking fresh inspiration, Star of David quilling offers endless creative possibilities.
In this guide, you will discover six easy craft lessons that teach the fundamentals of creating beautiful quilled Star of David designs. Each lesson builds upon the previous one, helping you gain confidence while developing essential quilling skills. By the end, you will be able to create decorative wall art, greeting cards, ornaments, and personalized gifts featuring elegant Star of David quilling patterns.
Let’s explore this fascinating craft step by step.
What Is Star of David Quilling?
Star of David quilling is the art of creating the six-pointed Star of David using rolled and shaped paper strips. Instead of drawing the star with pencils or markers, artists build it using quilling techniques such as tight coils, loose coils, teardrops, marquise shapes, and scrolls.
The finished artwork can be simple and minimalist or highly detailed with decorative patterns filling every section of the star. Many crafters enjoy this project because it combines geometry, creativity, and precision while producing a meaningful piece of art.
Star of David quilling can be used for:
- Greeting cards
- Holiday decorations
- Framed wall art
- Educational projects
- Personalized gifts
- Scrapbooking
- Home decor accents
The beauty of this craft lies in its versatility. Each artist can create a unique interpretation while following the same basic structure.
Materials You’ll Need
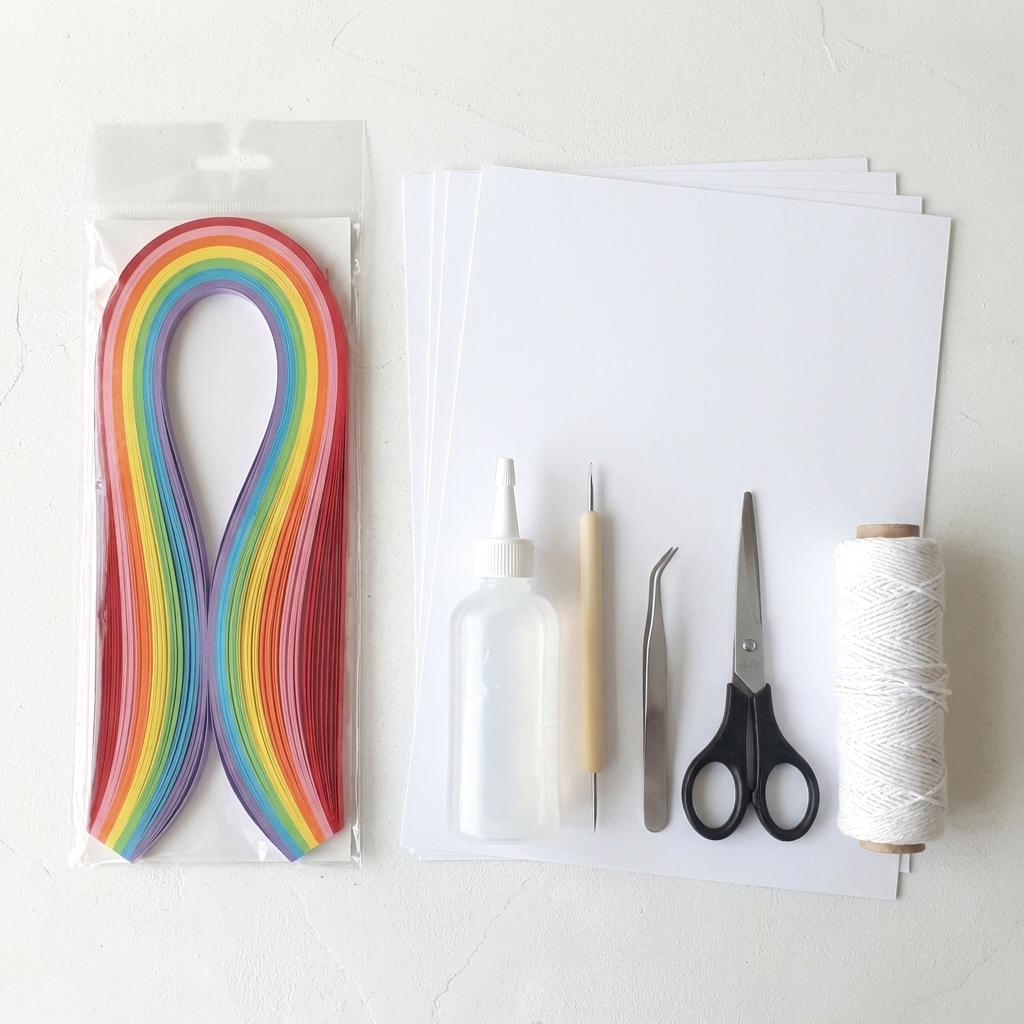
Before beginning your Star of David quilling project, gather the following supplies:
Basic Materials
- Quilling paper strips
- Quilling tool
- Craft glue
- Tweezers
- Scissors
- Ruler
- Pencil
- White or colored cardstock
- Corkboard or work mat
Optional Supplies
- Metallic quilling paper
- Glitter paper strips
- Shadow box frame
- Decorative beads
- Colored cardstock backgrounds
Having quality materials makes the crafting process smoother and more enjoyable.
Lesson 1: Learning Basic Quilling Shapes
Every successful Star of David quilling project starts with mastering basic shapes.
Tight Coil
Roll a paper strip tightly around the quilling tool. Secure the end with glue. This shape serves as the foundation for many designs.
Loose Coil
Create a tight coil, then allow it to expand slightly before gluing the end. Loose coils add softness and texture.
Teardrop Shape
Pinch one side of a loose coil to create a teardrop form. This shape is useful for decorative elements within the star.
Marquise Shape
Pinch both sides of a loose coil. The result resembles an eye shape and works beautifully in geometric patterns.
Scrolls
Scrolls are made by curling paper ends without fully rolling them into coils. They add elegance and movement to quilled artwork.
Practice these shapes multiple times before moving to the next lesson. Strong fundamentals lead to cleaner and more professional results.
Lesson 2: Creating the Star Outline
The next step in Star of David quilling is constructing the basic star framework.
Step 1
Draw a six-pointed Star of David lightly on cardstock.
Step 2
Choose paper strips that match your preferred color scheme.
Step 3
Use the edge of each strip to follow the star lines carefully.
Step 4
Apply small amounts of glue as you work.
Step 5
Allow the outline to dry completely before adding decorative elements.
A clean outline creates the structure that supports the entire design.
Helpful Tip
Work slowly around corners and intersections. Precision is more important than speed.
Lesson 3: Filling the Triangles
Now comes the exciting part adding decorative quilled shapes inside the star.
Simple Triangle Fill
Use loose coils arranged neatly inside each triangular section.

Floral Fill
Combine teardrops to create flower-like designs within the triangles.
Geometric Fill
Use marquise shapes arranged symmetrically for a modern appearance.
Spiral Fill
Create flowing spirals that add movement and visual interest.
The key is maintaining balance. Since the Star of David is highly symmetrical, similar patterns on both sides create a harmonious result.
Common Beginner Mistake
Avoid overcrowding the sections. Leave small spaces between elements to allow each shape to stand out.
Lesson 4: Adding Decorative Borders
Decorative borders transform a basic design into a polished work of art.
Double-Line Border
Add a second paper strip just inside the original outline.
Scroll Border
Attach small scrolls around the edges for elegance.
Beaded Effect
Use tight coils evenly spaced around the perimeter.
Layered Border
Combine multiple paper colors to create depth and contrast.
Decorative borders help frame the artwork while drawing attention to the central design.
Color Suggestions
Popular color combinations include:
- Blue and white
- Gold and navy
- Silver and white
- Black and gold
- Pastel blue and cream
Experiment with colors that complement your intended display space.
Lesson 5: Creating a 3D Star of David Quilling Design
Once you’ve mastered flat designs, try creating dimensional artwork.
Layering Technique
Create two identical stars and stack them with foam adhesive.
Raised Coils
Use taller coils to create depth.
Shadow Effects
Position shapes at different heights to produce subtle shadows.
Mixed Shapes
Combine tight coils and loose coils for varied texture.
Three-dimensional Star of David quilling projects look especially impressive in shadow box frames.
Why 3D Designs Work
The added depth highlights the intricate paper shapes and creates a more dynamic visual experience.
Lesson 6: Designing a Professional Display Piece
The final lesson focuses on presentation.
Choose a Background
Select cardstock that contrasts with your quilling colors.
Frame Your Artwork
A simple frame protects your creation while enhancing its appearance.
Add Personalized Details
Consider incorporating:
- Initials
- Dates
- Decorative patterns
- Inspirational words
Create a Theme
Coordinate colors and decorative elements around a specific purpose such as:
- Holiday decor
- Wedding gifts
- Educational displays
- Home decoration
Presentation can elevate even a simple quilling project into a memorable piece of art.
Creative Star of David Quilling Project Ideas
After mastering the six lessons, explore these creative applications:
Handmade Greeting Cards
Decorate cards with miniature quilled stars for special occasions.
Wall Art
Create large framed pieces for home decor.
Holiday Ornaments
Design lightweight hanging decorations.
Bookmarks
Add elegant quilled stars to personalized bookmarks.
Scrapbook Embellishments
Enhance memory albums with meaningful quilled designs.
Educational Displays
Use quilling projects to teach geometry, symmetry, and artistic techniques.
Tips for Better Star of David Quilling Results
Use Quality Paper
Consistent paper thickness produces cleaner shapes.
Apply Glue Sparingly
Too much glue can distort paper and create visible marks.
Practice Symmetry
Measure carefully to maintain balanced proportions.
Work on a Flat Surface
A stable workspace improves precision.
Be Patient
Quilling rewards careful craftsmanship and attention to detail.
Keep Tools Clean
Clean tools ensure smoother rolling and shaping.
Benefits of Learning Star of David Quilling
Beyond creating beautiful artwork, Star of David quilling offers several benefits.
Encourages Creativity
Each project allows personal expression through color and design choices.
Improves Fine Motor Skills
Rolling and shaping paper enhances hand coordination.
Reduces Stress
Many people find quilling calming and meditative.
Builds Patience
The process encourages focus and attention to detail.
Creates Meaningful Gifts
Handmade artwork often carries greater sentimental value than store-bought items.
Common Challenges and Solutions
Problem: Uneven Shapes
Solution: Use a sizing board and practice consistent rolling techniques.
Problem: Visible Glue
Solution: Apply glue with a toothpick in very small amounts.
Problem: Loose Structures
Solution: Allow each section to dry completely before continuing.
Problem: Asymmetrical Design
Solution: Measure carefully and compare corresponding sections frequently.
Problem: Flattened Coils
Solution: Handle shapes gently using tweezers.
Conclusion
Star of David quilling is a rewarding craft that combines creativity, precision, and artistic expression. With just a few simple tools and paper strips, anyone can transform a meaningful symbol into a stunning work of art. By following these six easy craft lessons, beginners can quickly learn essential quilling techniques while building confidence and skill.
From basic coils and outlines to advanced layered designs and professional displays, Star of David quilling offers endless opportunities for creativity. Whether you create greeting cards, decorative wall art, ornaments, or personalized gifts, each project reflects your unique artistic style.
The beauty of quilling lies in its simplicity. A single strip of paper can become something extraordinary when shaped with care and imagination. Start with the basic lessons, practice regularly, and soon you’ll be creating impressive Star of David quilling designs that showcase both craftsmanship and creativity.
Happy quilling!