
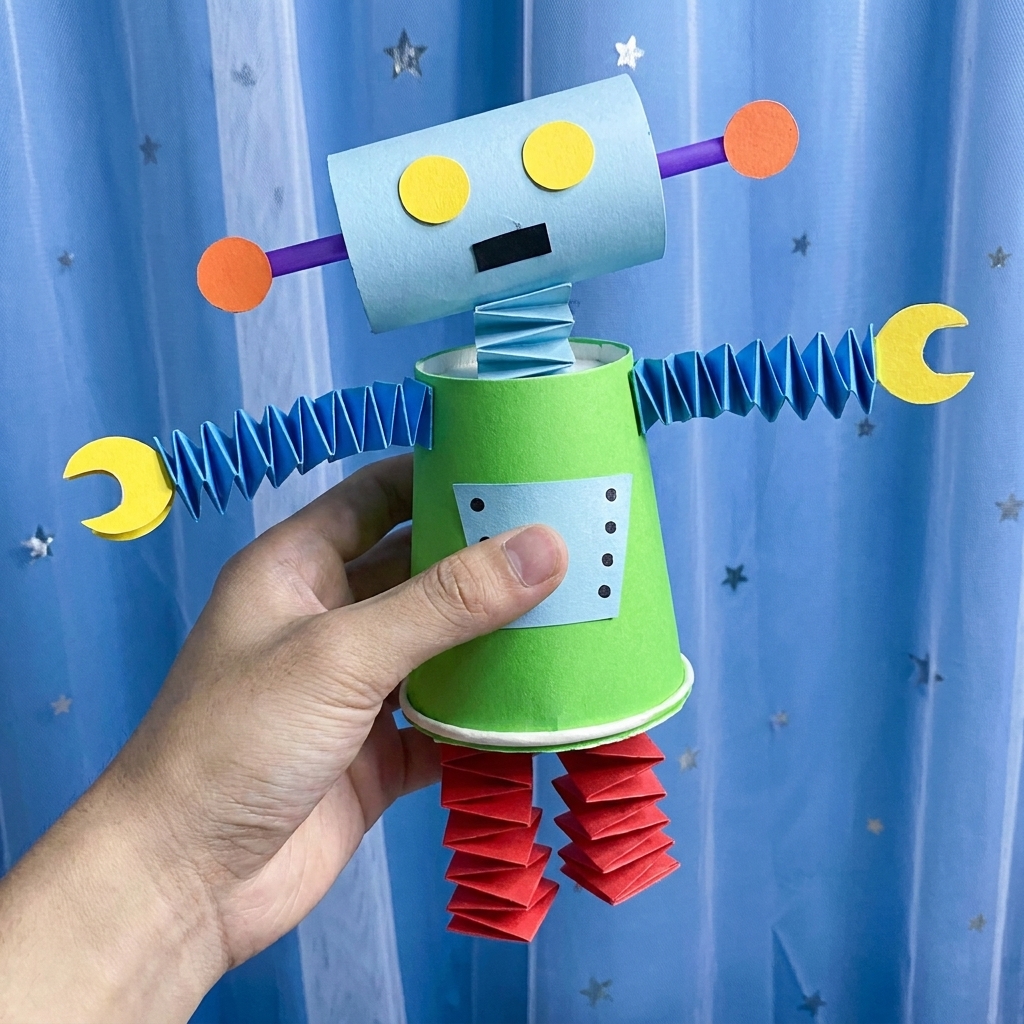
School projects are an exciting way for students to explore science, technology, engineering, art, and mathematics through hands-on learning. Instead of only reading about these subjects in textbooks, students can apply their knowledge by designing, building, testing, and improving creative models. One enjoyable and educational project is making a paper robot that moves. Although paper is light and flexible, it can be transformed into an amazing moving robot with thoughtful design, careful construction, and simple mechanical principles.
A moving paper robot introduces students to basic engineering, mechanics, and creativity. The project encourages learners to think like inventors as they solve problems, test different ideas, and improve their designs. Students also discover that movement does not always require expensive motors or complicated electronics. By using folded paper, cardboard, rubber bands, paper fasteners, and simple linkages, they can create robots that walk, wave their arms, nod their heads, or roll across a table.
This project is suitable for elementary and middle school students because it combines imagination with practical skills. It also teaches perseverance, as the first design may not work perfectly. Every adjustment helps students understand how engineers improve machines through testing and redesign.
| Quick Overview | Details |
| Project Name | Moving Paper Robot |
| Subject | Science, Engineering, STEAM |
| Difficulty | Easy to Moderate |
| Recommended Age | 8–15 years |
| Main Materials | Paper, cardboard, tape, glue, paper fasteners |
| Main Goal | Build a paper robot that can move |
| Skills Learned | Creativity, engineering, teamwork, problem-solving |
Why This Project Is Important
Making a moving paper robot teaches much more than arts and crafts. Students learn how simple machines transfer motion and how different parts work together to create movement. They also discover that engineering involves planning, experimenting, testing, and improving rather than simply assembling materials.
This activity encourages curiosity by asking questions such as:
- How can paper become strong enough to support moving parts?
- Which joints move most smoothly?
- How can one movement control several parts?
- How can friction be reduced?
By answering these questions through experimentation, students gain a deeper understanding of engineering principles.
Learning Objectives
At the end of the project, students should be able to:
- Understand the engineering design process.
- Build a simple mechanical model.
- Explore motion and movement.
- Practice measuring and cutting accurately.
- Improve creativity and imagination.
- Strengthen teamwork and communication.
- Record observations during testing.
- Develop confidence through problem-solving.
These learning objectives connect science with practical creativity.
Materials Needed
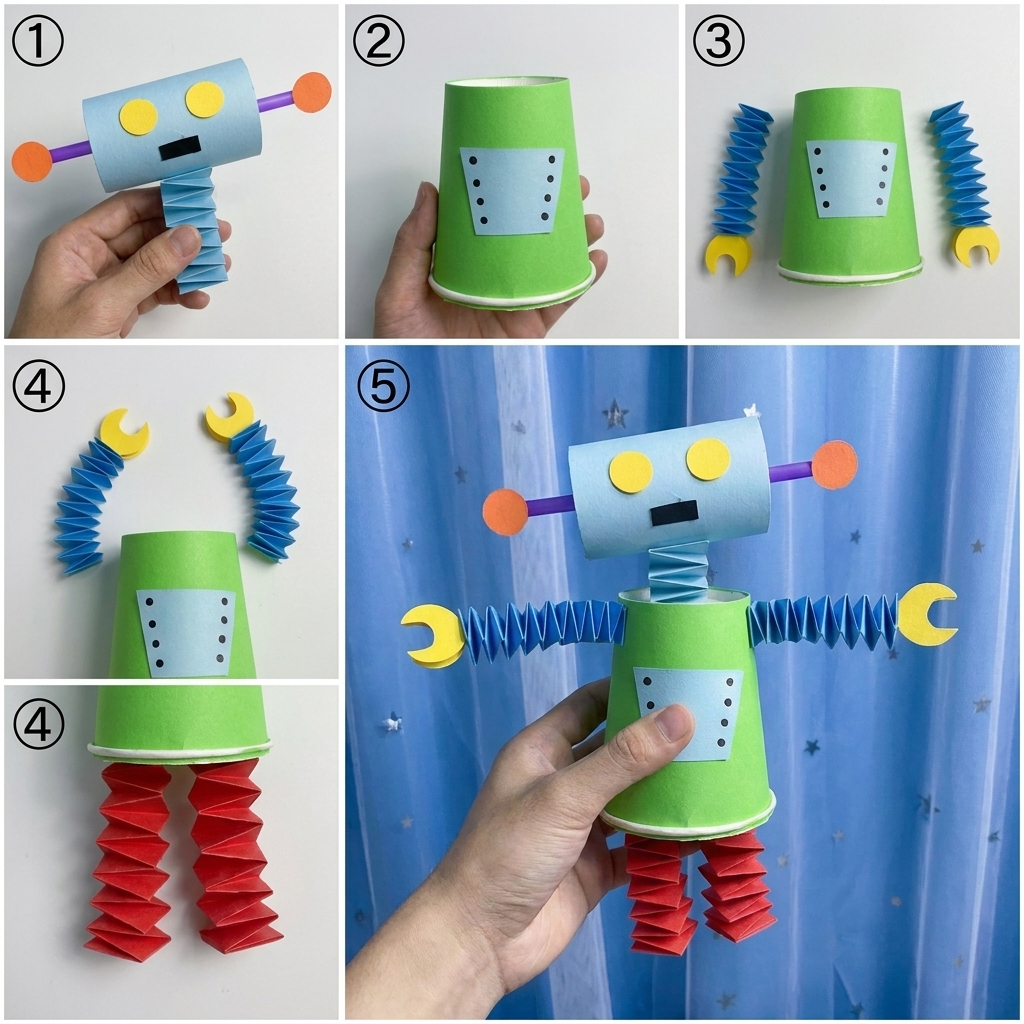
Most materials are inexpensive and easy to find.
- Colored paper
- Cardboard
- Glue
- Tape
- Scissors
- Pencil
- Ruler
- Markers or crayons
- Paper fasteners (brads)
- Drinking straws
- Wooden craft sticks
- Rubber bands
- String
Optional materials include googly eyes, stickers, and recycled packaging to decorate the robot.
Planning the Robot
Every engineering project begins with careful planning.
Students should first draw a simple sketch of their robot.
Questions to consider include:
- What will the robot look like?
- Which parts will move?
- How tall should it be?
- Will it stand or roll?
- Which materials are strongest?
A simple drawing helps organize ideas before construction begins.
Understanding Movement
Before building, students should understand several types of movement.
Examples include:
- Walking
- Rolling
- Swinging
- Rotating
- Sliding
- Bending
Different mechanisms create different motions.
Understanding these movements helps students choose the best design.
Choosing a Robot Design
Many robot styles are possible.
Some students build:
- Friendly helper robots
- Space exploration robots
- Dancing robots
- Animal-inspired robots
- Factory robots
- Rescue robots
Each design presents unique engineering challenges.
Building the Robot’s Body
The body forms the main structure.
Students can fold thick paper into a rectangular box or use lightweight cardboard.
The body should be:
- Strong
- Balanced
- Lightweight
- Symmetrical
A stable body makes movement easier.
Creating the Arms
The arms can move using paper fasteners.
Each arm consists of:
- Upper arm
- Lower arm
- Shoulder joint
- Elbow joint
Paper fasteners allow smooth rotation while keeping the pieces connected.
Students may create robots that wave or lift objects.
Building Moving Legs
Walking mechanisms are among the most exciting parts of the project.
Simple moving legs can be created using:
- Paper strips
- Folded cardboard
- Craft sticks
- Brads
Some students may use a rubber band to create bouncing motion.
Others may design legs that swing back and forth.
Using Linkages
Linkages are mechanical connections that transfer movement.
For example:
Turning one wheel may cause:
- Both arms to move.
- The head to nod.
- The legs to swing.
- The hands to wave.
This introduces students to one of the most important ideas in mechanical engineering.
Adding Wheels
Some paper robots move more easily on wheels.
Students can make wheels from:
- Cardboard circles
- Bottle caps
- Thick paper discs
Drinking straws can act as axle holders.
Rolling robots demonstrate friction and balance.
Decorating the Robot
Creativity makes every robot unique.
Students may add:
- Bright colors
- Buttons
- Antennas
- Smiling faces
- Control panels
- Robot names
Decoration allows students to combine engineering with art.
Testing the Robot
Once construction is complete, students begin testing.
Questions include:
- Does every joint move smoothly?
- Can the robot stand?
- Does it tip over?
- Are the arms balanced?
- Do the wheels roll freely?
Testing helps identify problems before final presentation.
Common Problems
Most first designs experience challenges.
Common difficulties include:
- Loose joints.
- Weak paper.
- Uneven balance.
- Too much friction.
- Heavy decorations.
- Poor wheel alignment.
Every problem provides an opportunity for improvement.
Improving the Design
Engineers rarely stop after the first attempt.
Students may improve their robot by:
- Reinforcing weak sections.
- Reducing weight.
- Adjusting joint positions.
- Using stronger folds.
- Improving wheel alignment.
- Strengthening the base.
Small improvements often produce much smoother movement.
Recording Observations
Students should keep notes during testing.
A simple table can organize results.
| Test | Observation | Improvement |
| 1 | Arms moved slowly | Loosen joints |
| 2 | Robot leaned sideways | Widen base |
| 3 | Wheels rubbed body | Move axle |
| 4 | Robot moved smoothly | Final design successful |
Scientific observation helps students compare different solutions.
Teamwork During the Project
Group work allows students to share ideas.
Possible team roles include:
- Designer
- Builder
- Decorator
- Tester
- Recorder
- Presenter
Working together teaches cooperation and communication.
Engineering Concepts Learned
The moving paper robot introduces many engineering ideas.
Students explore:
Balance
A balanced robot stands more easily.
Friction
Too much friction slows movement.
Motion
Mechanical parts transfer force from one area to another.
Stability
A wide base improves stability.
Mechanical Advantage
Simple linkages create larger movements using small forces.
These principles are found in many real machines.
Connections to Real Robots
Modern robots perform many important jobs.
They help in:
- Hospitals
- Factories
- Space exploration
- Agriculture
- Schools
- Homes
Although classroom robots are made from paper, they demonstrate the same basic mechanical principles used in advanced robotics.
Students gain appreciation for engineers who design machines that improve everyday life.
Presentation Day
At the end of the project, each team presents its robot.
Students explain:
- Their original idea.
- Materials used.
- Challenges they faced.
- Improvements they made.
- How the robot moves.
- What they learned.
Presentations strengthen communication and public speaking skills.
Skills Developed
The project develops many valuable abilities.
Students improve:
- Creativity
- Engineering thinking
- Scientific observation
- Problem-solving
- Communication
- Teamwork
- Patience
- Fine motor skills
- Planning
- Decision-making
These skills support learning in many school subjects.
Environmental Awareness
This activity also encourages recycling.
Students can use:
- Recycled cardboard
- Scrap paper
- Old boxes
- Paper tubes
- Packaging materials
Teachers can discuss how engineers design products while reducing waste and protecting the environment.
Reflection
Many students are surprised that paper can become a working machine. Through folding, connecting, and reinforcing simple materials, they discover that engineering is based on ideas rather than expensive supplies. Even if the first robot does not move perfectly, every adjustment teaches something new.
Students also learn that invention requires patience. Professional engineers rarely create successful machines on the first attempt. Instead, they observe problems, redesign their models, and continue improving them. This mindset encourages resilience, curiosity, and confidence.
Perhaps the greatest lesson is that creativity and science work best together. Building a moving paper robot combines imagination with practical engineering, allowing students to transform ordinary materials into an exciting mechanical creation.
Conclusion
Making a paper robot that moves is an enjoyable and educational school project that combines science, technology, engineering, art, and mathematics into one engaging activity. Using simple materials such as paper, cardboard, glue, and paper fasteners, students learn how movement is created through careful design and mechanical connections. They discover that planning, testing, observation, and improvement are essential parts of the engineering design process.
Beyond the technical knowledge, the project develops important life skills, including teamwork, creativity, communication, patience, and critical thinking. Students realize that mistakes are valuable opportunities to learn and that every redesign brings them closer to success. By the end of the project, they not only build a moving paper robot but also gain confidence in their ability to solve problems, think like engineers, and turn simple ideas into impressive inventions. This memorable experience inspires curiosity about robotics and encourages students to continue exploring the exciting world of science and engineering.
