
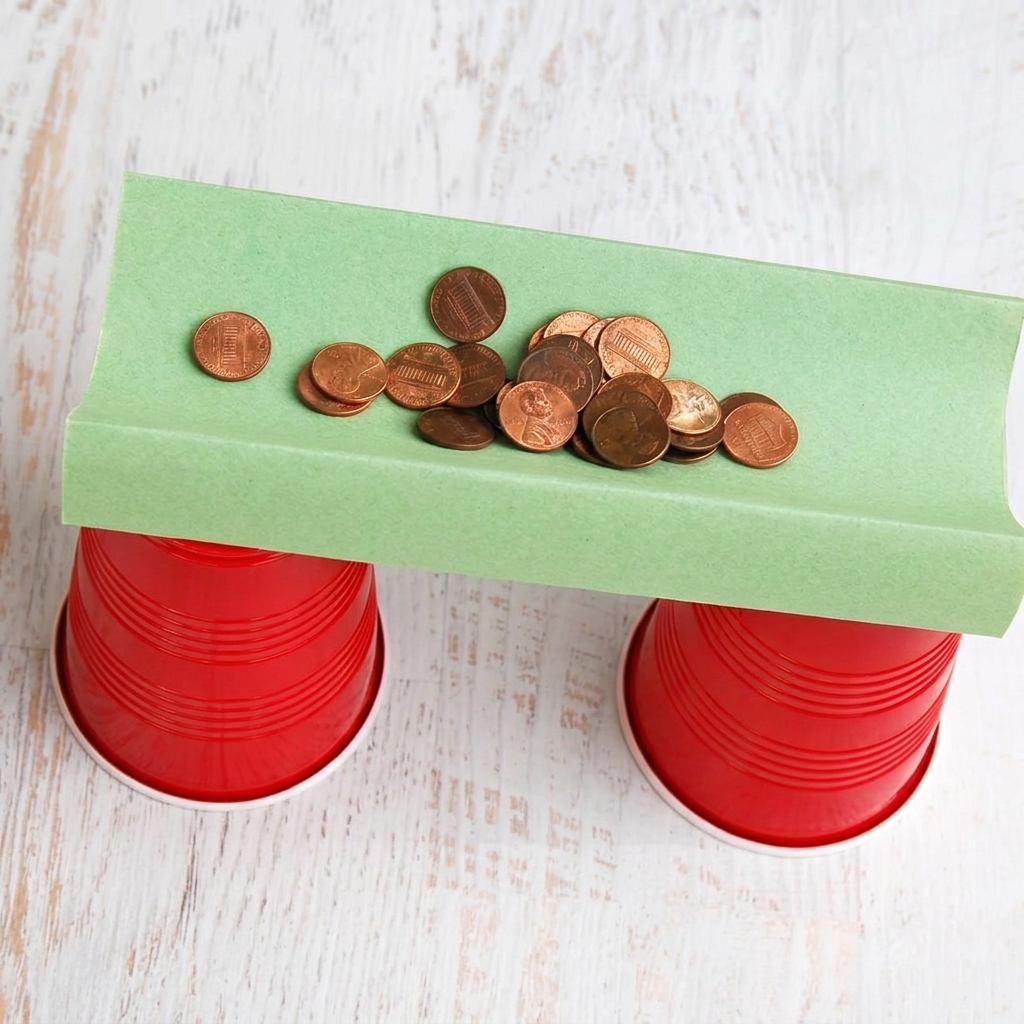
School projects give students the opportunity to learn through hands-on experiences that make classroom lessons more meaningful and enjoyable. Rather than simply reading about science, mathematics, or engineering in textbooks, students can apply these subjects by designing, building, testing, and improving their own creations. One exciting engineering challenge is building a paper bridge strong enough to support 100 coins. Although paper appears to be a weak material, careful design and smart construction techniques can transform it into a surprisingly strong structure.
The paper bridge project introduces students to the basic principles of structural engineering. It encourages them to think like engineers by asking questions, developing ideas, testing prototypes, and making improvements based on results. This activity also promotes teamwork, creativity, critical thinking, and problem-solving. Every successful bridge begins with careful planning, while every failed bridge provides valuable lessons that lead to better designs.
Professional engineers face similar challenges every day when designing bridges that carry thousands of vehicles, trains, bicycles, and pedestrians. They must balance strength, safety, efficiency, and cost. Through this simple classroom project, students gain an appreciation for the science and creativity involved in building safe structures while discovering that even ordinary paper can become remarkably strong.
| Quick Overview | Details |
| Project Name | Paper Bridge Challenge |
| Subject | Science, Engineering, STEAM |
| Difficulty | Easy to Moderate |
| Recommended Age | 9–15 years |
| Main Materials | Paper, tape, ruler, coins |
| Goal | Build a bridge that supports 100 coins |
| Skills Developed | Engineering, teamwork, creativity, problem-solving |
Why This Project Is Valuable
The paper bridge challenge teaches students that engineering is much more than building things. It involves observation, planning, testing, and continuous improvement. Students learn that the shape of a structure often matters more than the material itself.
This activity also encourages curiosity. Students begin asking questions such as:
- Why did one bridge hold more weight than another?
- Which folding method creates the strongest beam?
- How can small changes improve stability?
- What happens when supports are moved closer together?
Finding answers through experimentation helps students develop scientific thinking.
Learning Objectives
By completing this project, students can:
- Understand the engineering design process.
- Learn how bridges support loads.
- Explore the relationship between shape and strength.
- Practice measuring and planning.
- Improve teamwork and communication.
- Develop creativity and critical thinking.
- Record scientific observations.
- Build confidence through experimentation.
These objectives combine science, mathematics, and engineering into one enjoyable activity.
Materials Needed
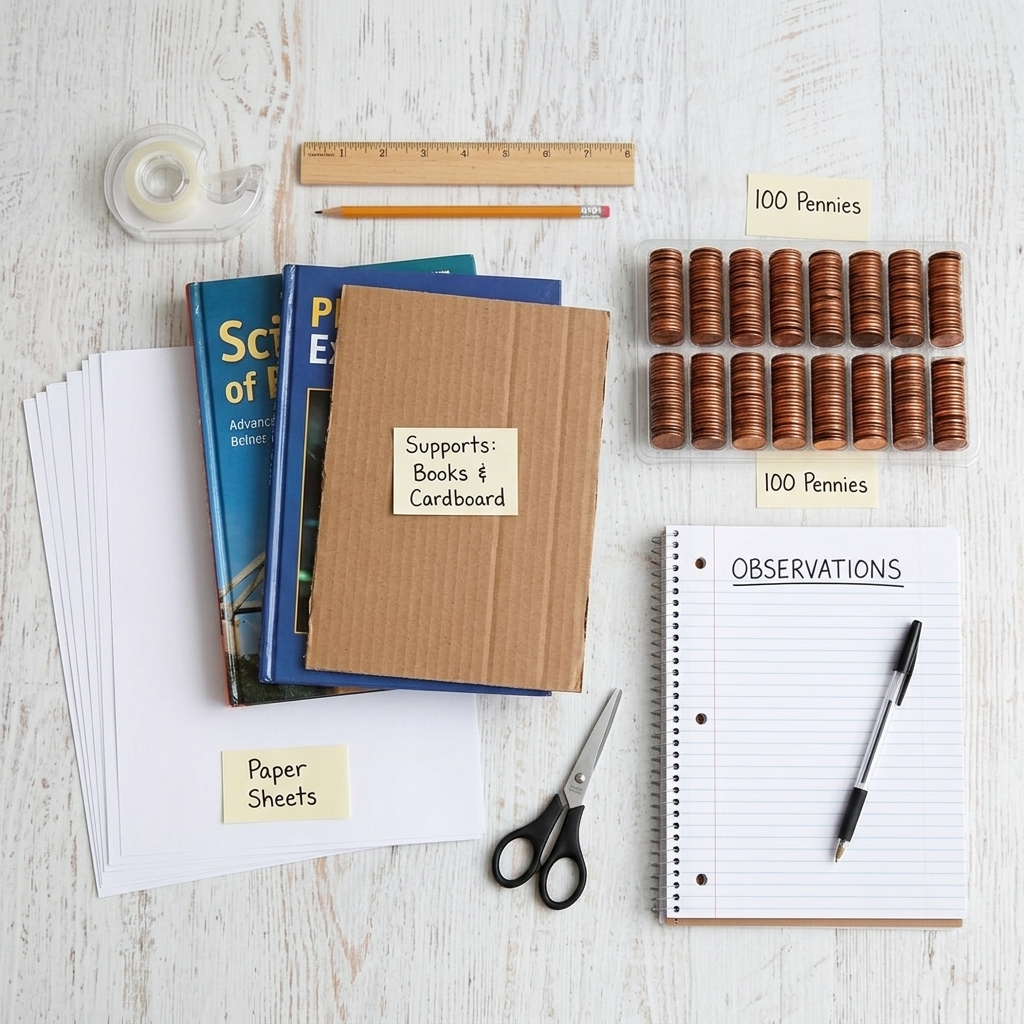
Only a few inexpensive materials are required.
- Sheets of printer paper
- Cardboard or books for bridge supports
- Transparent tape
- Ruler
- Pencil
- Scissors (optional)
- One hundred identical coins
- Notebook for recording observations
Because the materials are affordable, nearly every classroom can participate.
Understanding Bridges
Before construction begins, students should learn about different bridge designs.
Some common bridge types include:
- Beam bridges
- Arch bridges
- Truss bridges
- Suspension bridges
- Cable-stayed bridges
Each design solves engineering problems in different ways. Although professional bridges use steel or concrete, the same engineering principles can be explored using paper.
Planning the Design
Every successful project begins with a plan.
Students should sketch their bridge before folding or cutting paper.
Important questions include:
- How long should the bridge be?
- Where will the supports be placed?
- Should the paper remain flat or be folded?
- Which shape will provide the greatest strength?
Planning helps avoid unnecessary mistakes during construction.
Why Paper Can Be Strong
Many students are surprised to discover that paper becomes much stronger when folded.
A flat sheet bends easily under pressure.
However, folding paper into shapes such as:
- Triangles
- Tubes
- Corrugations
- Accordion folds
- Box beams
greatly increases its strength.
The project demonstrates that geometry plays an important role in engineering.
Choosing the Right Bridge Shape
Different bridge designs perform differently during testing.
Flat Bridge
A flat sheet is the simplest design.
Advantages:
- Easy to build.
Disadvantages:
- Bends quickly.
- Holds very little weight.
Folded Beam
Folding the edges creates a beam.
Advantages:
- Stronger than flat paper.
- Easy to construct.
Accordion Fold
Creating many folds increases stiffness.
Advantages:
- Excellent strength.
- Good weight distribution.
Tube Design
Rolling paper into cylinders produces surprisingly strong columns.
Advantages:
- High compression strength.
- Lightweight.
Students may compare several designs to determine which performs best.
Building the Bridge
Construction should follow a careful process.
Step 1: Measure
Measure the distance between two supports.
Step 2: Fold
Fold the paper according to the chosen design.
Step 3: Secure
Use small amounts of tape where necessary.
Step 4: Position
Place the bridge carefully across the supports.
Step 5: Inspect
Check that both ends rest evenly.
Attention to detail improves the final result.
The Coin Challenge
Now comes the exciting test.
Students place coins onto the bridge one at a time.
They should:
- Add one coin.
- Observe the bridge.
- Continue slowly.
- Count each coin.
- Stop if the bridge begins to fail.
- Record the total.
The goal is to reach one hundred coins without collapsing.
Recording Results
Scientific investigations require careful record keeping.
Students can use a simple table.
| Attempt | Bridge Design | Coins Held | Notes |
| 1 | Flat | 12 | Bent quickly |
| 2 | Folded Beam | 46 | Stable but sagged |
| 3 | Accordion Fold | 82 | Very strong |
| 4 | Improved Design | 100 | Successful |
Recording results makes comparisons easier.
Why Some Bridges Fail
Failure is an important part of engineering.
Common reasons include:
- Weak folds.
- Uneven supports.
- Too much tape adding weight.
- Poor weight distribution.
- Thin support beams.
- Long bridge span.
Each failure teaches students how to improve the next design.
Improving the Bridge
After testing, students should redesign their bridge.
Possible improvements include:
- Adding extra folds.
- Using triangular supports.
- Reinforcing the center.
- Making the bridge shorter.
- Reducing unnecessary weight.
- Improving symmetry.
Even small adjustments often produce significant improvements.
Engineering Concepts Learned
The paper bridge project introduces many engineering ideas.
Students discover:
Compression
Some parts of the bridge are squeezed together.
Tension
Other parts are stretched.
Load Distribution
Weight spreads across the structure.
Stability
Balanced structures resist movement.
Structural Efficiency
Strong shapes use less material.
These concepts appear in real bridges around the world.
Teamwork During the Project
Working together helps students solve problems more effectively.
Each member can have a different responsibility.
For example:
- Planner
- Builder
- Tester
- Recorder
- Presenter
Teamwork teaches communication and cooperation while allowing students to share ideas.
Creativity in Engineering
No two bridges need to look exactly alike.
Some students may design:
- Curved bridges
- Multi-layer bridges
- Folded box beams
- Paper trusses
- Combination designs
Creativity often leads to innovative solutions.
Connecting the Project to Real Life
Real bridge engineers must consider many factors.
They ask questions such as:
- How much weight will the bridge carry?
- How strong are the materials?
- How will weather affect the bridge?
- How long should the bridge last?
- How can construction costs be reduced?
Although students use only paper, they experience a simplified version of these engineering challenges.
Presentation and Discussion
At the end of the activity, each group presents its bridge.
Students explain:
- Their original design.
- The challenges they faced.
- The improvements they made.
- Their final results.
- What they would change next time.
Presentations help students develop confidence and public speaking skills.
Skills Developed
The paper bridge challenge strengthens many valuable abilities.
Students improve:
- Critical thinking
- Engineering skills
- Scientific observation
- Creativity
- Communication
- Collaboration
- Patience
- Time management
- Decision-making
- Problem-solving
These skills are useful in many future careers.
Environmental Awareness
This project also encourages responsible use of materials.
Students can use recycled paper instead of new paper whenever possible.
Teachers may discuss:
- Recycling
- Sustainable engineering
- Reducing waste
- Reusing classroom materials
These conversations help students understand that engineering should protect the environment as well as solve problems.
Reflection
Many students are surprised when their strongest bridge is not the one they expected. A carefully folded piece of paper can hold far more weight than a flat sheet because its shape distributes forces more effectively. This realization demonstrates one of the most important lessons in engineering: successful designs depend on thoughtful planning, experimentation, and improvement rather than expensive materials.
Students also learn that failure is a valuable teacher. Every collapsed bridge reveals a weakness that can be corrected. Engineers rarely achieve perfect designs on their first attempt. Instead, they test, analyze, redesign, and improve until they find the best solution. This mindset encourages resilience, curiosity, and persistence.
Conclusion
The challenge of building a paper bridge that holds 100 coins is an enjoyable and educational school project that combines science, mathematics, engineering, and creativity. Using only simple materials such as paper, tape, and coins, students explore the principles of structural design while developing practical problem-solving skills. They learn that geometry, careful planning, and continuous testing can transform an ordinary sheet of paper into a remarkably strong bridge.
Beyond the engineering concepts, the project teaches valuable life lessons. Students discover the importance of teamwork, patience, communication, and perseverance. They learn that mistakes are opportunities for improvement and that every successful design is the result of thoughtful experimentation. By completing this challenge, students gain confidence in their ability to solve real-world problems and develop a deeper appreciation for the work of engineers who design the bridges that connect our communities every day. The paper bridge project is therefore much more than a classroom activity—it is an inspiring introduction to innovation, creativity, and the exciting world of engineering.
