
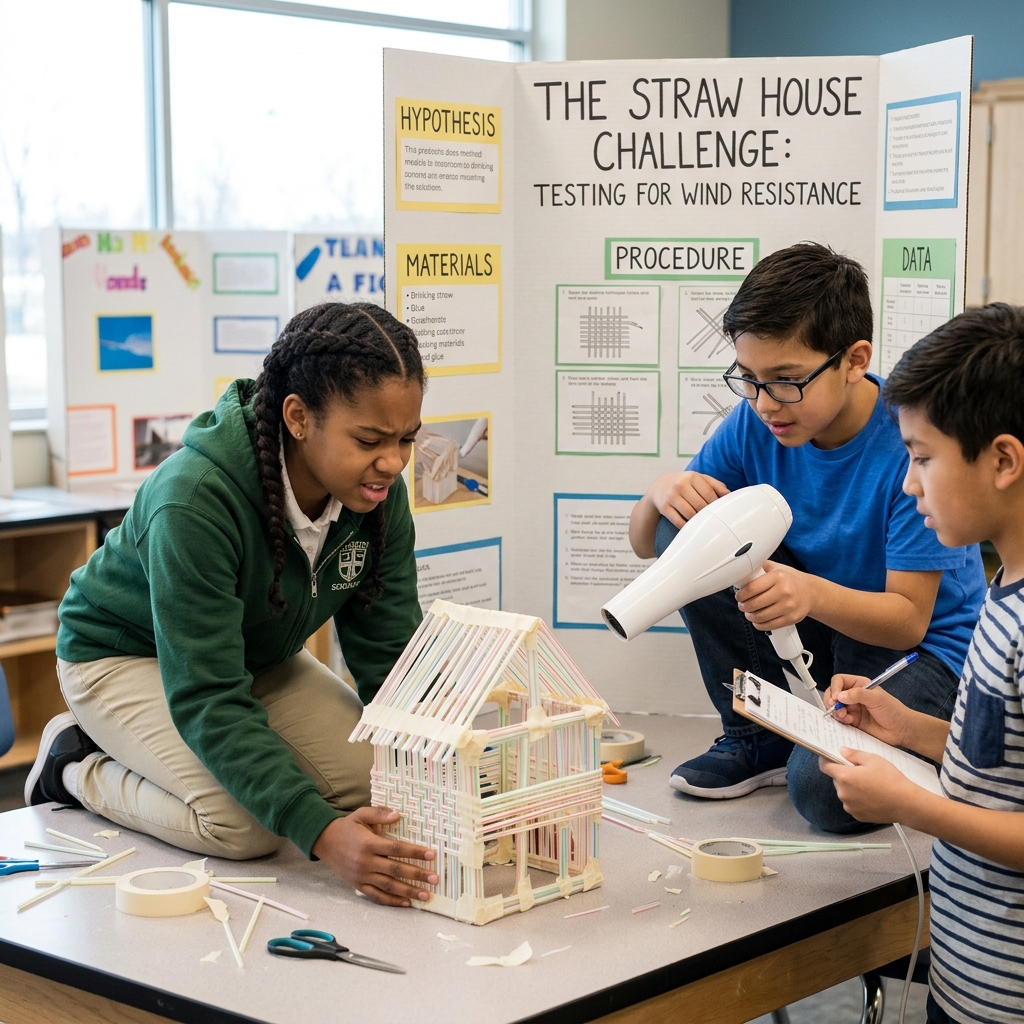
School projects are one of the best ways for students to learn by doing. Instead of only reading about science, engineering, and mathematics, students can explore these subjects through hands-on activities. One exciting project is the challenge of building a wind-resistant house using drinking straws. Although straws seem light and weak, they can become surprisingly strong when used correctly. This project teaches students how engineers design buildings that can survive strong winds while encouraging creativity, teamwork, and problem-solving.
Natural disasters such as hurricanes, tornadoes, and powerful storms affect communities around the world every year. Engineers work hard to create buildings that are safer and stronger. Students can learn the basic ideas behind these engineering challenges by designing miniature houses from simple materials. The straw house project is inexpensive, fun, and suitable for classrooms of different grade levels. It combines science, technology, engineering, art, and mathematics (STEAM) into one exciting activity.
Throughout this project, students discover that the strongest buildings are not always made from the strongest materials. Instead, good design, careful planning, and smart construction techniques make the biggest difference. Every test provides valuable lessons, even when a model collapses.
| Quick Overview | Details |
| Project Name | Wind-Resistant Straw House |
| Subject | Science, Engineering, STEAM |
| Difficulty | Easy to Moderate |
| Age Group | 9–15 years |
| Main Materials | Drinking straws, tape, cardboard, glue |
| Skills Learned | Engineering, teamwork, creativity, problem-solving |
| Final Goal | Build a house that survives strong wind tests |
Why This Project Is Important
Building a wind-resistant house helps students understand how engineers solve real-world problems. Around the world, millions of homes are exposed to powerful winds. Designing safer structures can protect families and reduce damage during storms.
Students also discover that engineering is a process rather than a single answer. They learn to ask questions, create ideas, build prototypes, test them, improve them, and try again. This cycle is called the engineering design process and is used by professional engineers every day.
The project also develops patience. The first model may fail, but failure becomes an opportunity to learn. Each improvement makes the structure stronger and more stable.
Learning Objectives
By completing this project, students can:
- Understand how wind affects buildings.
- Learn about structural engineering.
- Explore different building shapes.
- Practice measuring and planning.
- Develop teamwork skills.
- Improve communication.
- Record scientific observations.
- Build confidence through experimentation.
These objectives make the project both educational and enjoyable.
Materials Needed
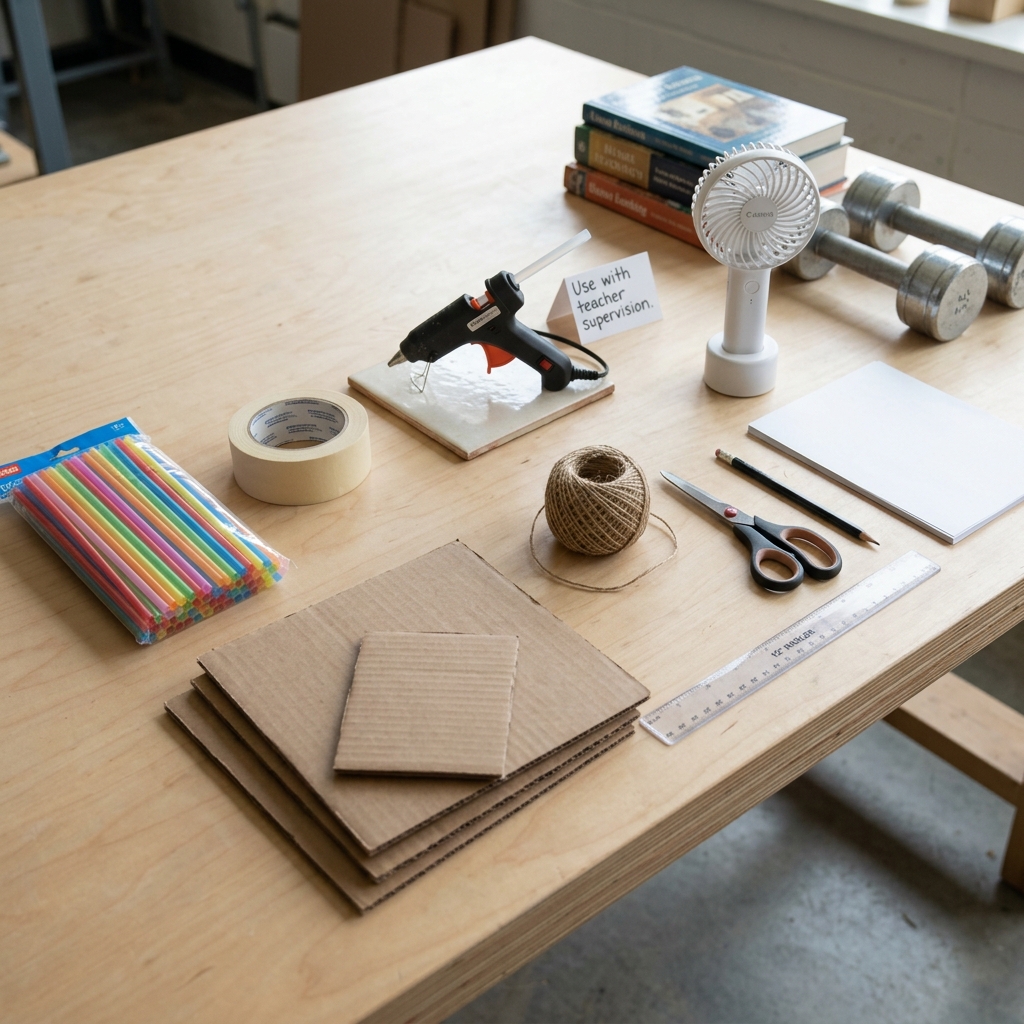
The materials are simple and affordable.
- Drinking straws
- Masking tape
- Hot glue (teacher supervision recommended)
- Cardboard base
- String
- Scissors
- Ruler
- Pencil
- Paper
- Small fan for wind testing
- Books or weights for extra testing
Most schools already have these supplies, making the activity easy to organize.
Planning the Design
Before building begins, students should sketch their ideas. A simple drawing helps them decide where each straw will go.
Important questions include:
- How tall should the house be?
- How wide should the base be?
- Should the roof be flat or sloped?
- Where will doors and windows be placed?
- Which parts need extra support?
Planning saves time and reduces mistakes during construction.
Understanding Wind Forces
Wind pushes against buildings with invisible force. When the wind becomes stronger, that force increases.
Students learn several important ideas:
- Wide surfaces catch more wind.
- Tall buildings experience greater pressure.
- Weak joints often break first.
- Strong foundations keep buildings stable.
Watching how the model reacts during testing helps students understand these concepts.
Building a Strong Foundation
Every successful building begins with a solid foundation. Even a perfectly designed roof cannot save a house with a weak base.
Students should securely attach their straw frame to a cardboard platform. Extra tape or glue at the corners increases stability.
A wider base lowers the center of gravity, making it more difficult for the structure to tip over.
Creating a Strong Frame
The frame acts as the skeleton of the house.
Students should:
- Connect corners carefully.
- Keep walls straight.
- Make equal-sized sections.
- Strengthen joints with tape.
- Double important supports if necessary.
A strong frame distributes the force of the wind throughout the structure.
The Power of Triangles
One of the most valuable engineering lessons is that triangles are stronger than squares.
A square can easily change shape under pressure. A triangle keeps its shape because all three sides support each other.
Students can improve their models by adding diagonal braces across walls.
These braces dramatically increase strength without adding much weight.
Choosing the Best Roof
Roof design affects wind resistance.
Flat roofs may catch more wind from above.
Sloped roofs allow air to flow more smoothly over the structure.
Students may compare:
- Flat roofs
- Gable roofs
- Pyramid roofs
- Hip roofs
Testing different roof styles helps students understand aerodynamics.
Testing the House
Testing is one of the most exciting parts of the project.
A fan can simulate wind at different speeds.
Students may test the model several times.
Example testing procedure:
- Place the model in front of a fan.
- Start with low speed.
- Increase the speed gradually.
- Observe movement.
- Record damage.
- Repair weak areas.
- Test again.
Each round provides useful information.
Recording Observations
Scientific projects require careful observation.
Students can create a table like this:
| Test | Wind Speed | Result | Improvements Needed |
| 1 | Low | Stable | None |
| 2 | Medium | Slight movement | Strengthen corners |
| 3 | High | Roof shifted | Improve roof supports |
| 4 | Very High | Wall collapsed | Add diagonal braces |
Keeping accurate notes helps students compare designs.
Common Problems
Many first designs experience difficulties.
Typical problems include:
- Weak corners
- Loose tape
- Tall narrow structures
- Heavy roofs
- Uneven foundation
Recognizing these weaknesses teaches valuable engineering lessons.
Improving the Design
After testing, students should redesign their models.
Possible improvements include:
- Adding more triangles.
- Using shorter wall sections.
- Strengthening joints.
- Widening the base.
- Reducing roof weight.
- Reinforcing corners.
Engineering is all about continuous improvement.
Teamwork During the Project
Working together makes the project more successful.
Each team member can have a different role.
For example:
- Designer
- Builder
- Recorder
- Tester
- Presenter
Everyone contributes unique skills to the final result.
Creativity and Innovation
Although every group uses the same materials, every house looks different.
Some students may create colorful homes.
Others may invent unusual roof designs.
Some may discover new ways to reinforce walls.
Creativity makes engineering exciting because there is rarely only one correct solution.
Real-World Connections
This classroom project reflects challenges faced by real engineers.
Engineers designing homes in coastal regions must consider:
- Hurricanes
- Strong storms
- Heavy rain
- Flying debris
Modern buildings often include reinforced walls, stronger roofs, and improved foundations to resist extreme weather.
Students begin to appreciate the importance of safe building design.
Presentation Day
At the end of the project, each team presents its work.
Students explain:
- Their original design.
- Problems encountered.
- Changes they made.
- Final results.
- Lessons learned.
Presentations improve communication skills and encourage confidence.
Skills Developed
This project develops many important life skills.
Students improve:
- Critical thinking
- Engineering knowledge
- Scientific observation
- Creativity
- Collaboration
- Time management
- Communication
- Decision-making
- Resilience
- Problem-solving
These abilities are valuable both inside and outside the classroom.
Environmental Awareness
Using reusable or recyclable straws teaches students about sustainability.
Teachers can discuss:
- Recycling
- Waste reduction
- Eco-friendly construction
- Responsible use of materials
Students learn that engineering should consider environmental impact as well as strength.
Reflection
After completing the project, students often realize that success comes through testing and improvement rather than perfection.
Even houses that failed during early tests provided important lessons. Every broken wall, bent straw, or collapsed roof showed students what needed to change.
This mindset encourages curiosity and persistence—qualities shared by successful scientists and engineers.
Conclusion
The challenge of building a wind-resistant house using straws is an engaging and educational school project that combines science, engineering, creativity, and teamwork. Students learn that even simple materials can create strong structures when they are used wisely. Through planning, construction, testing, observation, and redesign, they gain practical experience with the engineering design process while developing valuable problem-solving skills.
More importantly, the project demonstrates that failure is not the end of learning but the beginning of improvement. Every test helps students build stronger models and deeper understanding. By the end of the activity, they not only create a successful straw house but also gain confidence in their ability to think critically, collaborate effectively, and solve real-world challenges. This memorable experience inspires curiosity about engineering and encourages students to imagine innovative solutions for the buildings of the future.
