Making a simple catapult with wooden sticks is one of the most exciting STEM activities for kids, parents, and teachers. This hands-on engineering project transforms basic household materials into a miniature launching machine while teaching science, physics, math, and creativity all at once.
From backyard learning sessions to classroom science experiments, catapults continue to be one of the most popular STEM challenges because they combine fun with real educational value. Kids love launching marshmallows across the room, while adults appreciate the opportunity to teach engineering concepts in an interactive way.
The best part about making a simple catapult with wooden sticks is that it introduces children to the Engineering Design Process. Students can brainstorm, build, test, improve, and experiment with different catapult models while learning how energy and motion work together.
This guide explores the physics behind catapults, the best materials to use, and four proven catapult designs ranging from beginner-friendly models to advanced engineering builds. You will also discover exciting games, launch experiments, and optimization tricks that make this DIY project even more entertaining.
Whether you are building a DIY wooden stick catapult for homeschool STEM lessons, science fairs, or family fun, this complete guide will help you create stronger, farther-flying catapults with confidence.
The Physics of the Launch
Understanding the science behind making a simple catapult with wooden sticks helps children connect fun activities with real-world physics concepts.
Newton’s Three Laws of Motion
Newton’s First Law: Inertia
Objects stay at rest until a force acts upon them. The marshmallow or pom-pom remains still until the catapult arm launches it forward.
Newton’s Second Law: Acceleration
The harder the catapult arm pushes, the faster the projectile accelerates. Stronger rubber bands create more force and increase launch distance.
Newton’s Third Law: Action and Reaction
Every action has an equal and opposite reaction. When the arm snaps forward, energy transfers into the projectile, sending it flying.
Potential Energy and Kinetic Energy
When you pull down the catapult arm, energy is stored inside the bent craft sticks and stretched rubber bands.
This is called potential energy.
Once released, that stored energy transforms into kinetic energy, which launches the object through the air.
The Strength of the Triangle
Triangles are one of the strongest structural shapes in engineering. Many advanced catapult designs use triangle frames because they evenly distribute pressure and reduce wobbling.
This same principle is used in bridges, towers, and geodesic domes.
Tension vs. Torsion
Most DIY catapult using craft sticks and rubber bands rely on tension, which comes from stretched rubber bands.
More advanced siege engines use torsion, where ropes twist tightly to store powerful energy before release.
Master Materials List: Beyond the Basic Stick
Using the right materials can dramatically improve catapult performance.
Craft Sticks
Large 6-inch wooden craft sticks work best because they are flexible and strong enough to store energy without snapping.
Smaller sticks often break or lose tension too quickly.
Rubber Bands
Thicker rubber bands create more tension and allow the arm to launch projectiles farther.
Always test different sizes safely.
Fulcrum Options
The fulcrum is the pivot point that controls movement.
Popular choices include:
- A stack of 7–8 craft sticks
- Binder clips
- Clothespins
- Wooden blocks
Each option changes launch height and stability.
Projectile Basket
Instead of using spoons, many engineers now use small plastic portion cups because angled sides release projectiles more smoothly.
Advanced Components
Advanced builders often include:
- Bamboo skewers
- Drinking straws
- Hot glue
- Cardboard supports
These reduce friction and create smoother arm rotation.
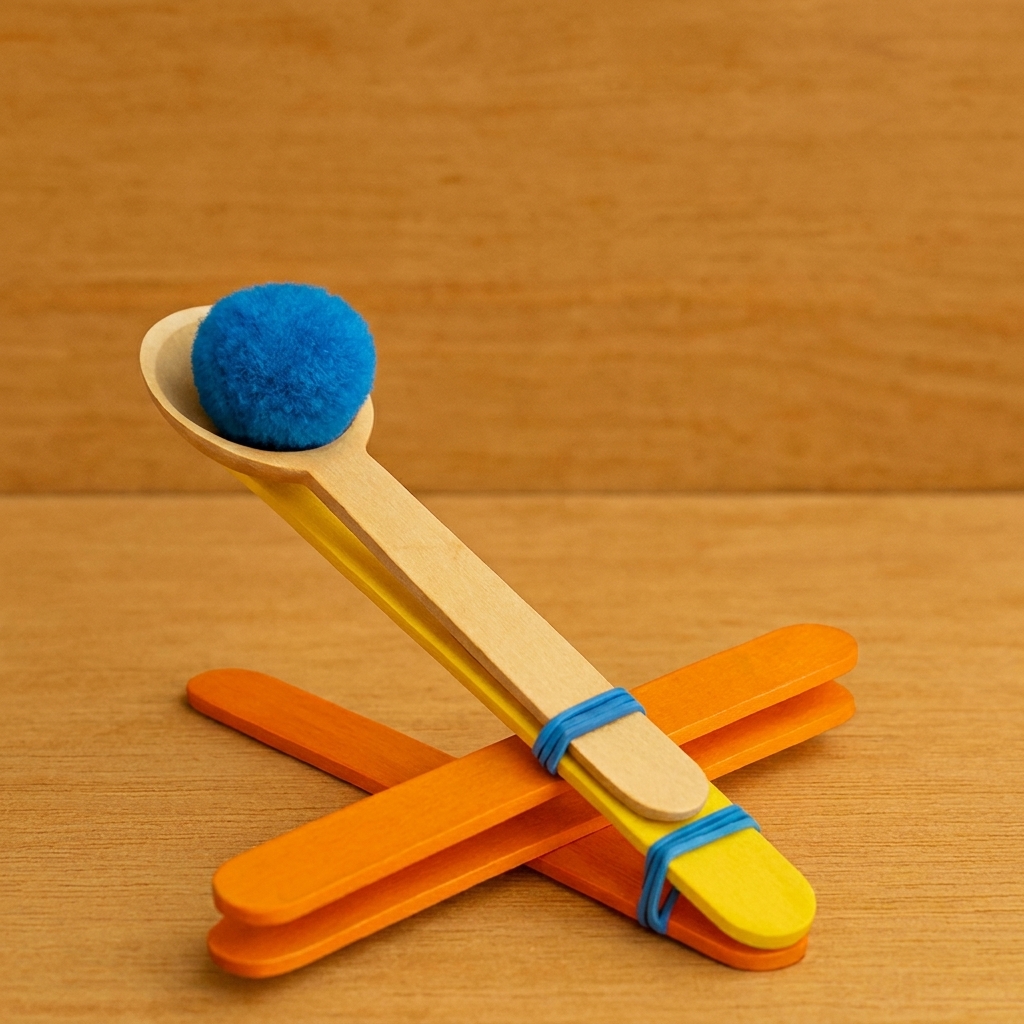
Design 1: The Classic Catapult
Best for Young Kids and Quick Builds
The classic design is the easiest method for making a simple catapult with wooden sticks.
Materials Needed
- 10 craft sticks
- Rubber bands
- Plastic spoon
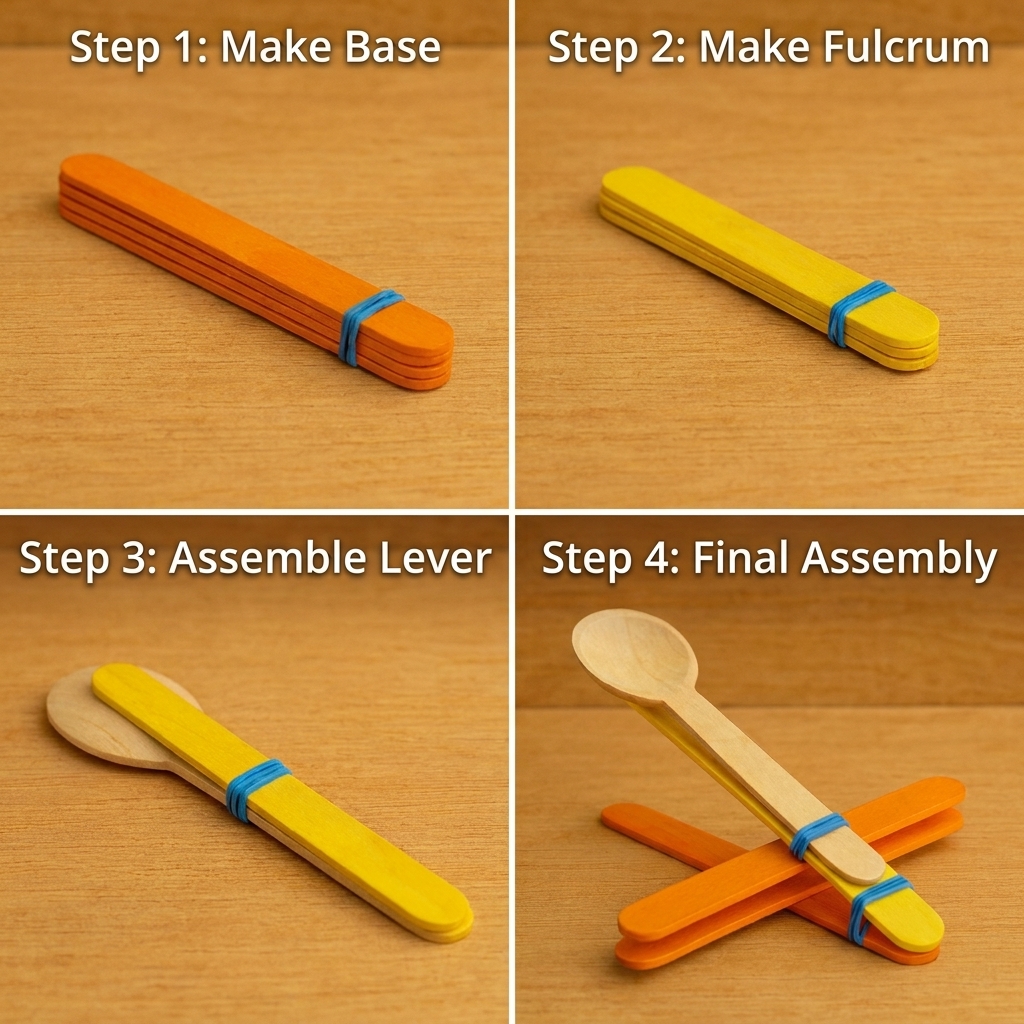
How to Build It
- Stack 7 sticks together and secure both ends with rubber bands.
- Bind 2 sticks together at one end only.
- Slide the large stack between the two loose sticks.
- Attach the spoon to the top arm.
- Pull back and launch.
Optimization Tip
Move the fulcrum closer to the rubber-band end to increase leverage and improve launch distance.
This simple adjustment dramatically changes performance.
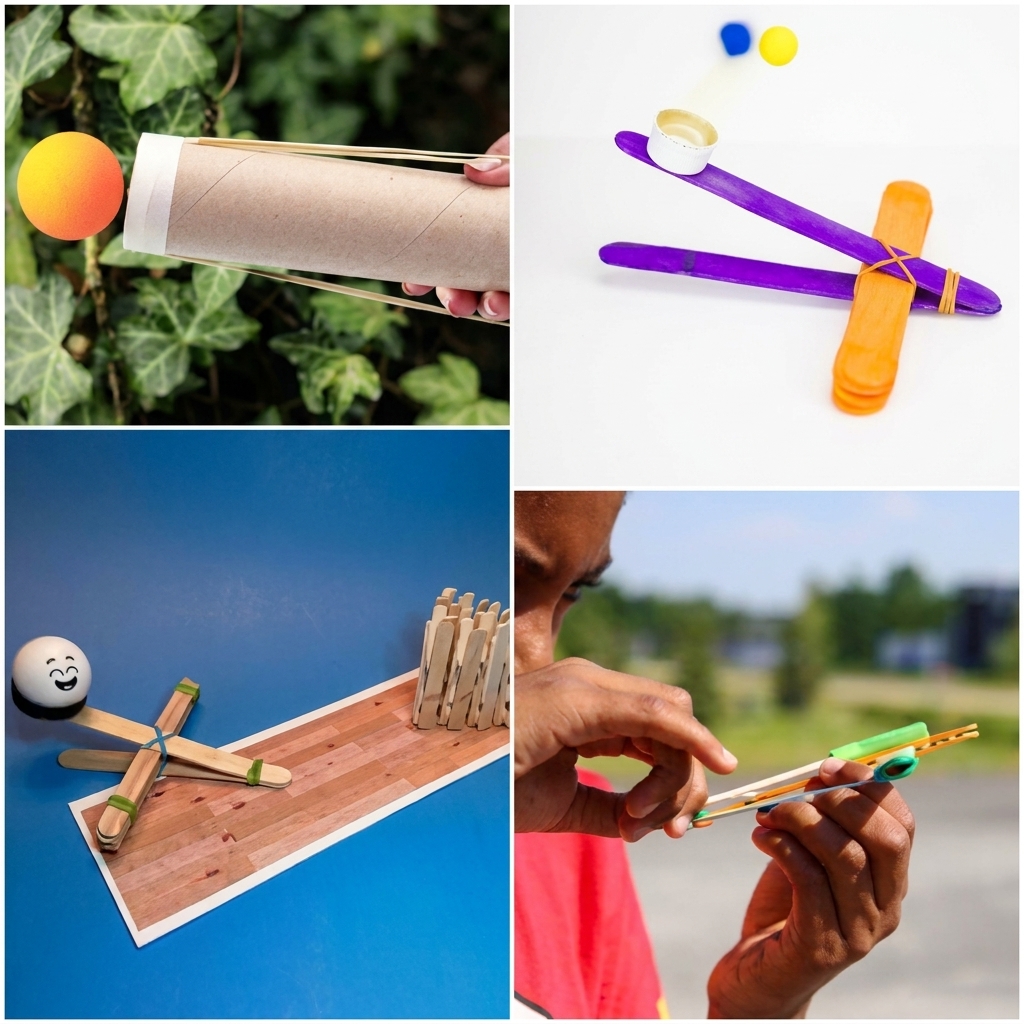
Design 2: The High-Performance Skewer & Straw Model
This upgraded design improves accuracy and launch consistency.
The Method
A bamboo skewer acts as an axle while a straw allows smooth arm rotation.
Why It Works Better
The rotating motion reduces friction and prevents energy loss during launch.
The frame also stays more stable during repeated use.
The Stop Stick Trick
Adding a horizontal stick across the front controls the release angle.
This helps users test different trajectories more accurately.
Best Uses
- STEM classrooms
- Science fair projects
- Distance competitions
This design is ideal for students exploring engineering principles in greater detail.
Design 3: The Engineering Champion
The Powerful Binder Clip Catapult
This design consistently outperforms classic spoon catapults.
Testing often shows launches exceeding 5 feet, while basic models may only reach 14 inches.
How to Build It
Materials
- Medium binder clip
- Craft sticks
- Hot glue
- Rubber bands
Instructions
- Secure two sticks to each side of the binder clip.
- Attach the launch arm to the clip hinge.
- Add rubber bands for tension.
- Test and adjust arm angles.
Why This Design Wins
The binder clip acts as a durable pivot point, allowing smoother motion and greater energy transfer.
This results in:
- Longer launches
- Better accuracy
- More durability
It is one of the best DIY wooden stick catapult designs for advanced STEM learning.
Design 4: The Geodesic Siege Engine
Advanced Engineering Build
This massive catapult design uses approximately 32 craft sticks arranged into triangular supports.
The result is an incredibly strong structure capable of handling heavy tension.
Benefits of Triangular Frames
Triangles prevent bending and collapse by distributing stress evenly across the structure.
This allows builders to use stronger rubber bands without damaging the frame.
Launch Potential
Advanced geodesic catapults can launch lightweight projectiles up to 30 feet under the right conditions.
Recommended For
- Teen STEM projects
- Engineering clubs
- Competitive design challenges
This design introduces students to architectural engineering and structural mechanics.
The Catapult Design Challenge
The most exciting part of making a simple catapult with wooden sticks is experimenting with variables and testing results.
Trajectory Trials
Changing the fulcrum position affects launch angle.
High Launches
Move the fulcrum toward the center.
Long-Distance Launches
Move the fulcrum closer to the back.
Students can measure distances and compare results.
Mass and Density Experiments
Different projectiles behave differently in flight.
Try launching:
- Pom-poms
- Marshmallows
- Cotton balls
- Wooden beads
- Paper balls
Heavier objects may travel farther but require stronger tension.
Distance Challenge
Create a worksheet to track:
| Projectile | Launch Distance | Launch Angle |
| Marshmallow | 4 ft | Medium |
| Pom-pom | 6 ft | High |
| Wooden Bead | 8 ft | Low |
This introduces students to data collection and averages.
Interactive Catapult Games
Attack the Castle
Build LEGO towers or block castles and try knocking them down using mini projectiles.
This game improves aim and problem-solving skills.
Target Practice
Draw scoring zones on cardboard and compete for points.
Students can calculate averages and track improvement.
Longest Launch Competition
Challenge kids to improve their catapult designs for maximum distance.
This encourages creativity and engineering thinking.
STEM Tournament Day
Create multiple teams and judge designs based on:
- Distance
- Accuracy
- Creativity
- Structural stability
This transforms science learning into an exciting event.
Safety Tips for Catapult Activities
Safety is essential during any STEM experiment.
Important Rules
- Never aim at faces or animals
- Use soft projectiles only
- Wear safety glasses if needed
- Launch indoors carefully
- Supervise younger children
Safe learning environments help students enjoy experiments responsibly.
Quick Overview Table
| Design | Difficulty | Launch Distance | Best For |
| Classic Spoon | Easy | Short | Young Kids |
| Skewer & Straw | Medium | Medium | STEM Learning |
| Binder Clip | Medium | Long | Engineering Challenges |
| Geodesic Siege Engine | Advanced | Very Long | Teen Projects |
Conclusion
Making a simple catapult with wooden sticks is one of the best ways to combine science, creativity, and hands-on learning into one unforgettable STEM activity. From understanding Newton’s laws to experimenting with launch angles and projectile weights, catapult projects help students explore real engineering principles through play.
Whether you choose a beginner-friendly spoon model or an advanced geodesic siege engine, each design teaches valuable lessons about motion, force, energy, and problem-solving.
The flexibility of a DIY catapult using craft sticks and rubber bands also makes it perfect for homeschool lessons, classroom activities, science fairs, and rainy-day family projects.
Most importantly, these catapult challenges encourage curiosity, innovation, teamwork, and experimentation—skills that students will carry far beyond the classroom.
Gather your craft sticks, grab some rubber bands, and start building your own engineering masterpiece today.